

Article verified for Release 15.2 on January 25, 2026.
This article explains how to create a test and make it accessible directly from your website using a testing session link. It covers the full process, from preparing users and creating the test to generating a session link that allows candidates to start the test externally without navigating through the application.
Adding users
Before creating a test session that can be started from your website, you can decide how users will be added. The application supports multiple user creation methods. There are four ways to create profiles for users; for further information, please visit this article.
Note: You can also integrate with an external system. Contact the YouTestMe Customer Success Team for more information.
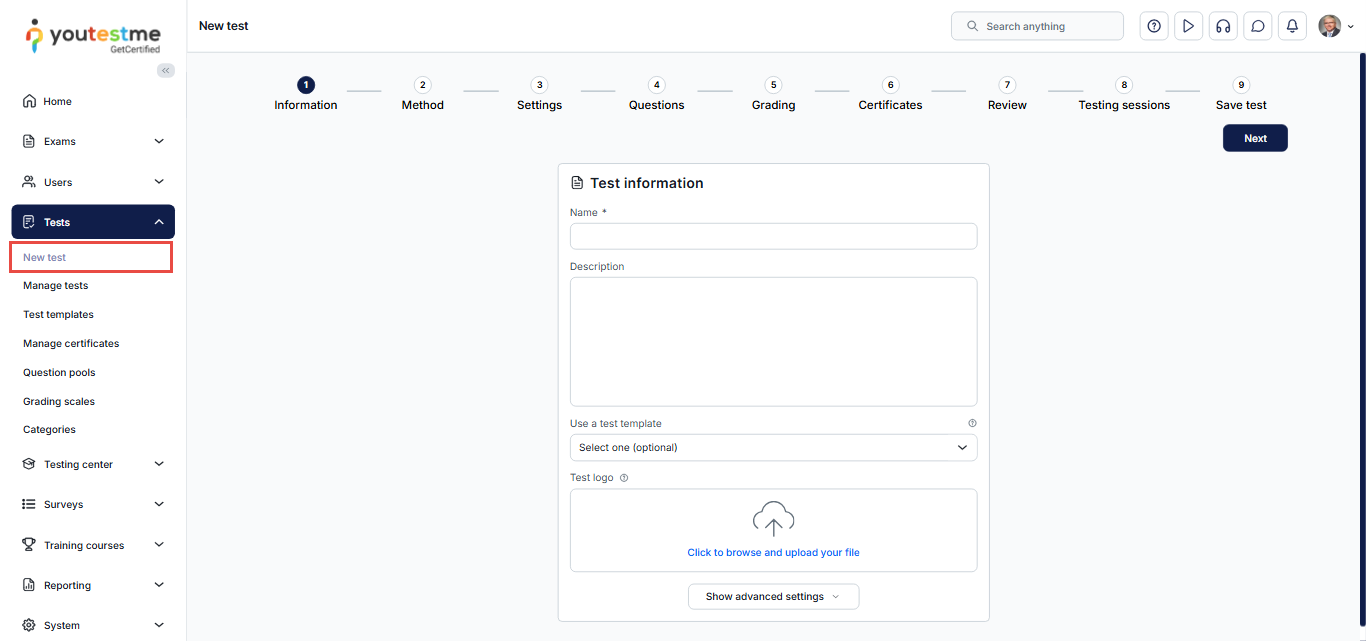
Create the Test
To create a test, use the Test Creation Wizard, which guides you through the process step by step.
- Navigate to Tests, then select New Test.
- Click New Test to launch the Test Creation Wizard.
- Complete the required steps to configure the test.
For detailed instructions, visit this article.
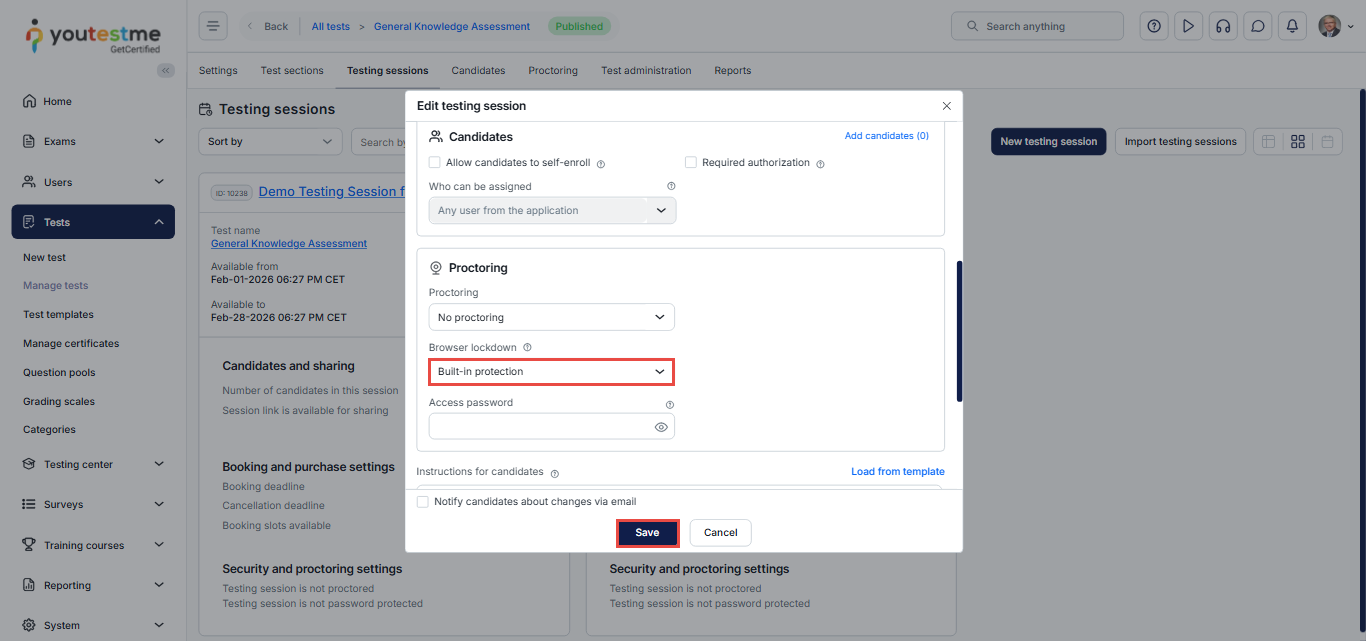
Create a Testing Session
Testing sessions allow you to organize test delivery for different groups of users and enable direct access to the test.
To create or configure a session:
- Navigate to Tests and choose Manage Tests
- Select the desired test
- Navigate to the testing sessions page
- Create a new session or edit an existing one
During session configuration, you can enable browser lockdown options to secure the test environment. These options prevent users from copying content, switching tabs or screens, taking screenshots, or exiting full-screen mode during the test.
By enabling this option, the users cannot cut, copy, save, or print anything from the screen during the test-taking process. Also, the web browser will be in full-screen mode, and if the users try to minimize it, the test attempt will be terminated. It disables candidates from switching screens and tabs, right-clicking, or making screenshots.
For further information, please visit this article.
How to create a testing session with a direct access link
Once the testing session is created, you can generate a direct access link that allows candidates to start the test from your website.
- Navigate to the Sharing option
- Select Copy guest link to clipboard
This guest link provides direct access to the test session and can be embedded on your website or shared via email. Candidates accessing the test through this link do not need to create user profiles.

For more information, please visit this article.
Managing Guest Users
Guest users who access the test via a session link can be managed. For further information, please refer to this article.
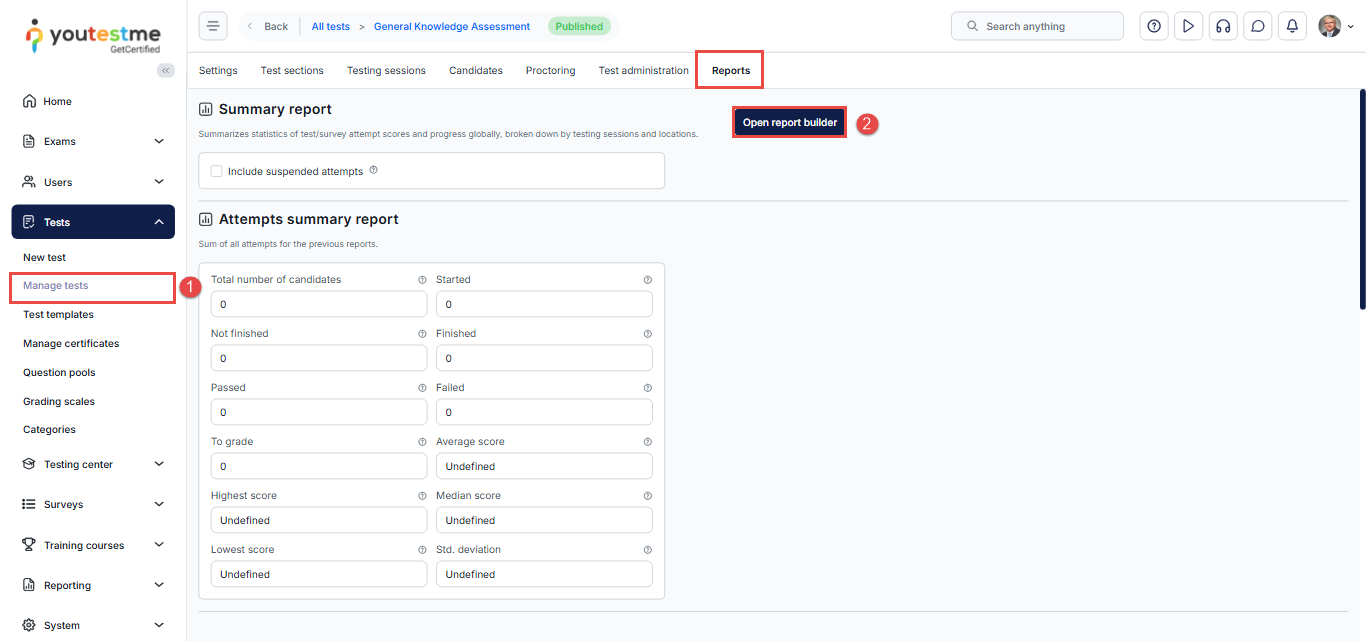
Viewing Results and Reports
After the test is completed, you can review results and generate reports using the reporting module.
- Navigate to Tests, choose Manage Tests, locate the desired test, and navigate to the Reports page.
- Click Open Report Builder.
Using the Report Builder, you can:
- Load predefined report templates.
- Create custom reports by selecting specific data columns.
- Use advanced search filters to refine results.
For further information, please visit this article.
For more related articles, please see:
