Booking the test
This chapter provides a comprehensive overview of the test booking process from the candidate’s perspective.
On the My Tests page within the Assignments module, candidates can view their tests in three different layouts:
- List View
- Tile View
- Calendar View
For a more detailed explanation of each view, please refer to this article.
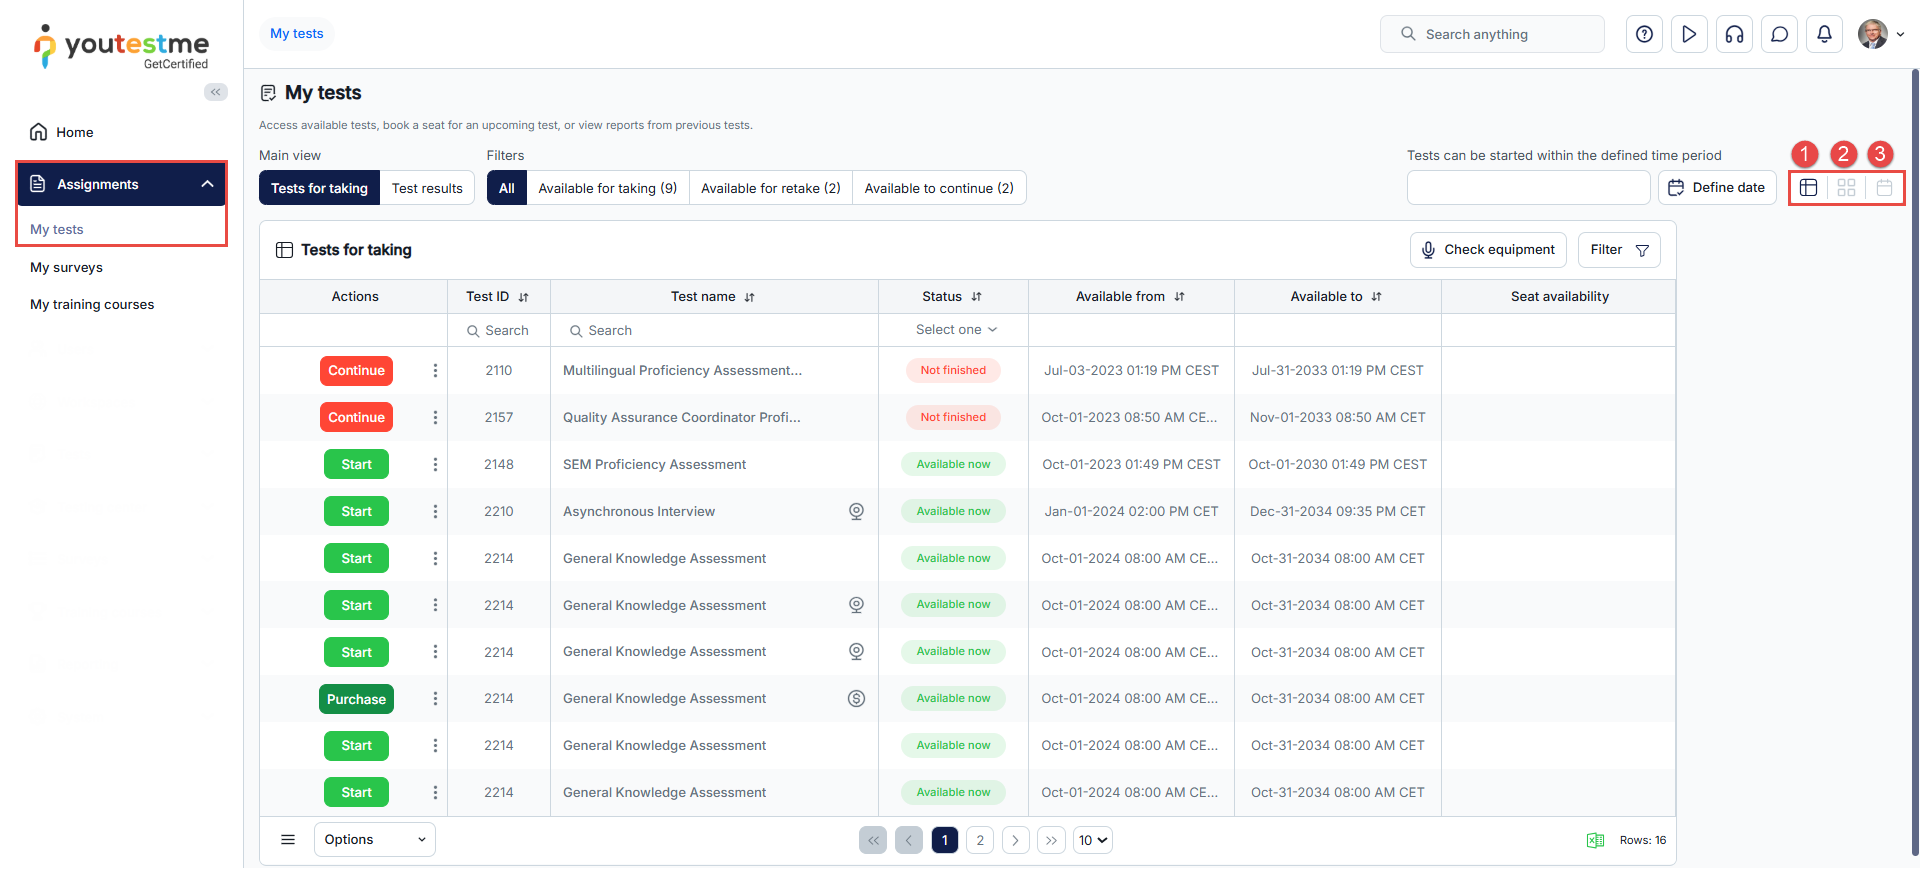
Booking a Test from the My Tests Page: List View
- Navigate to My Tests: From the left-hand navigation menu, open Assignments and select My Tests.
- The view set by default will be displayed (in this case, the List view).
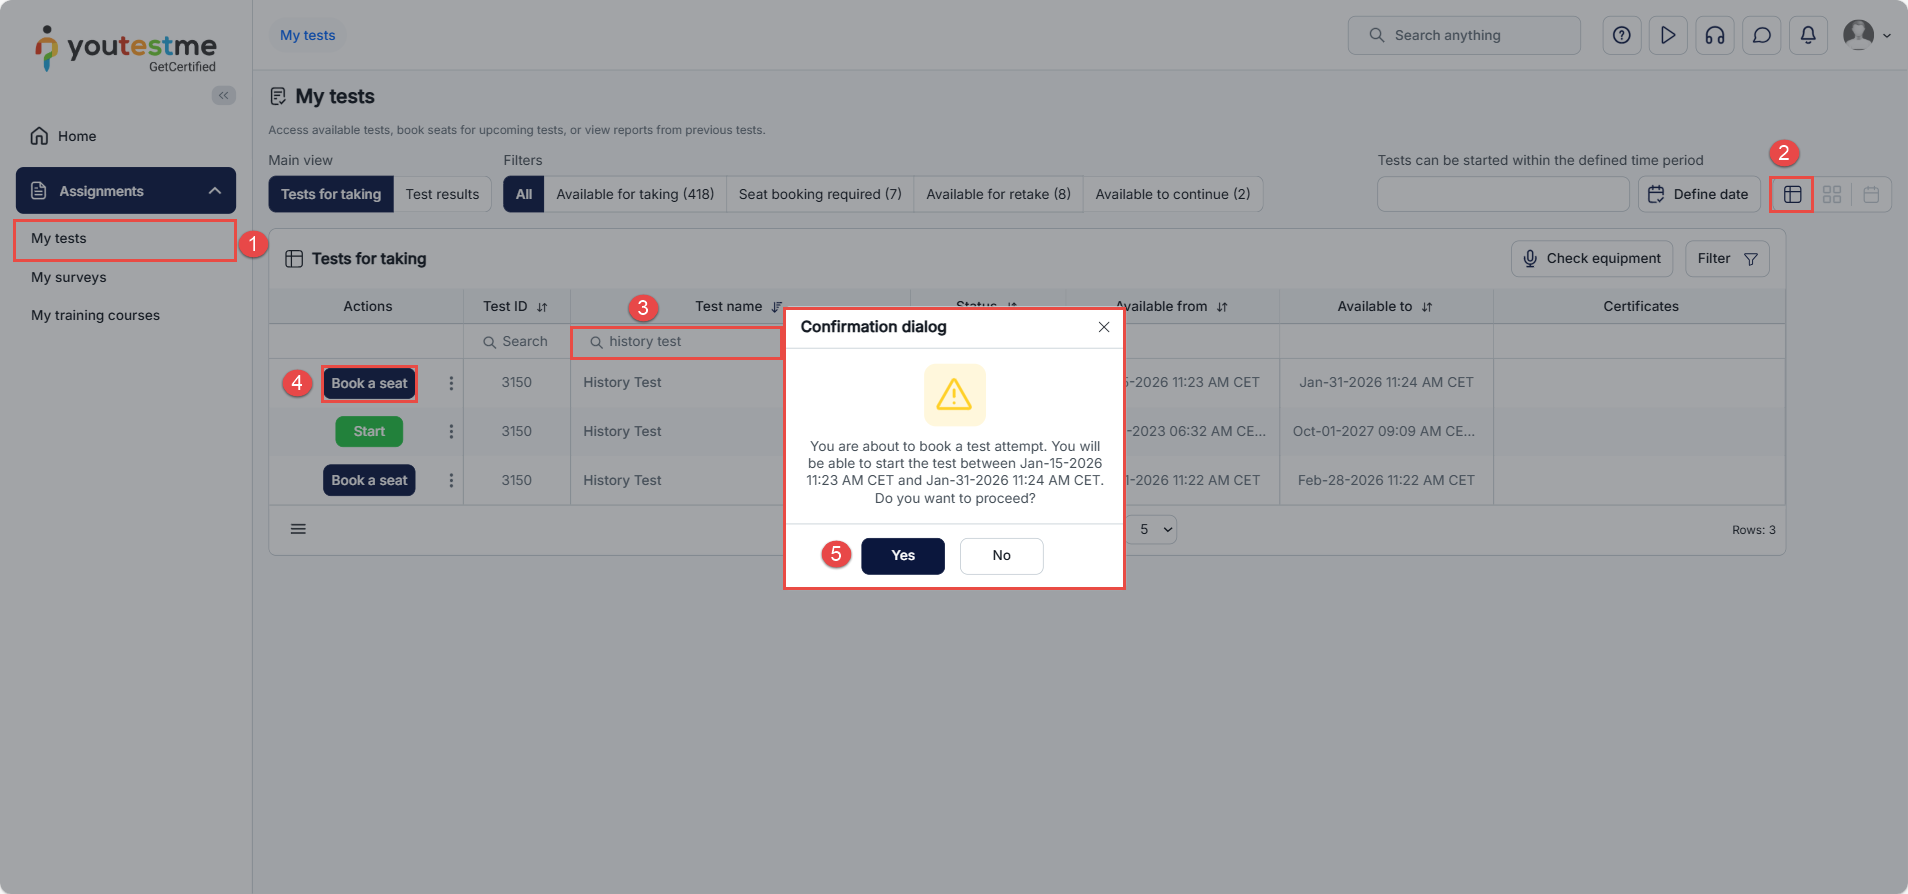
- Search for the Test: Use the search field above the test list to enter the test name (for example, History Test). This helps quickly locate the required test.
- Select “Book a seat”: In the Actions column next to the desired test, click Book a seat.
- Confirm the Booking: A confirmation dialog is displayed showing the time window during which the test can be started. Review the information carefully and click Yes to confirm the booking or No to cancel.
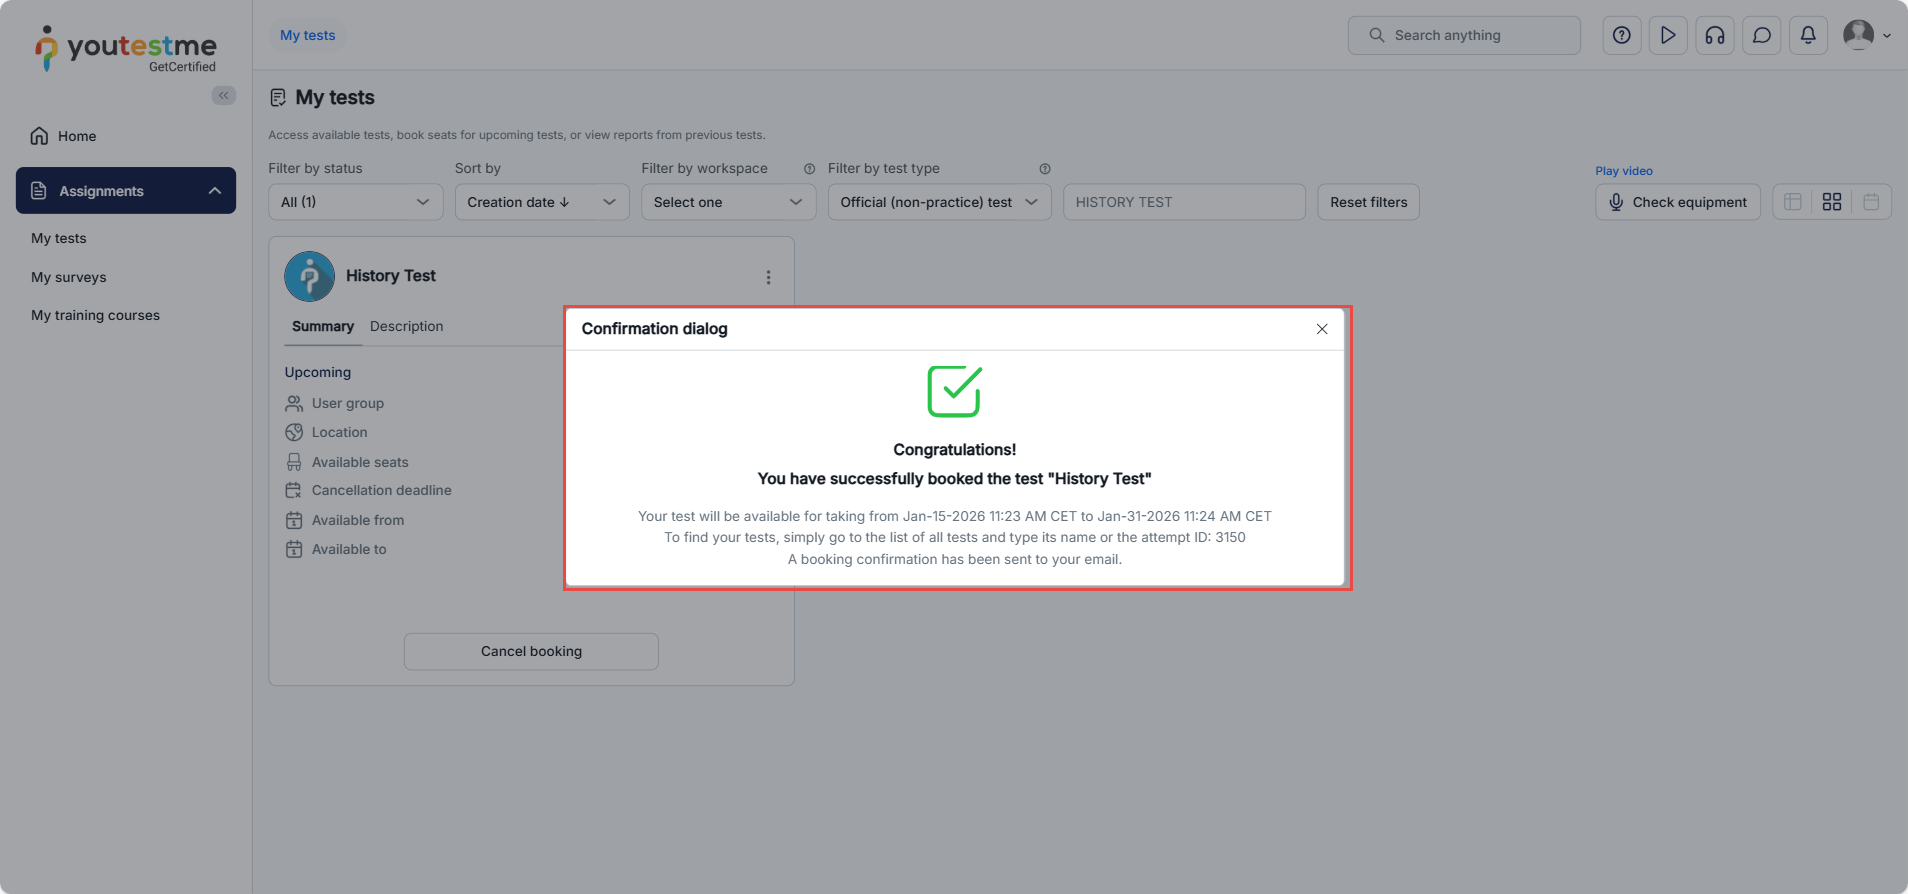
Once the booking is confirmed, the test will be reserved for the defined time period and will be available to start within that window.
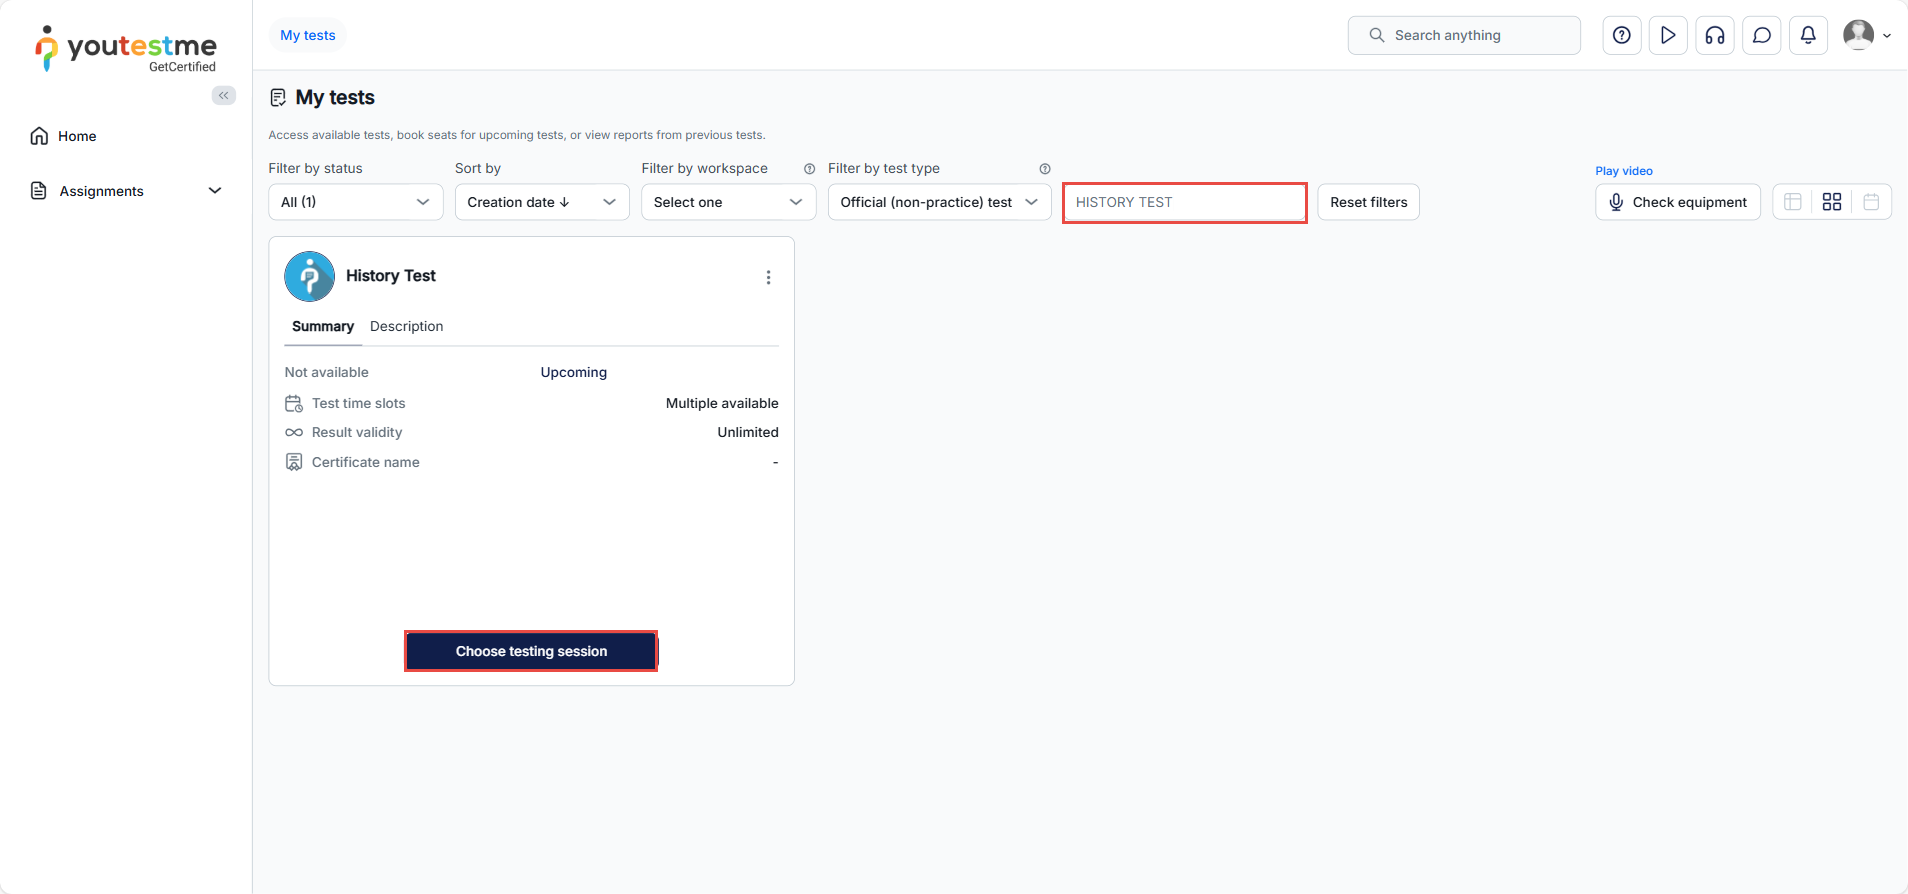
Note: For the Tile view, the steps are the same. Simply click Choose testing session, then proceed to book the test.
The test booking process in YouTestMe GetCertified is straightforward and user-friendly for candidates. It enables them to quickly find available testing sessions, select a suitable option, and complete their booking with ease.
For related topics, please visit:


