
Article verified for Release 15.1 on December 18, 2025
This article explains how to include/exclude fields on the registration page and customize it to your liking. This article explains how to customize the registration page by controlling which fields are displayed and which are required. You can include or exclude standard fields, enable custom properties, and adjust validation options to tailor the registration form to your organization’s needs and candidate experience.
Registration page layout fields
- To access the Registration page layout, select System in the left-side menu, then choose the Settings and customization tab from the drop-down menu.
- Make sure that you are on the System Preferences tab.
- Navigate to the Registration page layout menu option, then click it.
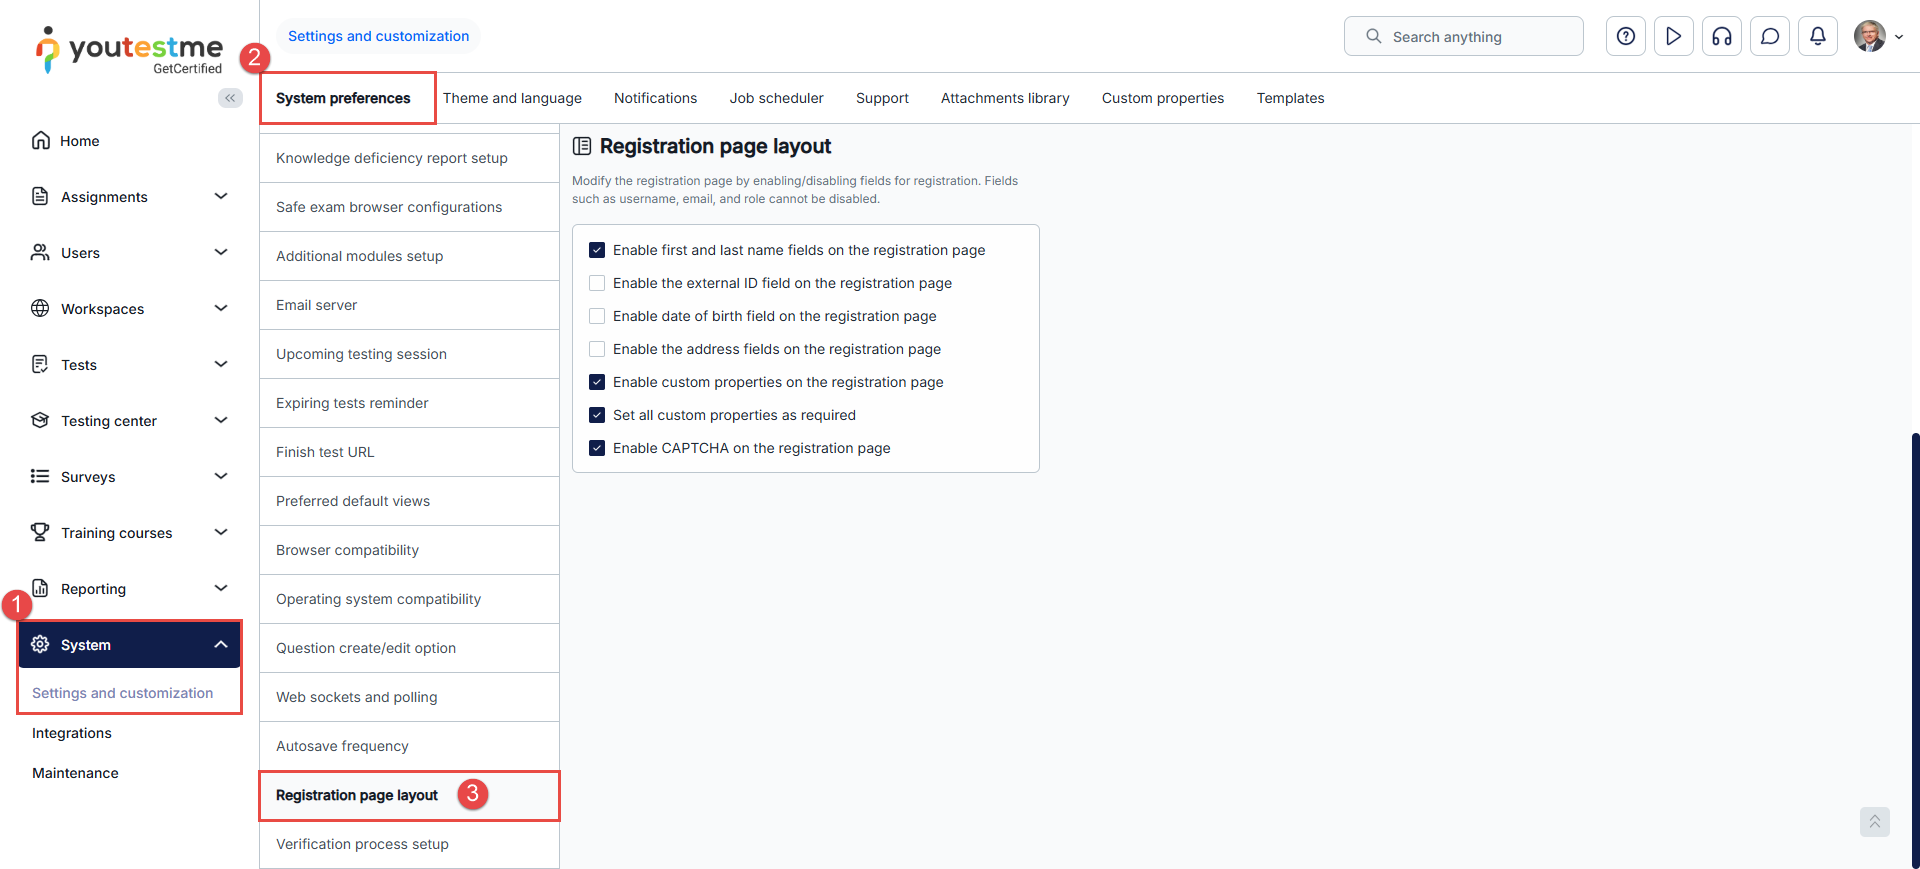
To configure the registration form and include or exclude the fields that will be presented to users when they are registering, you can:
- Enable First name and Last name fields on the registration page.
- Enable the External ID field on the registration page.
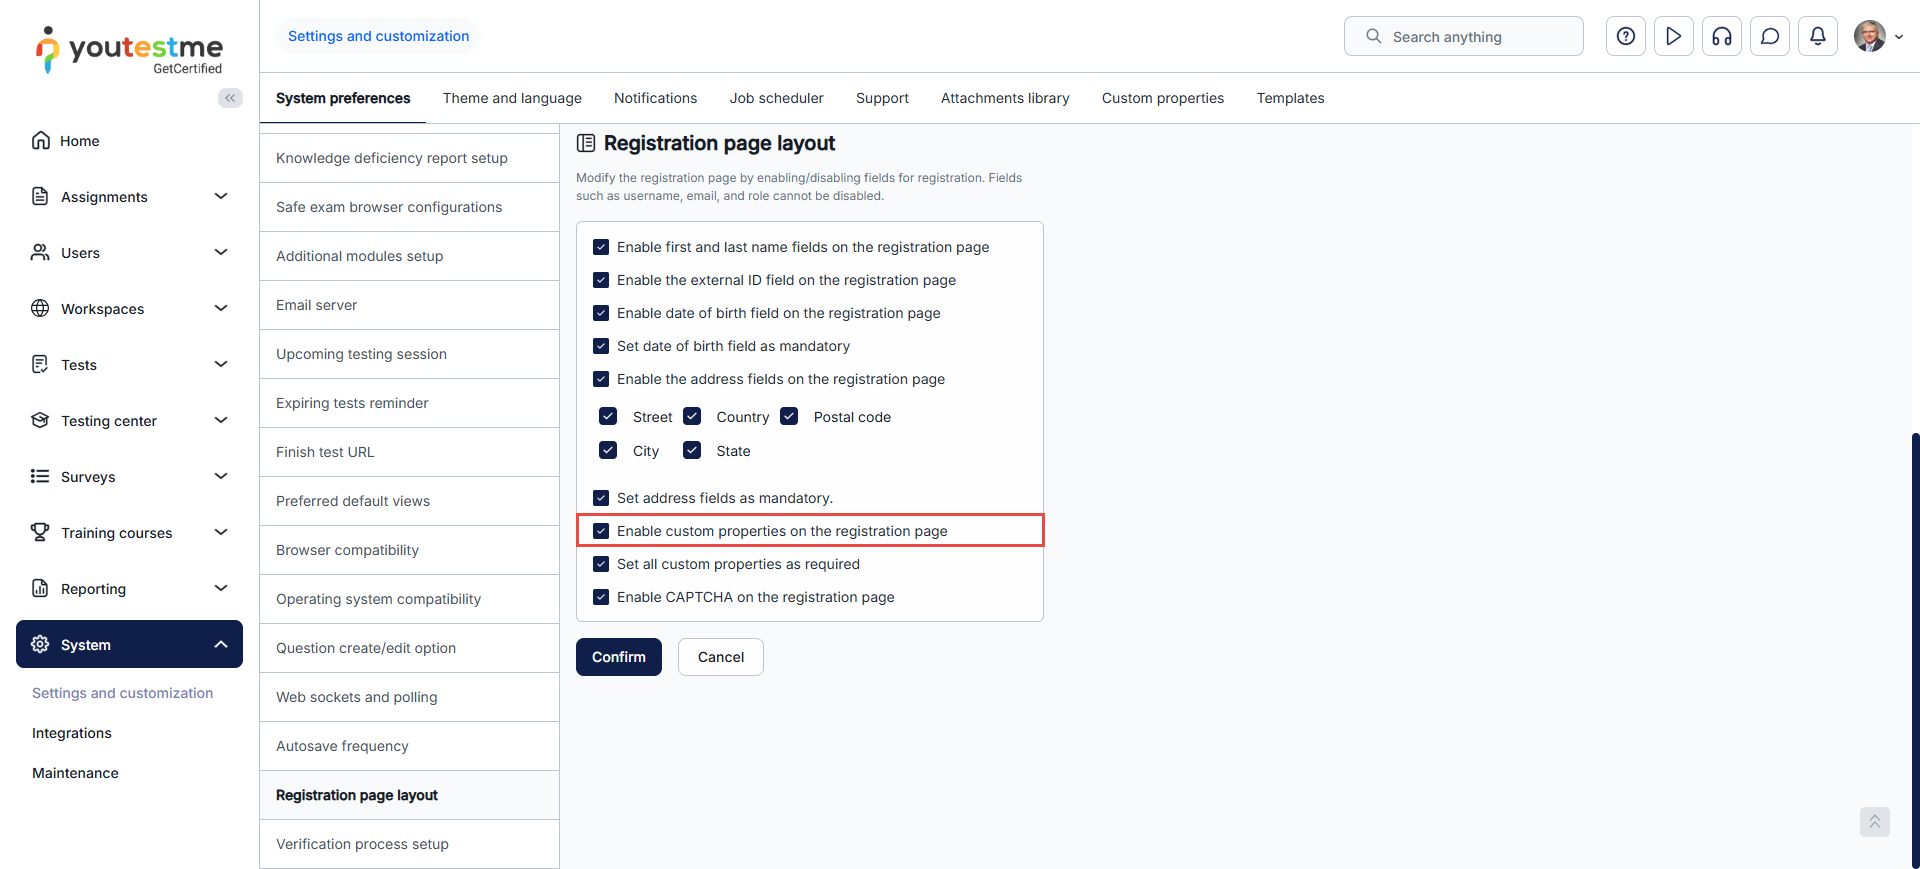
- Enable the Date of birth field on the registration page.
- Set the Date of birth field as mandatory.
- Enable Address fields on the registration page:
- Street
- Country
- Postal code
- City
- State
- Set Address fields as mandatory.
- Enable Custom properties on the registration page.
- Set all Custom properties as required.
- Enable CAPTCHA on the registration page.
- Click Confirm to save the configuration.
- Click Cancel to discard the changes.

Enable custom properties on the registration page
When you select this option, you can enable custom properties on the registration page, which allows you to add any field you need to the page. To find out how to create custom properties, watch this video.
Once you’ve created the custom properties, you can see and modify them in the Custom properties tab > Custom data types in the side menu:
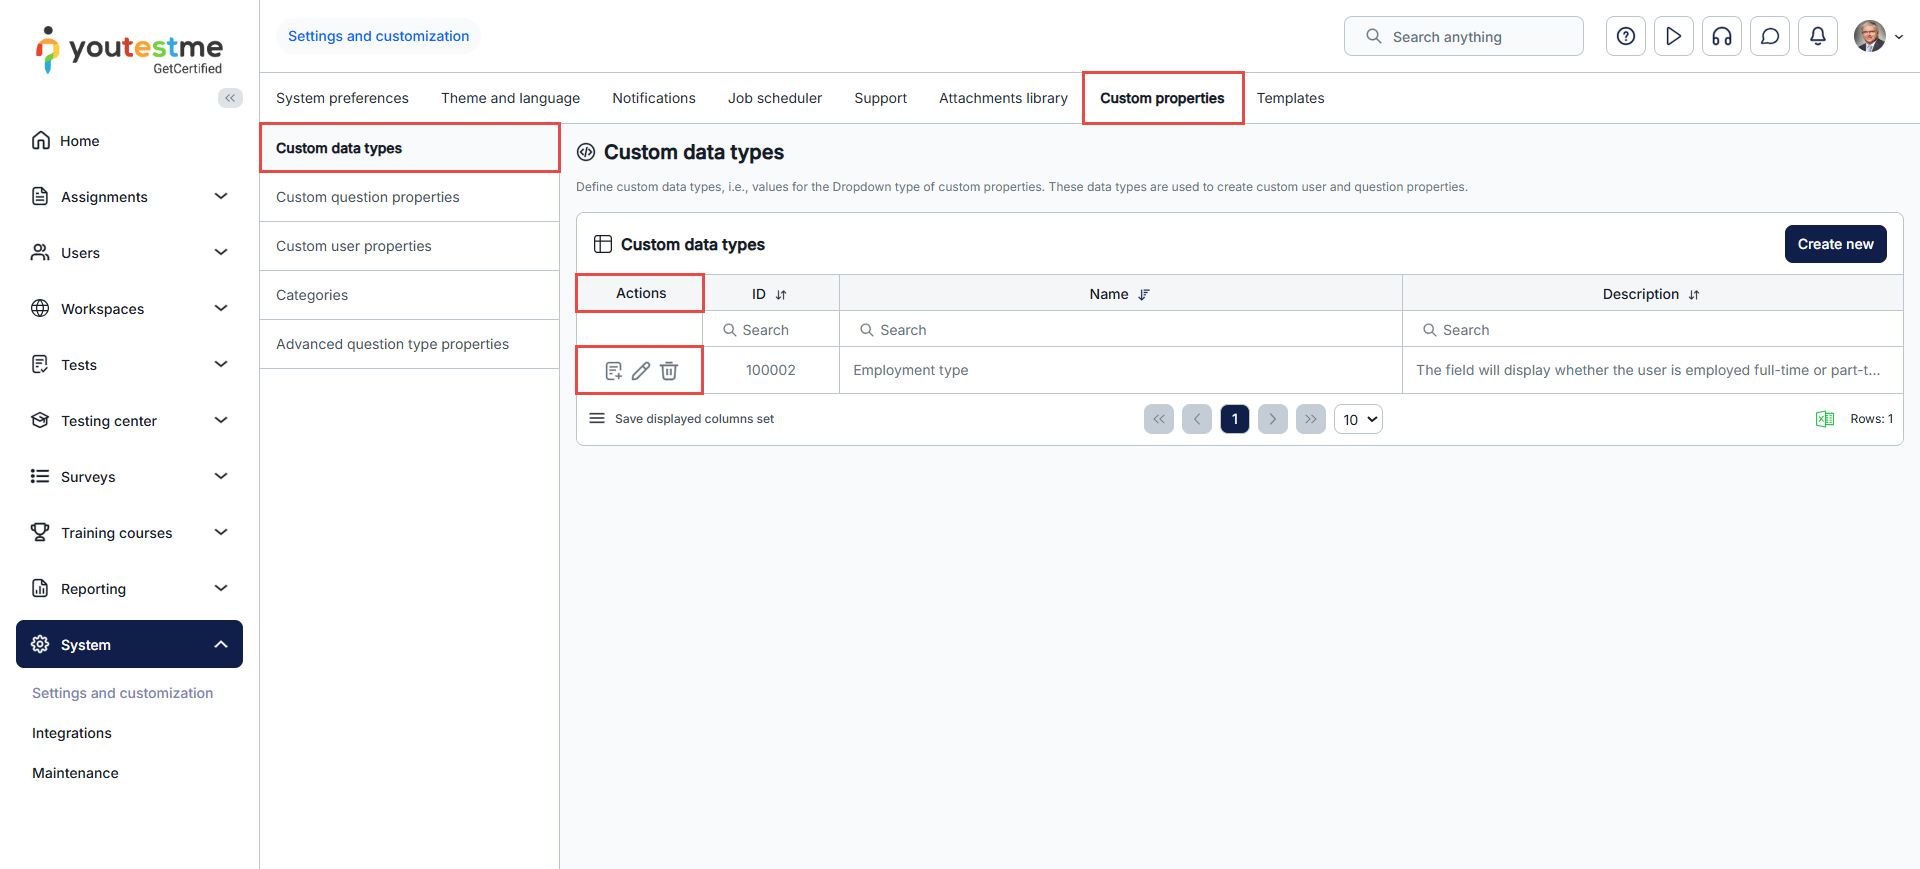
Inside the actions column of the Custom data types table, each custom data type has three separate options. You can use the following options:
- Define Values – Use this option to edit or add new values to the Custom data type
- Edit – Use this option to edit the name or the description of the Custom data type
- Delete – Use this option to delete the Custom data type. Notice that this option cannot be used if a Custom data type is already used.

To make the custom fields mandatory for candidate registration, check the Set all custom properties as required box.

Please check this article to learn how to change the field names displayed on the login/registration page.
Also, watch this video to see how candidates can self-register with or without the manager’s approval.
