Article verified for Release 15.1 on December 11, 2025.
This article provides a step-by-step guide to creating a survey in GetCertified.
A survey in GetCertified is a non-graded questionnaire used to collect feedback, opinions, or evaluation data from users. It is used to measure satisfaction, gather insights, or assess experiences without assigning scores.
Accessing the page
To access the Survey creation wizard:
- Select the Surveys then select the New survey tab.
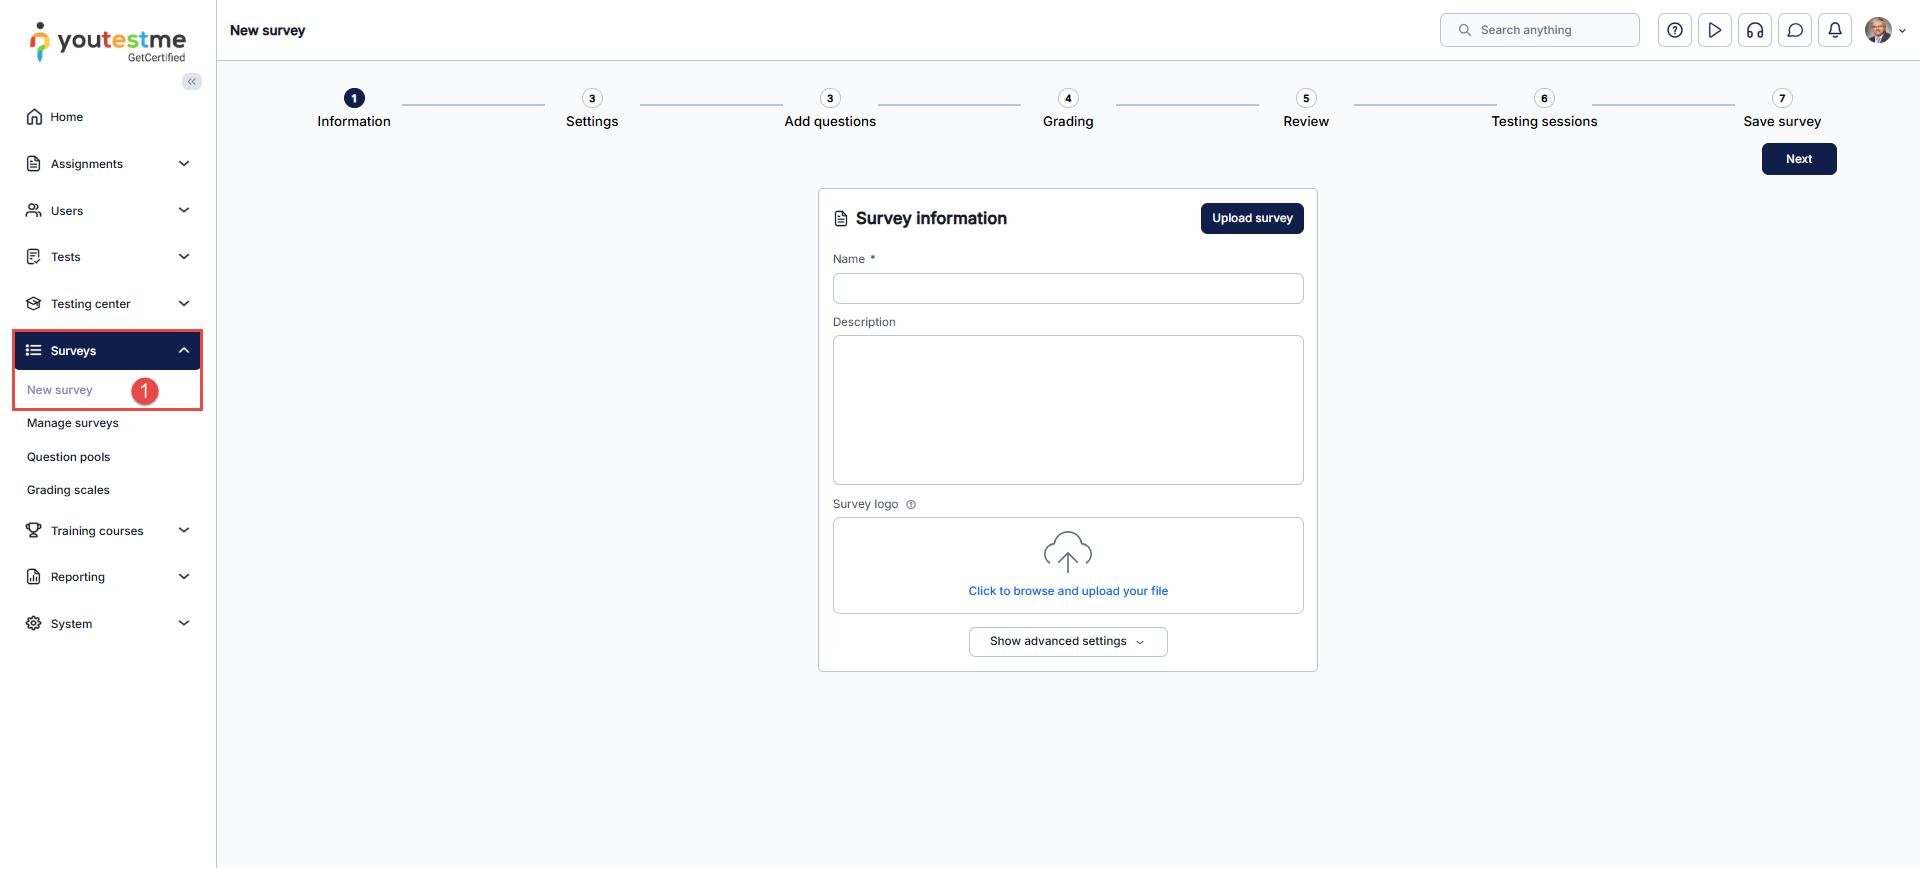
Survey information
On this page, you can:
-
Enter the Name of the survey you want to create.
-
In the Description field, you can give more details about the purpose.
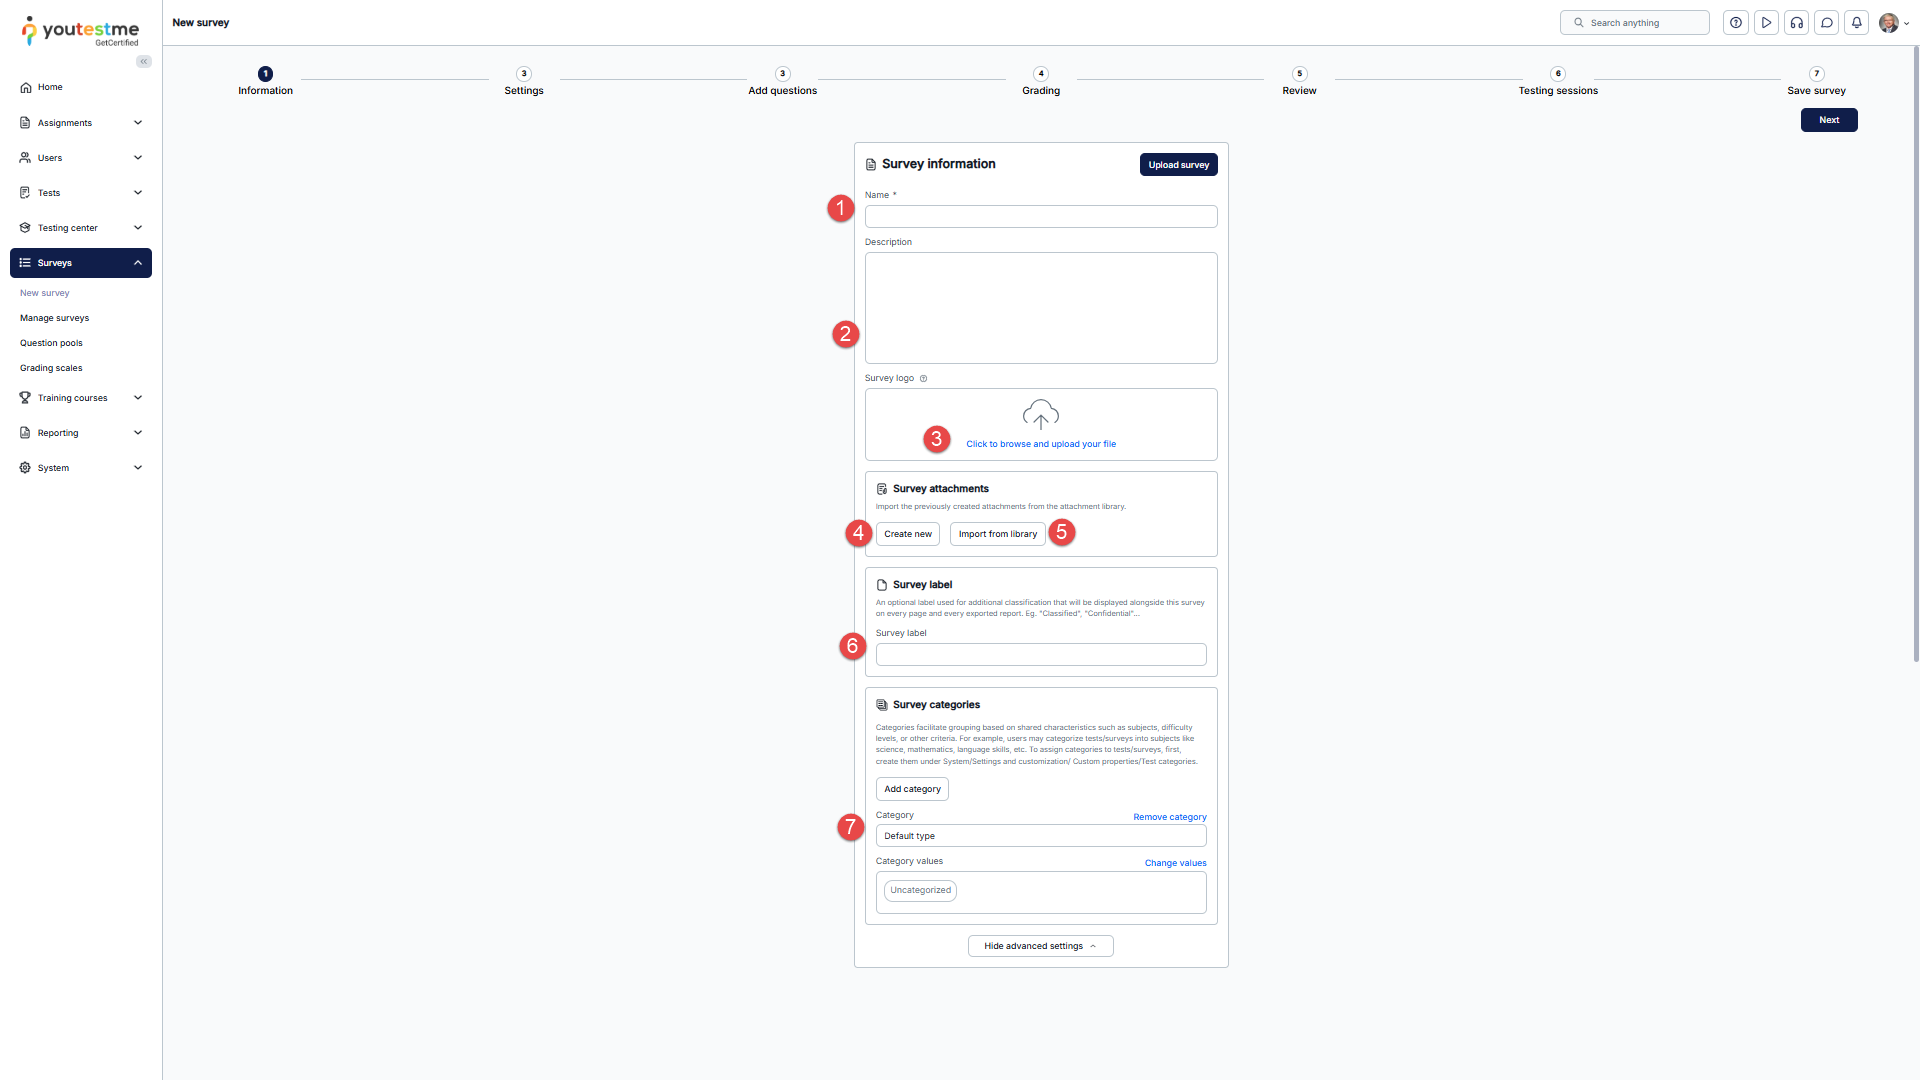
- By clicking the Click to browse and upload your file button, you can optionally upload the Survey logo. By clicking the Show advanced settings button, you can change the survey’s options.

-
Click the Create new button to import a new attachment from your computer.
-
Click the Import attachments button to add new attachments from the library of previously imported or created attachments.
-
Survey label – Add the survey label for additional classification that will be displayed alongside this survey on every page and every exported report, e.g., “Classified”, “Confidential”, etc.
- Survey category– With this option, you can connect surveys with similar characteristics.


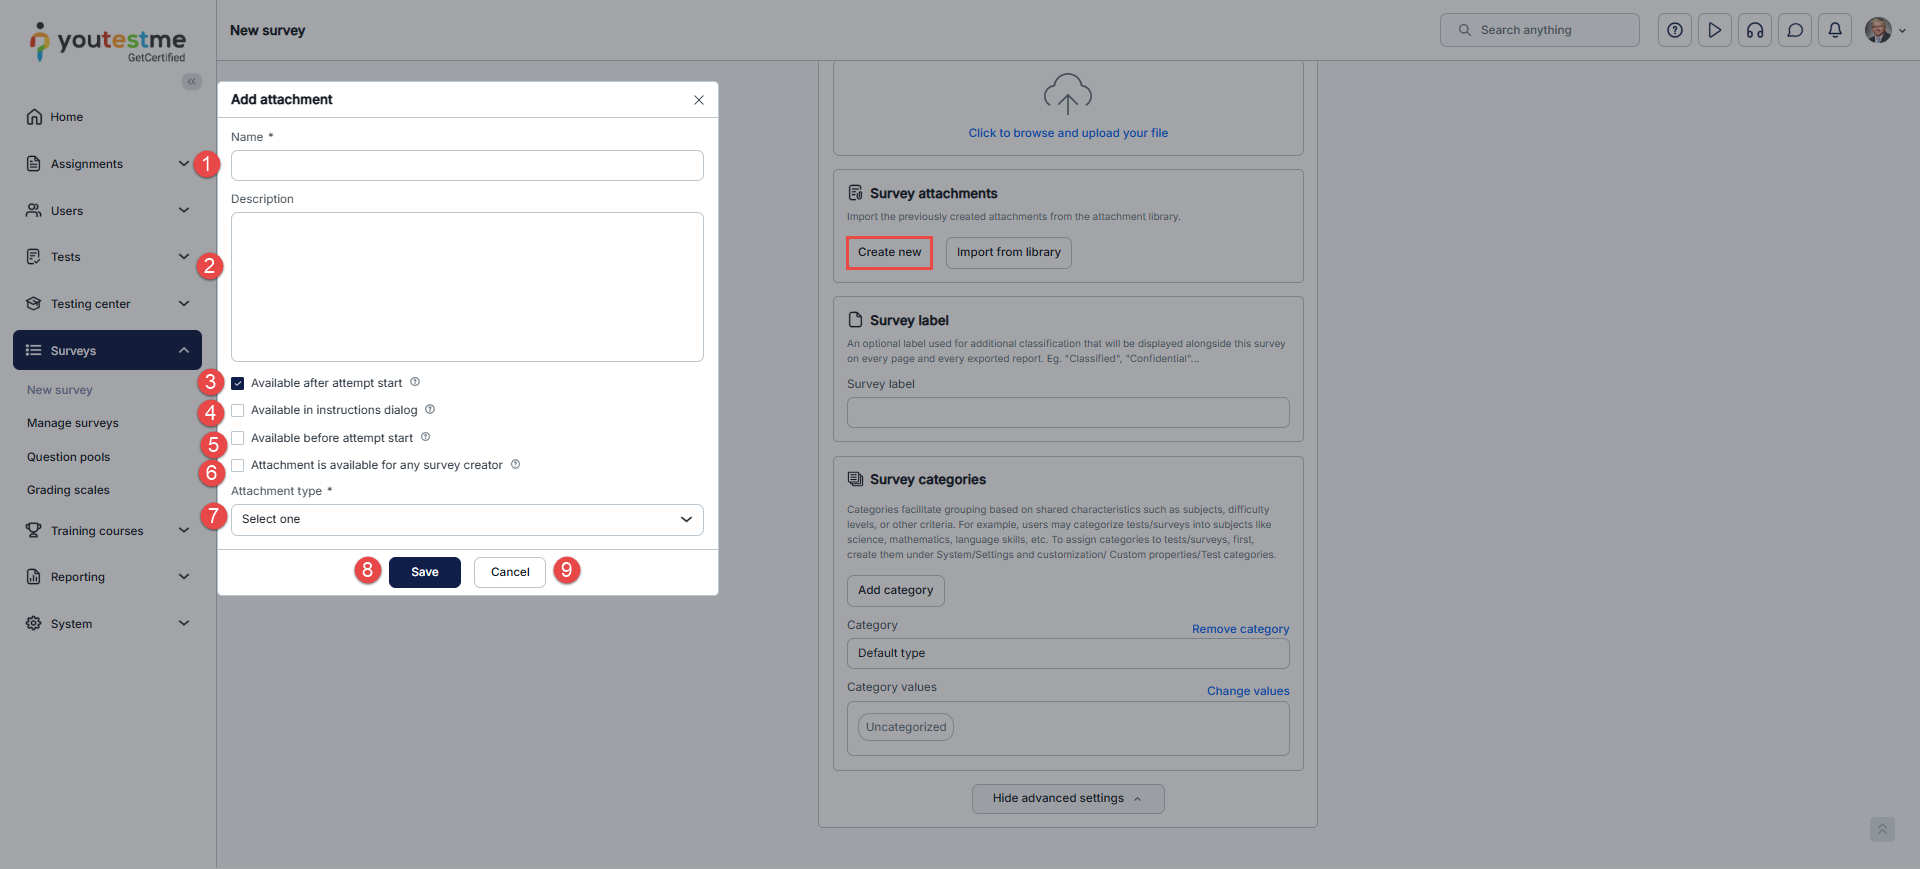
When the pop-up to create an attachment appears, you will be able to:
- Name – Enter the name of the attachment in this field.
- Description – Enter the attachment description.
- Available After Attempt Start – Enable this option to make the attachment accessible to candidates only after they begin the survey.
- Available in Instructions Dialogue – If checked, the candidate can preview the attachment directly from the Instructions Dialogue before starting the survey.
- Available Before Attempt Start – Enable this option to make the attachment accessible to candidates before they begin the survey.
- Attachment Is Available for Any Survey Creator – Enable this option to allow other survey creators to use the attachment. Specify whether the attachment will be:
- Private – accessible only by you.
- Public – available to any Survey creator. Other users can preview it, but cannot edit or delete it.
- Attachment Type – Select the attachment type from the dropdown list and click the Upload button.
- Click the Save button to finish creating the attachment.
- Click the Cancel button to discard the creation.
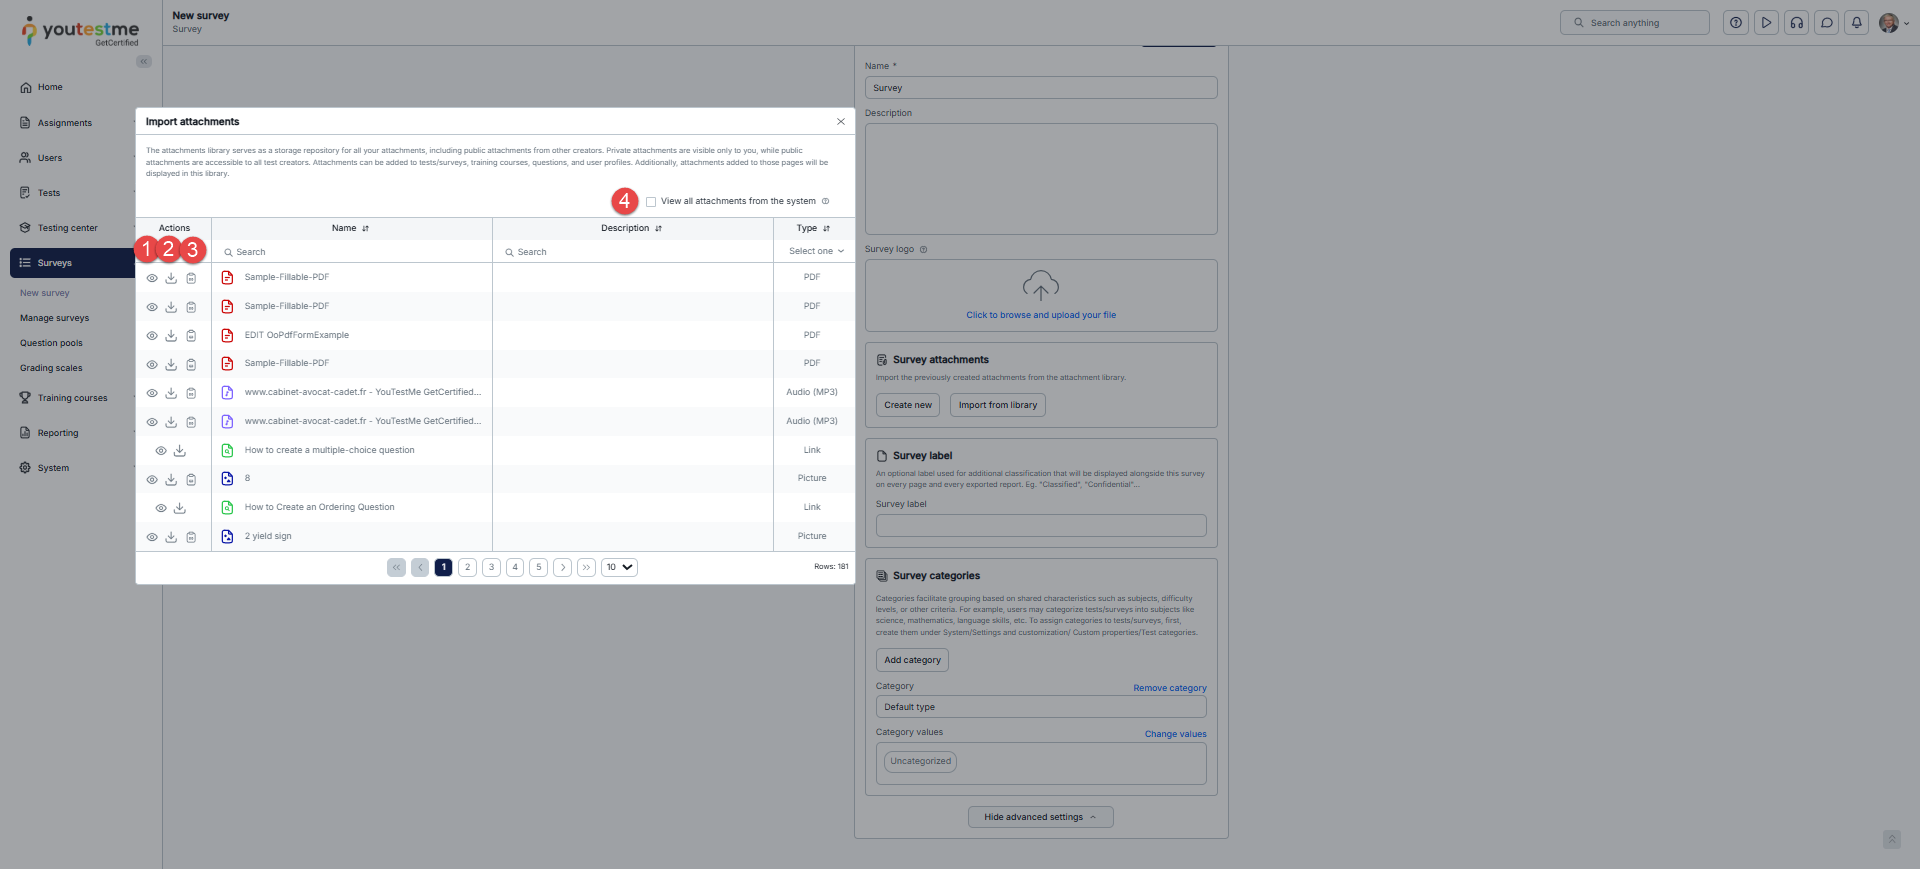
After selecting the Import from library button, a new window will appear, and you will be able to:
- Preview – Preview the attachment by clicking on the Preview icon.
- Import – Click the Download icon to import the attachment.
- Copy attachment URL – Select this option to copy the attachment link.
- View all attachments from the system – This option is available to anyone with the Manage any attachment permission.
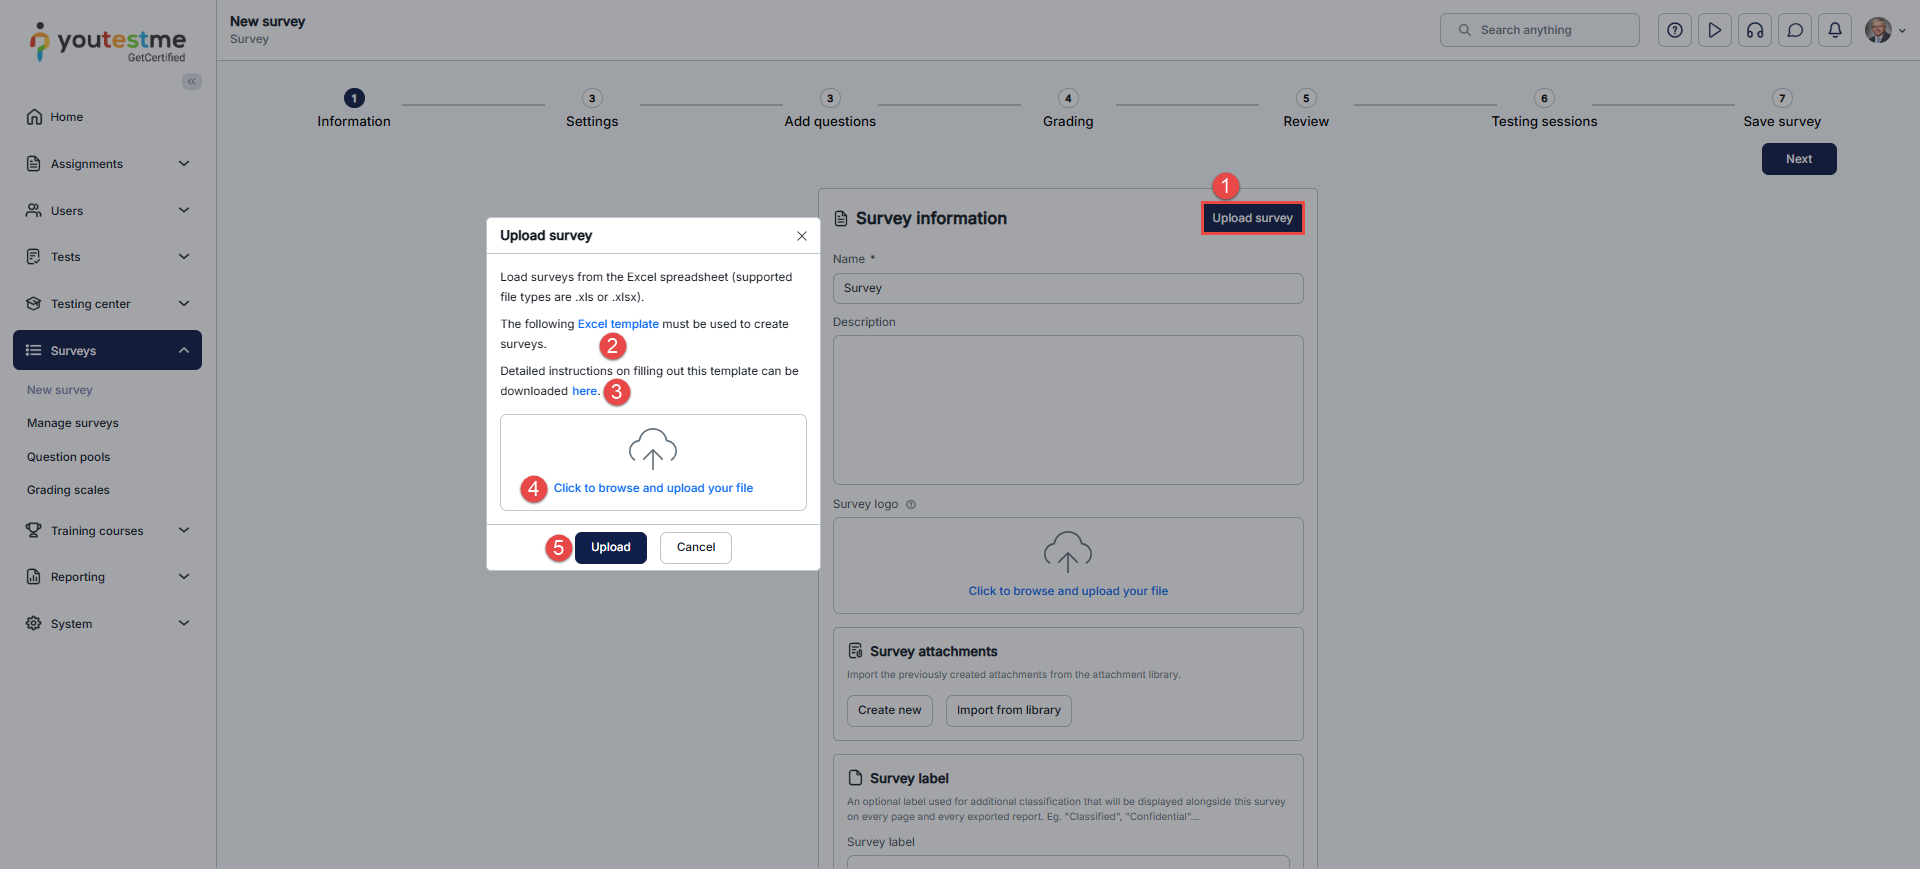
To upload a survey using an Excel template, follow these steps:
- Click the Upload survey button.
- You should download the predefined Excel template and enter the necessary data.
- Here you will find detailed instructions for entering data into the template.
- Once you fill in the template, click the Click to browse and upload your file button to add it.
- Click the Upload button to add a survey to the GetCertified application.
Survey settings
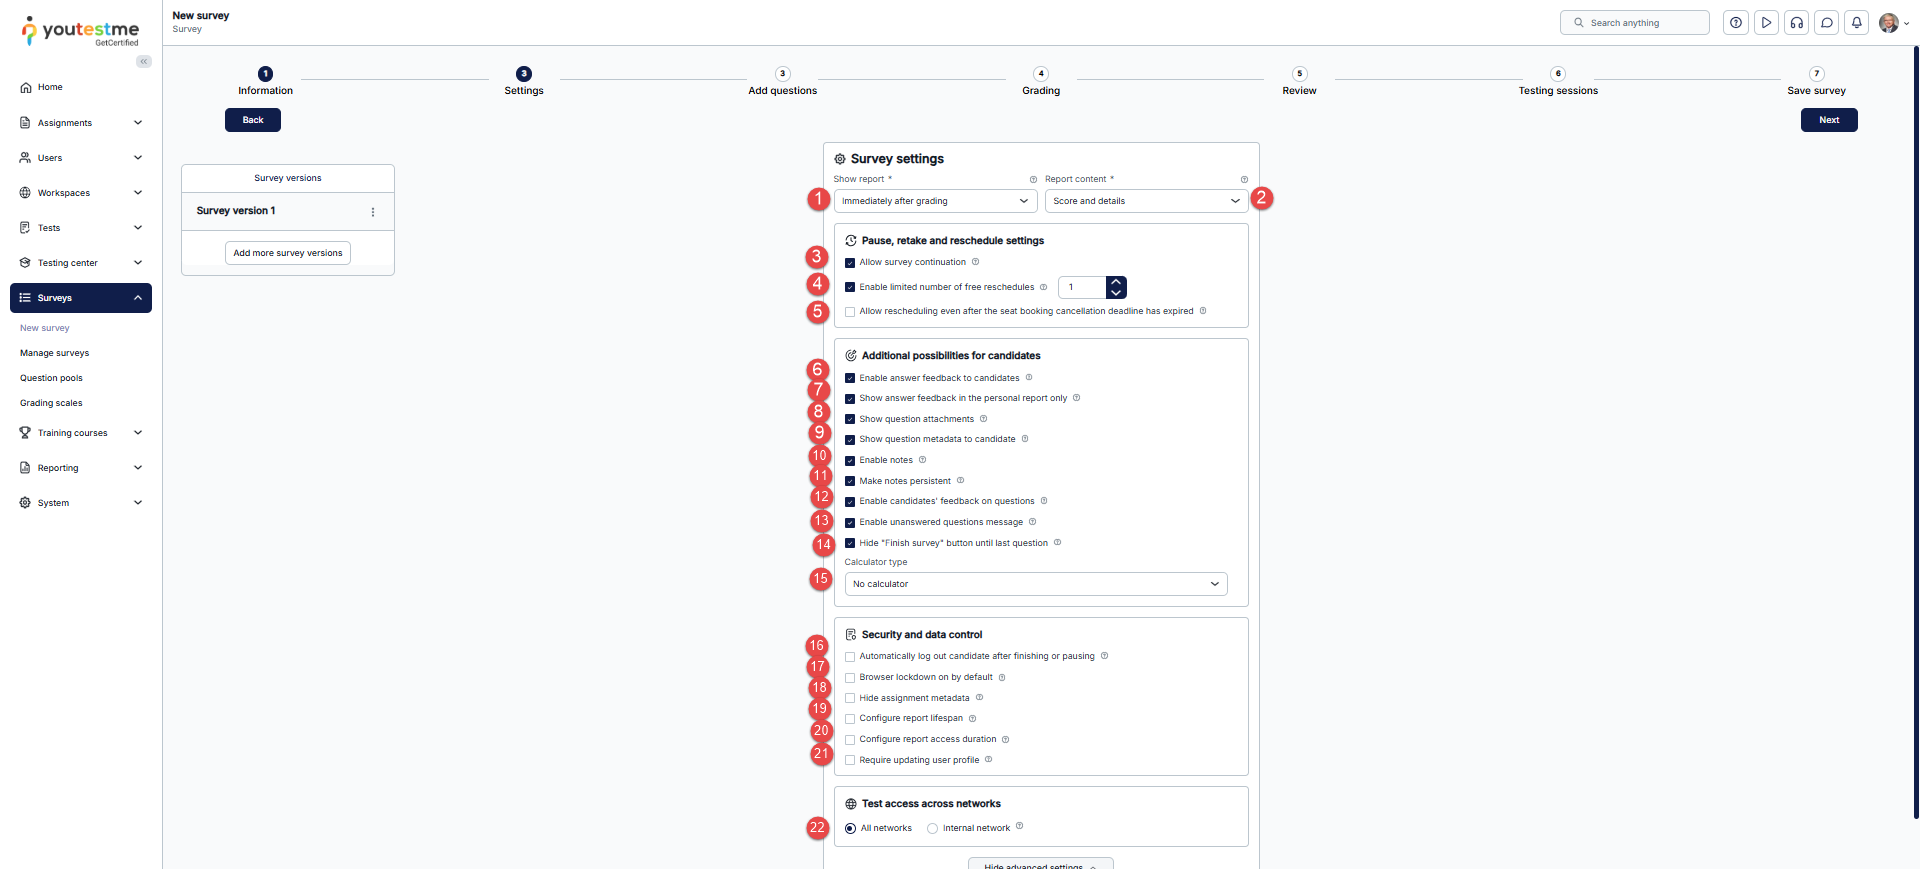
The Survey settings step contains the following options for configuring your survey:
- Decide when the report will be available to users. Options include:
- On the manager’s approval.
- Immediately after grading.
- Immediately after finishing the Survey.
- Report content – Define the report content the user will receive. You can choose between two options:
- Score and details – The user will see his score and all questions and their answers, e.g., his answer and the correct answer.
- Score only – The user will see only the score.
- Allow survey continuation – By enabling this option, you allow users to save their answers, pause, and resume the survey within the survey’s availability period.
- Enable limited number of free reschedules – With this option, you can decide on the number of free reschedules that candidates can have.
- Enable answer feedback – Explains how to enable feedback for the selected answers during the survey-taking process. Provide feedback for each answer displayed before moving to the next question. If you enable Immediate answer feedback, you will have instant answer feedback for single-choice questions.
- Show answer feedback in the personal report only– Feedback won’t appear during the Survey, but will be shown in the personal report afterward.
- Show question attachments – With this option, you can allow candidates to see attachments, if any, in the questions they are offered in the survey.
- Show question metadata to candidates – During the survey-taking process, users will be shown question points, type, and difficulty level.
- Enable notes – Allow candidates to take notes during the survey process. They will be presented with a text editor where they can write formatted and styled text. Enabling this option makes the notes visible only to the candidate during the survey-taking process.
- Make notes persistent – If checked, the notes will be saved and presented in the report for both instructors and candidates.
- Enable candidates’ feedback on questions – With this option, you enable candidates to provide feedback on the questions in the survey.
- Enable unanswered questions message – After completing the survey by pressing the Finish survey button, candidates will receive a pop-up message listing the unanswered questions.
- Hide the “Finish survey” button until the last question – Candidates will not see it until they answer all questions or reach the last question.
- Calculator type– Defines whether a calculator is available during the survey (none, simple, or advanced).
- Automatically log out candidate after finishing – The application will automatically log out the user upon completing the survey.
- Browser lockdown on by default – The users will not be able to cut, copy, save, or print anything from the screen during the survey-taking process. Also, the web browser will be in full-screen mode, and if the users try to minimize it, the survey attempt will be terminated.
- Hide assignment metadata – Users will not see the metadata on the My assignments page (logo from the certificate, assignment type, location).
- Configure report lifespan – Set how long the question details are visible to the users after they open their report for the first time.
- Report lifespan – You can set the report’s duration, which appears in this format (hh:mm:ss).
- Configure report access duration – Defines the time frame within which candidates can open and view their report after receiving access. For more information, see How to customize personal report settings.
- Require updating personal information – When initiating the survey, a screen with the user’s personal information will appear. The user can confirm the information’s validity or make the necessary changes to start the survey.
- Network access – Restrict candidates from taking the survey at forbidden locations by enabling the internal network option.
- Internal network – Limit access to a survey to people within your local (internal) network only.
- All networks – Choose this option to allow access to people inside and outside your network.
Add Question
- To create a question manually, select Add new question and choose the question type from the drop-down list. For step-by-step instructions on creating each type, please refer to the following articles:
-
- How to create a Single-choice question
- How to create a Multiple-choice question
- How to create a True/False question
- How to create an Essay question
- How to create an Open-ended question
- How to create an Accounting Question
- How to create a Hotspot question
- How to create a matrix question
- How to create a matching question
- How to create a fill-in-the-blanks question
- How to create an ordering question
Note: Some survey questions use a scoring method based on answer difficulty, and others require manual grading.
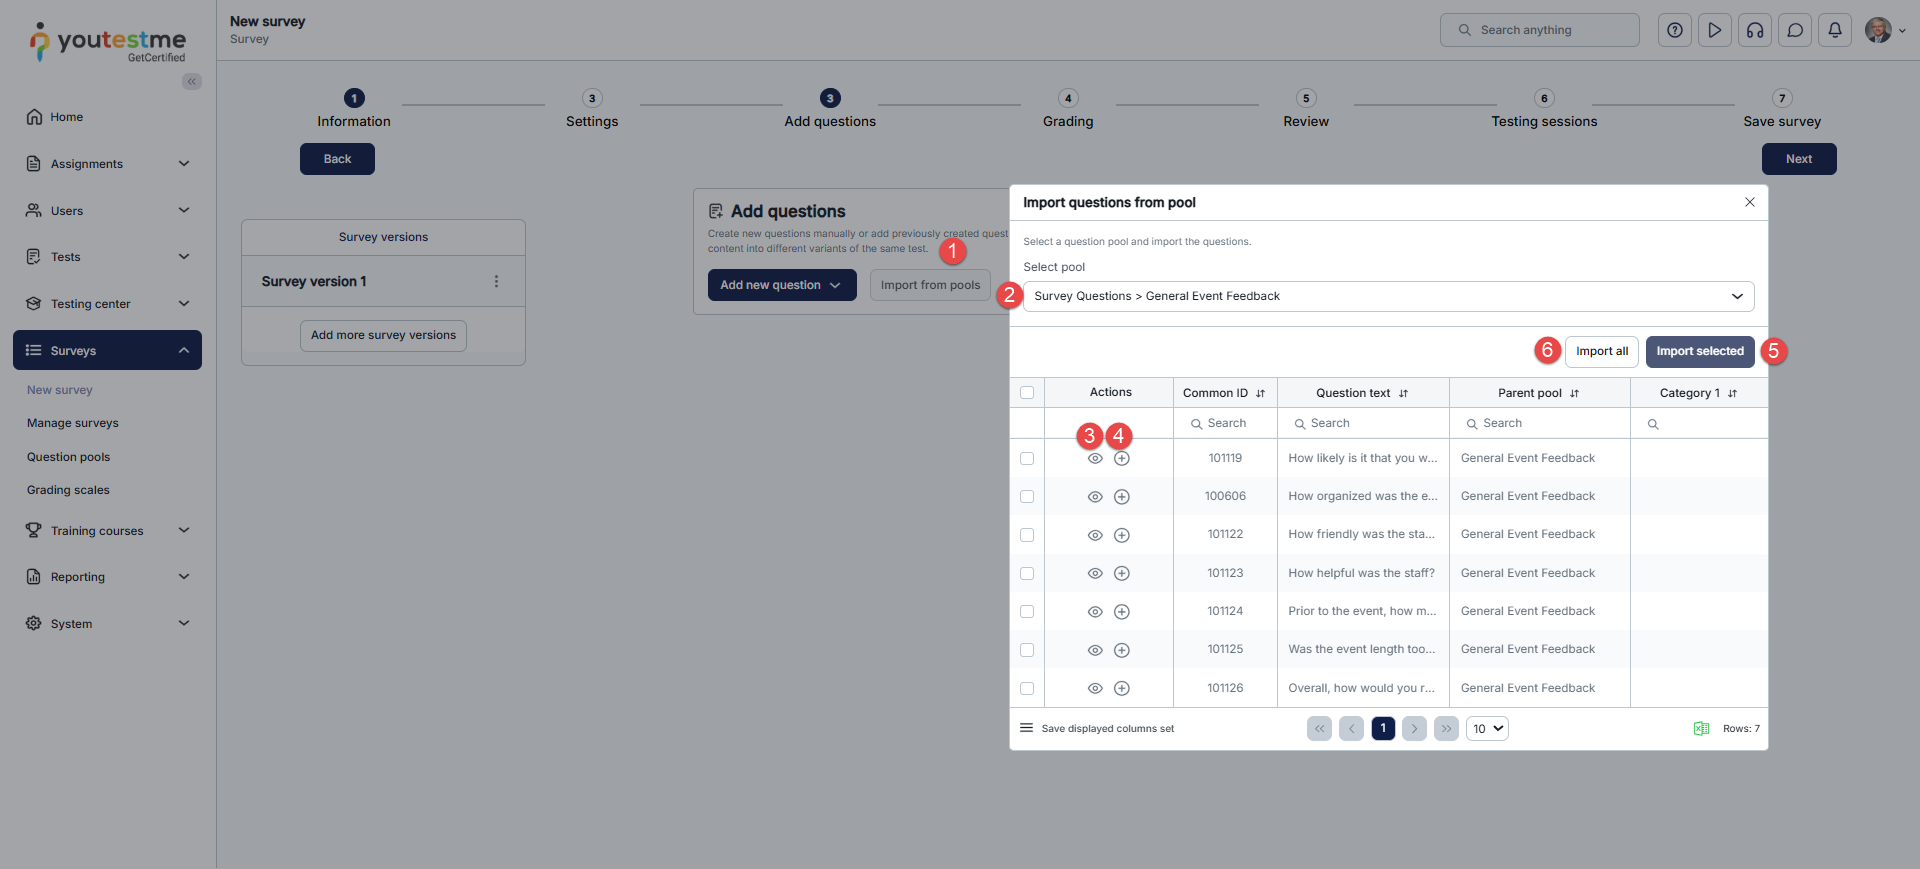
- Another way to add questions is to use the Import from pools option. Upon clicking this button, a pop-up window will open, redirecting you to add a question pool from an existing survey.

To add questions to a survey from an existing question pool, follow the steps below:
- Click on the Import from pools button.
- Click on the drop-down menu to view all available pools. You can select only the pools you create or manage. Once you choose the desired pool, you can:
- Preview each question.
- Add a question to the survey by clicking on the plus icon.
- You can select questions and click Import selected to add them to the survey.
- Import all questions from the selected pool.
Note: You can add questions from multiple question pools.
Note: To create a new question pool before the survey creation process, please visit Question pools.
Once you have added questions to the survey from the pools or manually, you can:
- Randomize question order – Users will receive questions in a different order.
- Randomize answer order – Users will get a different answer order for the same question.
- Edit each question.
- Delete a question from the survey.
- By clicking the arrow next to the number, you can reorder the questions.

Grading
The Grading step allows you to select the appropriate grading scale for the survey. For example, you can set a standardized scale from A to F to answer the survey and present its results. For more information on how to change the existing and create new grading scales, please visit the Grading scale.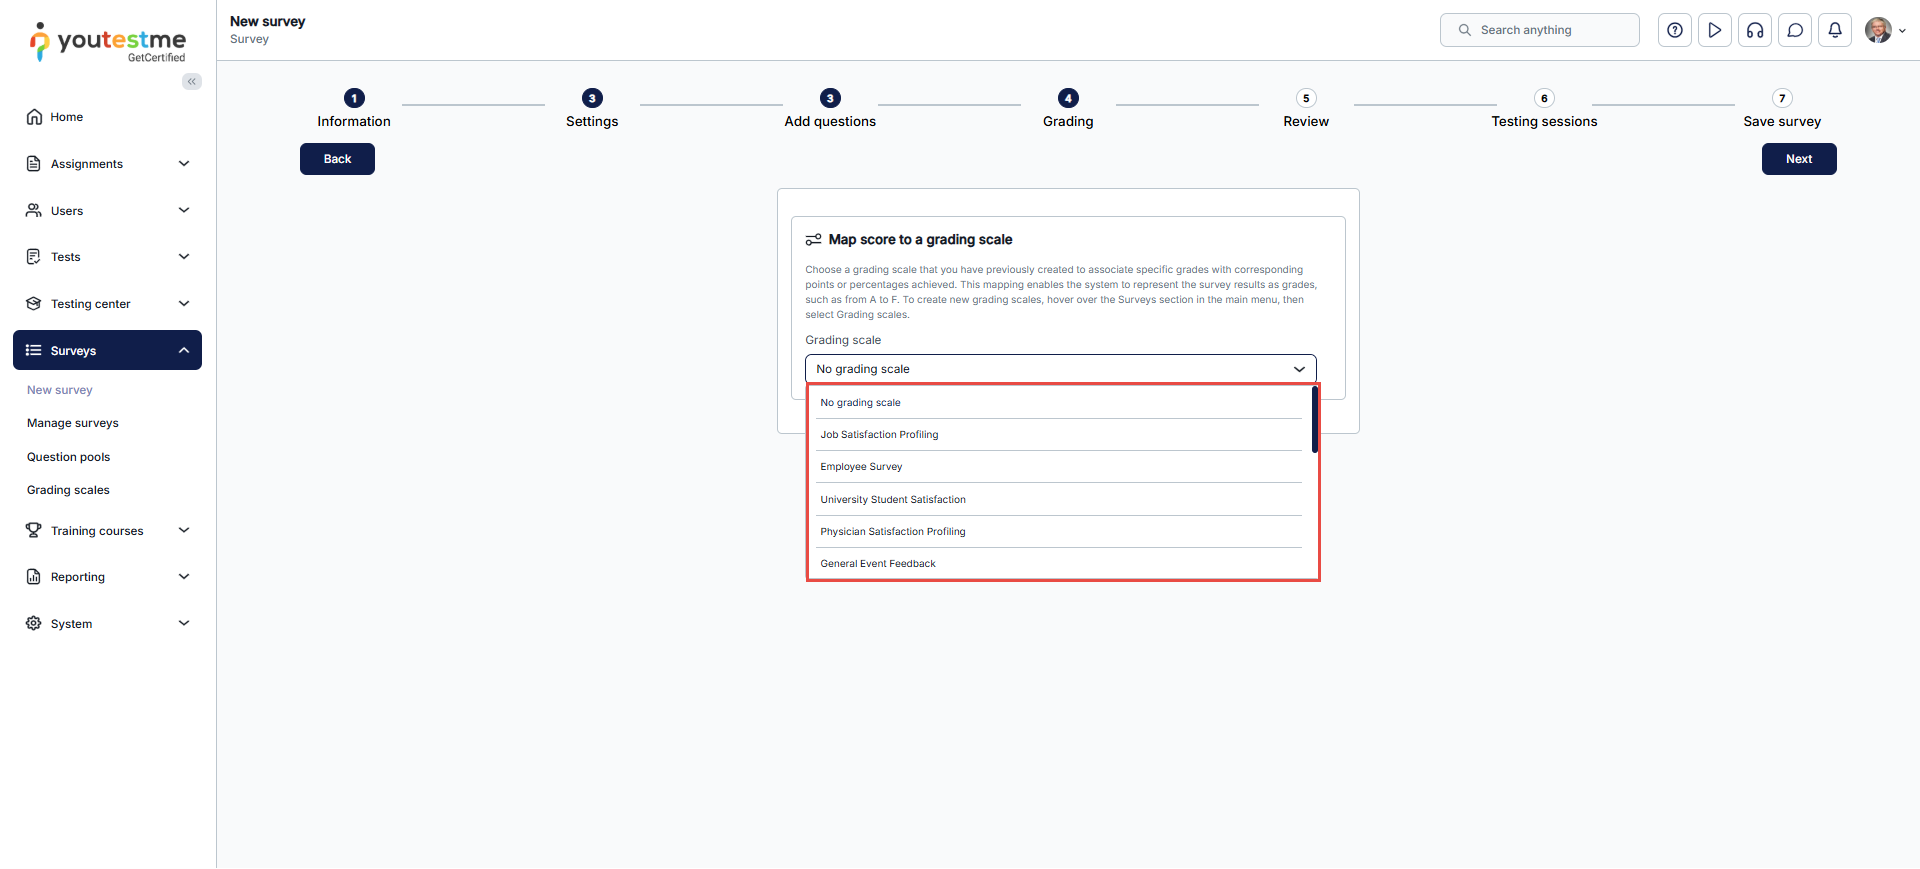
Review
In the Review step, you can recheck your survey settings and questions. You can also return to the previous steps and make the necessary changes by clicking the Back button. Click the Next button to proceed to the final step of the survey creation process.

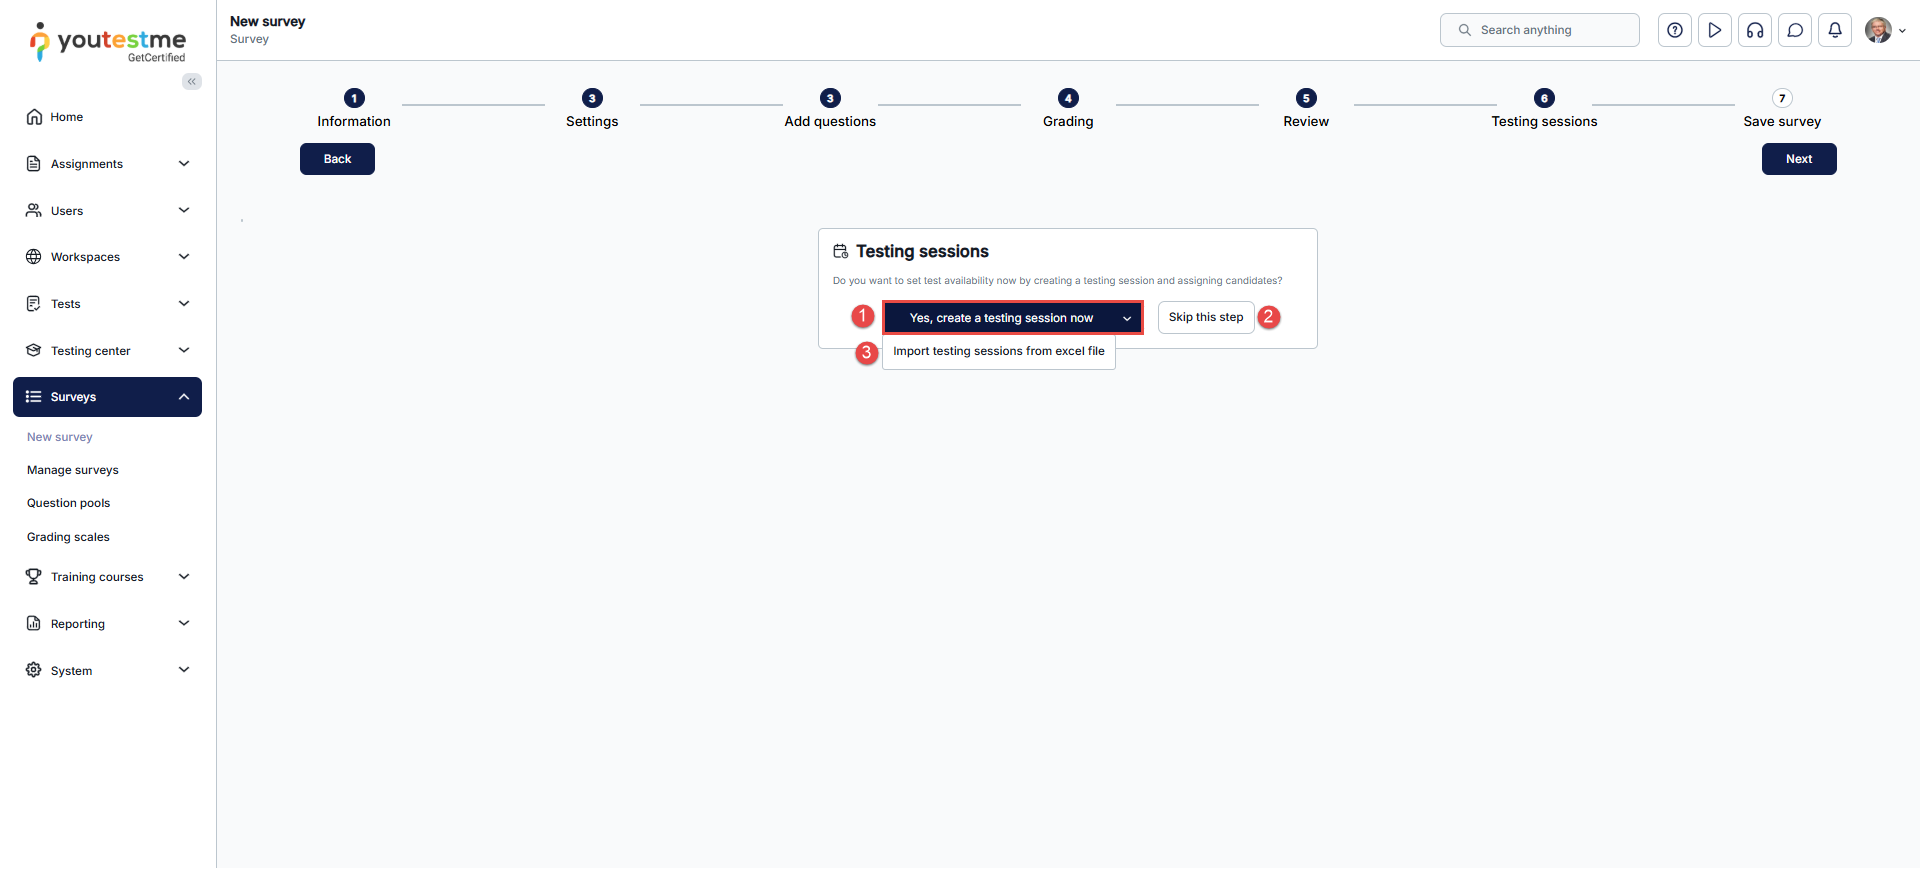
Testing sessions
In this step, you can:
- Create testing sessions. The testing sessions allow you to organize surveys for candidates in different locations (e.g., different time zones, states, or continents). For step-by-step instructions, please refer to this article.
- Skip this step – Since it’s optional, you can skip it and proceed to the final step.
- Import testing sessions via Excel – Upload an Excel file to import multiple testing sessions and assign candidates to each session directly within the file. For detailed guidance, see the article.

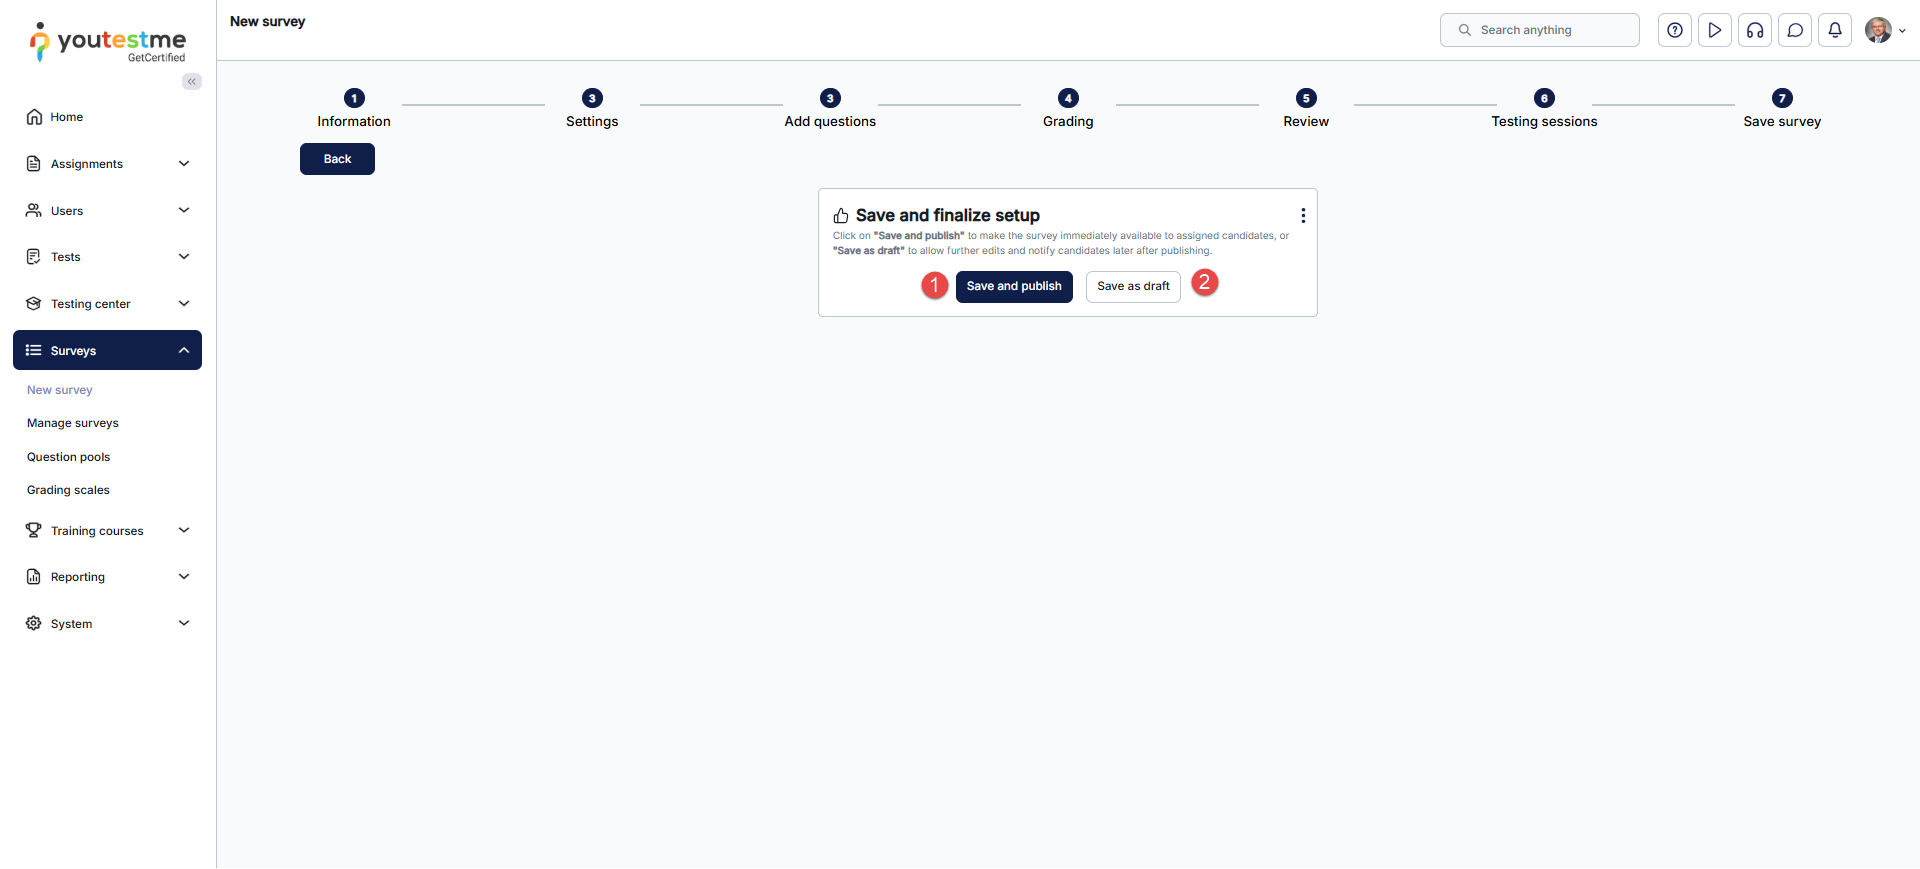
Save survey
The next step in the survey creation process is saving the survey.
- Click the Save and Publish button to save your survey.
- Click Save as Draft to save your survey without publishing it. Even if testing sessions have been created, the survey will remain hidden from candidates until it is published.
For more related instructional material, please see these links:


