
Article verified for Release 15.2 on January 23, 2026.
This article explains how to secure user access by enforcing Single Sign-On (SSO) as the only permitted login method. By enabling SSO at the system level and restricting password-based logins at the role level, administrators can ensure that users authenticate exclusively through their configured identity provider.
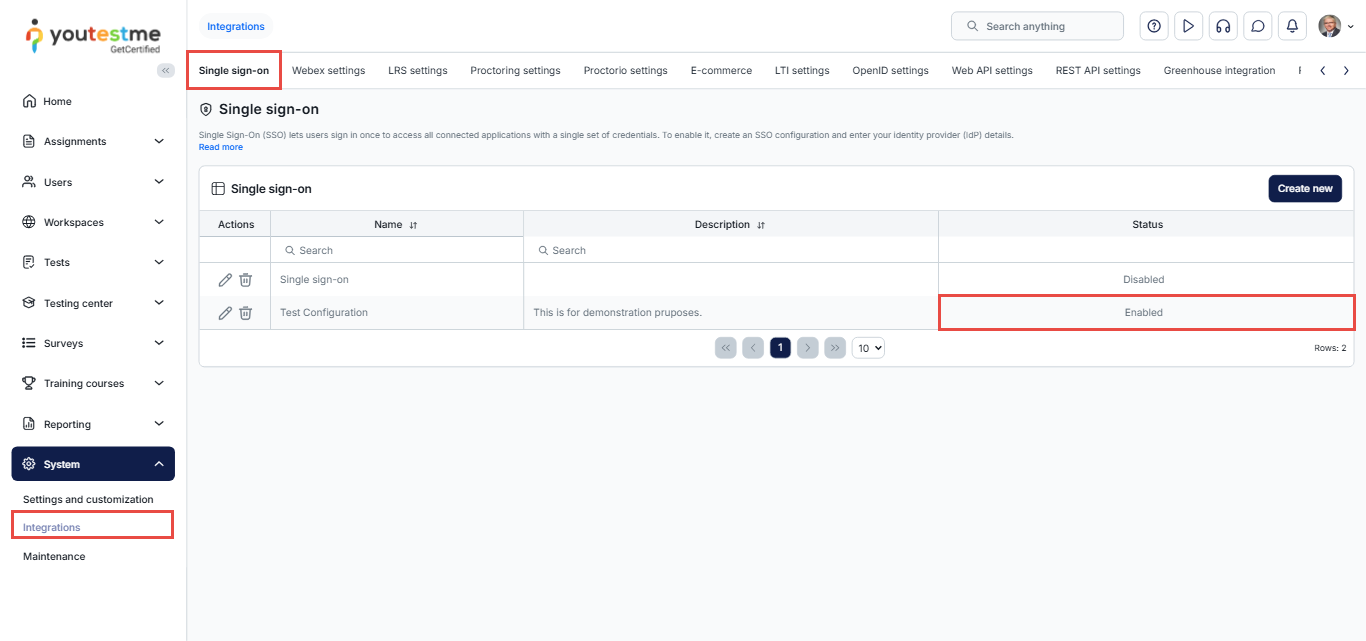
Ensure that the Single Sign-On (SSO) option is enabled
- From the main menu, navigate to System, then select Integrations.
- In the Single Sign-On (SSO) tab, verify that the SSO configuration status is set to Enabled.
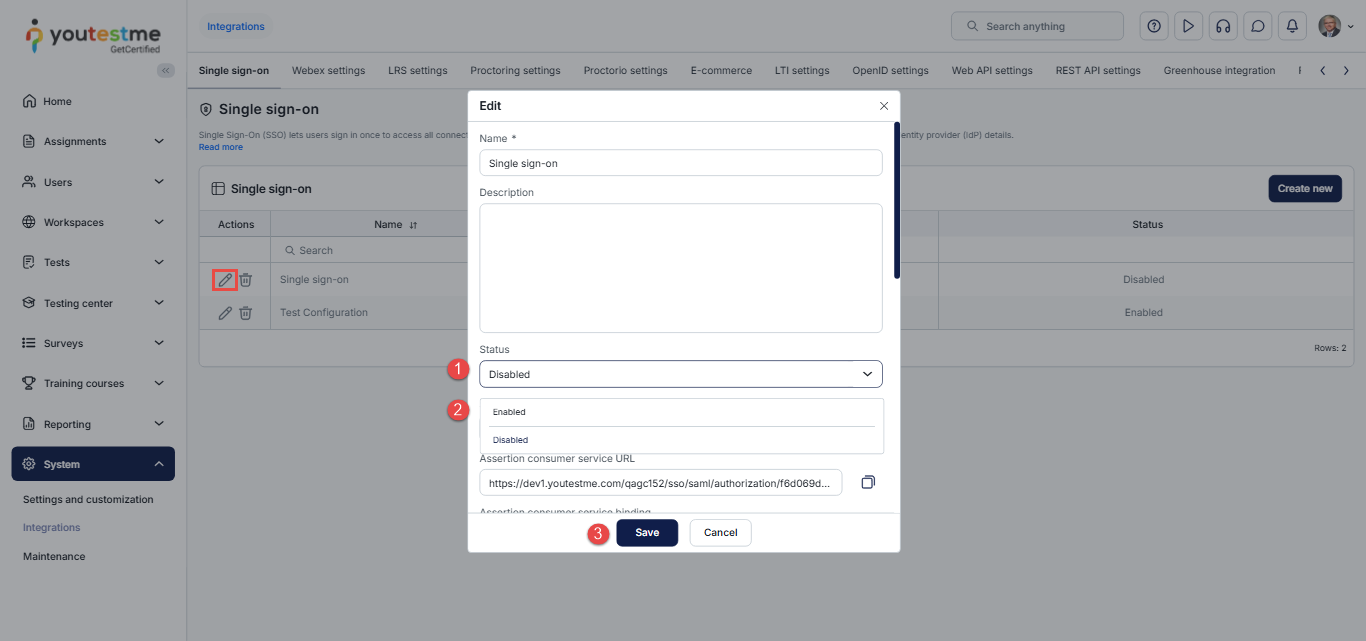
If the status is currently Disabled, click the Edit icon to modify the configuration.
In the dialog box:
- Select Status.
- Choose Enabled.
- Click Save to apply the changes.
In this article, you can review an example of how to set up SSO configuration with Okta.
Restrict login permissions for SSO
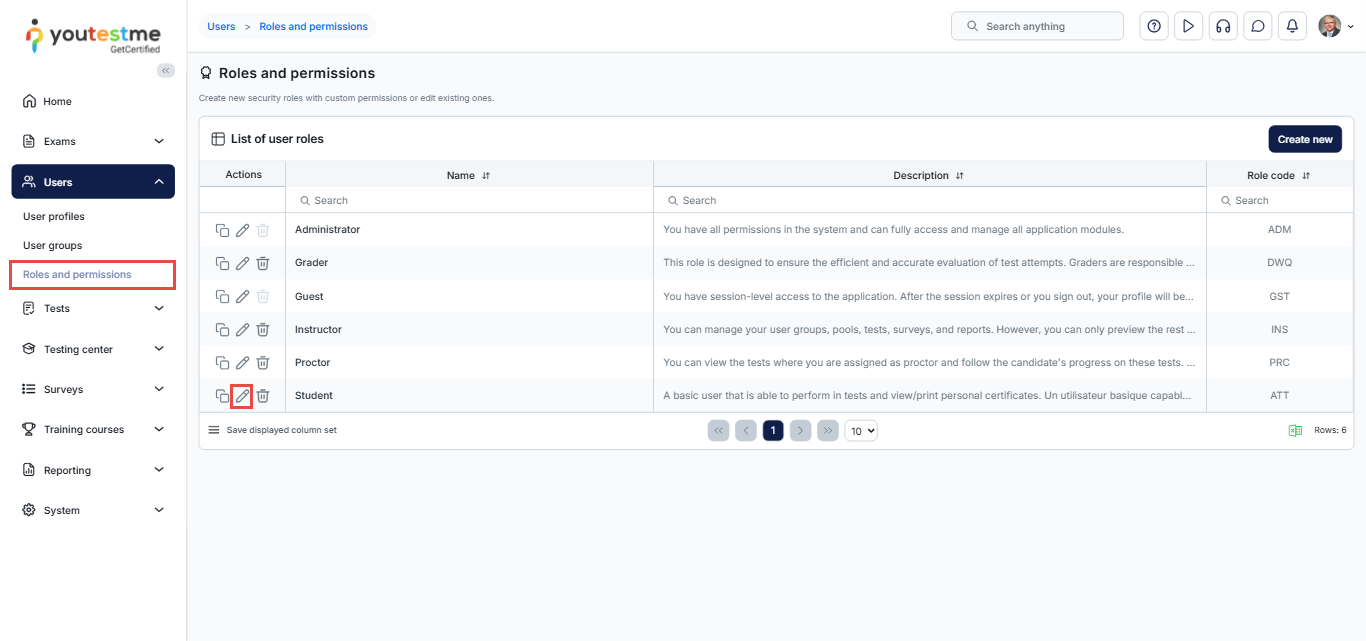
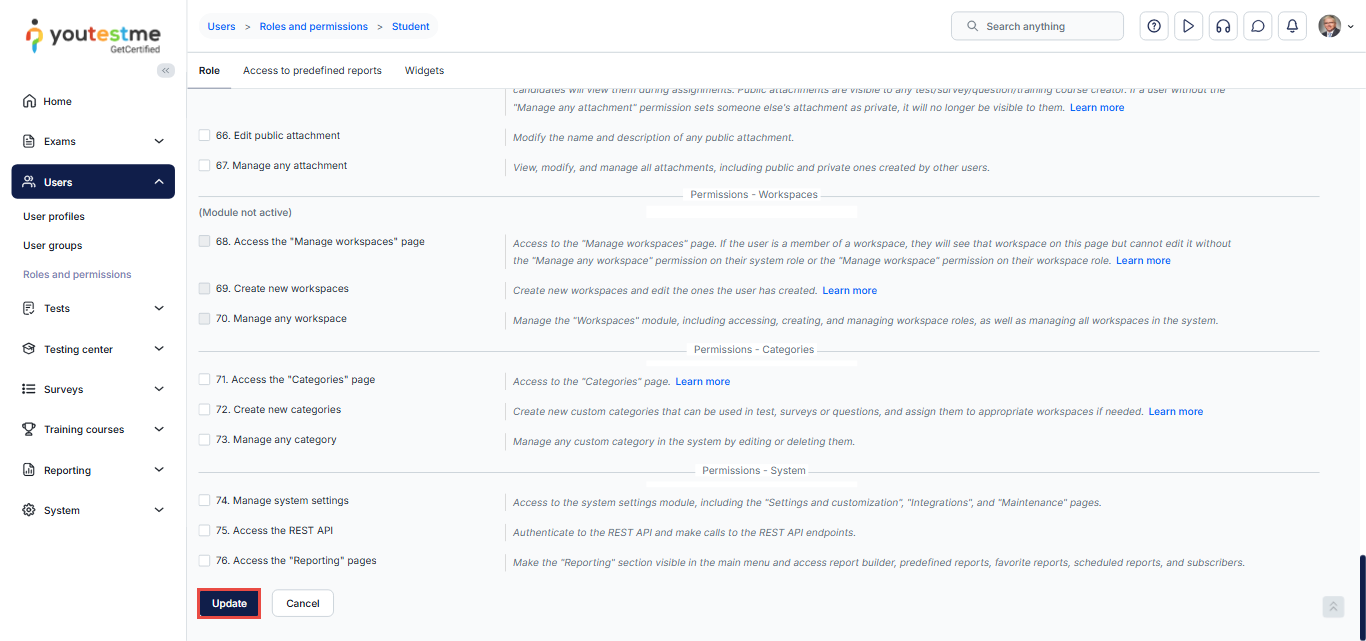
From the main menu, select Users, then choose Roles and permissions.
Locate the role for which you want to enforce Single Sign-On (SSO) login. For example, the Student role.
In the Actions column next to the selected role, click the Edit icon.
Scroll down to the permissions-Users section and deselect the checkbox next to Log in.
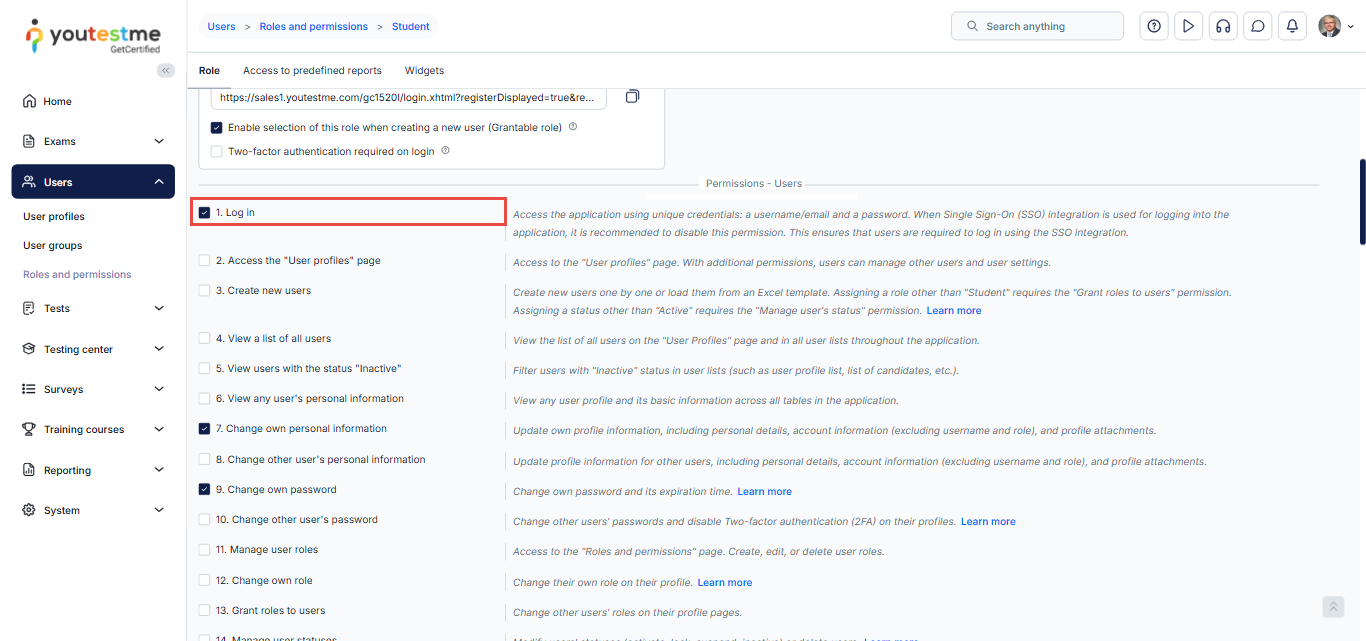
Apply the changes by clicking the “Update” button found at the bottom of the “Roles and permissions” tab.
Student’s perspective
By following these steps and disabling the Log in permission, users associated with the chosen role will be prompted to use the Single Sign-On (SSO) option for logging in.
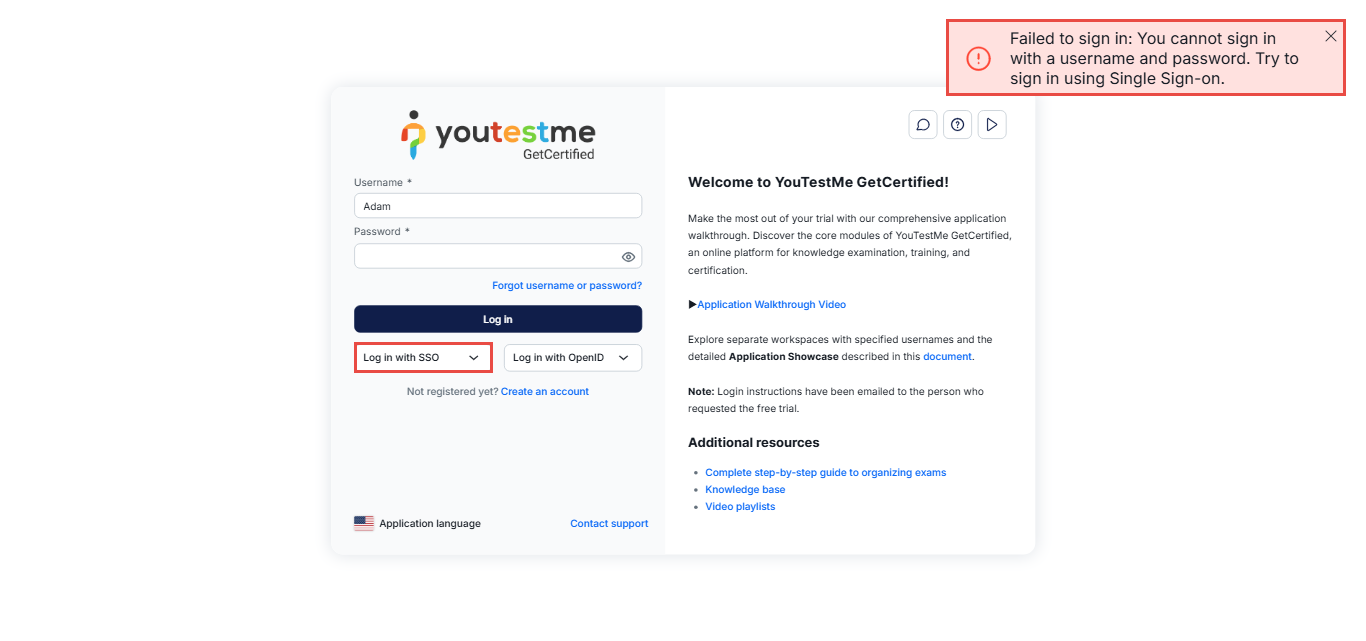
This method enhances security and user experience.
For more related instructional materials, please visit:
