Article verified for Release 15.1 on November 21, 2025.
This article explains how to import a test using an Excel file. You can prepare a test offline by defining test settings, adding questions, configuring question options, and then uploading the completed Excel file into the system.
Uploading a Test from an Excel File
Start the test creation process in the Test Wizard. For detailed instructions on creating a test, please refer to the article.
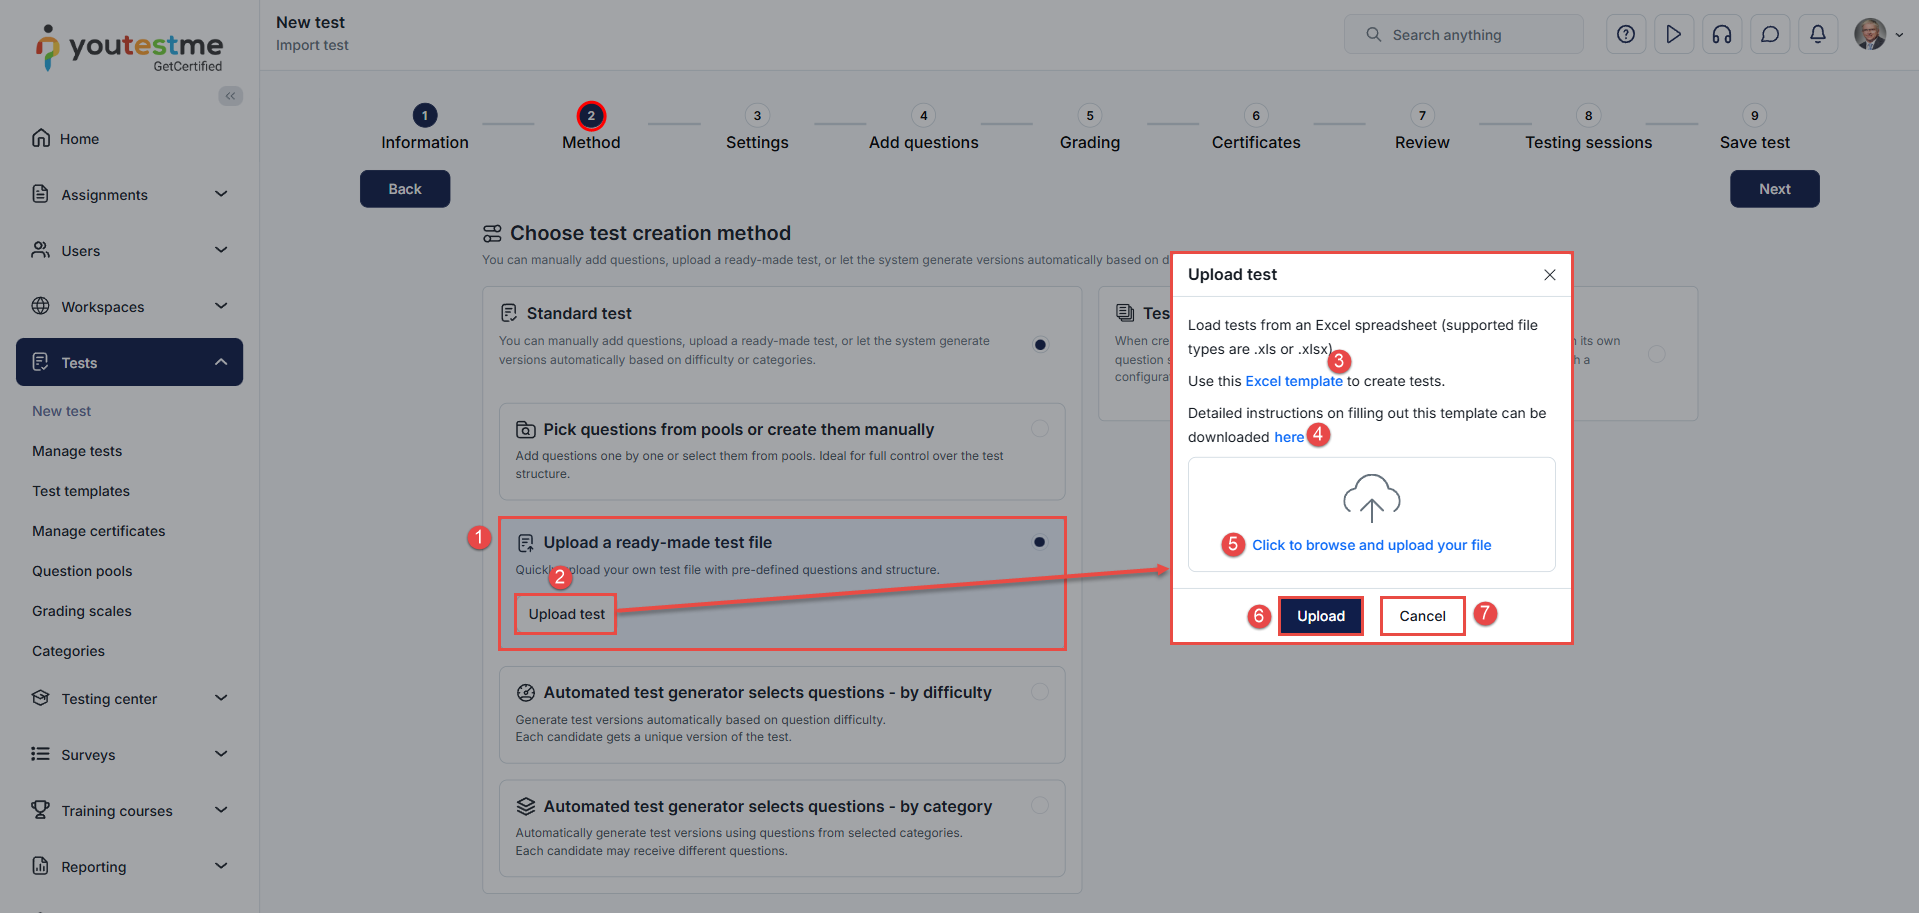
To upload a test using an Excel file, follow these steps in Step 2 – Method of the Test Wizard:
-
Select Upload a ready-made test file.
-
Click the Upload test button.
-
Click the Excel template hyperlink to download the predefined template you will fill with test content.
-
Click the hyperlink here to download detailed instructions on how to complete the template.
-
Once the template is filled in, click the Click to browse and upload your file button to select your Excel file.
-
Select Upload to import the test.
-
If you decide not to proceed, click Cancel to remove the selected file.
Note: After the import is complete, you can edit questions, adjust test settings, and modify question settings directly in the Test Wizard.
For a video tutorial, please watch this video.


