Article verified for Release 15.1 on December 12, 2025.
Optimizing workspace management is a cornerstone of productivity. This article explains how to edit, delete, and create workspaces in your dashboard. Additionally, we’ll explore how to seamlessly integrate new members to enhance collaboration, all while effectively organizing various components such as tests, surveys, and training courses.
Accessing the page
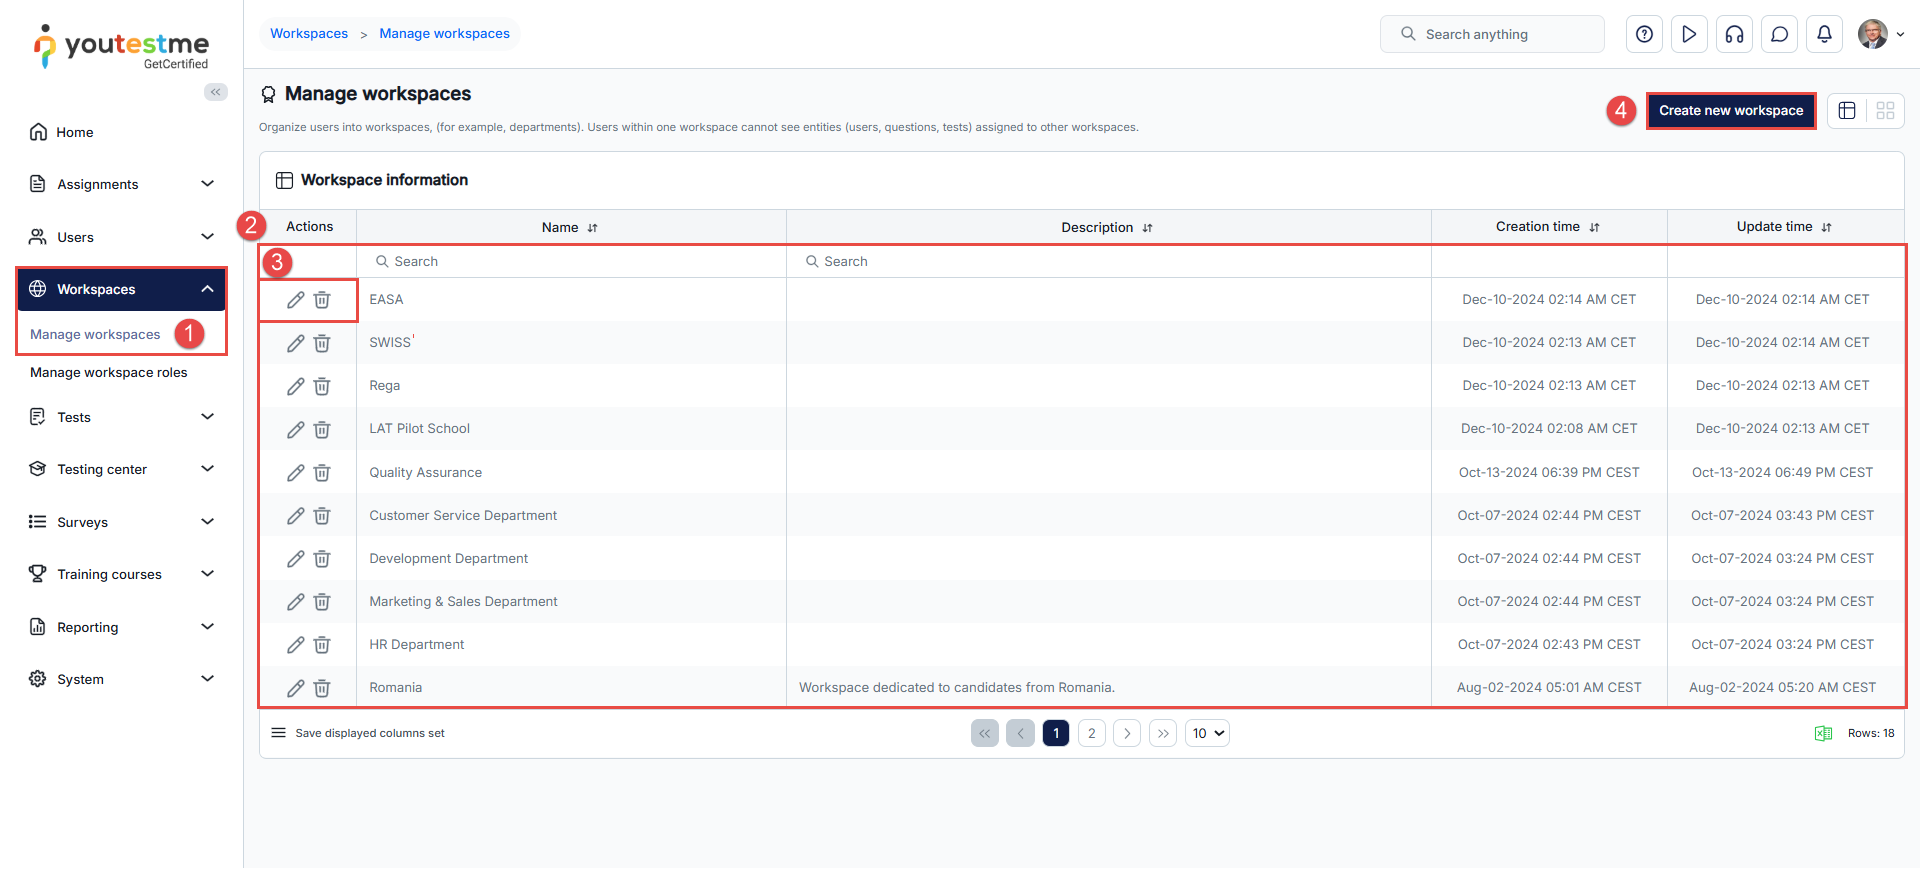
- Navigate to the Workspaces panel in the left-side menu and select Manage workspaces. Note: To access workspaces, you must have permission to access the Workspaces page. Make sure the Workspace module is enabled under System > Settings and Customizations.
- A table of the workspaces you can manage and/or are a member of.
Note: To manage a workspace, you need to be assigned the Manage any workspace permission or be assigned a role within that workspace with permission to manage that workspace.
A workspace manager can change the name, description, logo, and favicon of the workspace, add and remove members and edit membership rules. - The Actions button allows you to edit or delete a workspace.
- The Create new workspace button allows you to create a new one.
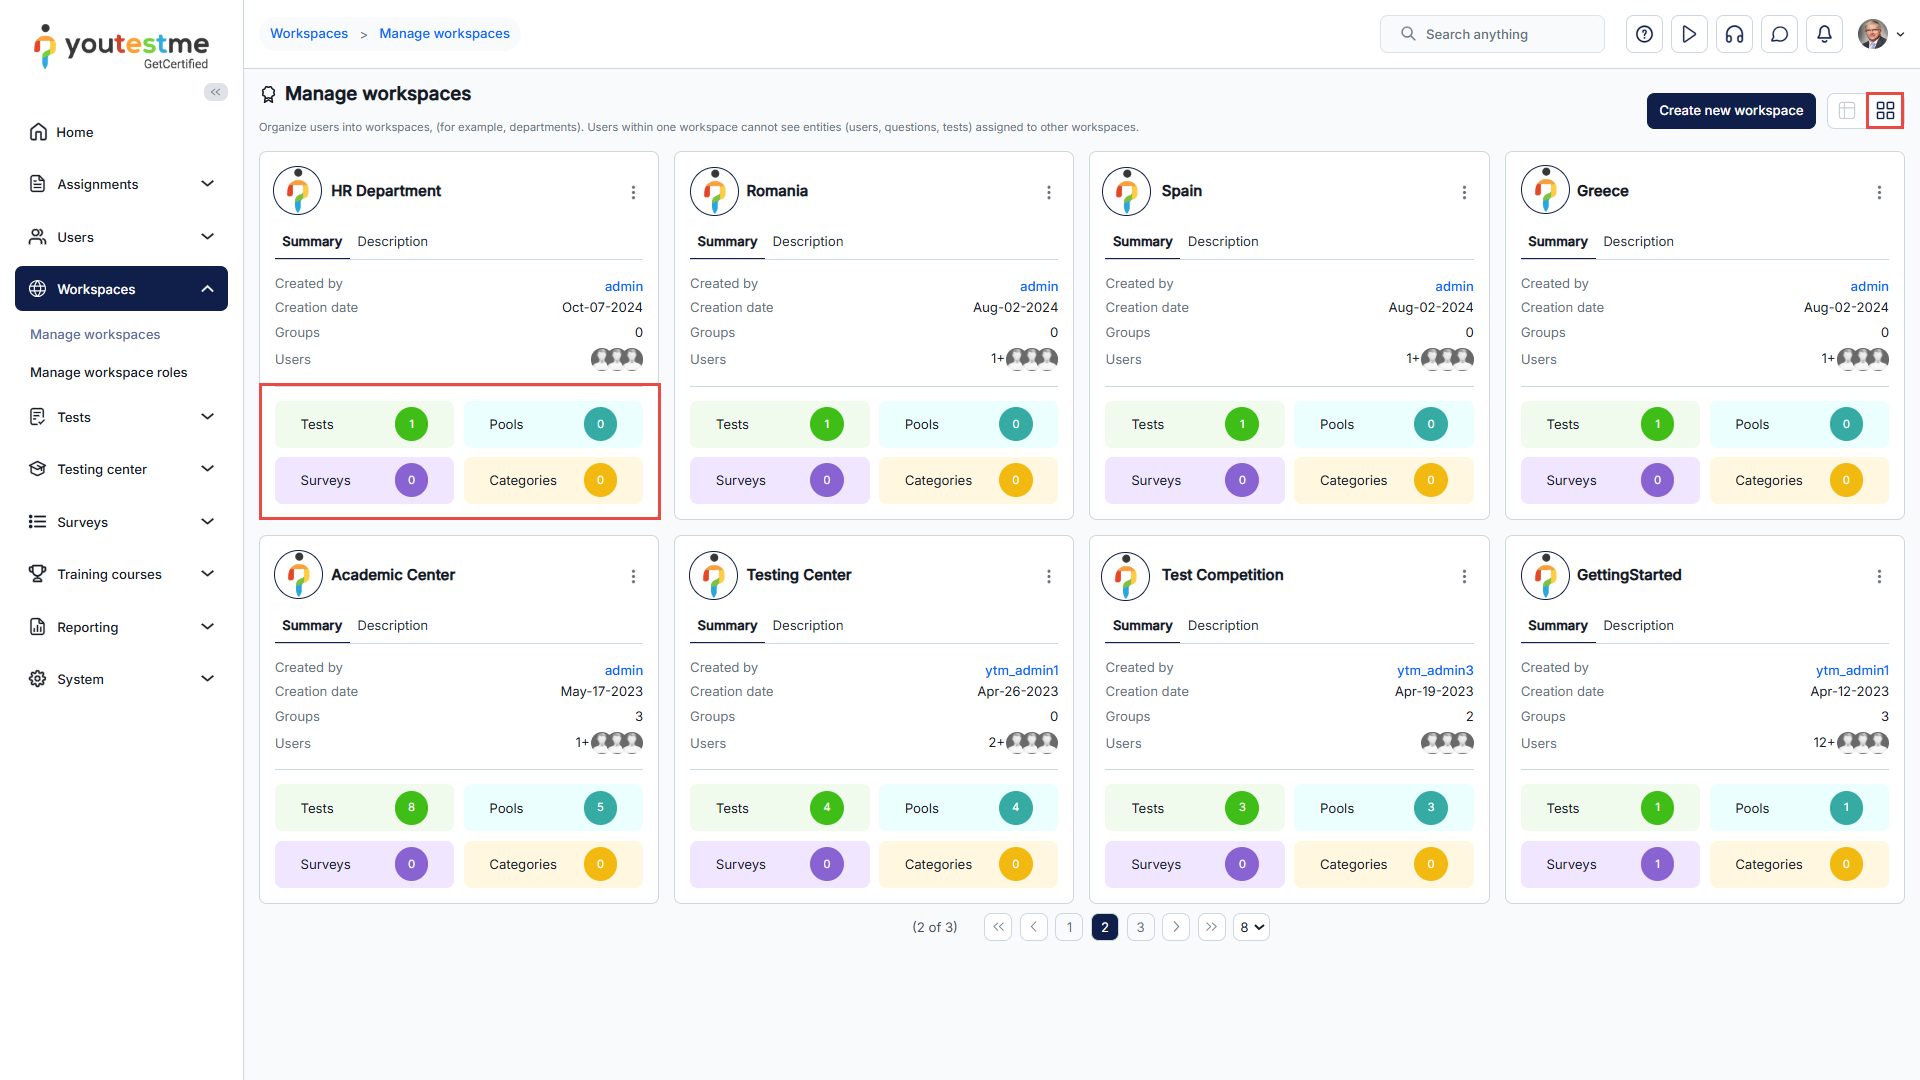
Note: The Tile view additionally displays the number of tests, surveys, question pools, and categories created within a workspace.
Creating a new workspace
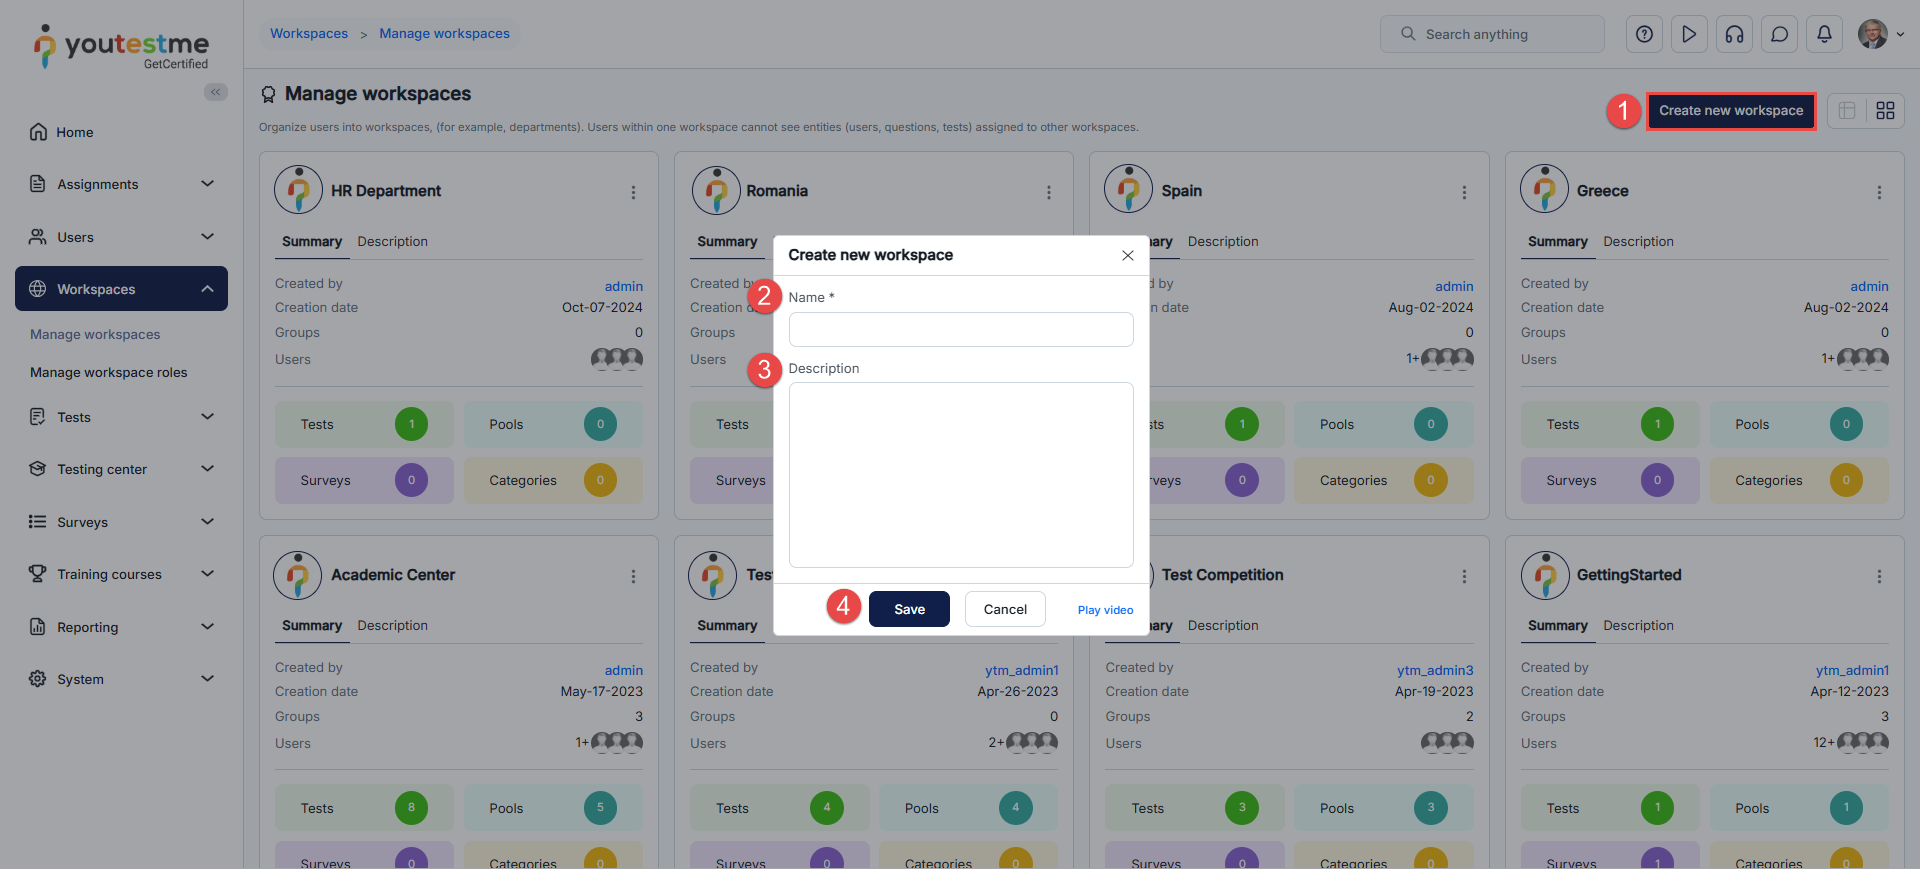
To create a new workspace, do the following:
- Click the Create new workspace button.
- Enter the name of the workspace.
- Enter a description of the workspace.
- Click the Save button.
Workspace information
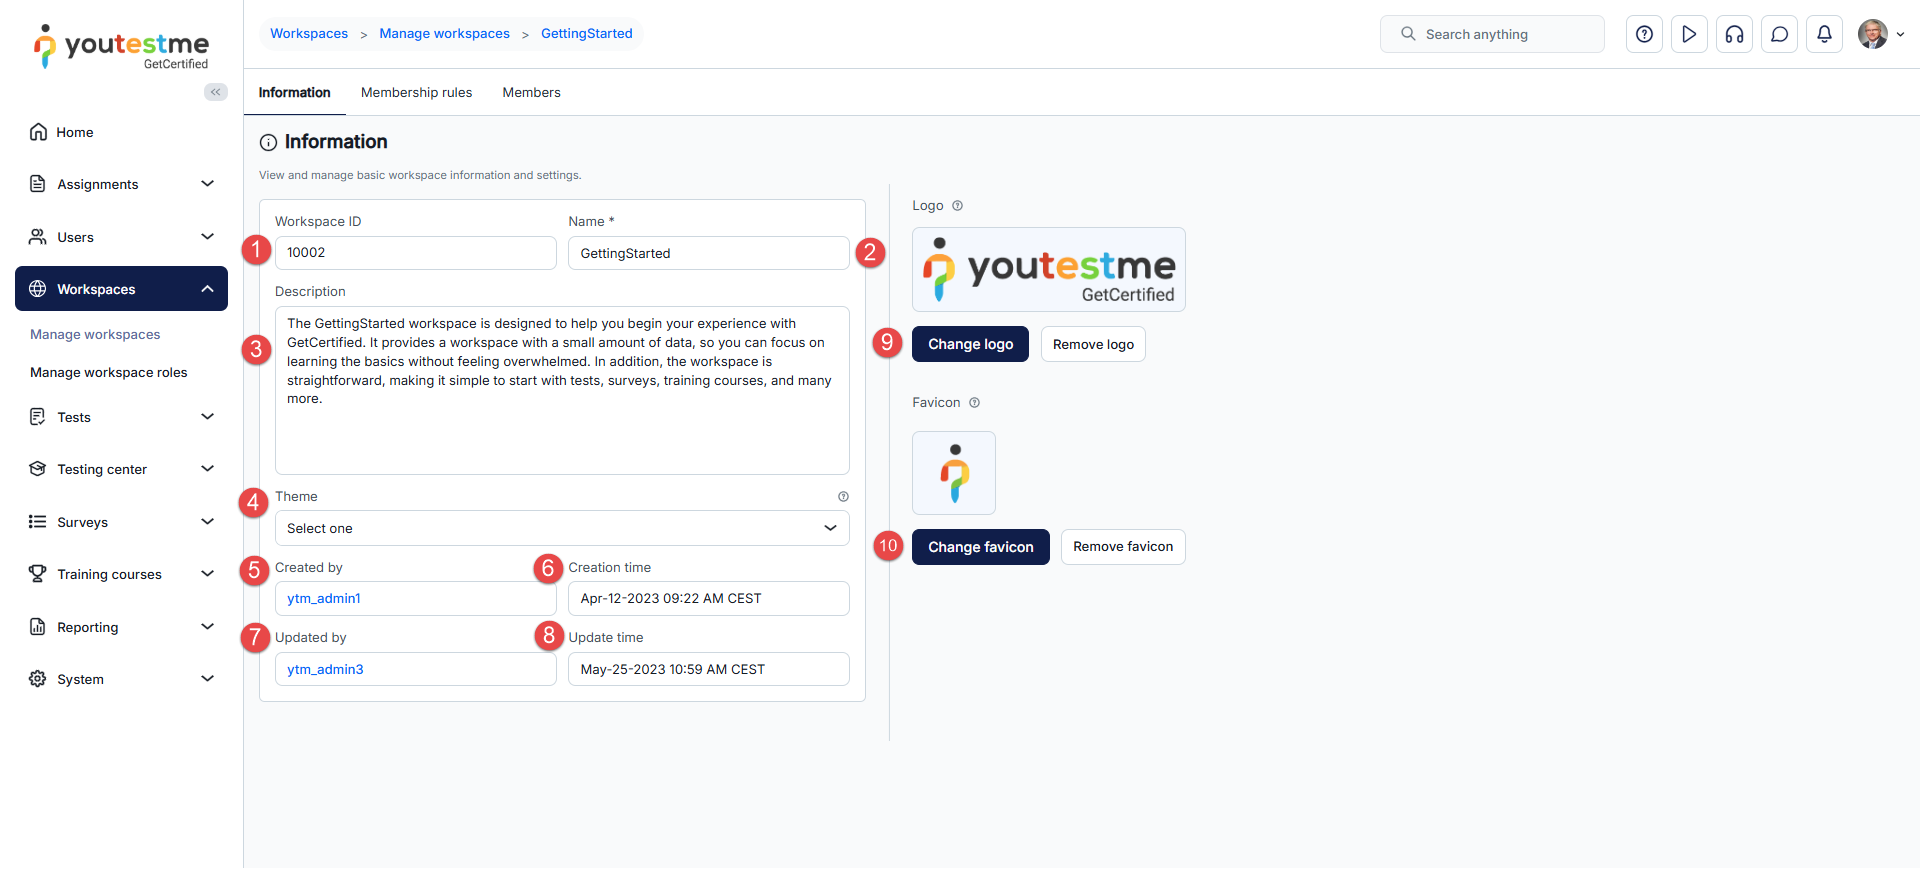
Once you enter a workspace, you will be redirected to the Information tab, where the following workspace settings are displayed:
- Workspace ID – A unique value generated automatically once the workspace is created that can be used to access the workspace with a URL.
- Name – The name of a workspace can be changed at any time.
- Description – An optional field where additional information regarding a workspace can be added.
- Theme – Optionally customize the user interface by replacing the application’s default theme. The selected theme will be applied to all members of the workspace.
- Created by – This field displays the workspace creator’s username. You will be redirected to that user’s profile by clicking said username.
- Creation date – This field displays the date when the workspace was created.
- Updated by – This field displays the username of the user who updated the workspace. You will be redirected to that user’s profile by clicking said username.
- Date of update – This field displays the date when the workspace was updated.
- Logo – The image you upload will override the system logo for all workspace members.
- Favicon – The image you upload will override the system favicon for all workspace members.
Assigning workspace members
Define a membership rule that automatically adds all users with a specific role as workspace members and assigns them the corresponding role within the workspace.
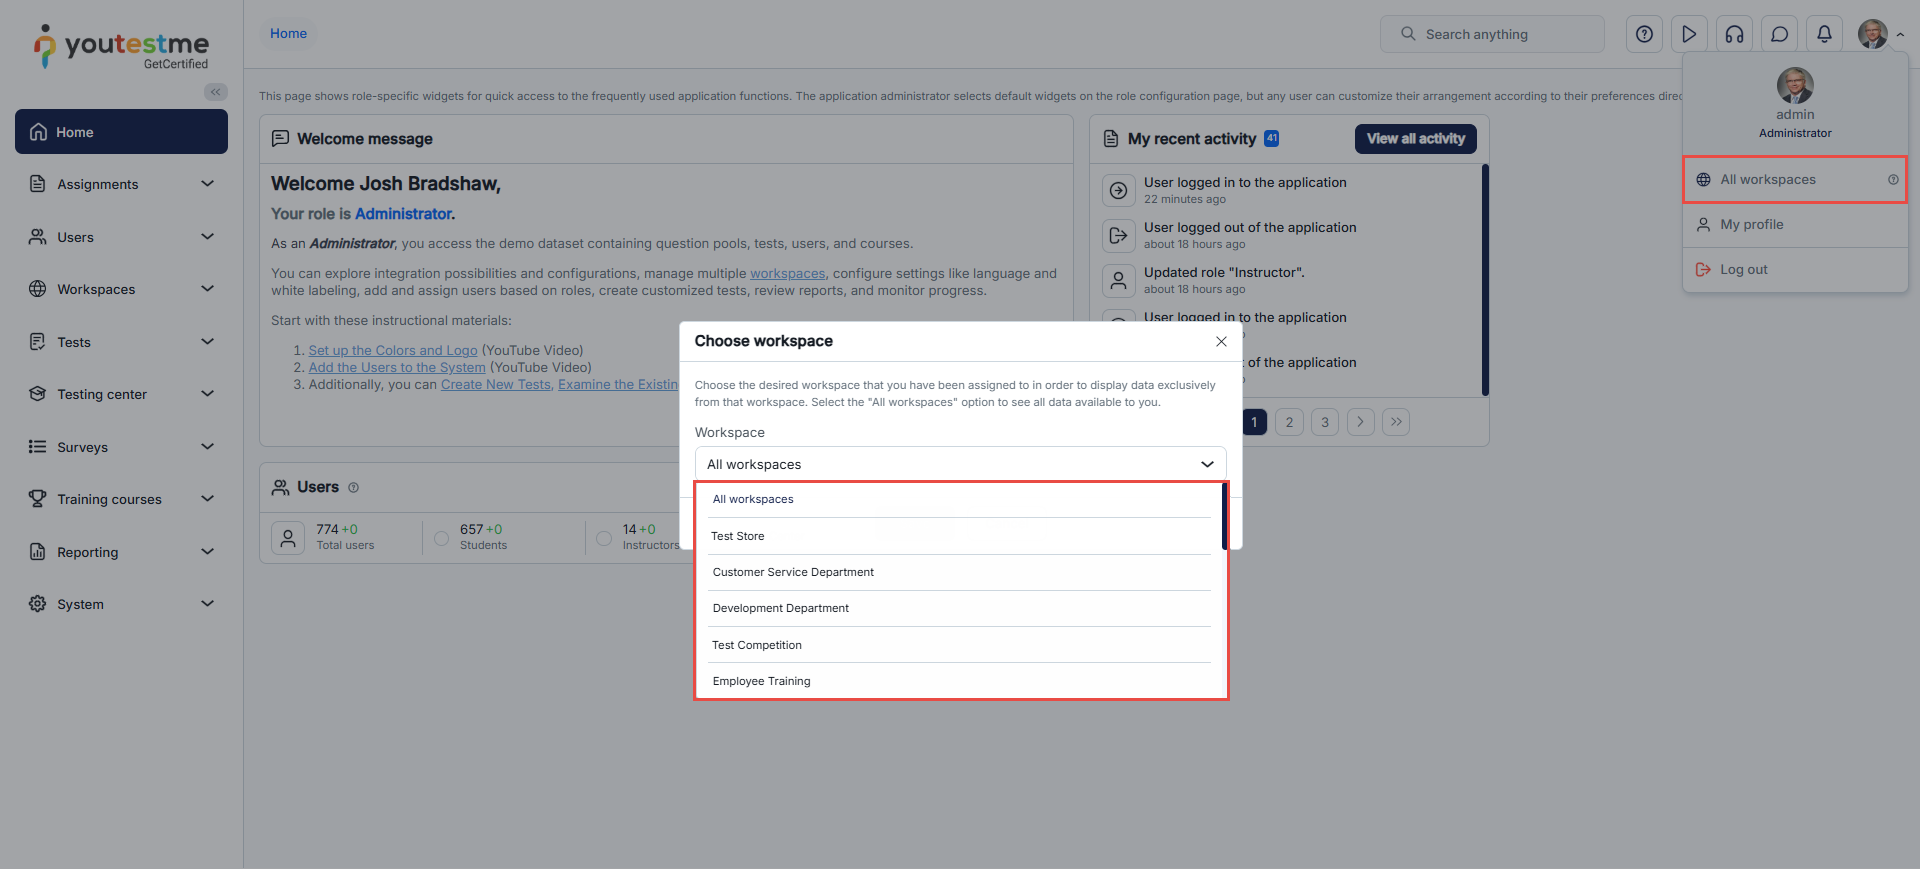
Assigned users are displayed the data from the workspaces they are assigned to. If a user is assigned to multiple workspaces, they can switch between workspaces.
The option to switch is located on the My profile panel. When a workspace is selected, the application appearance may change, and entities such as tests, users, user groups, training courses, and question categories will be filtered by that workspace. When the user switches to the All workspaces option, the collective data available to the user will be displayed.
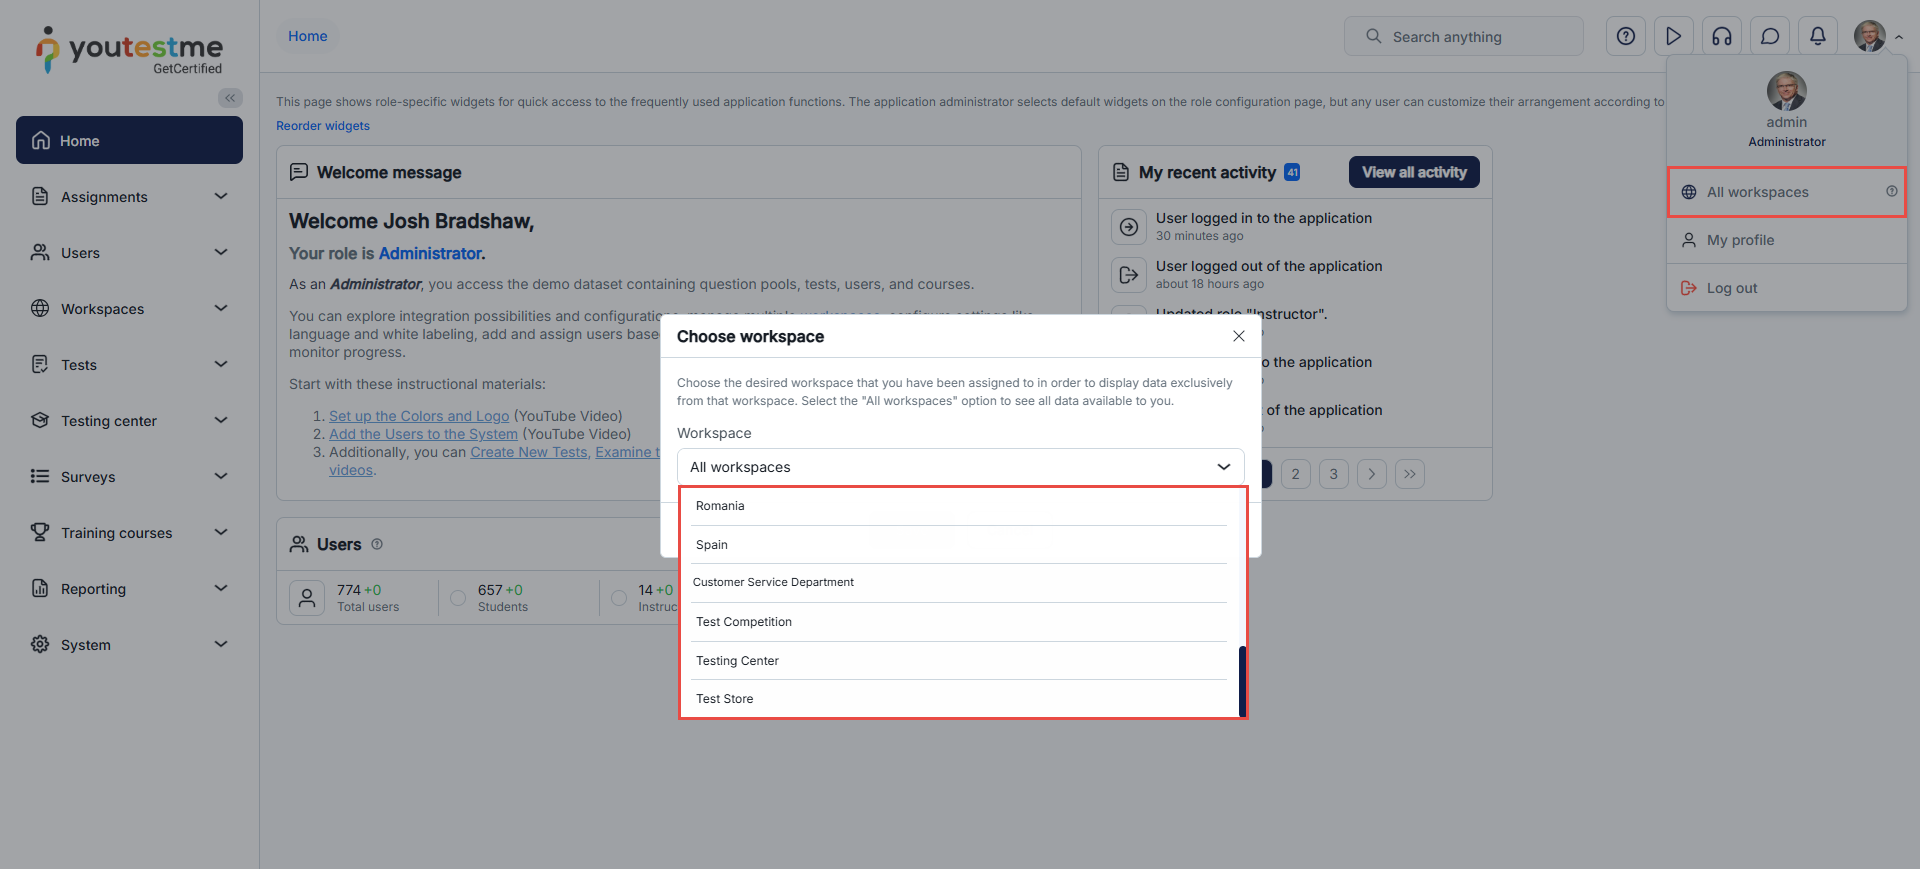
Note: Only the user can change the workspace; this change will not affect other users. System administrators don’t need to be assigned to any workspace because they manage all the system’s data.
Workspace roles define what users can do inside a specific workspace, and they must exist before you can assign them through membership rules. For more details, you can refer to this article: Workspace Roles vs. System Roles – Understanding Permissions
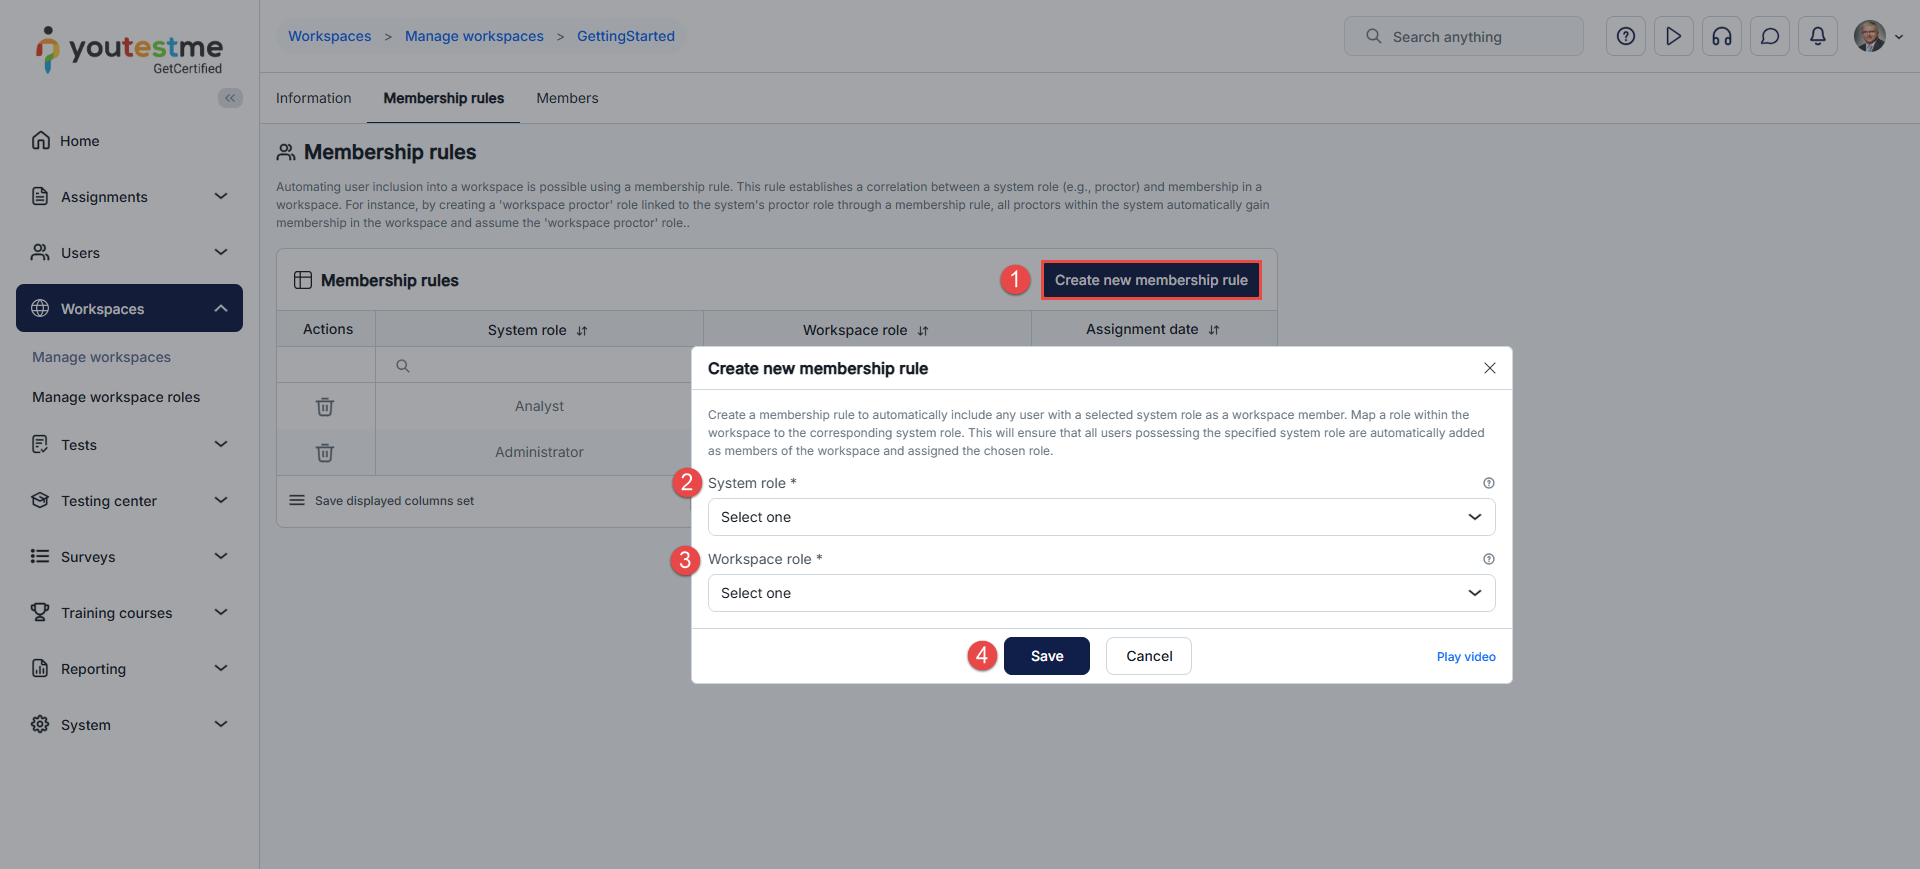
To assign members to a workspace, do the following:
- Click the Create new membership rule button.
- Choose the System role. Selecting a role selects all users in the system with that role.
- Choose the Workspace role. This role will be assigned to the selected users in the workspace. The role will grant users permissions uniquely for the entities in the selected workspace.
- Click the Save button to assign the selected users to the chosen workspace role.

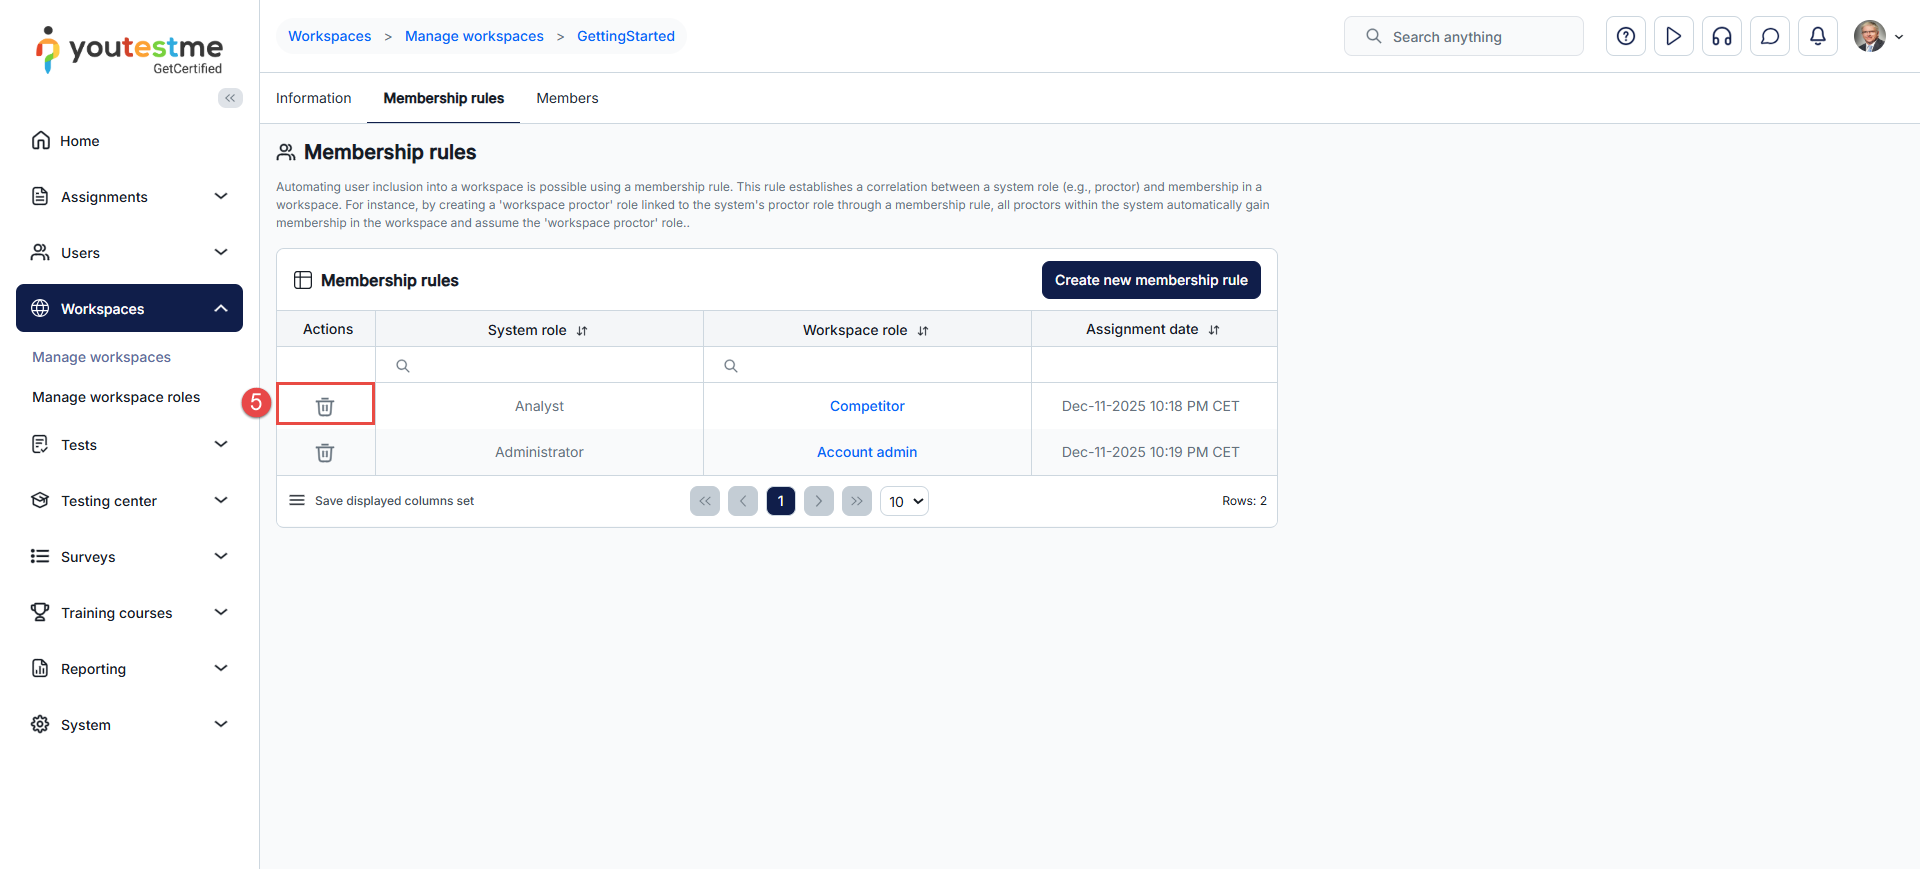
- Select the Delete option in the Actions column to remove a membership rule.
Workspace users
In the Users tab, you can view a list of all workspace members, including those inherited and those locally assigned. The inherited members are automatically assigned to a workspace when a membership linked to their role is created. In contrast, the local members are assigned manually from the list of all users.
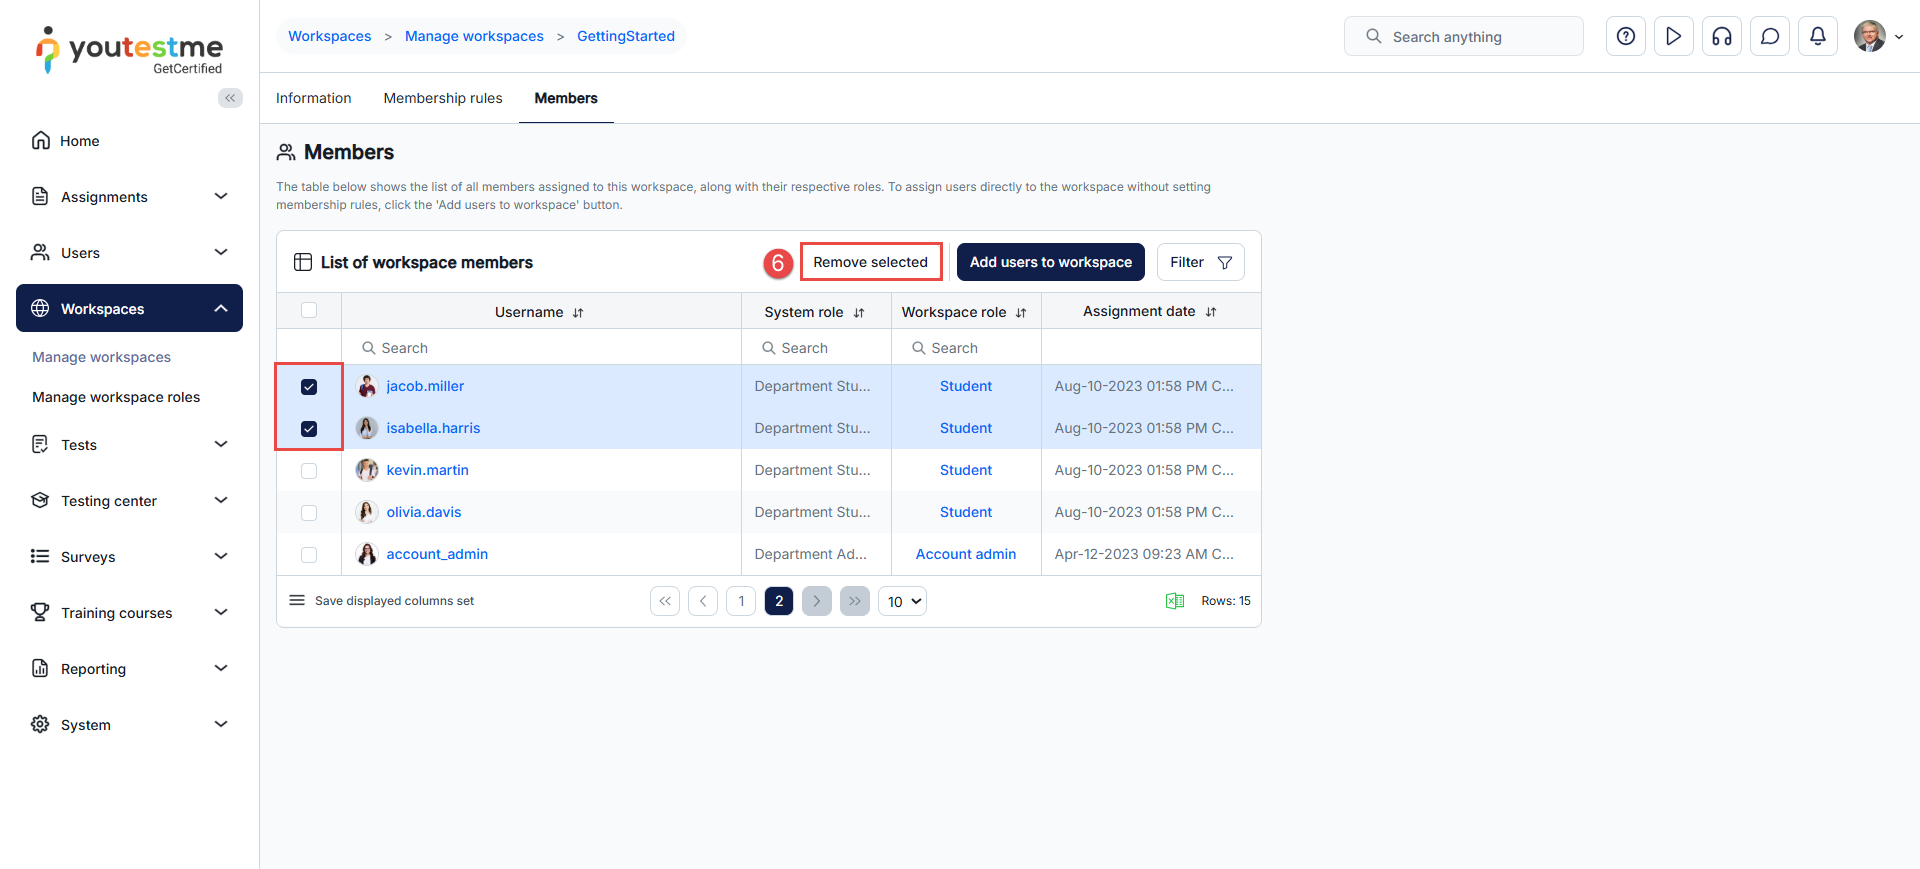
Note: To remove inherited members, the workspace membership must be removed. Select the users you wish to remove from the Users tab to remove the locally assigned members.
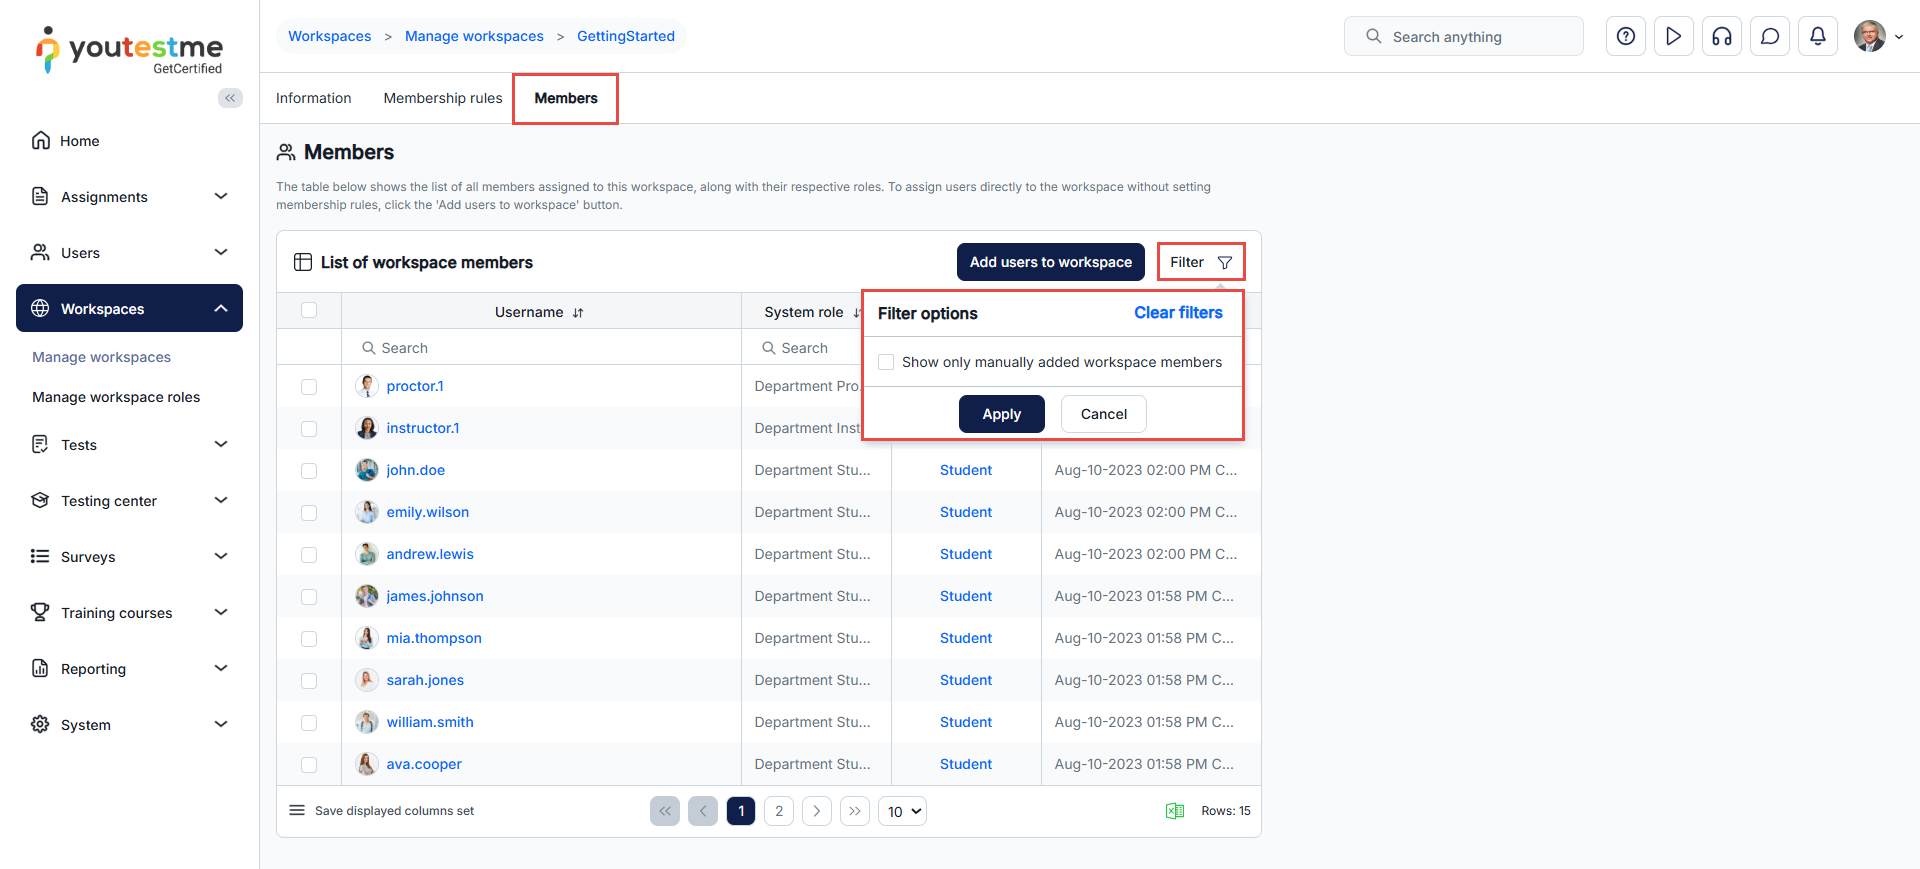
The table of users assigned as workspace members can be filtered to display the following:
When you click the “Filter” button in the Members tab, you will see the option “Show only manually added workspace members.”
- If this option is selected, the table will display only the members who were manually assigned to the workspace, along with actions for their management.
- If this option is not selected, the table will display all users with access to the workspace.
Assigning local members
To manually assign members to a workspace, do the following:
- Filter the Users tab to display only Manually added workspace members.
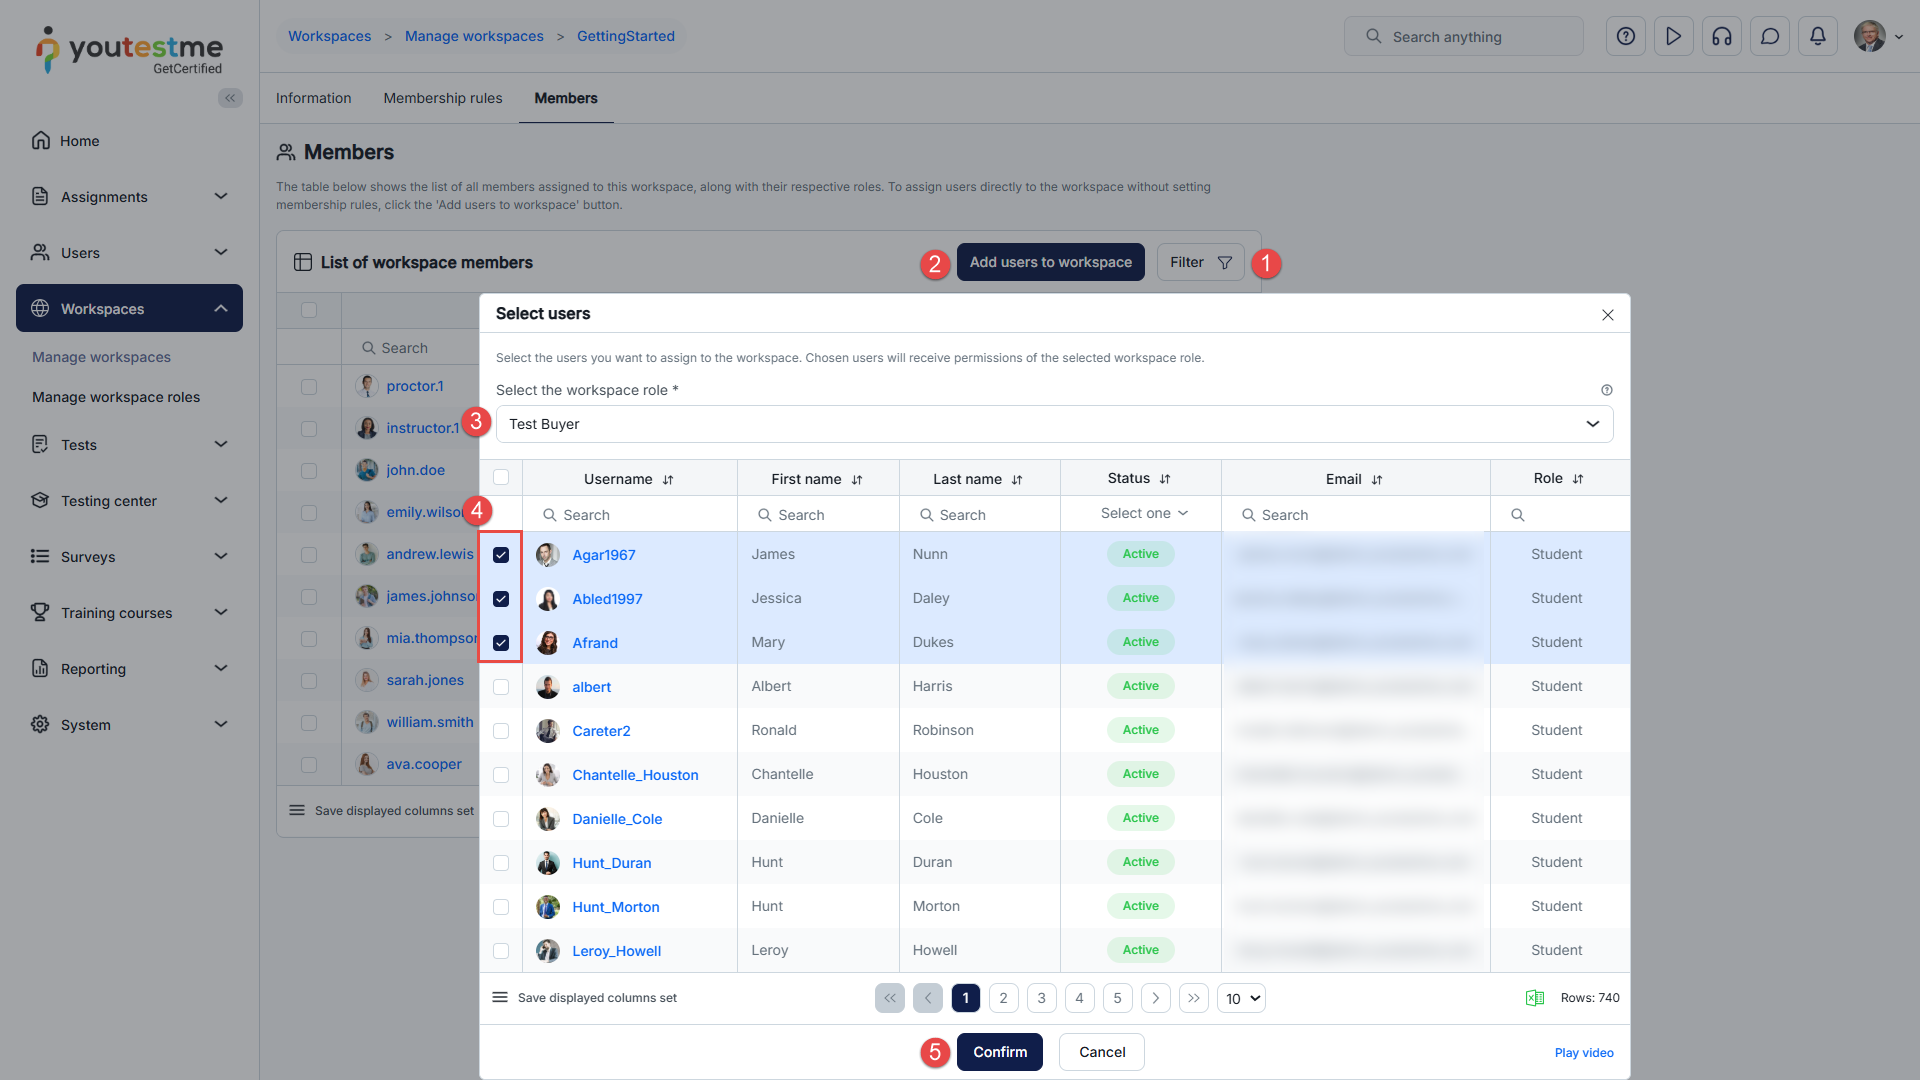
- Click the Add users to workspace button.
- Select the Workspace role. This role will be added to the selected users in the workspace. The role will grant users permissions uniquely for the entities in the selected workspace.
- Select the users you wish to assign to the workspace manually.
- Click the Save button to save the changes.

- Select the desired users to remove manually assigned members and click the Remove selected button.
For more related instructional materials, please visit:


