Article verified for Release 15.1 on September 20, 2025.
This article explains how to organize exam bookings and set prices for testing sessions. Candidates must purchase a session before they can book and take the test. To enable payments, ensure your system is integrated with Stripe through the E-commerce settings.
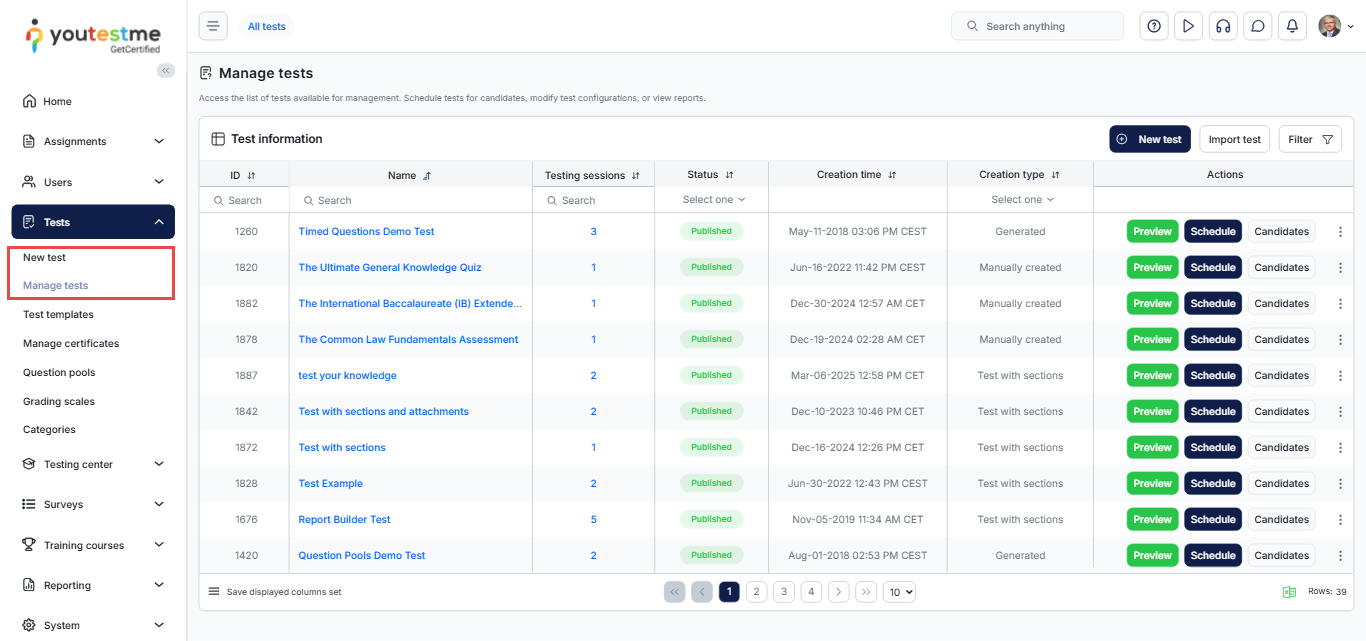
Create or Select a Test
To begin organizing a paid exam, you can either create a new test or use an existing one.
- Go to the “Tests” tab in the main menu.
- Click on “New Test” if you want to create a new one, or click Manage tests to select an existing test from the list. For more information on how to create a test, check this article.
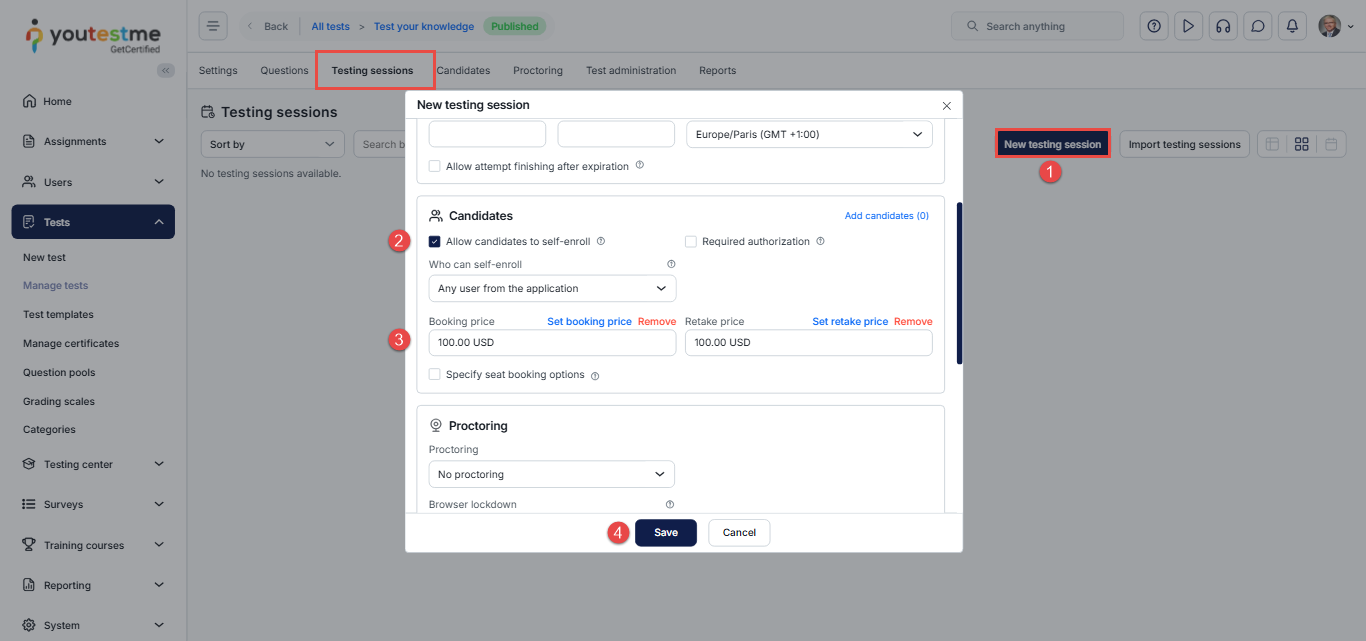
Create a Self-Enrolment Session
Once your test is ready, the next step is to create a self-enrollment testing session that candidates can book and pay for.
- Go to the Testing Sessions tab and click New Testing Session.
- Scroll down to the Candidates section and enable Self-Enrolment to allow candidates to book and purchase the session online.
- Set the Booking Price and, if needed, the Retake Price.
- Complete the session setup and click Save.
Note: You can also create the session directly from the test wizard while setting up a new exam.
For more related information on how to create a test session, please visit this article.
Setting Up Prices
To enable exam payments, start by connecting your Stripe account to the system:
- Go to the System page from the main menu.
- Select the Integrations tab.
- Open the E-commerce section.
- Enter your Stripe credentials to connect your account.
Note: For step-by-step instructions on setting up a Stripe account, refer to this article.
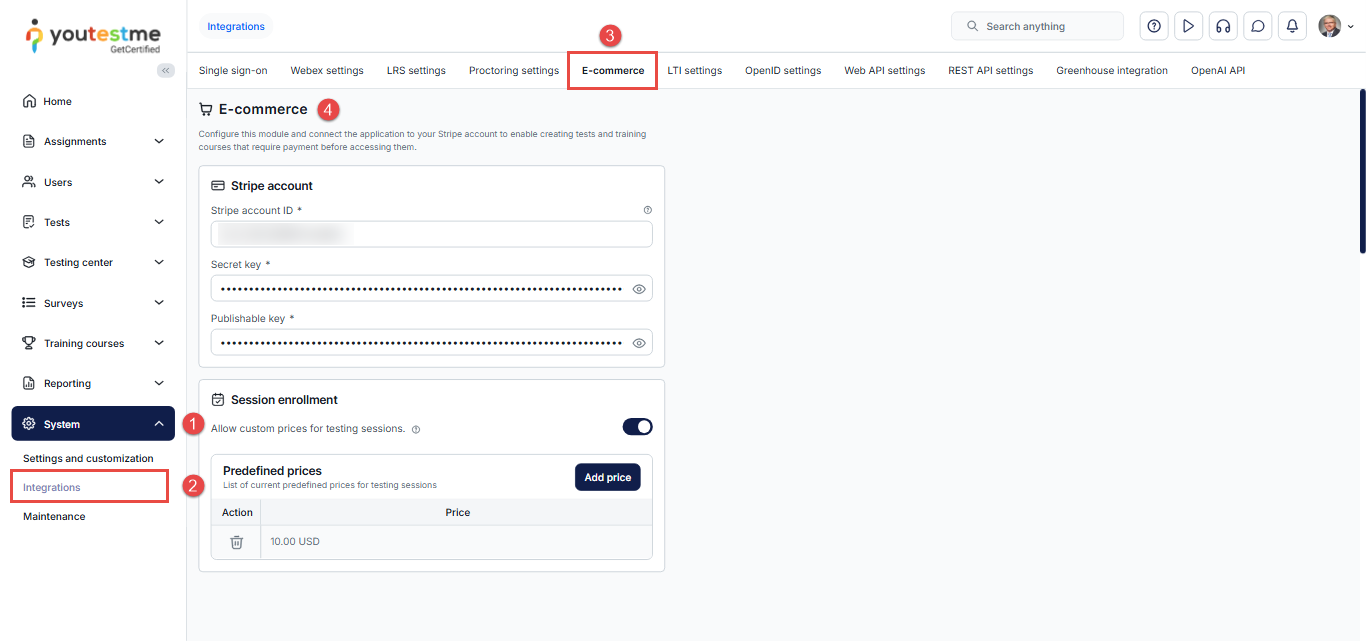
You can choose between two pricing options:
- Custom Prices – Enable the setting Custom Price for Testing Session Enrolment to allow defining custom prices for purchasing testing sessions instead of using predefined ones.
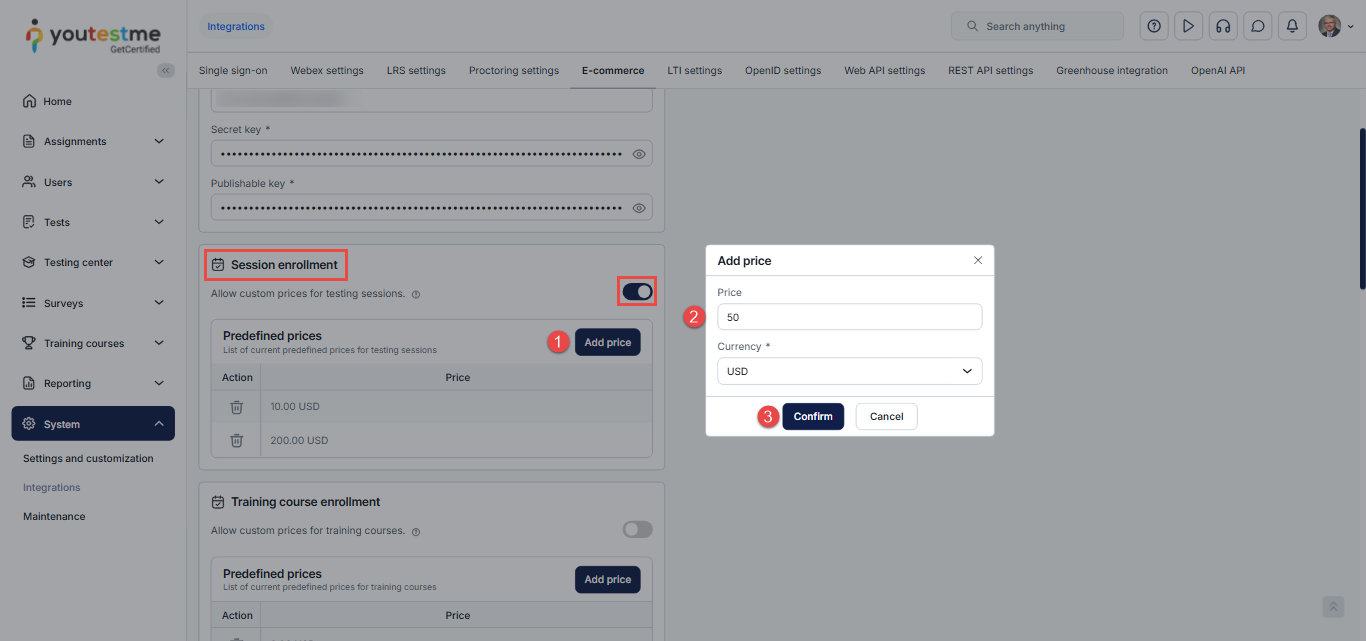
- Predefined Prices – If you prefer to use predefined prices, click the Add Price button to create and manage your price list.
-
- When you click the Add Price button, a pop-up window will appear
- Enter the desired price, currency, and confirm by clicking the Confirm button.
- After adding all the prices you need, click the Confirm button at the bottom of the page to save your changes.
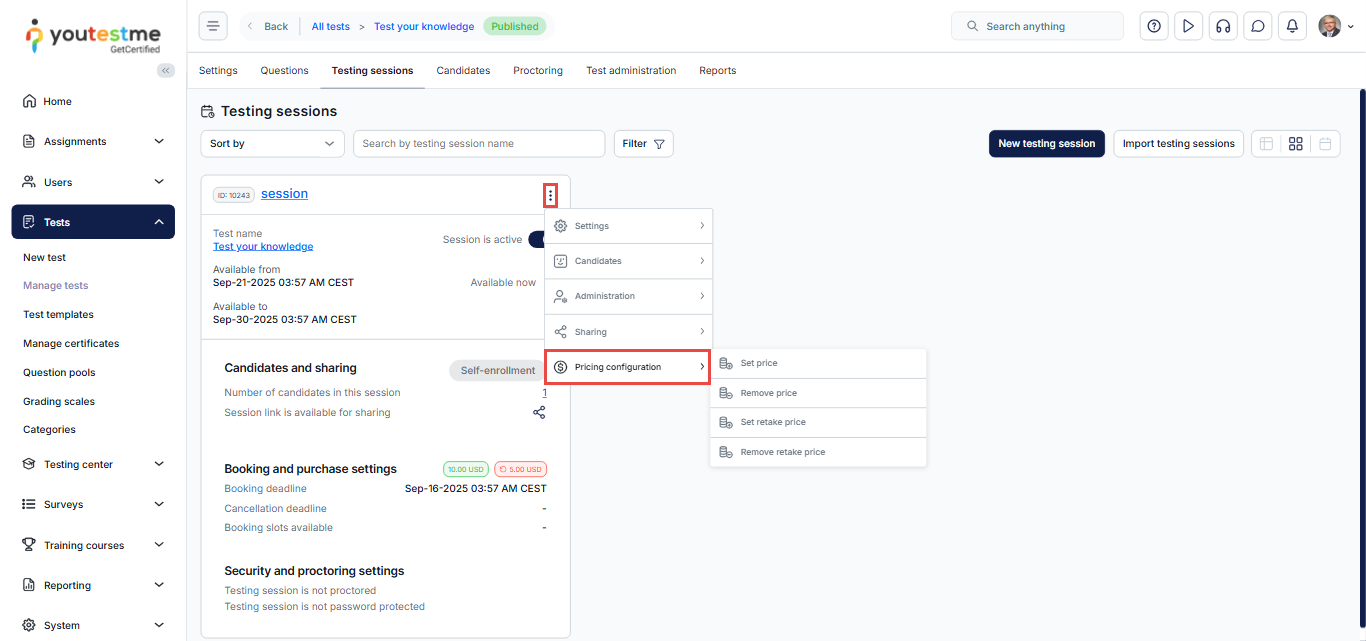
Please note that you can reassign the price and the retake price to a test session after it has been created. To do so, follow these steps:
- Click the three dots in the upper-right corner of the created session.
- Select Pricing configuration.
- Click Set price to open a pop-up window where you can enter the desired price and currency.
- If you want to charge for retake attempts, click Set retake price and enter the retake fee.
- Click Remove price to delete an existing price.
Now, the candidate must purchase the testing session to take the test.
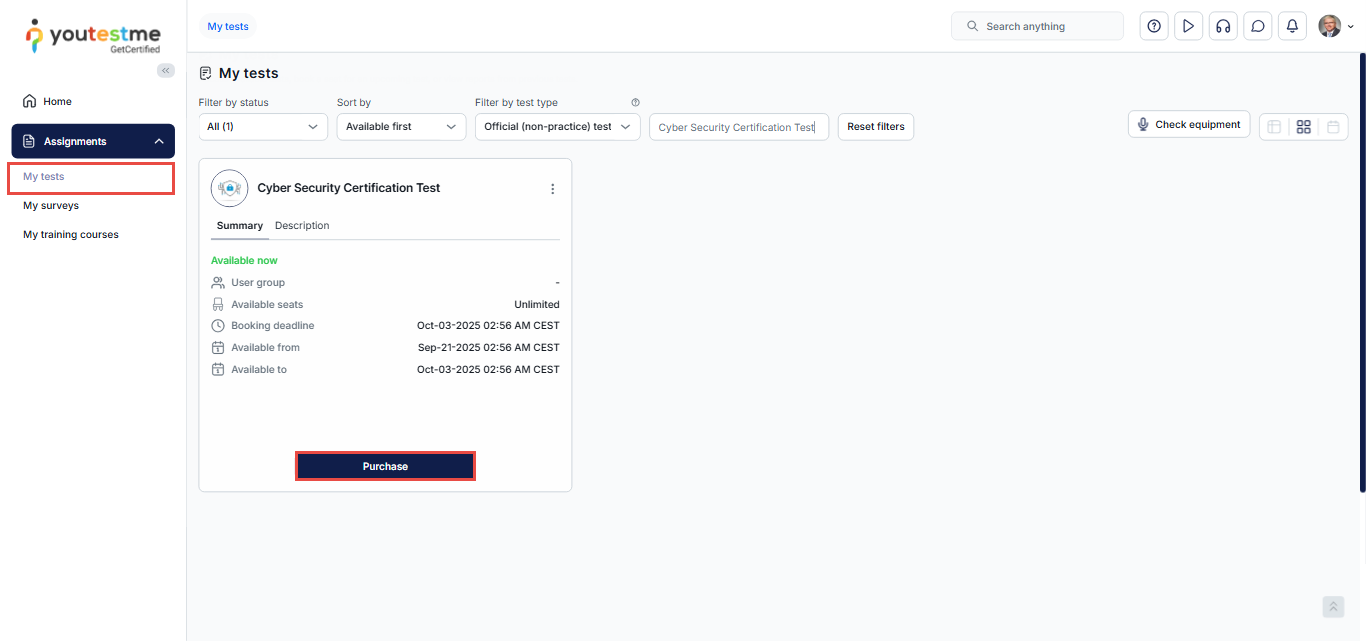
Candidate Perspective
- The candidate navigates to the Assignments tab and locates the desired exam.
- They click on Purchase and complete the checkout form.
- After the purchase is completed, the candidate is redirected to the Purchase Order page.
- The candidate can then return to the Assignments page to view all available tests, including the one they purchased.
 For more information on how to purchase an exam, please refer to this article.
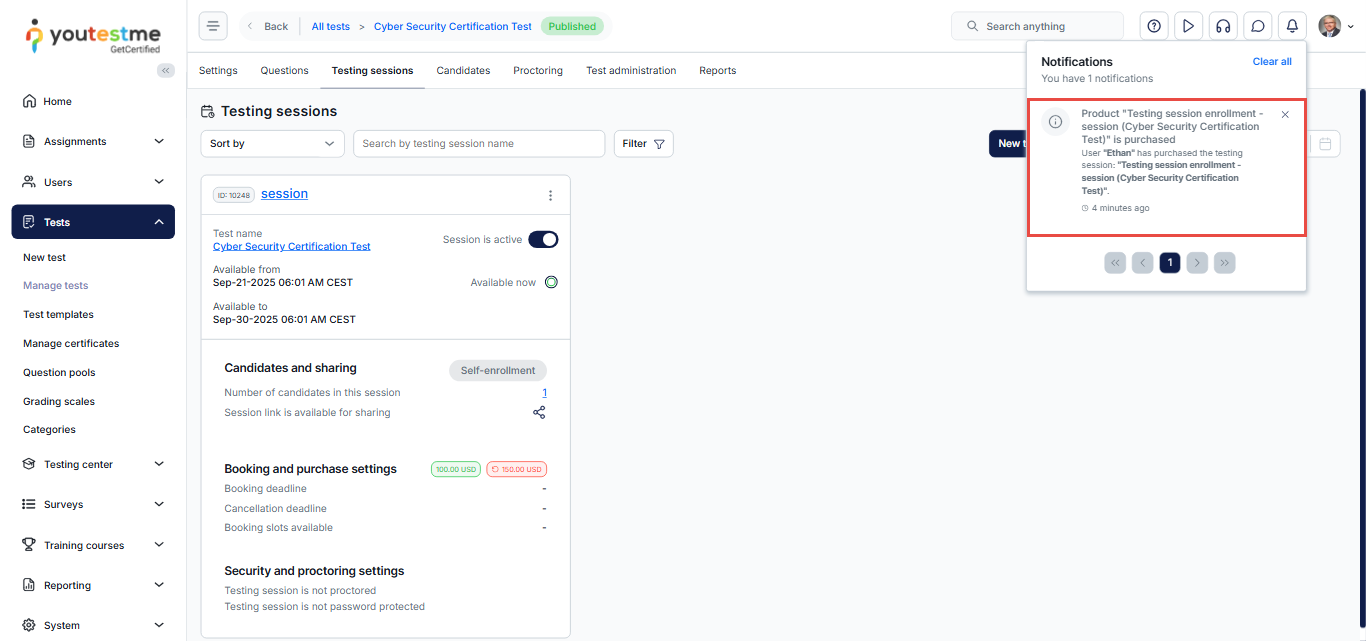
Payment Notifications
Once a candidate purchases the exam, you will receive a notification.
You can find all payment notifications in the Notifications section, as shown in the image below.
Test the Purchase Functionality
You can explore and test the entire exam booking and purchase process in the demo environment before using it in production.
For detailed instructions, refer to this article.
For more related instructional materials, please visit:
- How to purchase, book, cancel or reschedule an exam session
- How to set up training course fees with e-commerce
- How to create a stripe account
FAQ
#1 What is the difference between purchasing and booking an exam?
When the candidate purchases the exam, it means that he just performed the payment to get the right to take it. After that, the candidate needs to book a spot to take the exam at a specific available session.


