Article verified for Release 16.0 on February 12, 2026.
This article provides a complete guide to using the Virtual Interview platform for AI-powered candidate recruitment and evaluation. It explains how administrators can create and manage interviews, review AI-generated assessments, and collaborate with their teams, as well as how candidates can access interviews and submit their responses.
The guide is structured by user role to ensure a clear and efficient experience for both administrators and candidates. By following the steps outlined in this article, you can streamline your recruitment process, improve evaluation consistency, and make data-driven hiring decisions using AI-supported insights.
Recommended Browser: For the best performance and full functionality, we recommend using Google Chrome.
Note: This feature is included in the EE package. If you are unsure whether your environment includes this package, please contact sales@youtestme.com or your designated account manager for confirmation.
Access Virtual Interview
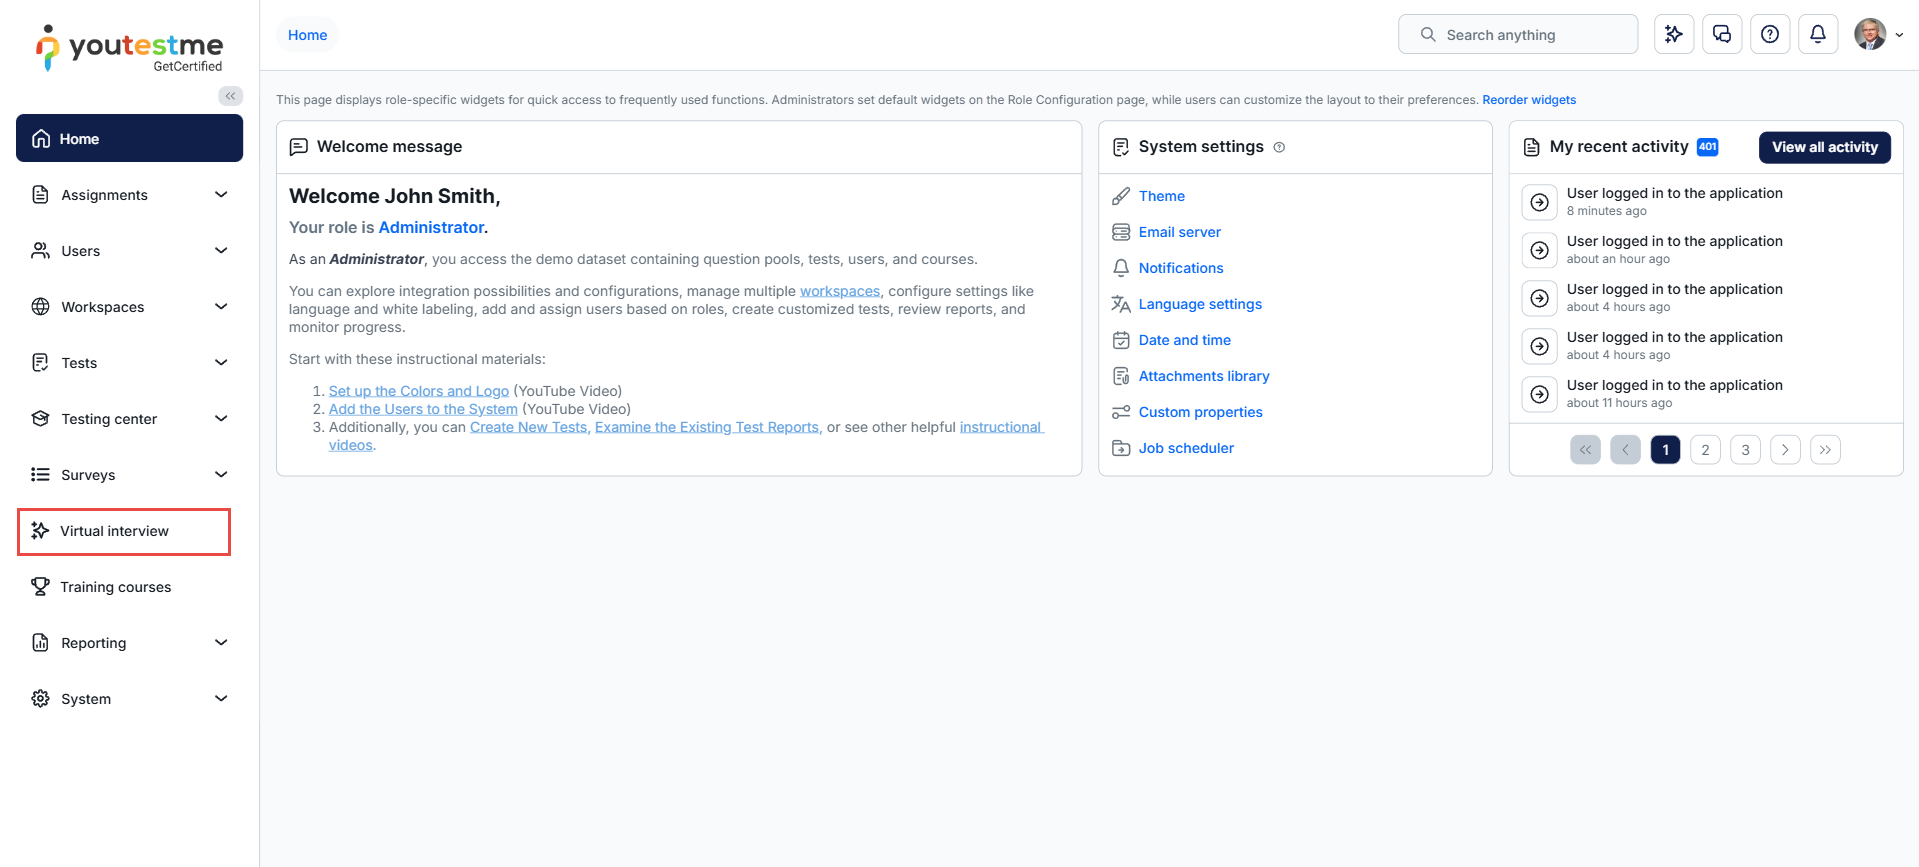
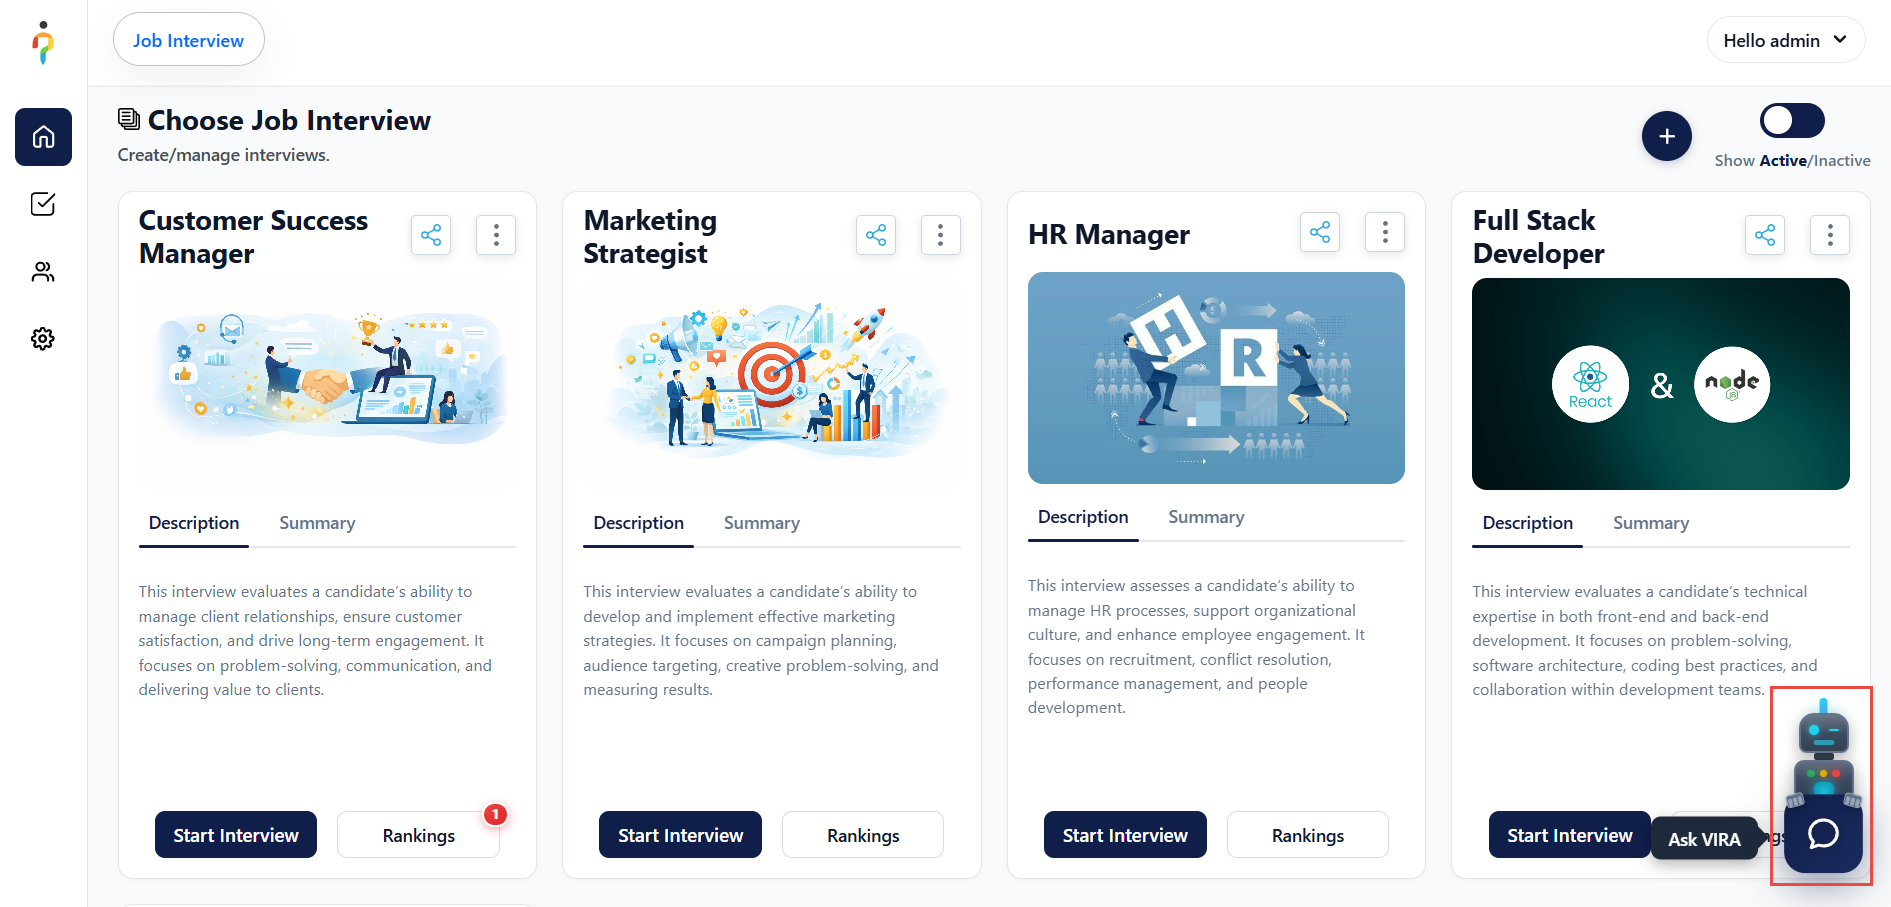
Interview Page
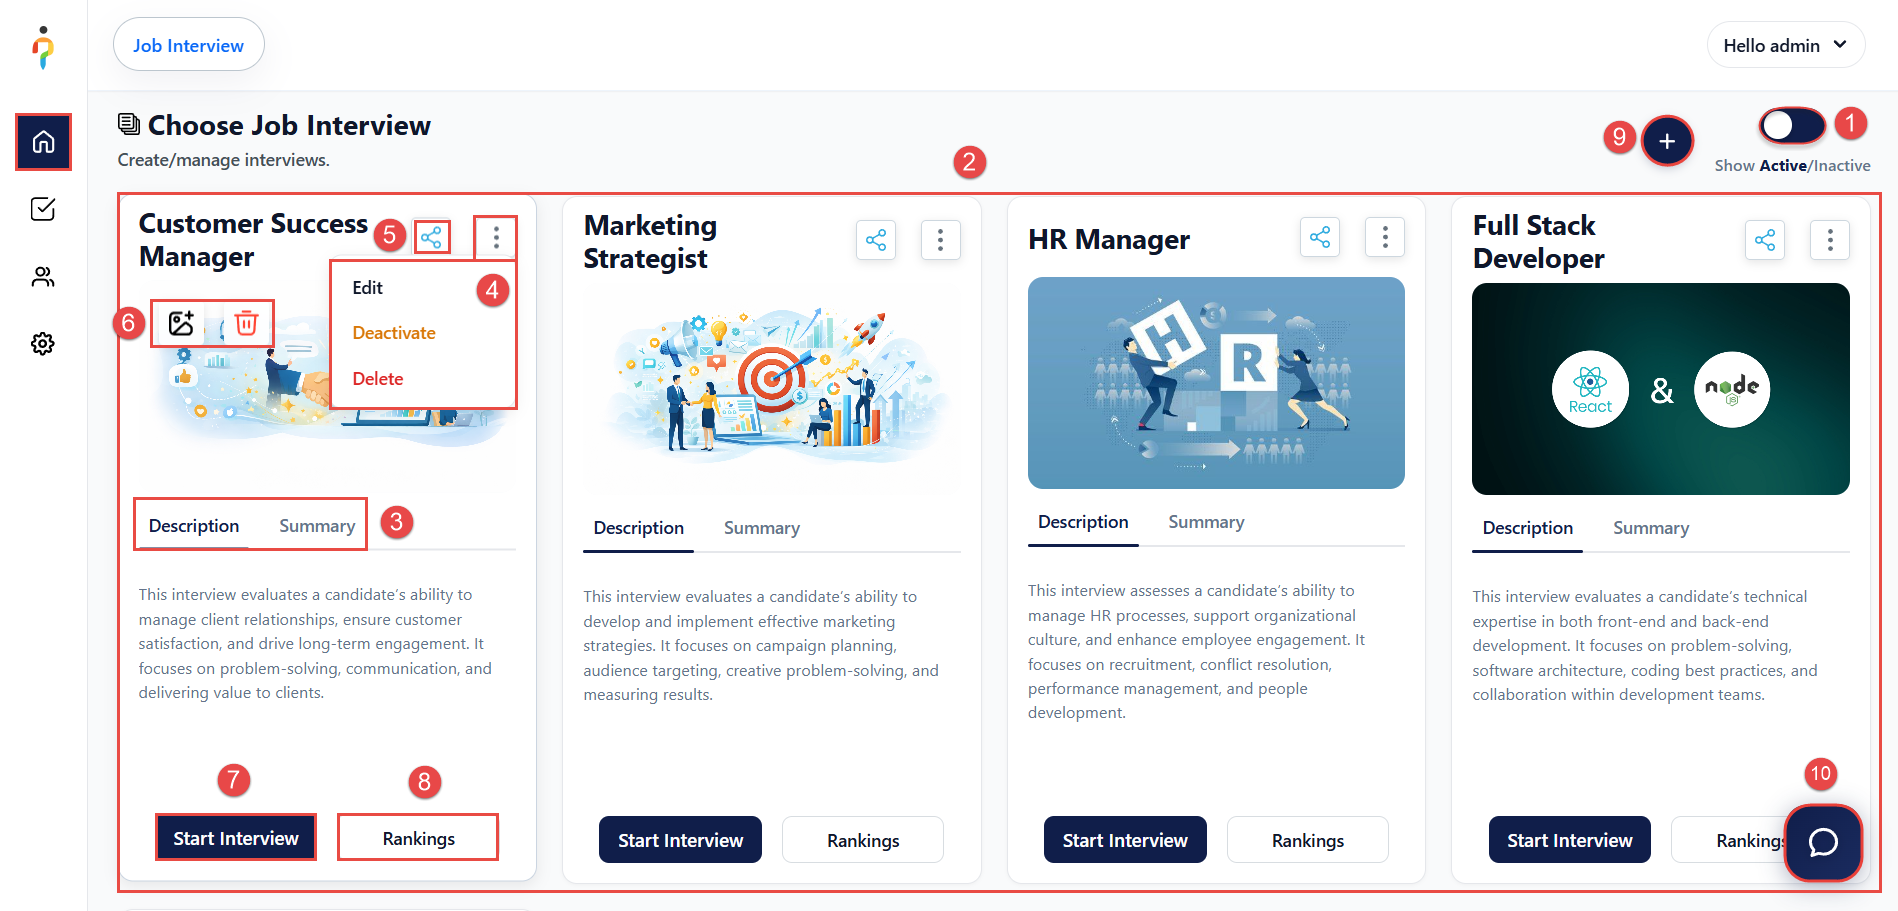
On the Interview Page, Administrators Can:
- Toggle Active/Inactive Interviews – Switch interviews between Active and Inactive status.
Note: Only Active interviews are visible and accessible to candidates. - View All Available Interviews – Access the complete list of created interviews.
- Review Interview Details
- Description – A brief explanation of the interview purpose.
- Summary – Displays the interview status and the total number of questions.
- Manage Interview Options
- Edit – Modify interview settings or questions.
- Activate/Deactivate – Change the interview’s availability depending on its current status.
- Delete – Permanently remove the interview and all associated candidate results.
- Important: Deleting an interview is not recommended, as all candidate results will be permanently lost. Consider deactivating the interview instead.
- Share Interview via Link – Generate and copy a direct access link to quickly locate and open a specific interview.
- Add or Remove Interview Image – Customize the interview by uploading or removing a cover image.
- Start Interview – Initiate the interview process.
- View Rankings – Access results and rankings for all candidates who completed the interview.
- Create a New Interview – Start the process of creating a new interview.
- Use AI Bot VIRA – Utilize the AI-powered assistant to search for candidates efficiently.
Note: You can drag and drop interviews to rearrange their order.
Creating Interviews
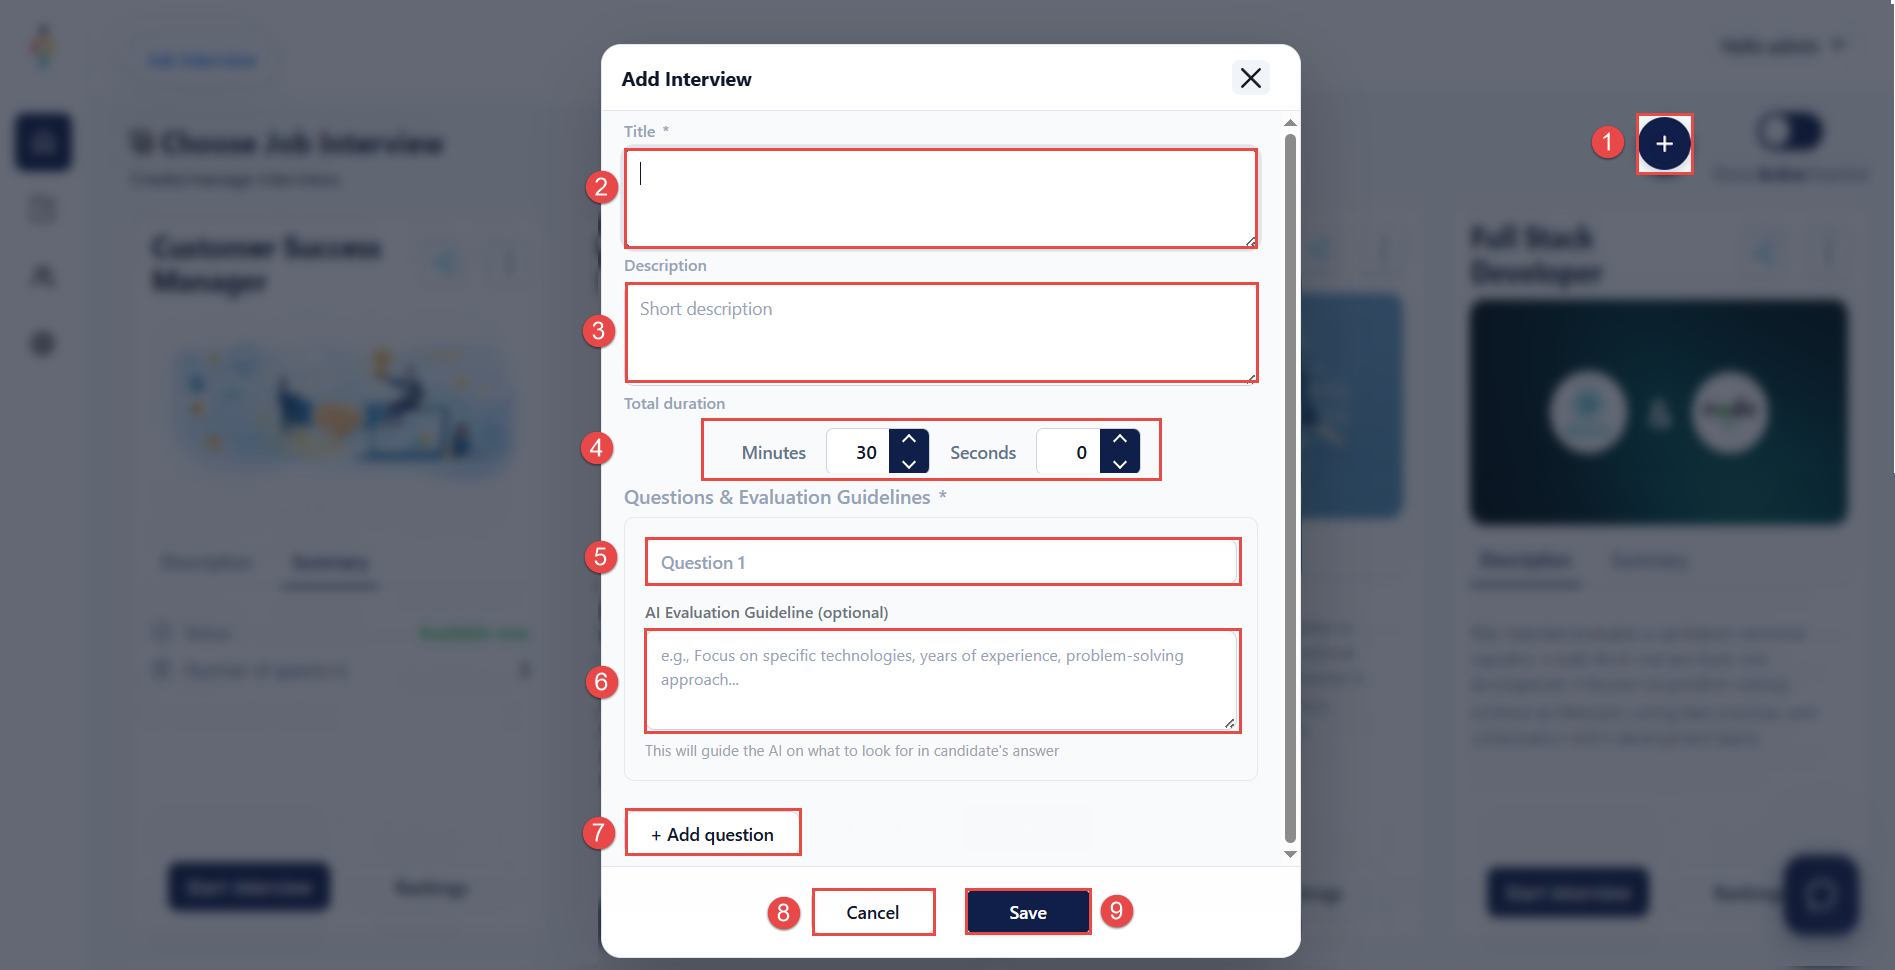
To create a new interview, follow these steps:
- Select the Add Interview button.
- Enter the Title of the interview.
- Provide a Description of the interview.
- Define the Interview Duration.
- Add the Question Text.
- (Optional) Add an AI Evaluation Guideline to instruct the AI on how to evaluate candidate responses. For example, you can define specific criteria such as:
- Required years of experience
- Key competencies or behaviors to assess
- Expected technical skills
- (Optional) Add additional questions as needed.
- To discard the process, select Cancel.
- Select Save to create the interview.
Note: Newly created interviews are saved as Inactive by default. This allows you to review and confirm all settings before making the interview available to candidates.
Check Rankings
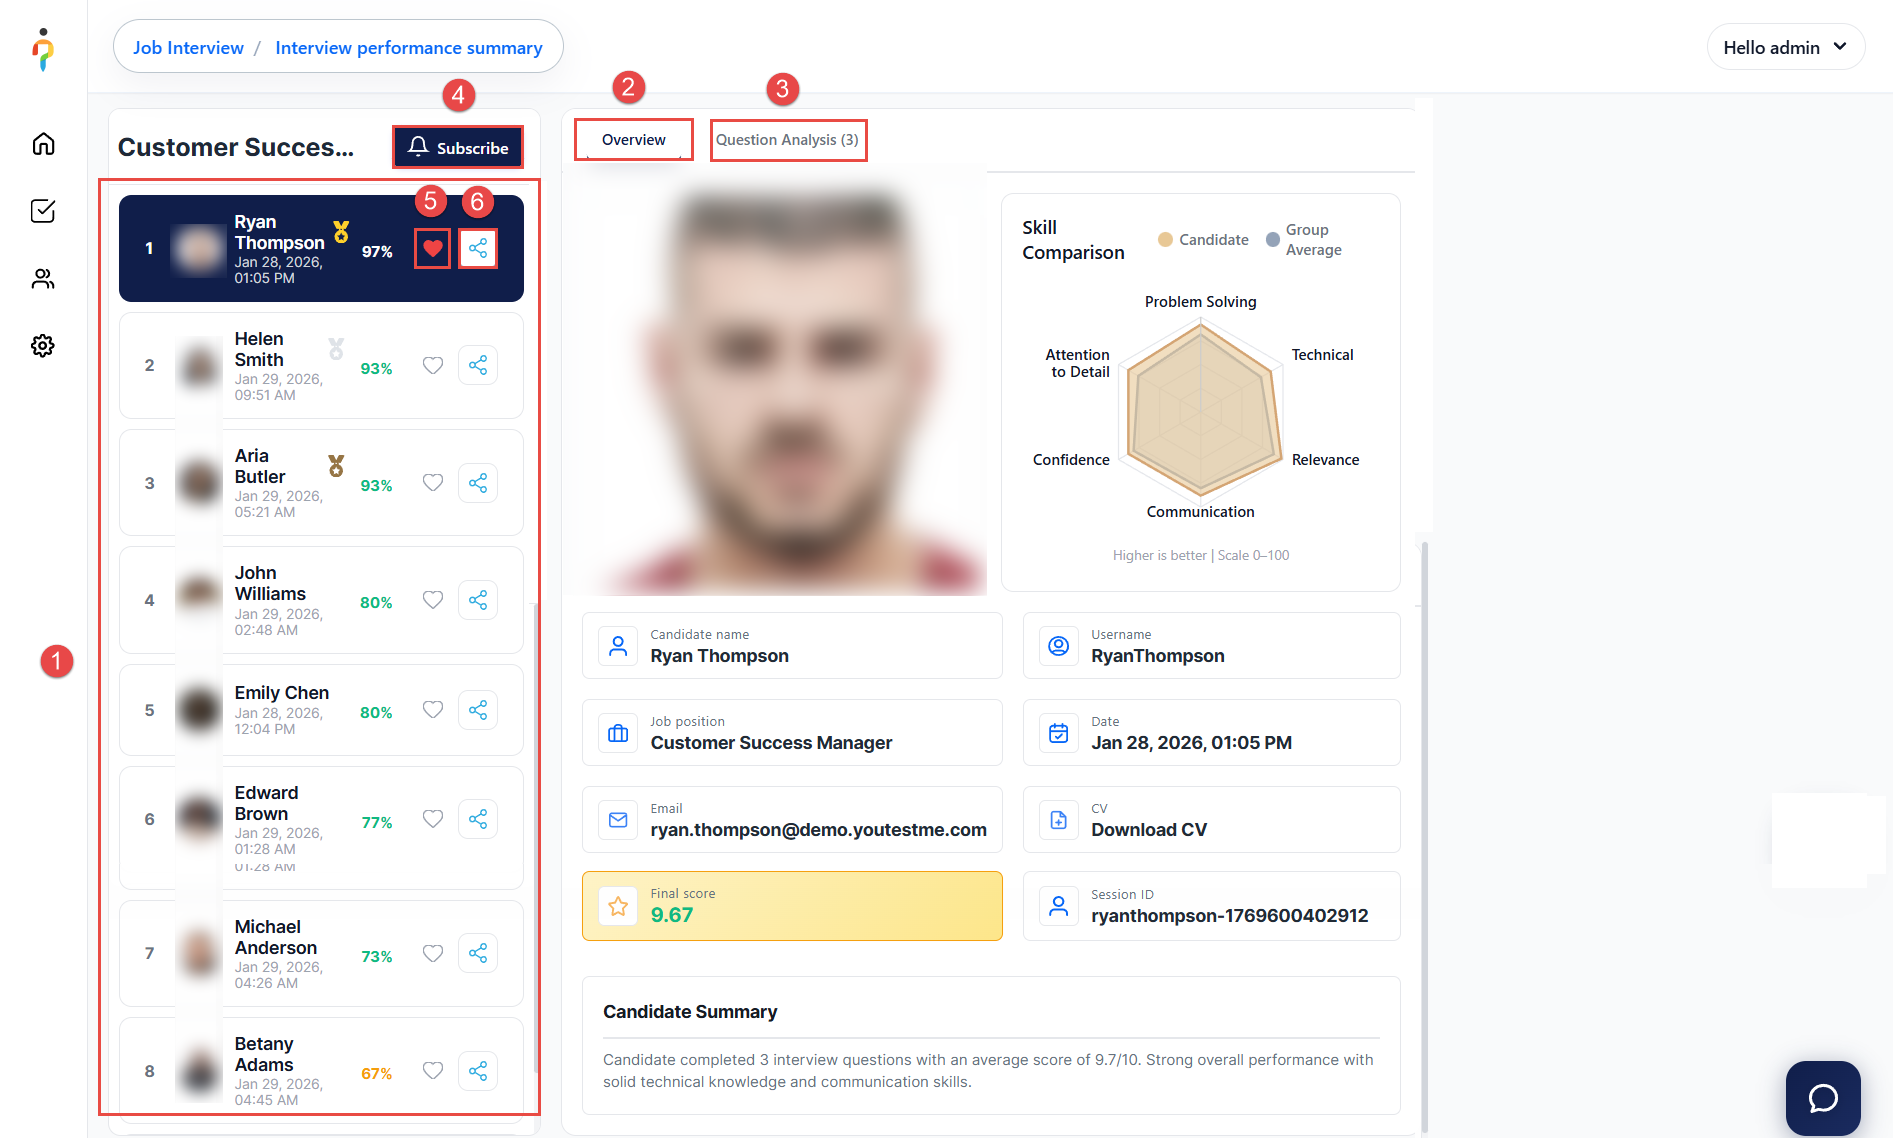
After selecting the Rankings button, administrators can access the following:
- List of Candidates – View all candidates who have completed the selected interview.
- Candidate Overview – Review detailed information for a selected candidate, including:
- Personal information
- AI evaluation results
- Question Analysis – Access a detailed breakdown of:
- All interview questions
- Candidate video responses
- Answer transcripts
- AI evaluation, including strengths, weaknesses, and overall summary
- Subscribe to Notifications – Receive automatic email notifications when candidates complete the interview and the AI evaluation is finalized. You can define a threshold score and choose to be notified only when a candidate exceeds that score.
- Like a Candidate – Mark candidates for easier identification or internal reference.
- Share Candidate Results – Share a specific candidate’s interview results via a secure link. Recipients will have access to:
- Skills breakdown and overall summary
- Video responses with AI evaluation
- Complete interview results and analysis
- Note: The shared link expires after 7 days for security purposes.
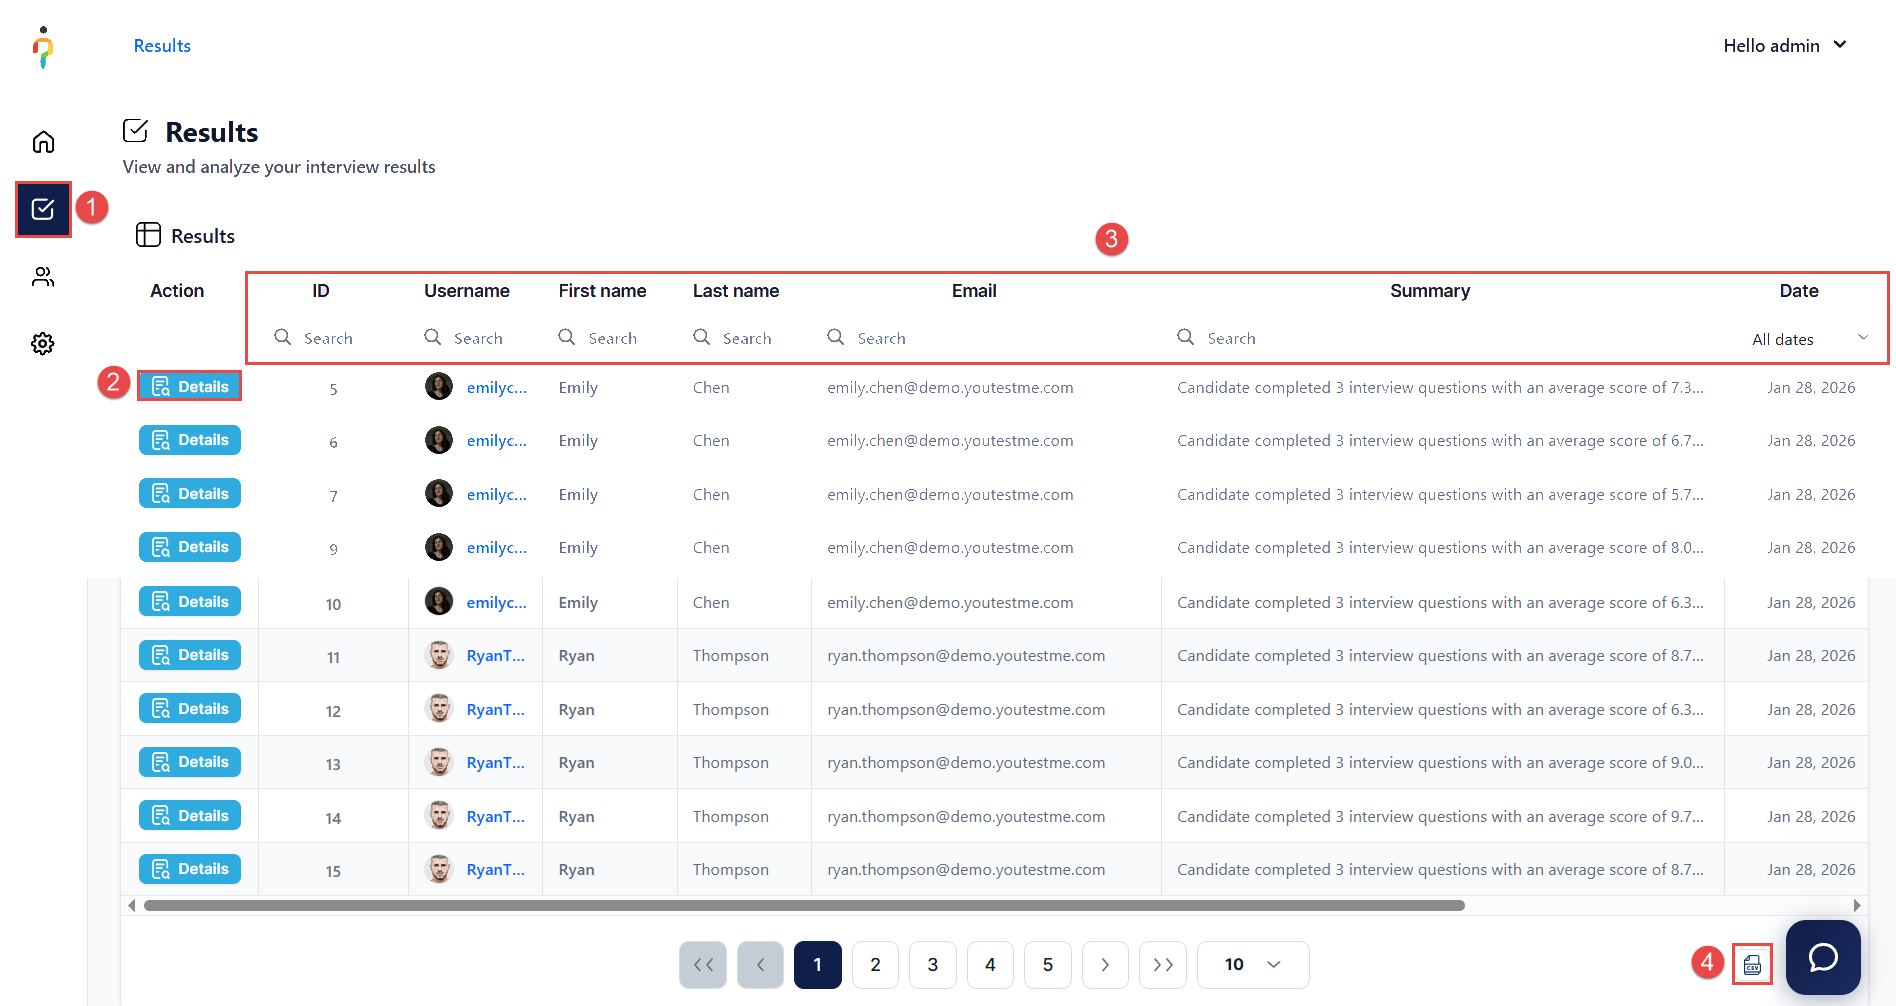
View All Results
You can review results across all interviews in one centralized location.
To access all results:
- Select Results from the main menu.
- Use View Details to see:
- Candidate overview
- Question analysis for the selected interview
- Apply Filters to refine the table based on your criteria.
- Select Export to download the results as a CSV file.
Use VIRA (Virtual Interview Recruitment Assistant)
To quickly identify suitable candidates for a specific position, you can use the VIRA AI Bot.
To access VIRA, select the VIRA icon located in the bottom-right corner of the screen.
Important:
Candidates must already exist in the system and have completed interviews with sufficient evaluation data. VIRA can only analyze and return results based on available data within the platform.
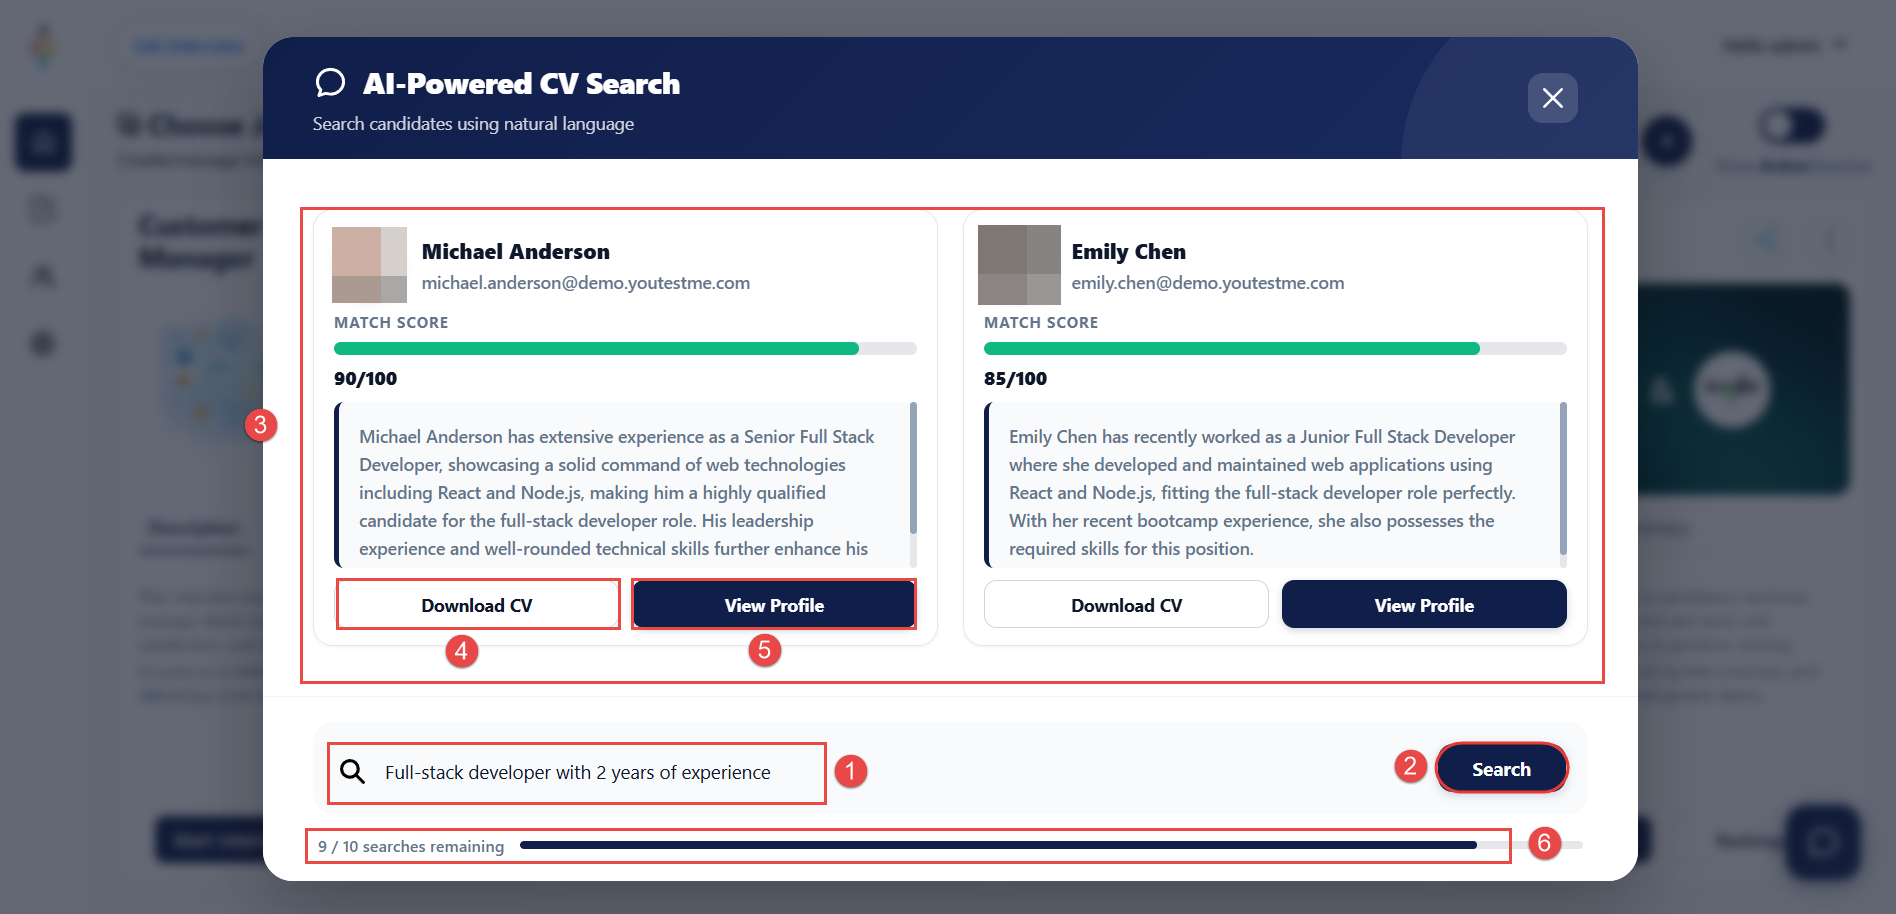
Once the VIRA dialog opens:
- Write down which candidate you are searching for (describe the required skills, experience level, competencies, or specific qualifications).
- Select Search to start the search process.
- VIRA will return candidates that satisfy your request.
- You can download their CV.
- You can open their profile.
- Keep in mind, you have a limit of 10 searches per day.
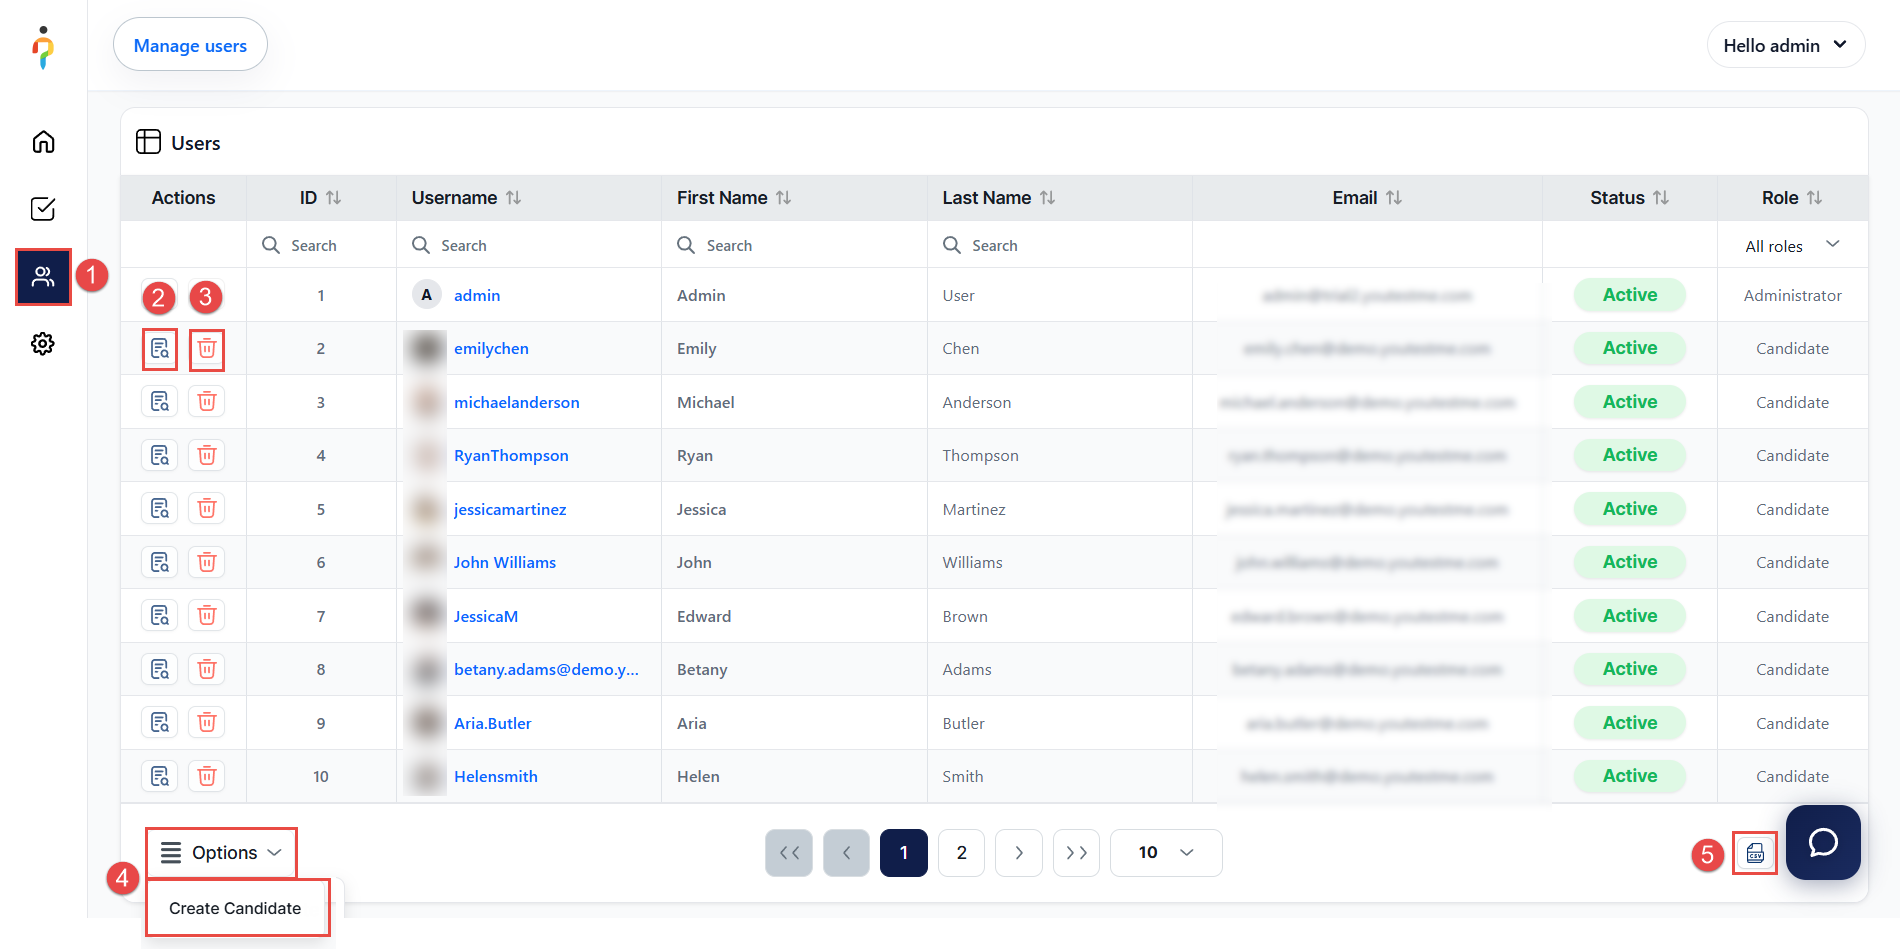
Manage Users
To access and manage users, follow these steps:
- Select Users Dashboard from the main menu.
- View the User Profile of a selected candidate to review their information and activity.
- Delete a candidate.
- Select Options > Create Candidate to add a new candidate to the system.
- Export all users by downloading the data in CSV format.
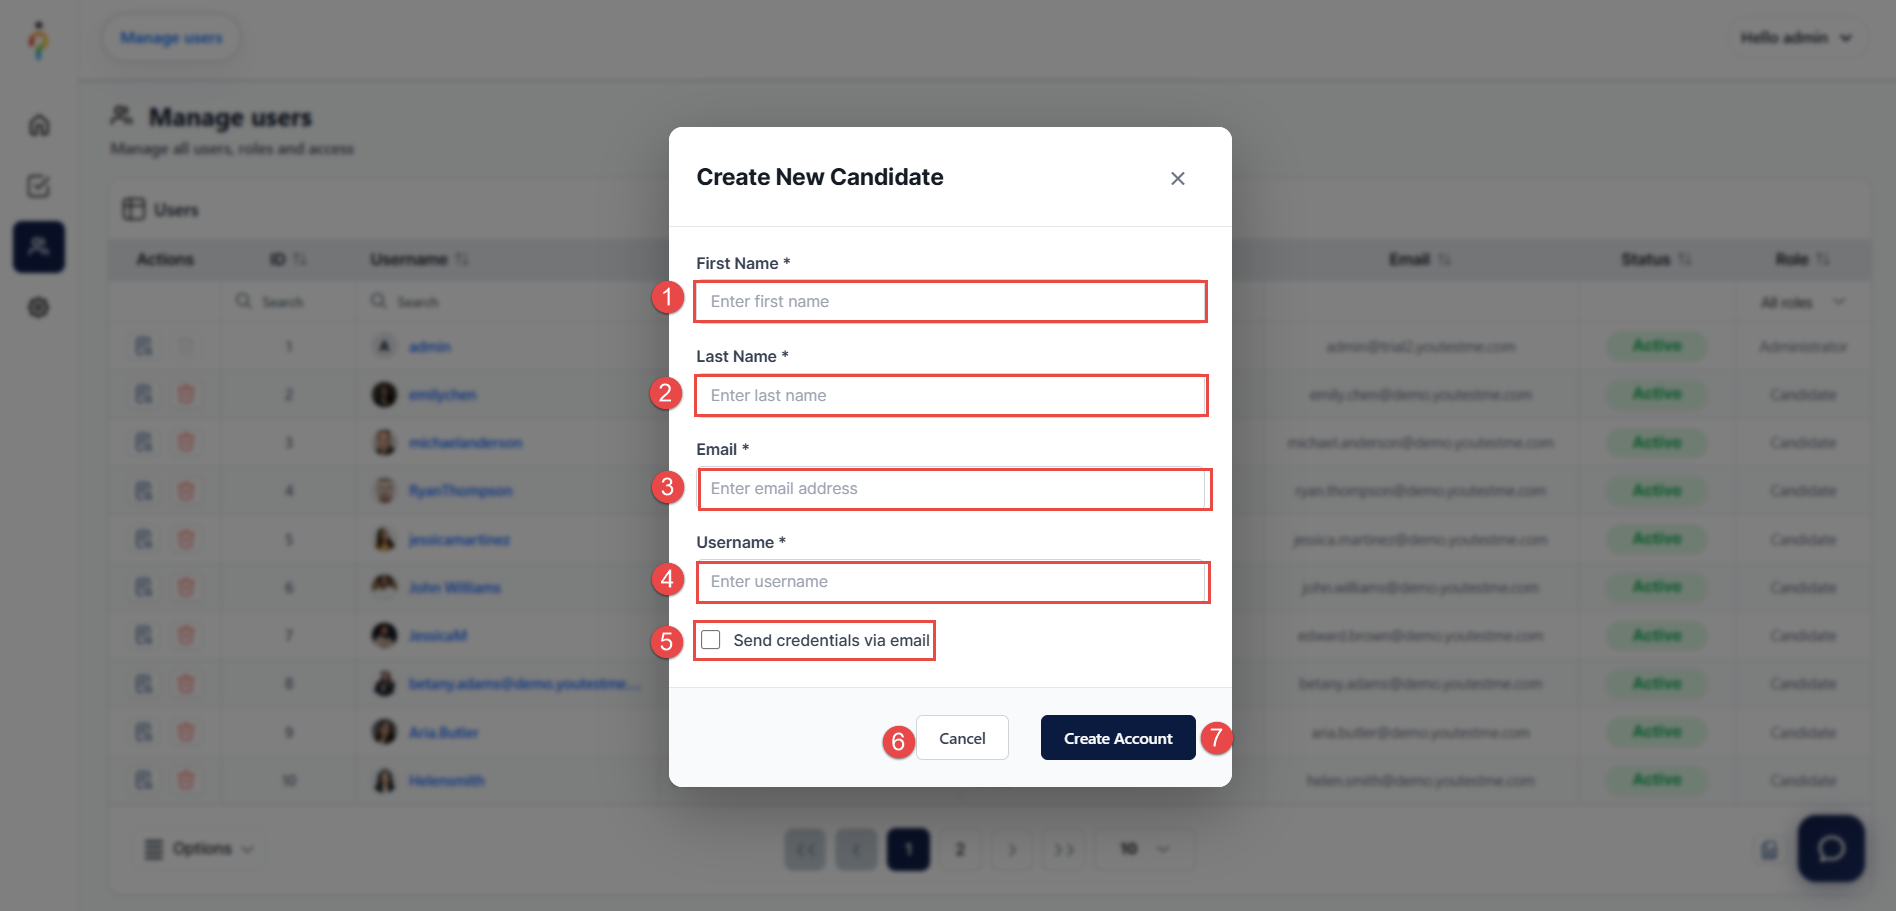
Create New Candidate
After selecting the Create Candidate button, a pop-up dialog will appear.
To create a new candidate account:
- Enter the First Name.
- Enter the Last Name.
- Provide the Email Address.
- Enter the Username.
- (Recommended) Select the checkbox to send login credentials to the candidate automatically via email.
- To discard the action, select Cancel.
- Select Create Account to complete the process.
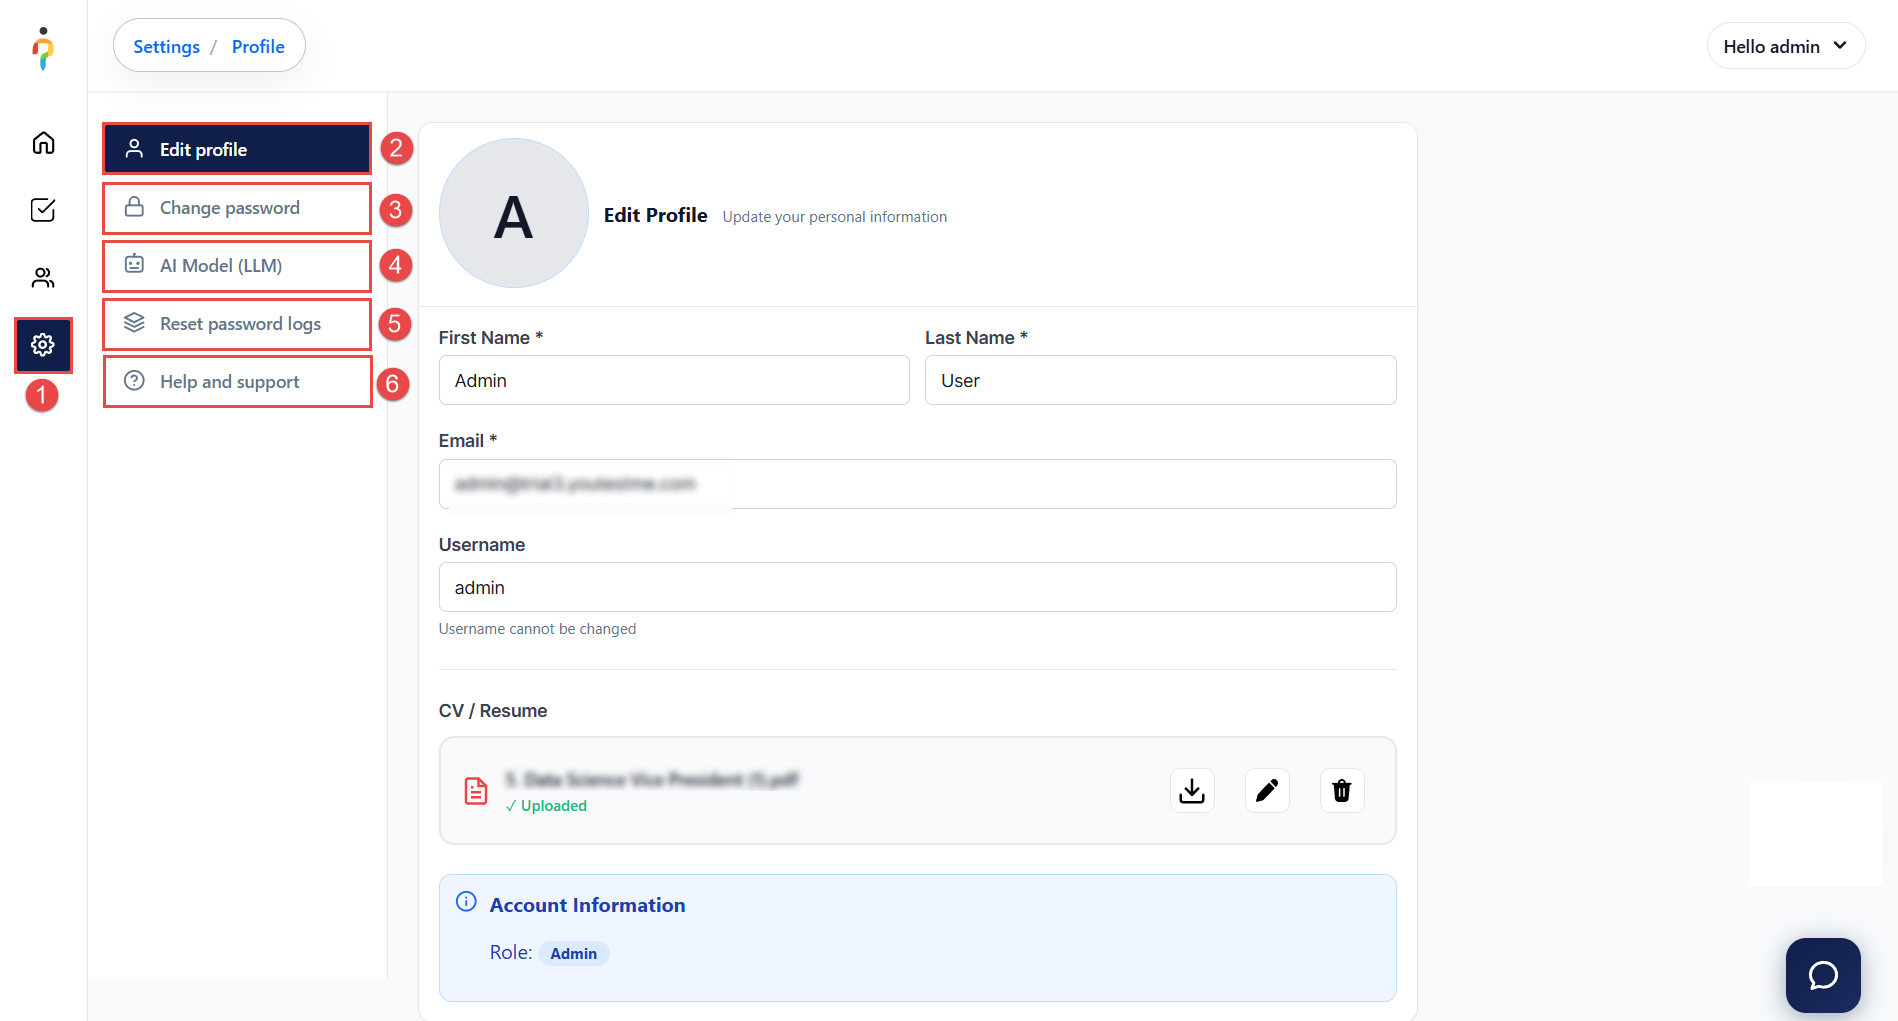
Access Settings
To access the Settings page:
-
Select Settings from the main menu.
Within the Settings section, you can manage the following:
- Edit Profile – Update your personal information and manage your CV (download, edit, or delete).
- Change Password – Update your account password.
- AI Model – Select the AI model used for interview evaluation:
- Llama 3.1:8B Model (Local Model)
- Fully private and secure
- Most affordable option
- Slower processing speed
- Moderate evaluation accuracy
- Llama 3.1:8B Model (Local Model)
-
- ChatGPT Business Model (Cloud Model)
- Fast and highly accurate responses
- Premium evaluation quality
- Higher cost per analysis
- ChatGPT Business Model (Cloud Model)
- Reset Password Logs – Review all password reset activity across users in the system.
- Help and Support – Access guides and frequently asked questions related to the Job Interview platform.
Take Interview – Candidate’s Perspective
For detailed step-by-step instructions on how the interview process works, please refer to the dedicated article.
Additional resources:


