Article verified for Release 15.0 on September 8, 2025.
This article explains how to reset a test attempt for a candidate, allowing them to retake the exam if needed.
By resetting the candidate’s attempt, a new attempt will be automatically generated without the need to rebook the test or manually reassign it. The candidate can retake the test through the same testing session, if it is still available, even if test retaking is not enabled. The previous attempt will be automatically suspended.
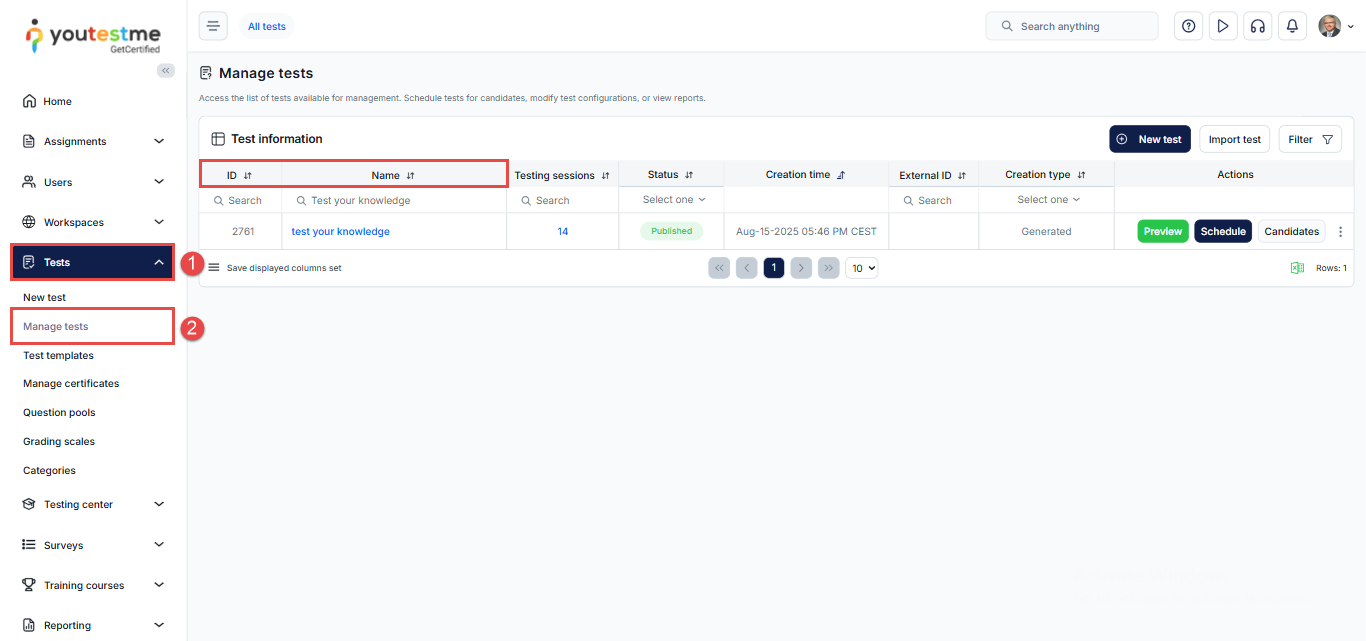
Locating the Test
To reset an attempt, locate the desired test. To do so, follow these steps:
- From the main menu, select Tests.
- Click Manage Tests.
- A table displaying all available tests will appear.
- Click the name of the desired test to access its settings. To quickly find the desired test, use the search bar and enter the test name or ID.
Resetting the Candidate’s Test Attempt
- After selecting the desired test, navigate to the Candidates tab.
- Use the search bar to find the specific candidate whose test attempt you want to reset.
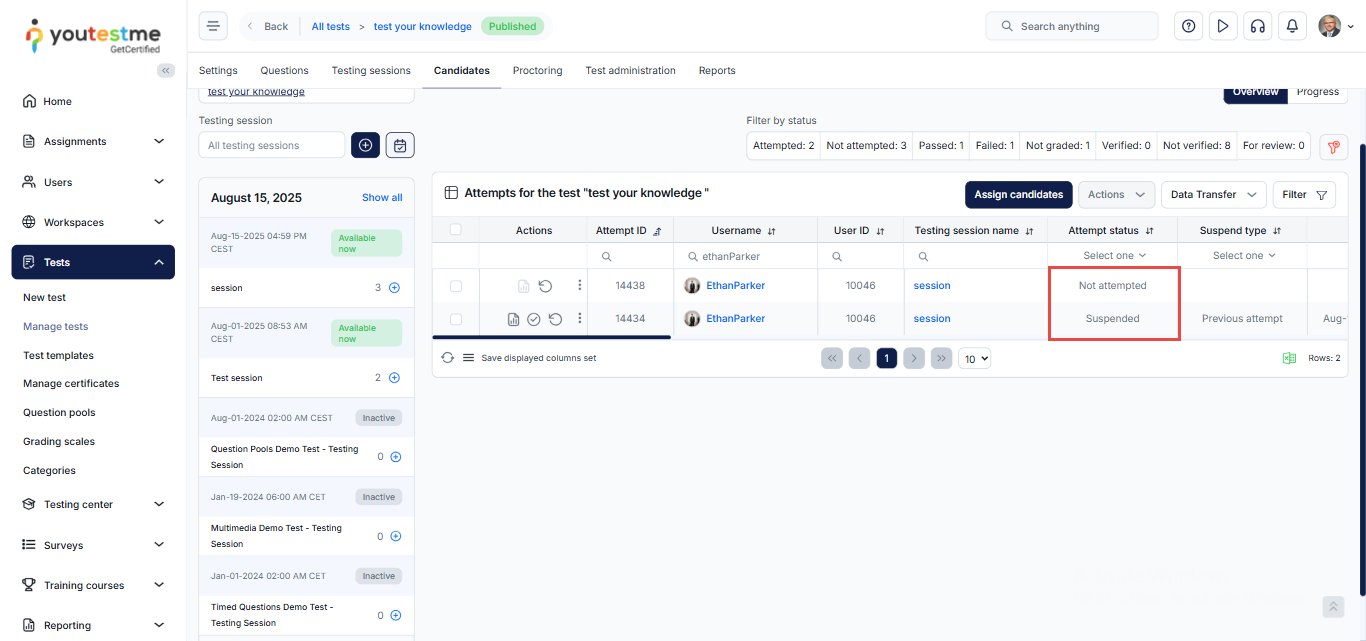
- In the Action column next to their attempt ID, click on the rounded arrow icon to reset the attempt.
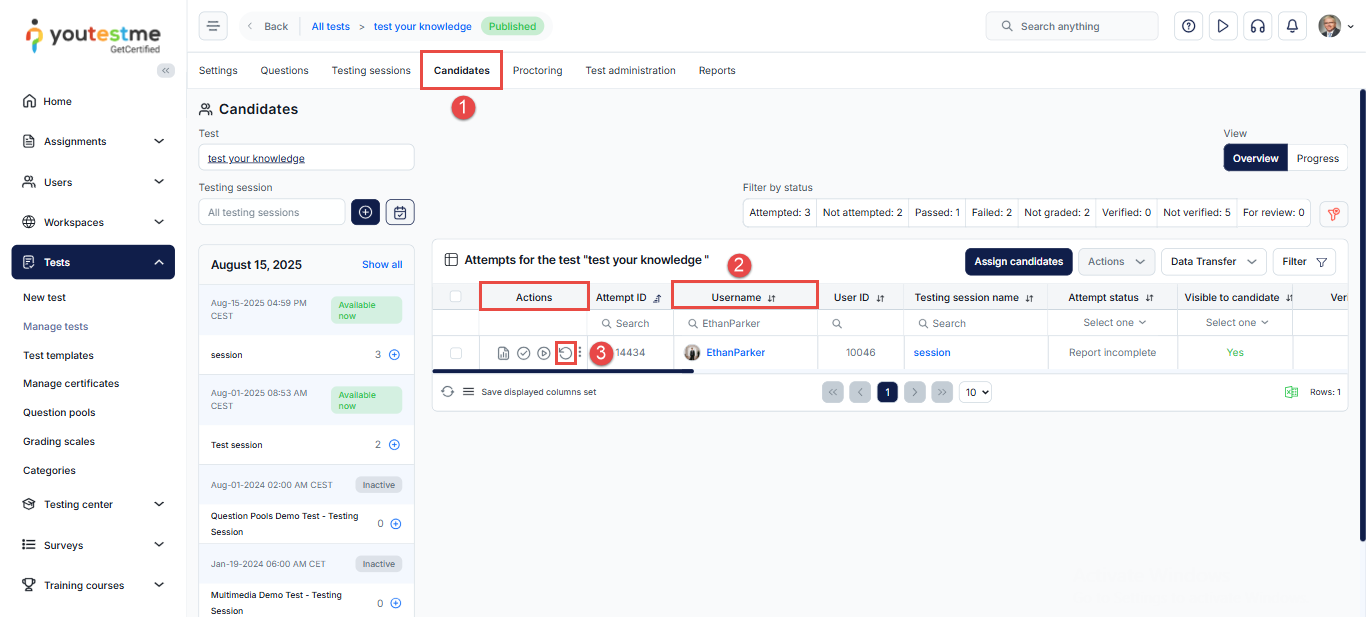
After clicking the icon, a pop-up window will appear:
- Select the desired session to which you want to assign the candidate. For more information on assigning candidates to a testing session, please visit this article.
- If the test is generated, you will see an option to manually assign a specific version. Turn the switch on to assign the same version as before, or off to let the system generate a new version automatically.
- Click Confirm, and the test attempt will be reset for the candidate.
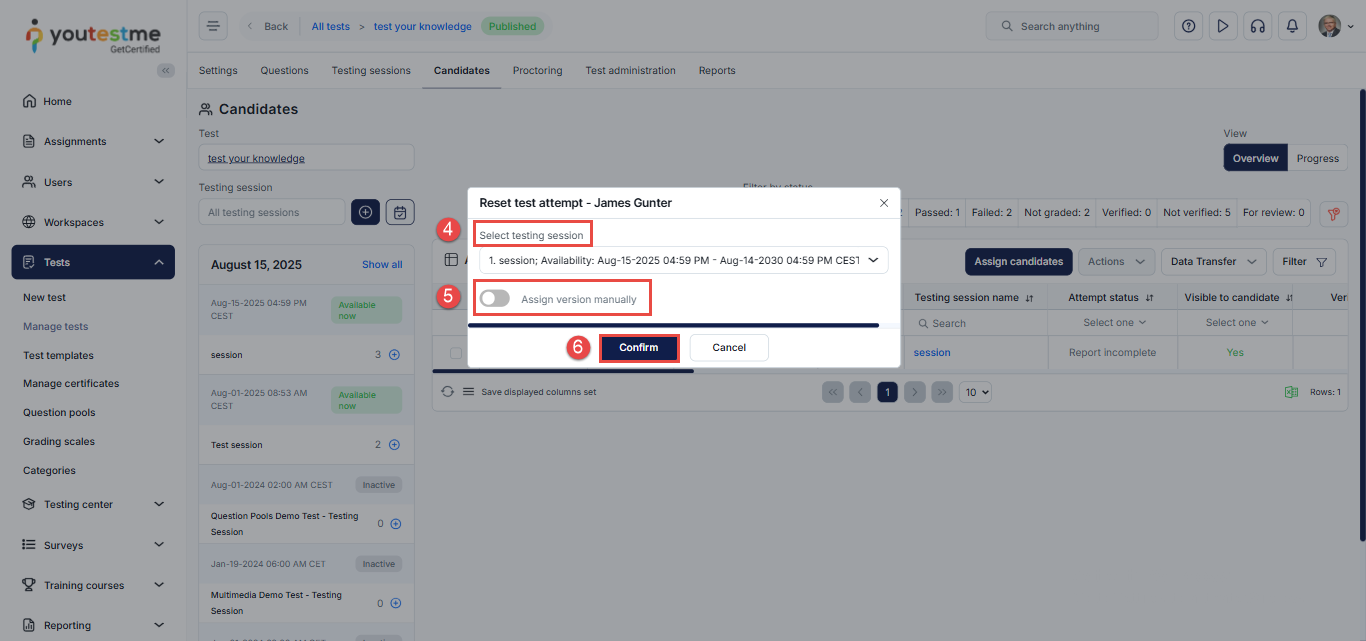
Note: When manual version assignment is disabled, the system automatically generates a new version for the candidate.
Previewing Suspended Attempts
When you reset a candidate’s test attempt, their previous attempt gets suspended. Suspended attempts remain stored in the system but are not shown by default. To view suspended attempts, you should enable the Show Suspended Attempts filter:
- Click on Filter.
- Check the box for Show Suspended Attempts.
- Click Apply.
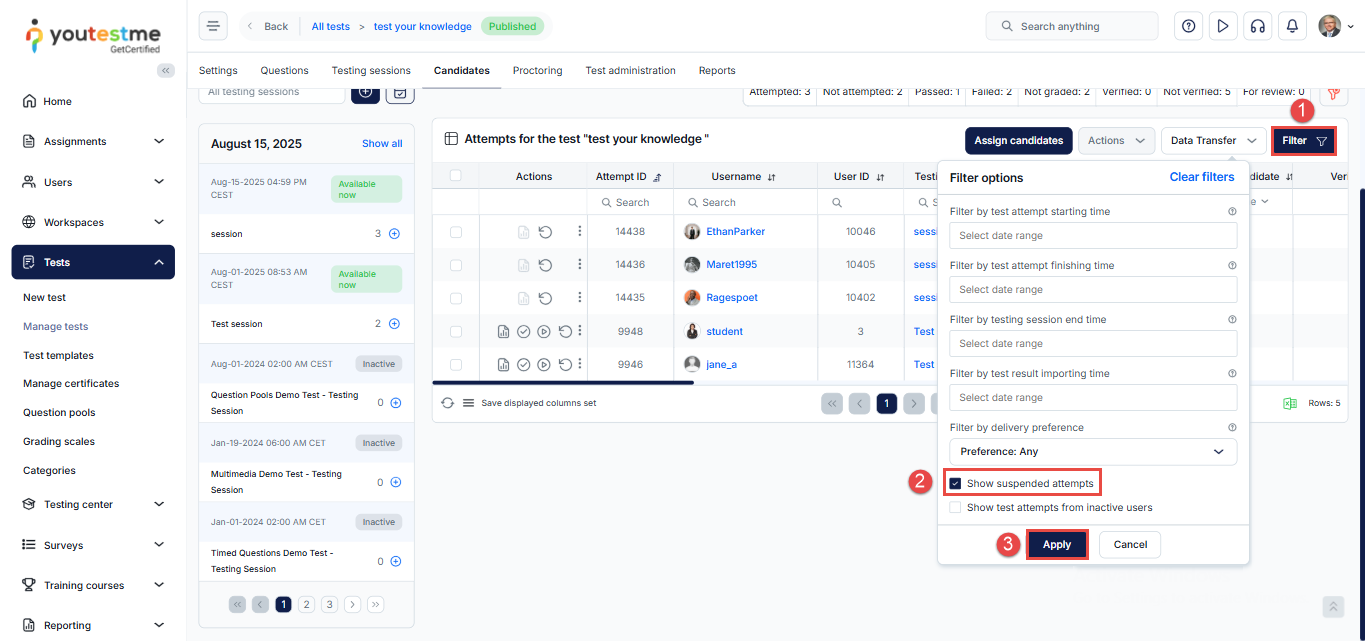
Once enabled, both the new and suspended attempts will be visible in the table.
For additional related topics, please refer to the following articles:


