Article verified for Release 15.1 on November 9, 2025.
This article explains how to set up contacts for application support.
The Support Contact Configuration feature allows administrators or other authorized users to define the support contacts that end users can reach out to for assistance. Up to three contacts can be added, each with a dedicated email address, phone number, and description to clarify the type of support they provide (e.g., Technical Support, Purchases and Refunds, etc.).
When users select the “Contact Support” option, available on both the login page and within the application interface, their inquiry will be sent directly to the specified support contact. If multiple contacts are configured, users will see a drop-down menu allowing them to choose the appropriate contact based on the nature of their request.
Setting up a contact email
To define the support contact, select “System” from the left-side menu and choose “Settings and customization”, then navigate to the “Support” tab.
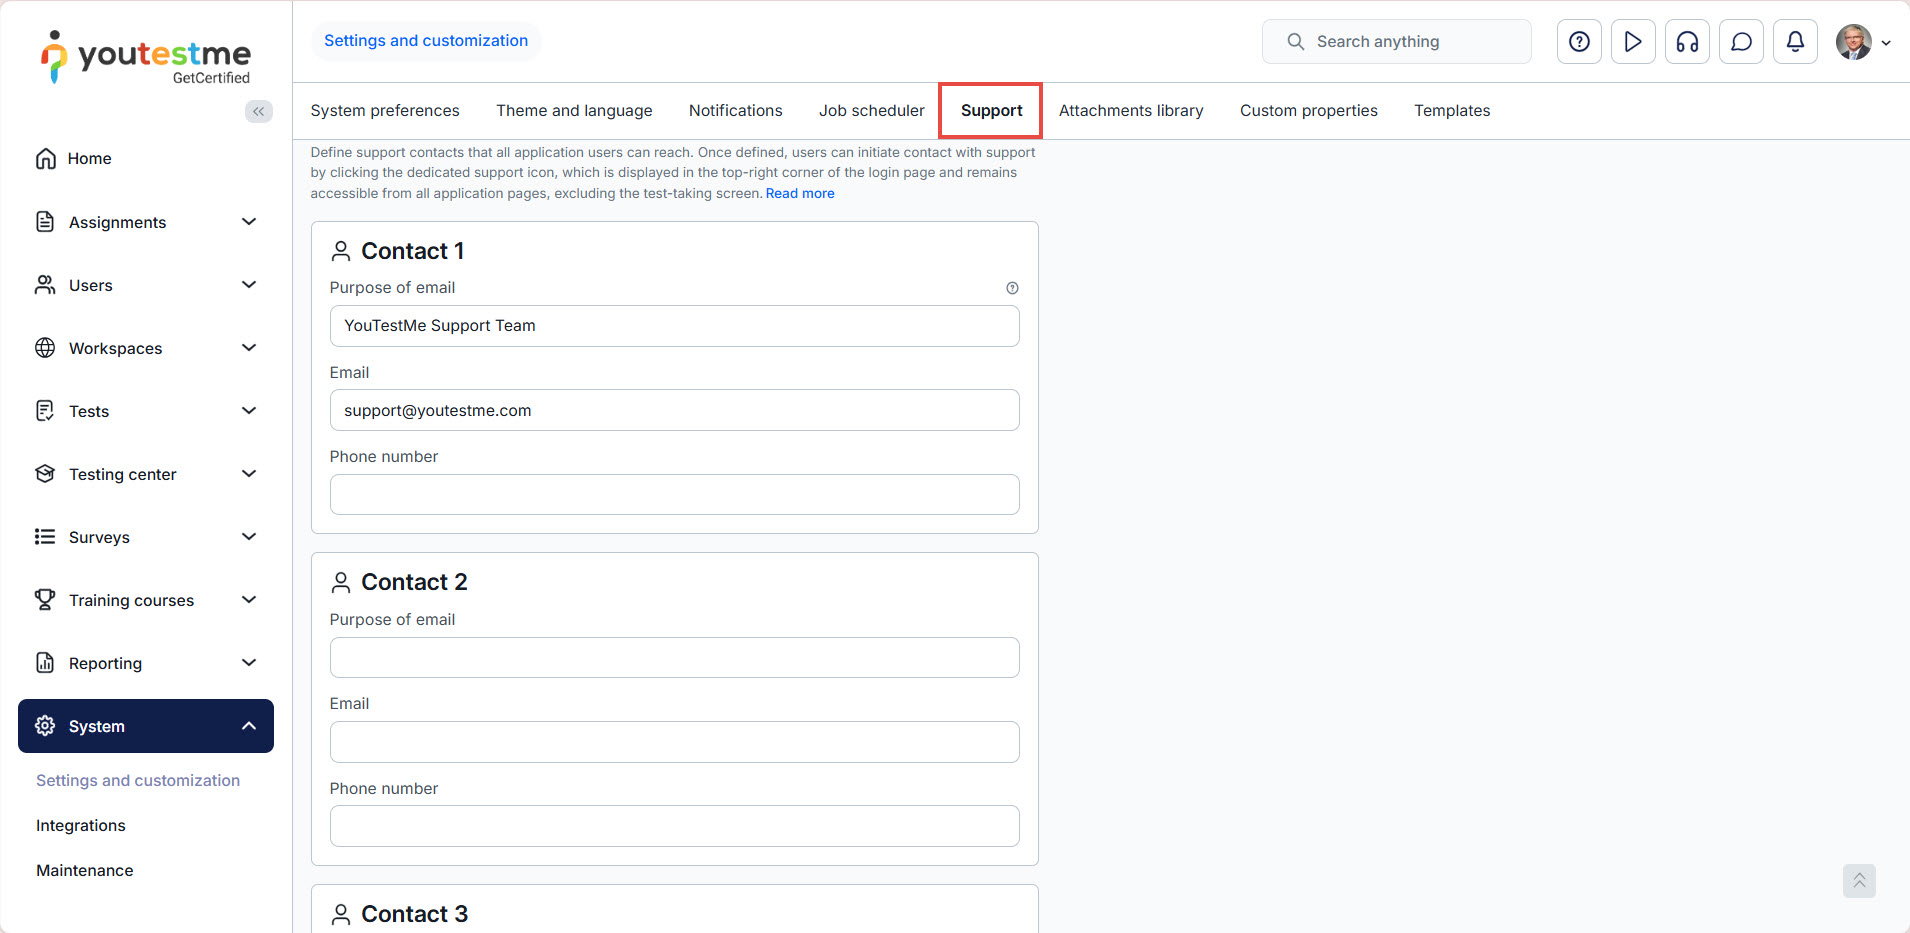
You will need to fill in the following fields to contact system support from the home page successfully:
- Purpose of email – Specify the type of support this contact represents, such as Technical Support or General Inquiries. This helps users identify the appropriate contact for their needs.
- Email – Enter the support email address. The first email field is mandatory and serves as the default contact if the user does not select another one.
- Phone number – Provide the support phone number associated with this contact.
- Additional Info Text – Add any extra details you wish to share with users, such as support availability hours, expected response times, or other relevant information.
- Click Confirm to save the changes.
- Click Cancel to abort.
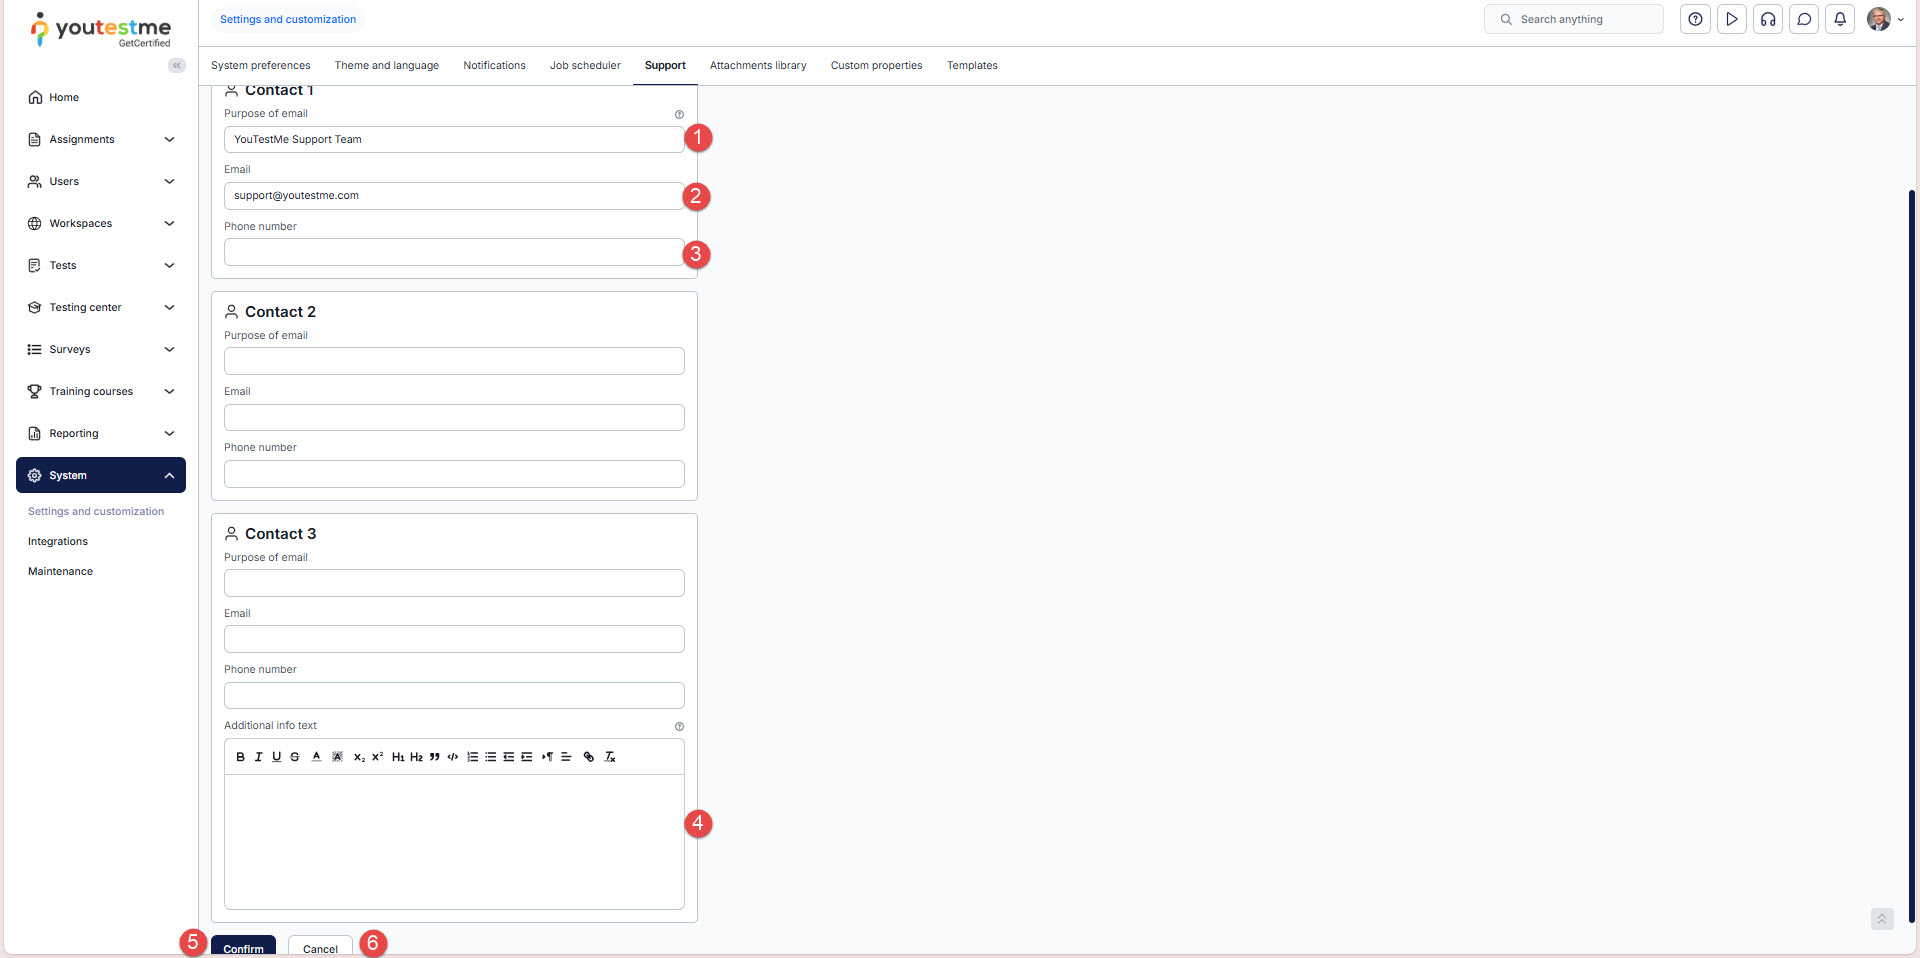
You can add up to 3 contacts for users to select from. However, it is required to have one support contact configured.
For a video tutorial on setting up contacts, please watch the video.
For more related instructional materials, please visit:


