Article verified for Release 15.1 on December 29, 2025.
This article explains how to configure and manage the Did not show up status for candidates who did not appear to take a test within the scheduled time. This option allows administrators to mark such attempts accordingly, prevent further test access, and manage results more accurately.
Setting up “Did not show up” status.
To set up the “Did not show up” status, do the following:
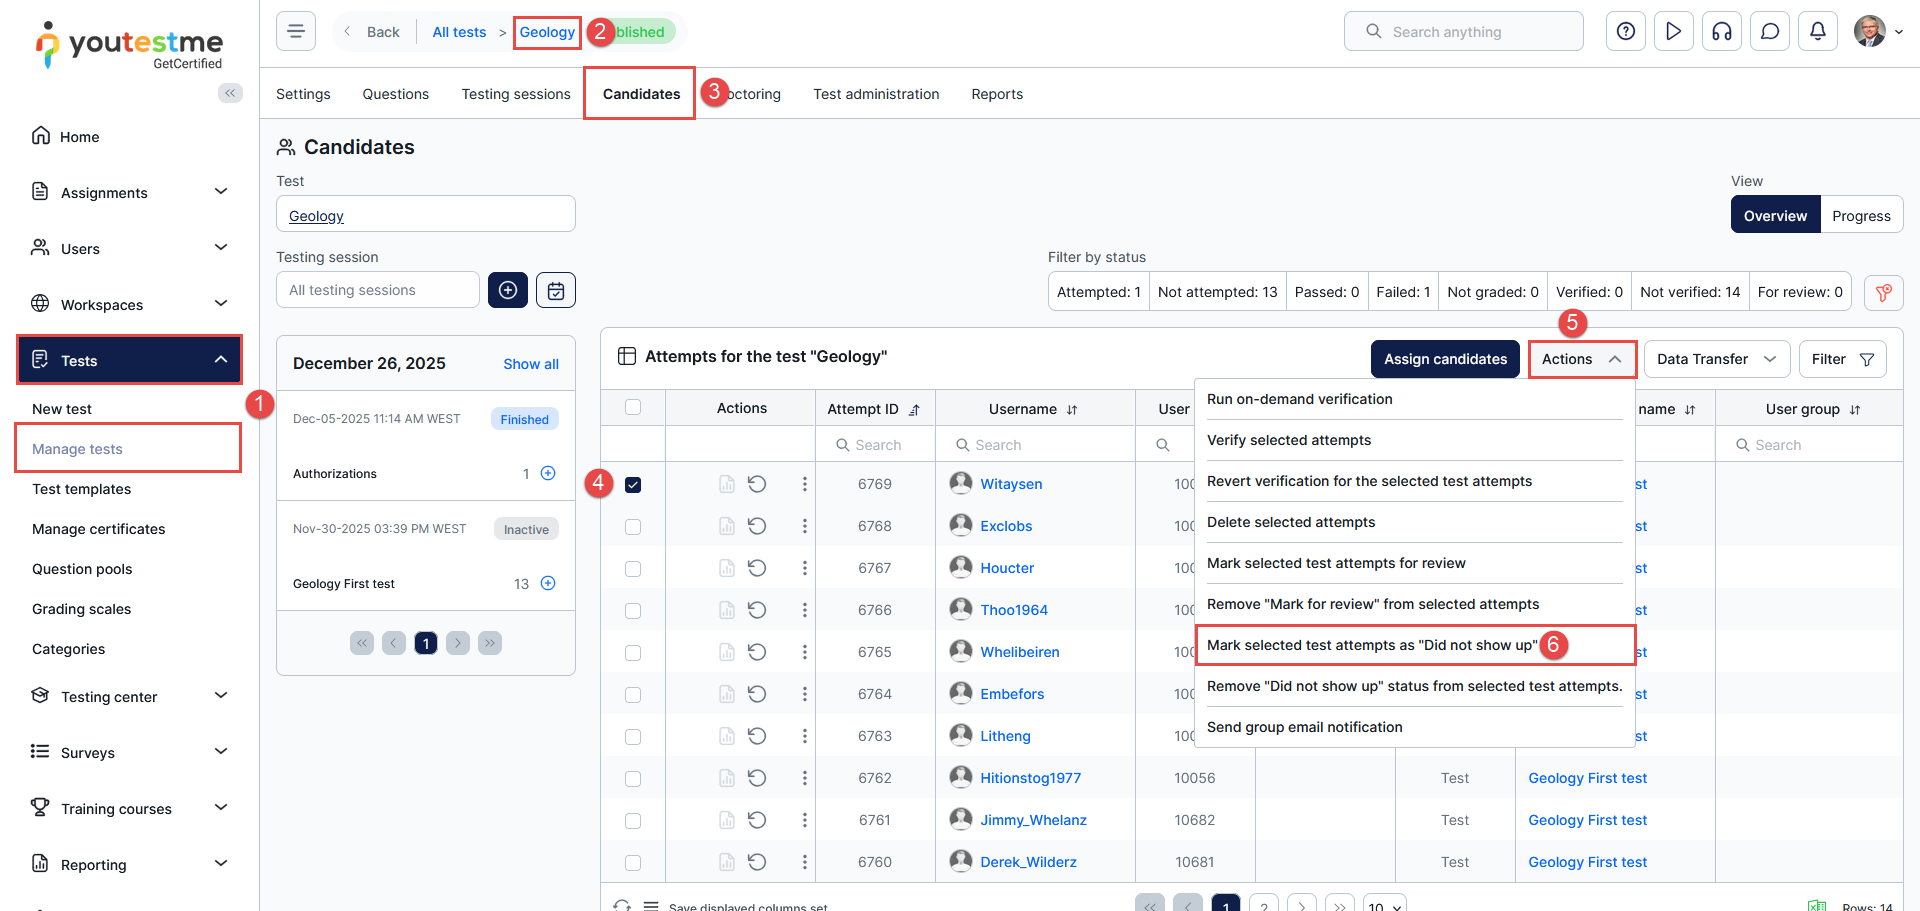
- Navigate to the Test > Manage tests.
- Choose the desired test.
- Navigate to the Candidates tab.
- In the Candidates table, select the desired candidates for whom you want to change the status.
- Click on the Actions button.
- From the dropdown menu, select the option – Set selected results as “Did not show up.”
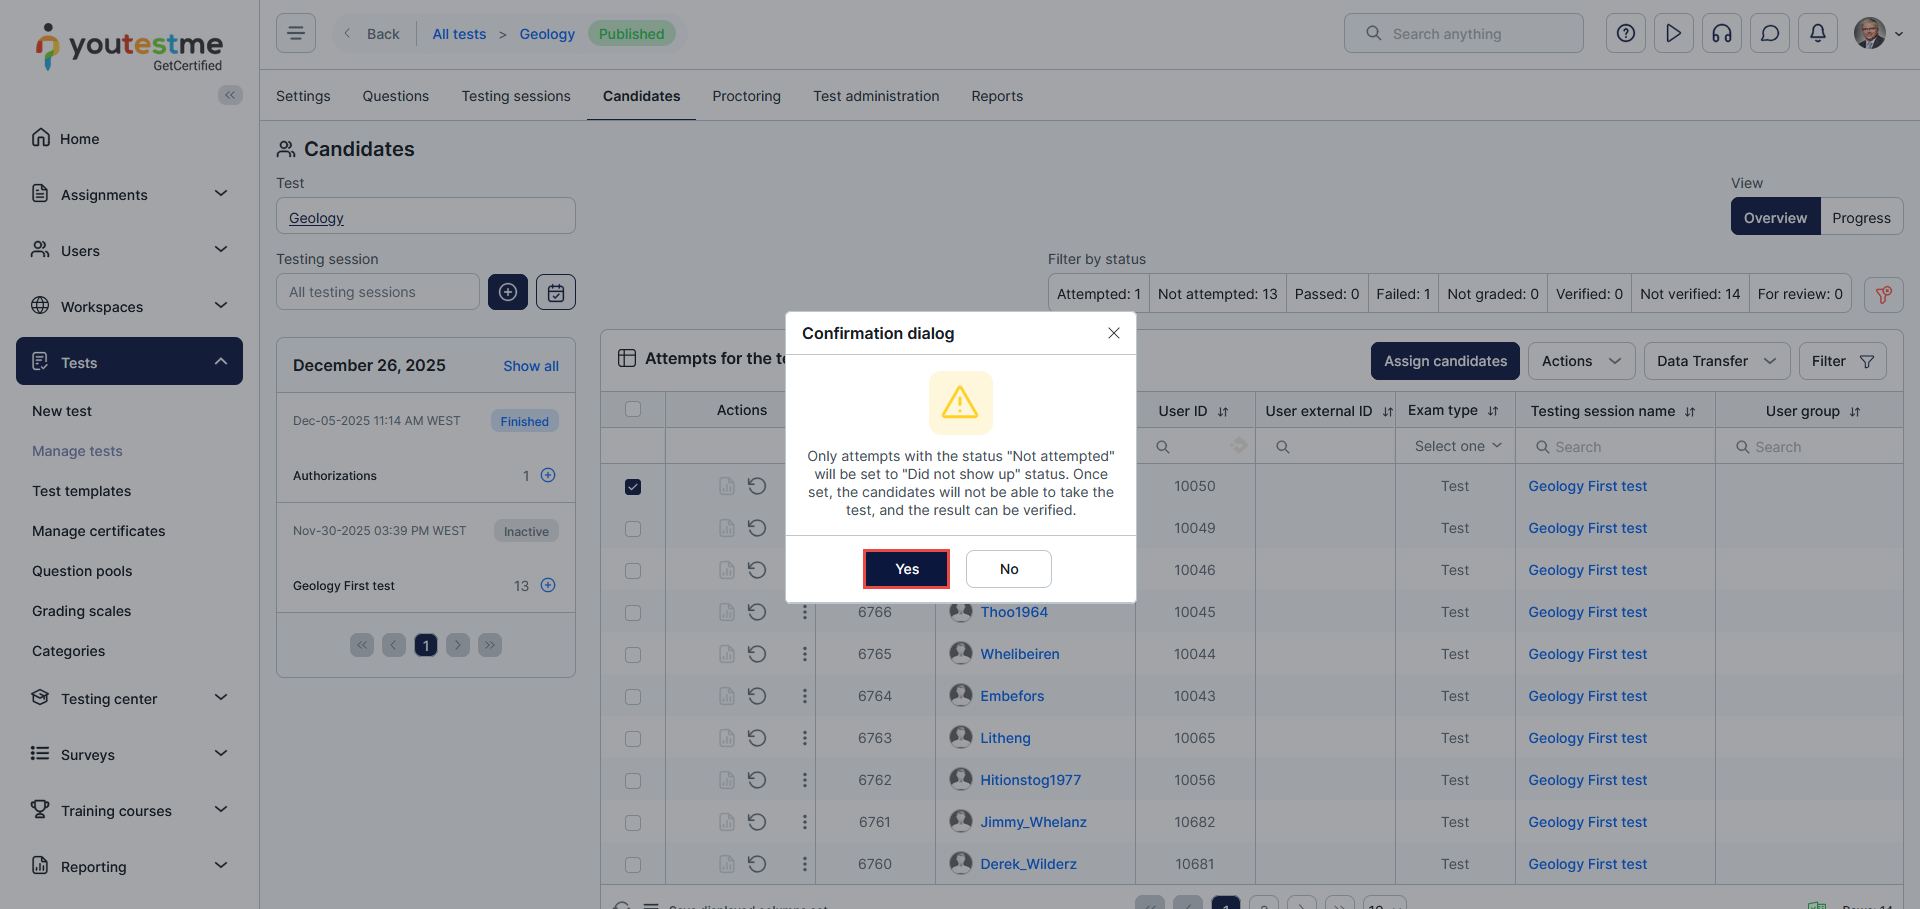
Note: Only attempts with the “Not attempted” status can be set to “Did not show up.”
After that, a confirmation dialogue will appear. Click the “Yes” button to confirm the status change.
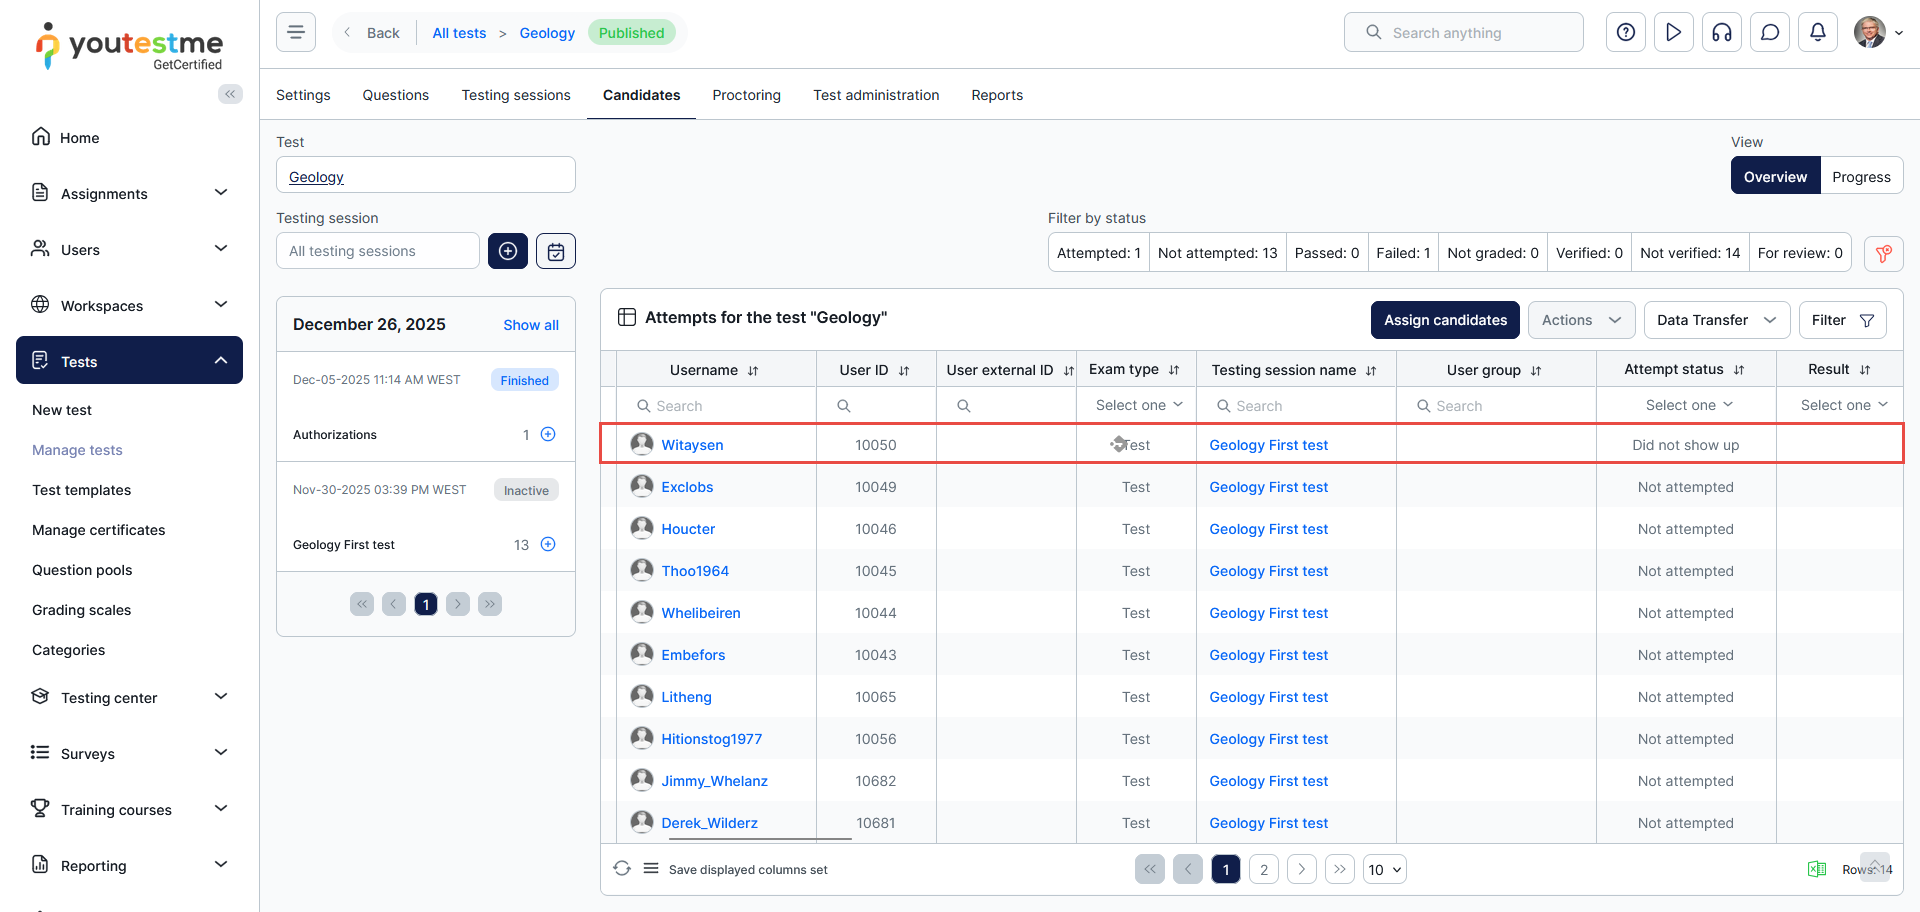
 Once you set the status to “Did not show up,” the candidates will not be able to take the test, and their results can be verified.
In the Candidates table, the status of selected candidates will be updated to “Did not show up.”
Candidate’s perspective
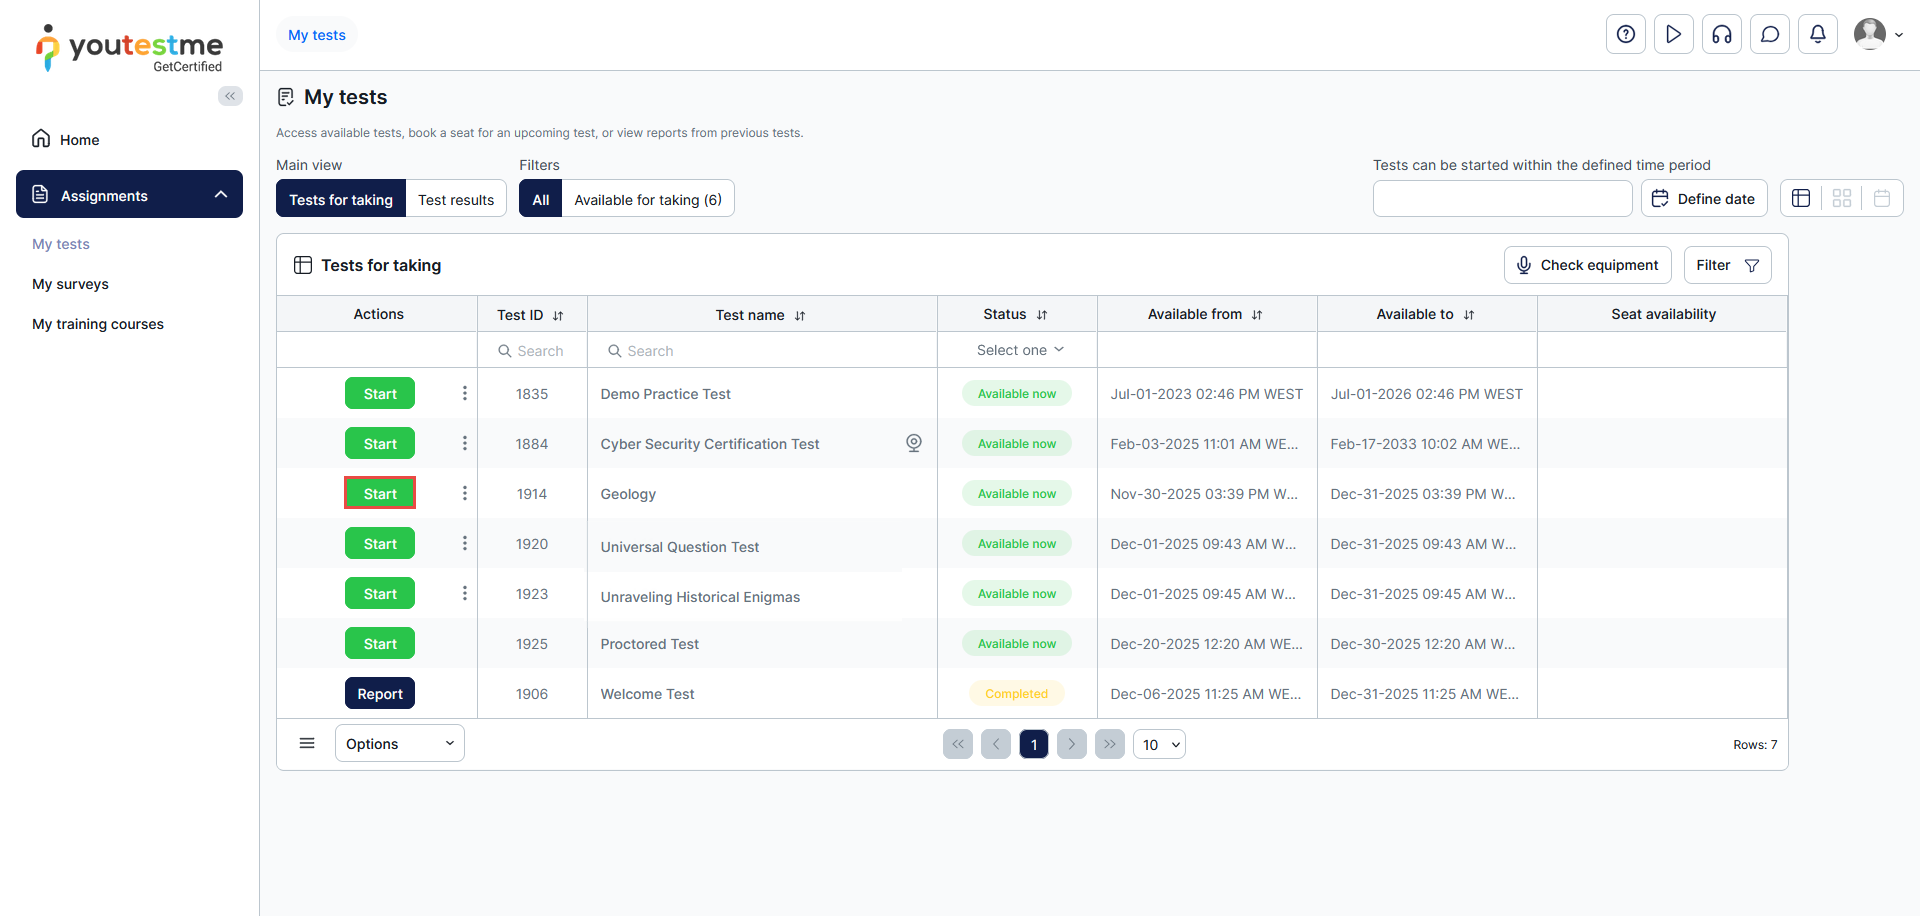
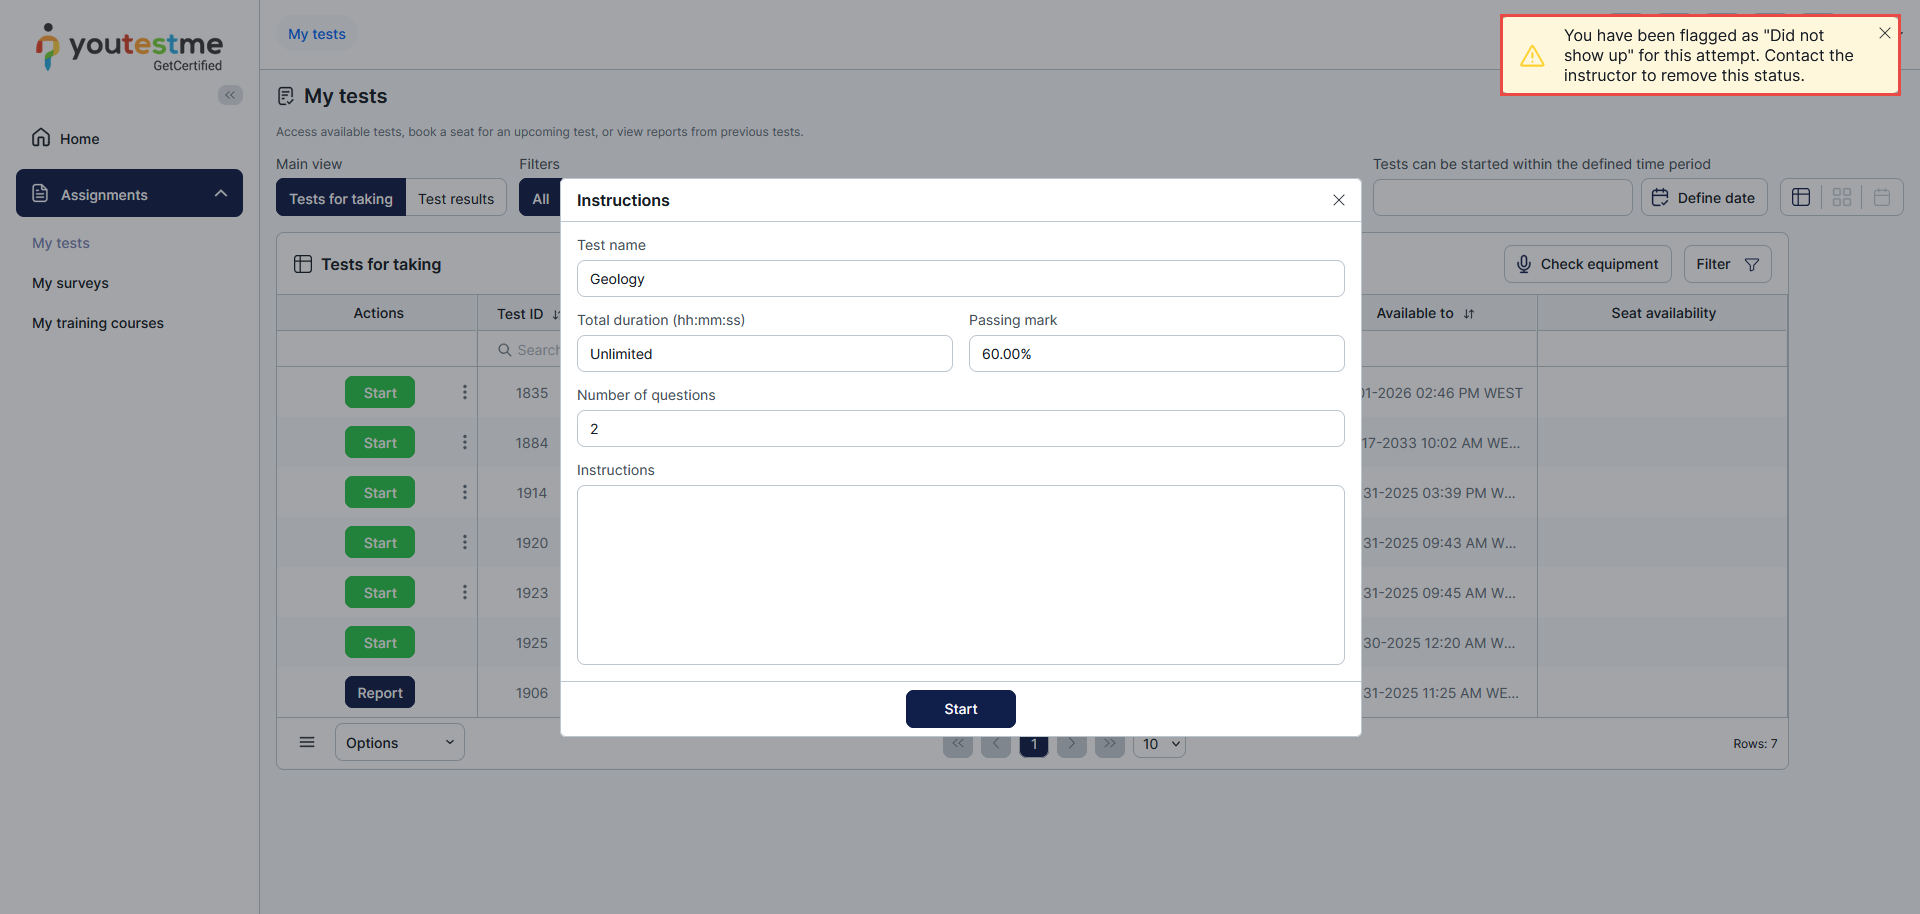
This is how it looks for the candidate who has the status “Did not show up.”
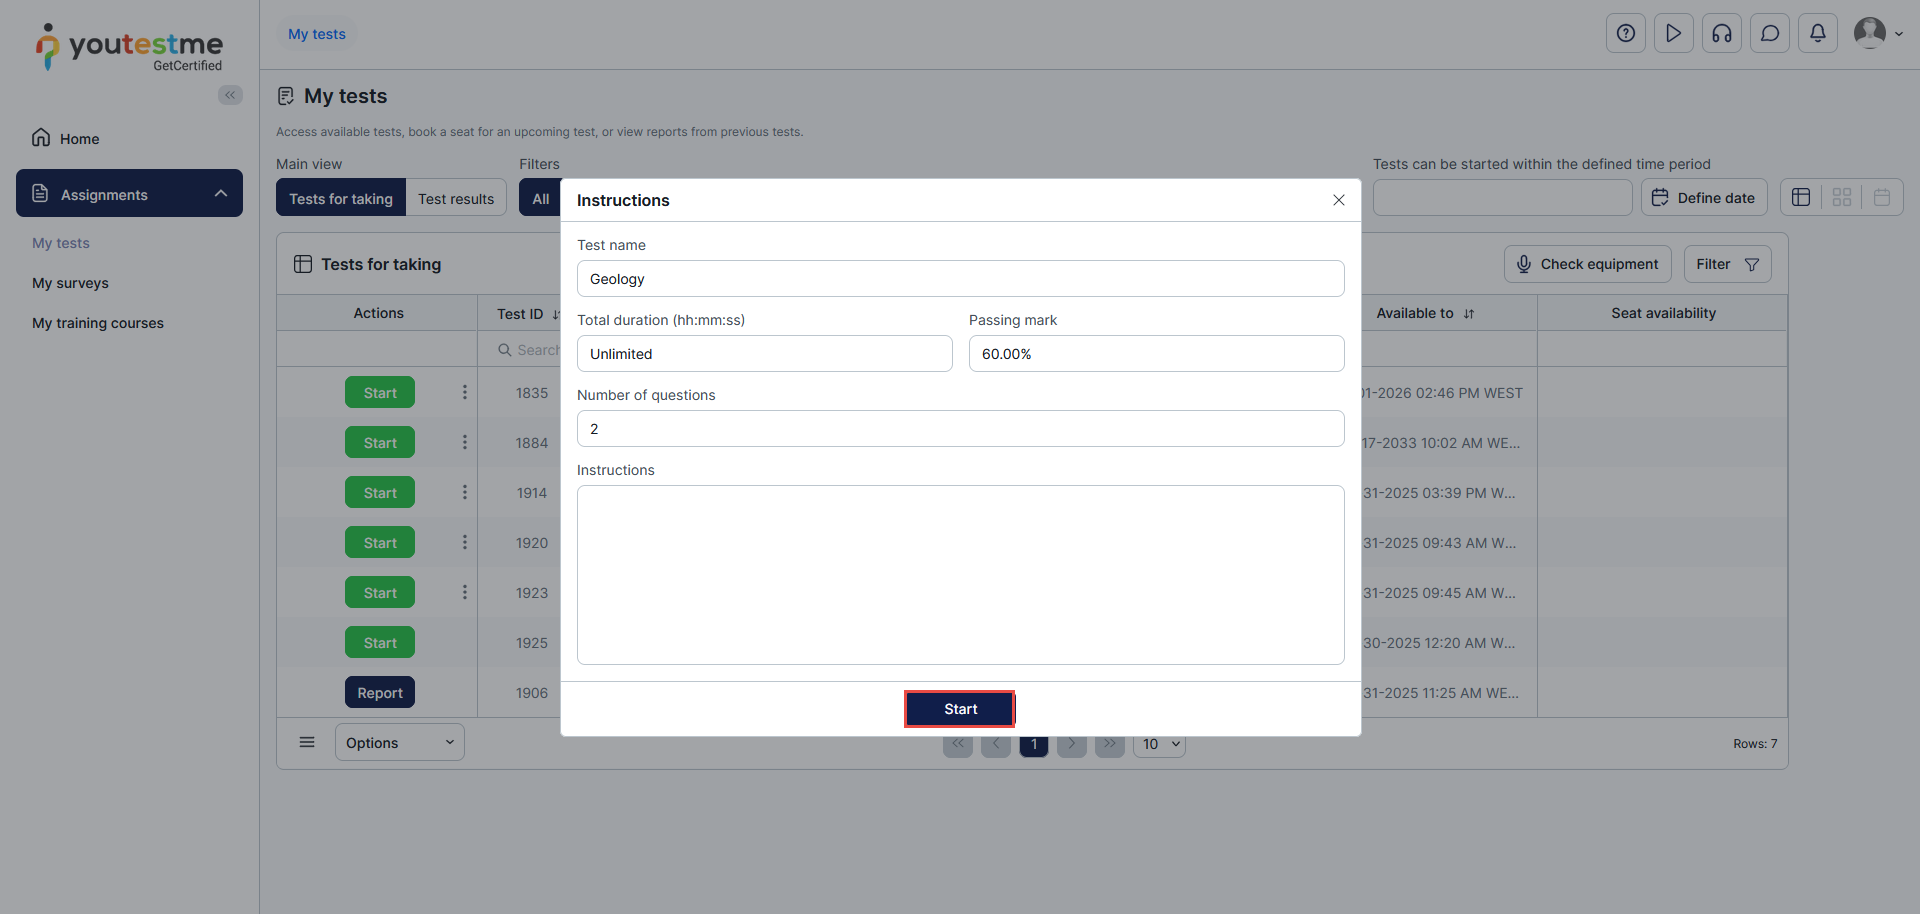
A candidate logs in to the application and chooses the test by clicking the Start button.
 A candidate acknowledges the test instructions and clicks on the “Start” button again.
 If a candidate did not show up for this test, a notification (displayed in the image below) will appear instructing them to contact the instructors.
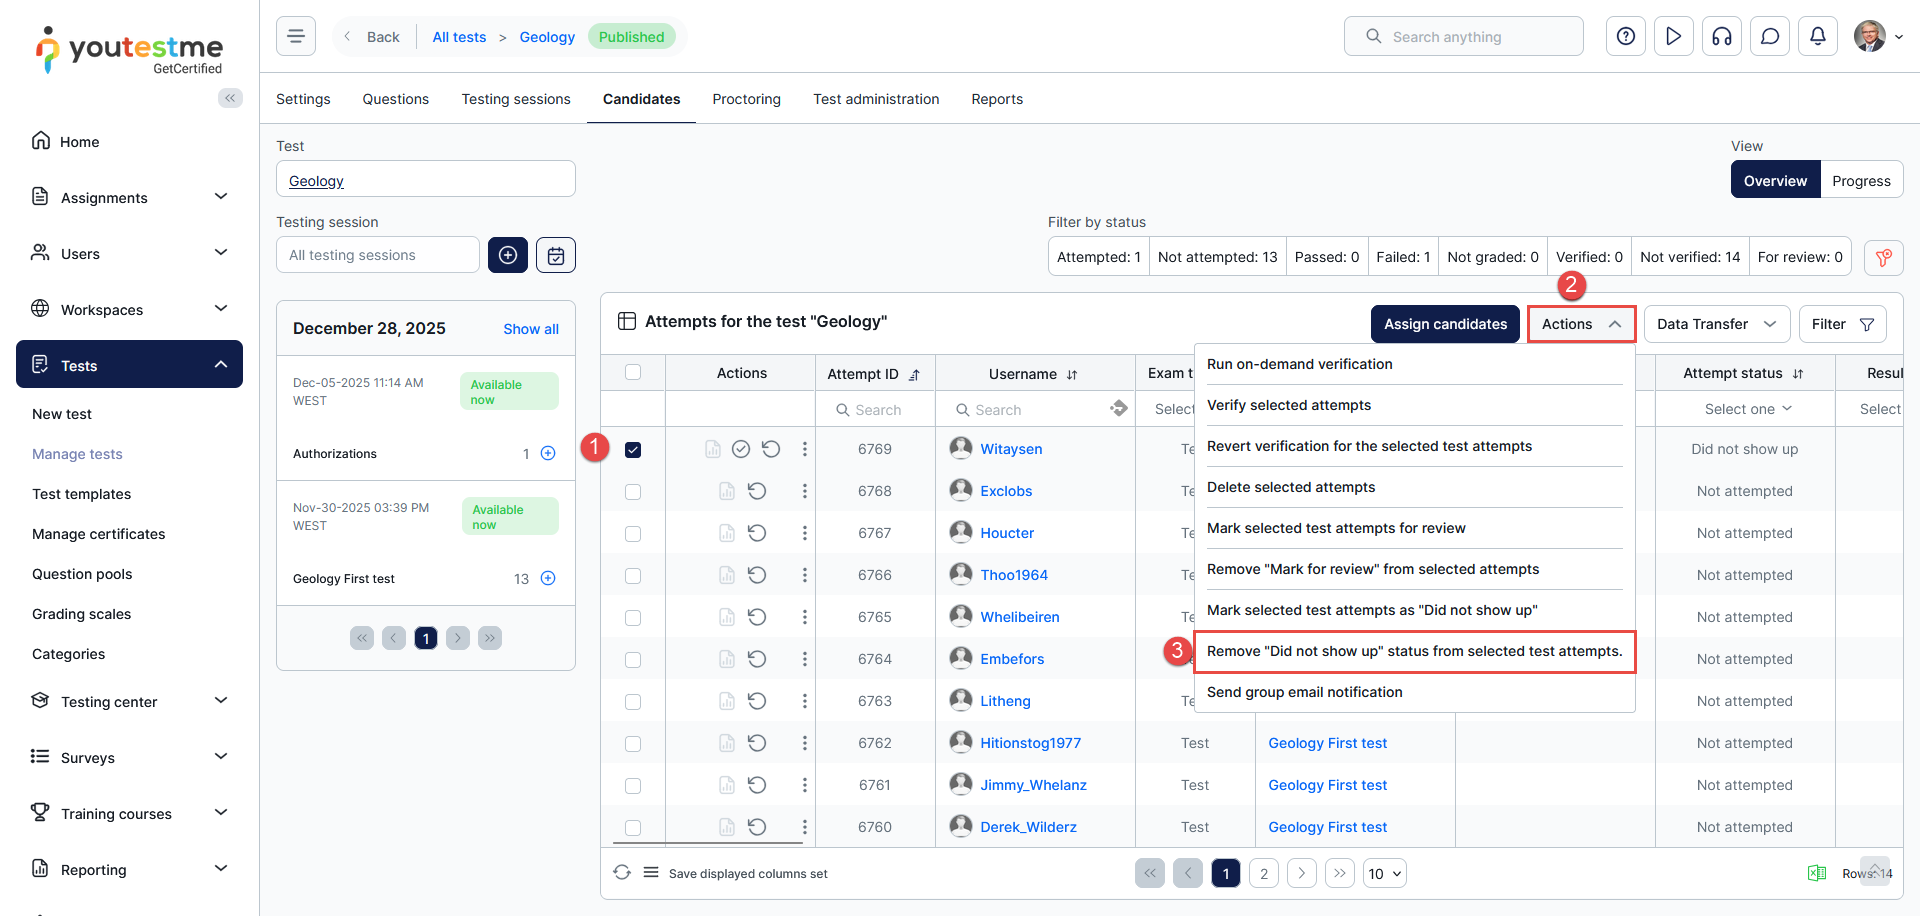
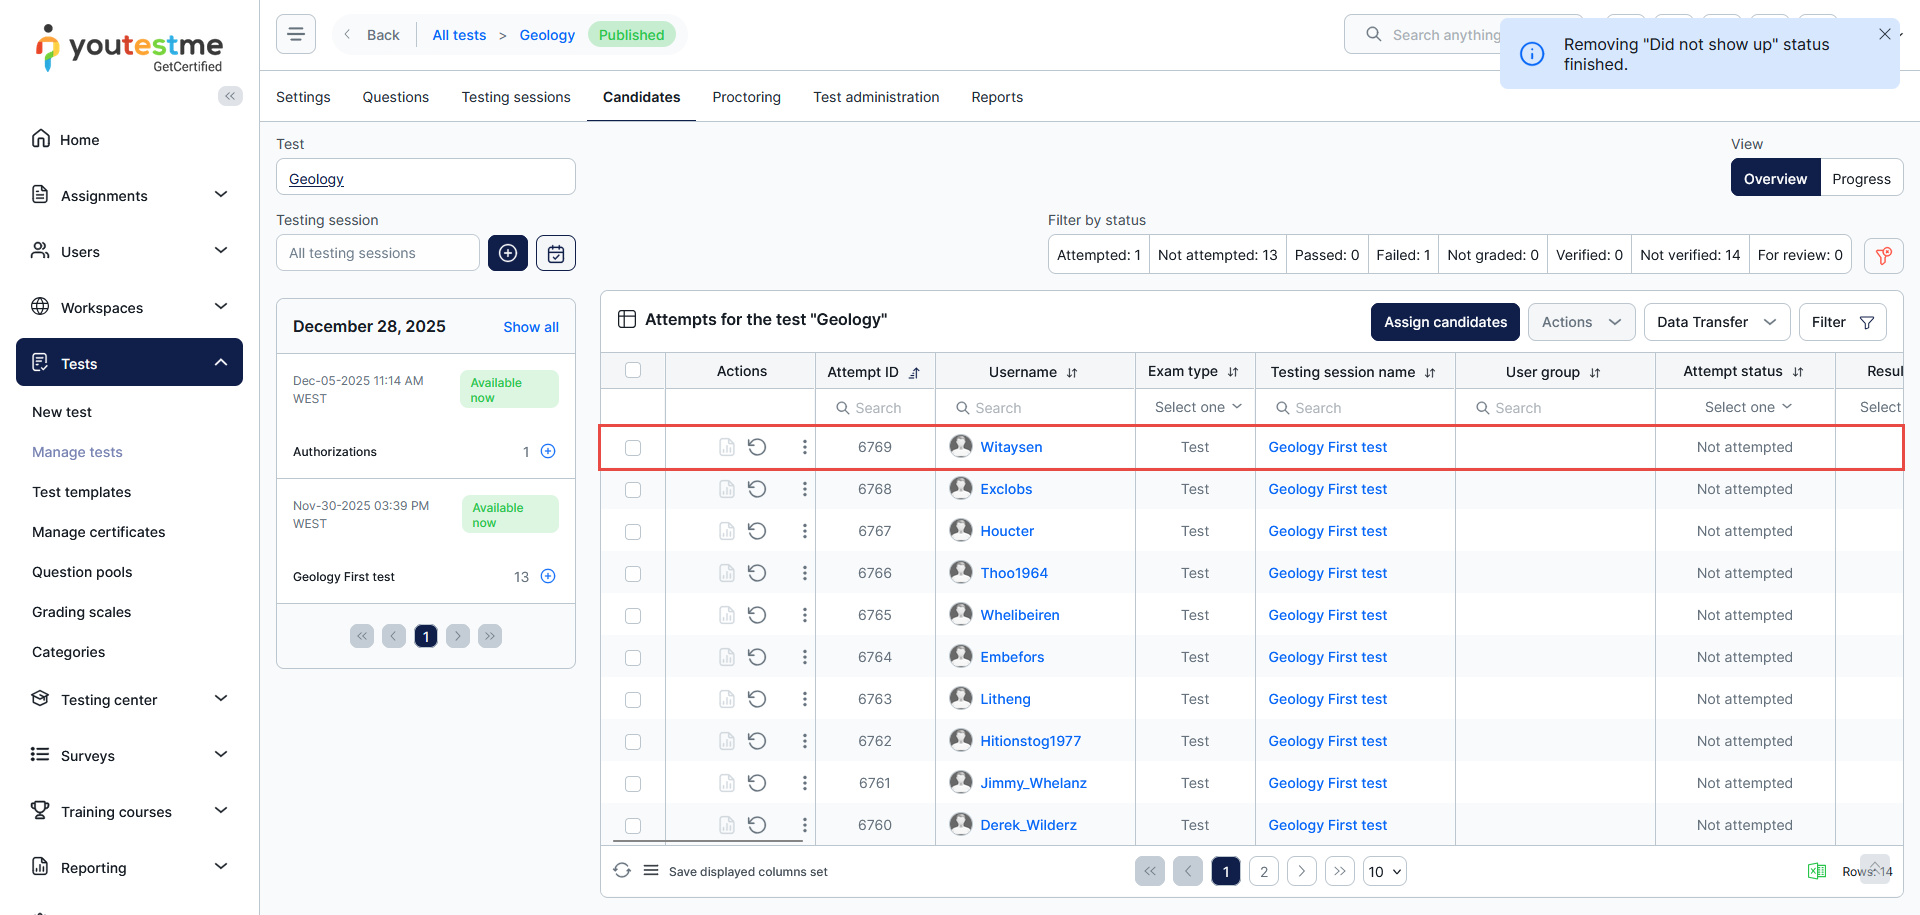
Removing the “Did not show up” status
If you want to remove the candidate’s status “Did not show up,” follow these steps:
- Select the desired candidate in the Candidate’s table.
- Click on the “Actions” button.
- Choose an option – Remove “Did not show up” status from selected candidates.

- After that, a confirmation dialogue will appear. Click the “Yes” button to confirm the status change.
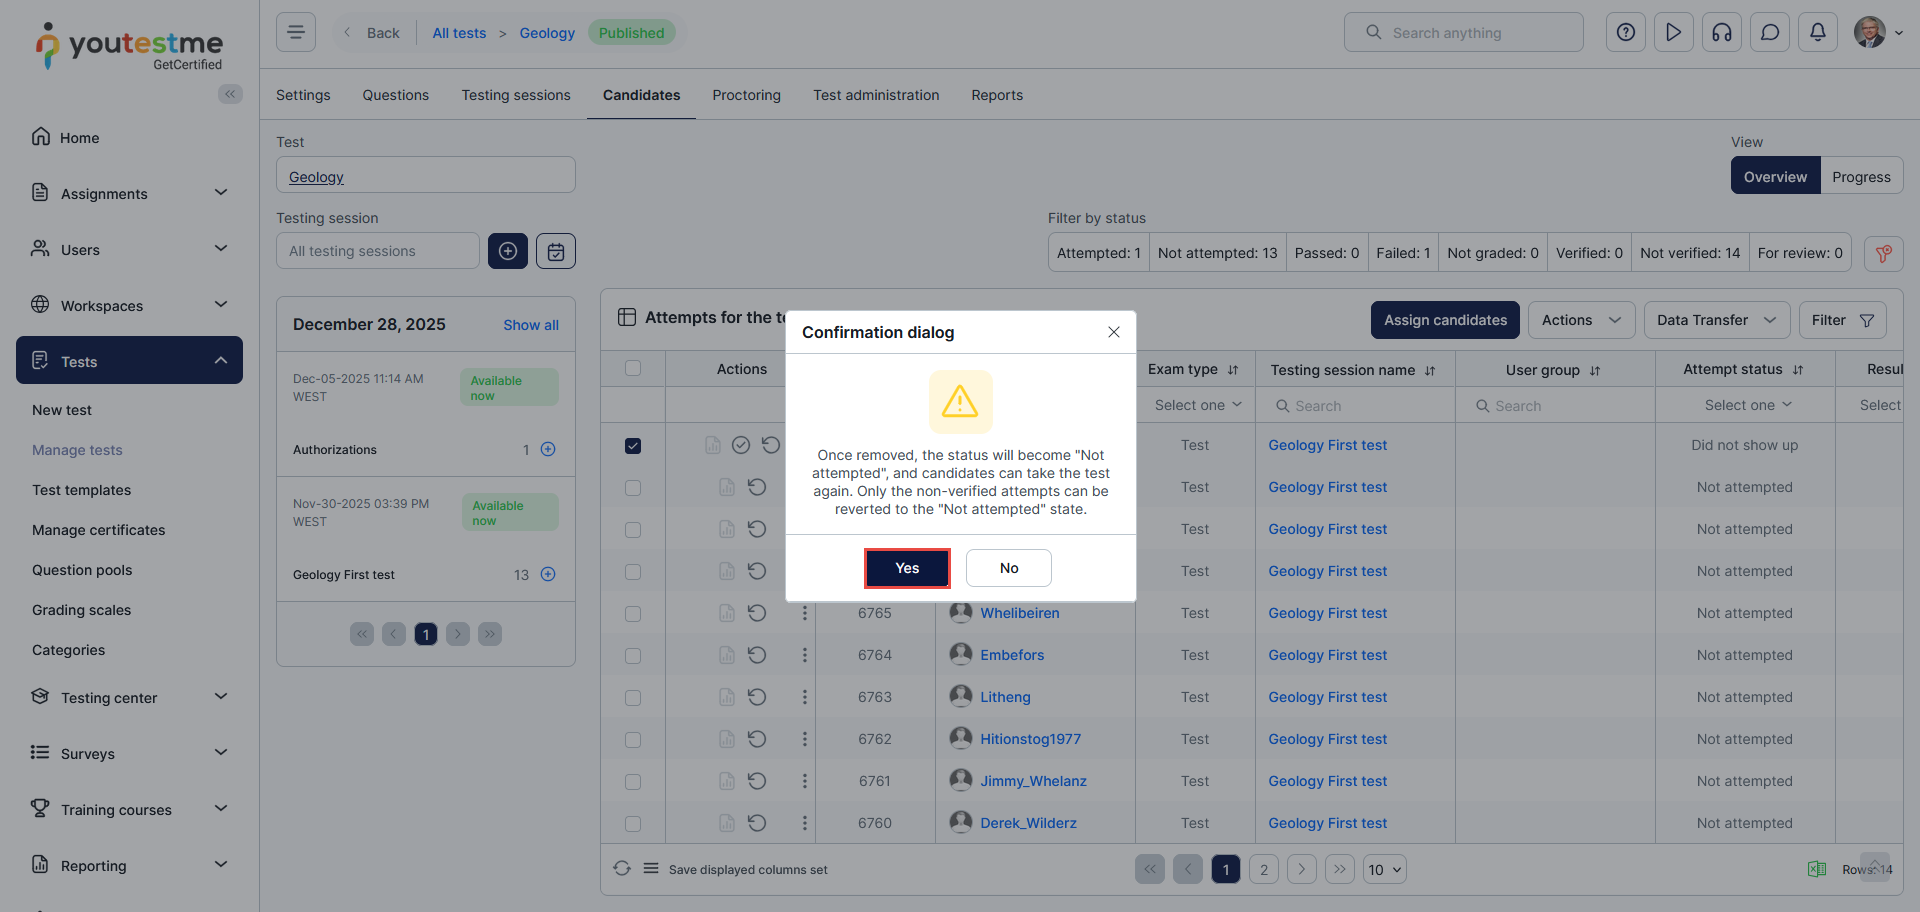 Once removed, the candidate’s status will become “Not attempted” again, and you can check that in the Candidate’s table.
Note: If you previously verified results for the candidate with ” Did not show up” status, you can’t remove the “Did not show up” status for that candidate. Only the non-verified attempts can be reverted to the “Not attempted” status.


