
This article explains how to enable or disable the calculator feature. When enabled, candidates gain access to a built-in calculator during their test, allowing them to perform calculations directly within the exam interface.
You can enable the calculator either from the test settings or during the test creation process.
Enabling the Calculator from the Test Settings
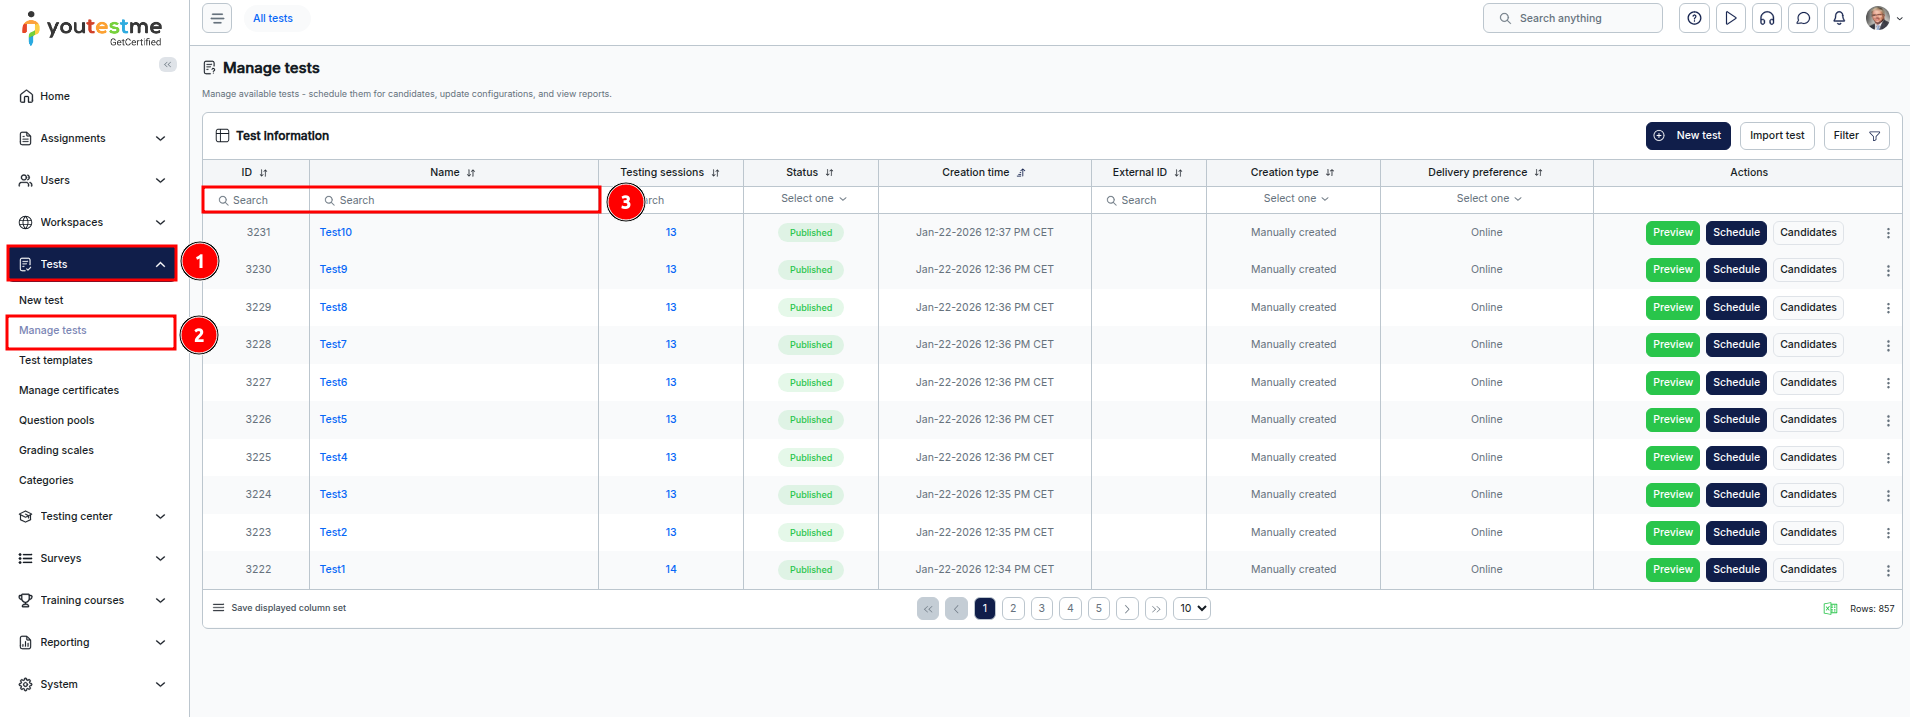
- Navigate to Tests
- Select Manage Tests.
- Search for and select the test for which you want to enable the calculator.
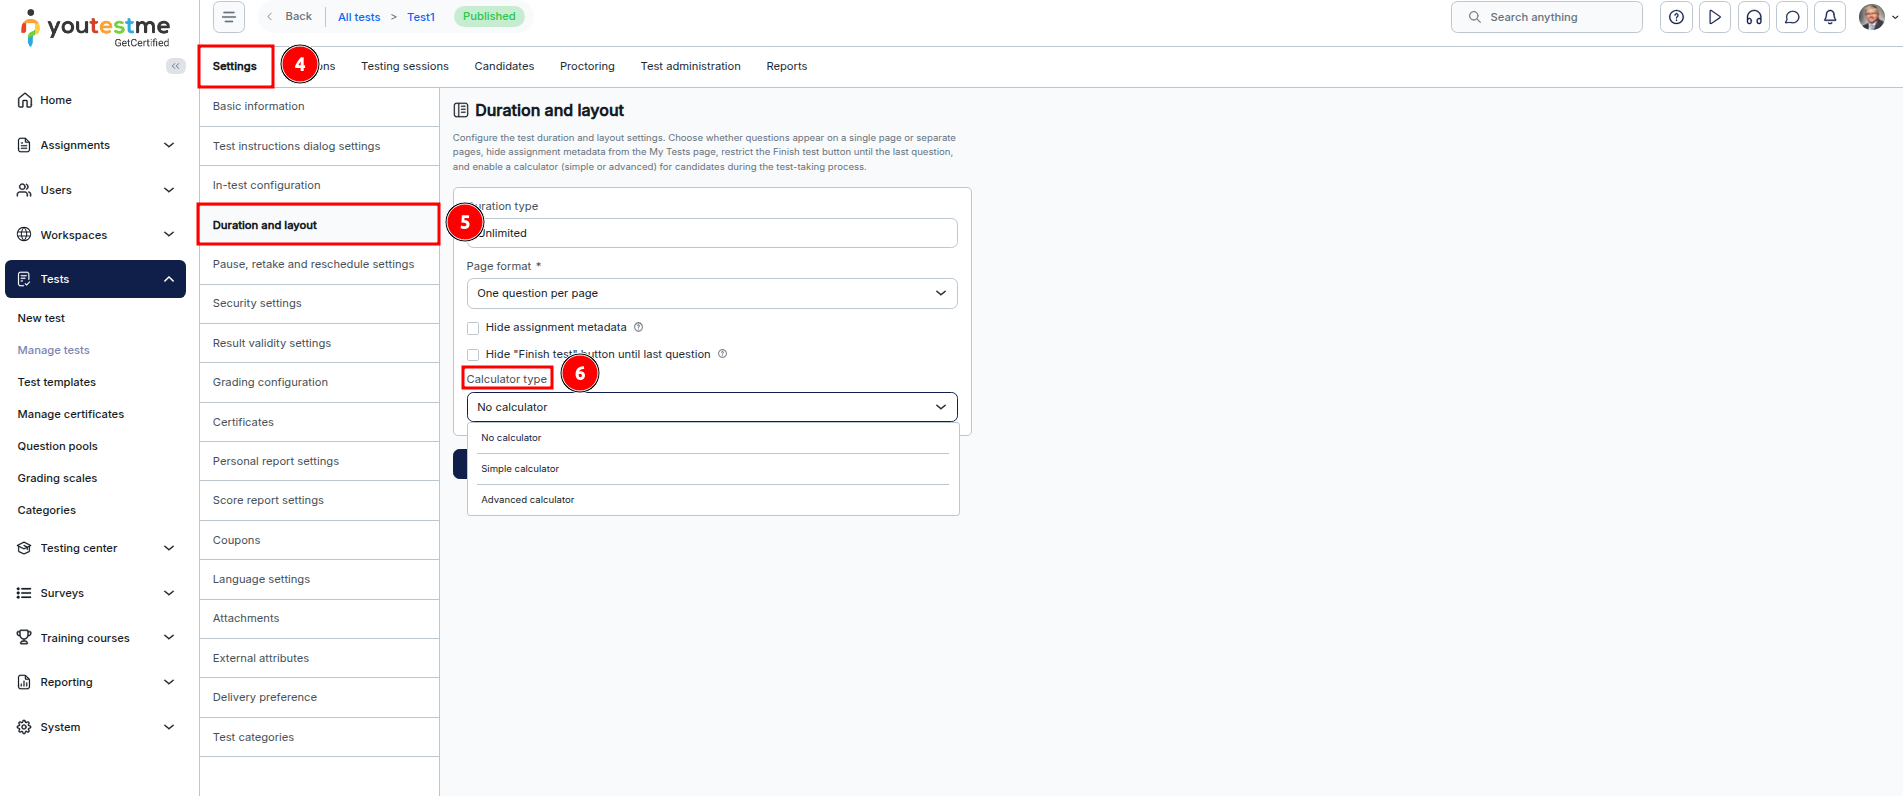
4. Go to the Settings section
5. Choose Duration and layout tab.
6. Locate the Calculator type setting.
From the dropdown menu, choose one of the following options:
-
- No calculator – if you do not want to allow calculator use during the exam.
- Simple calculator – To provide candidates with a basic arithmetic calculator.
- Advanced calculator – To provide candidates with a scientific calculator.
Click Save to apply the changes.
Note: For more details on the different calculator types and how candidates can use them during the exam, please refer to this article.
Enabling the Calculator During the Test Creation
You can enable the calculator and choose its type while creating a test using the test wizard. To do so:
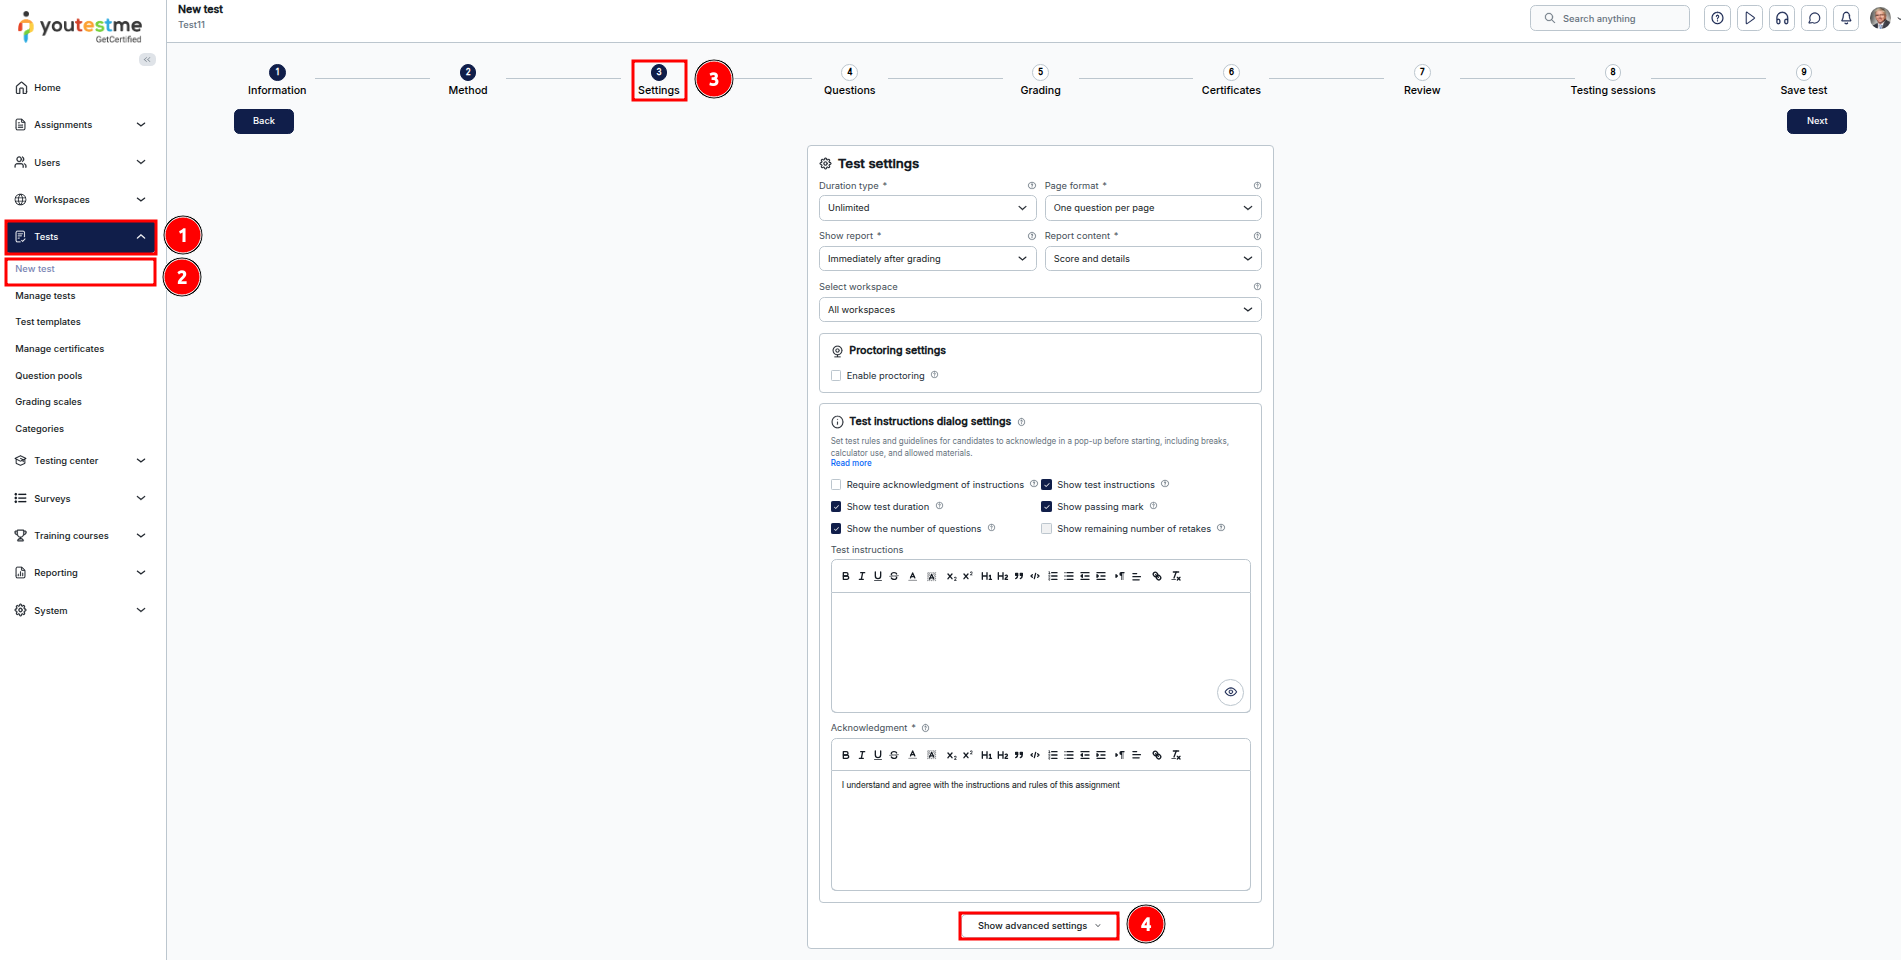
- Go to Test section
- Select New test
- Reach the Step 3 of the test wizard
- Click on Show advanced settings.
5. Scroll down to the Calculator Type section.
Select the desired calculator option from the dropdown menu:
-
- No calculator
- Simple calculator
- Advanced calculator
- No calculator
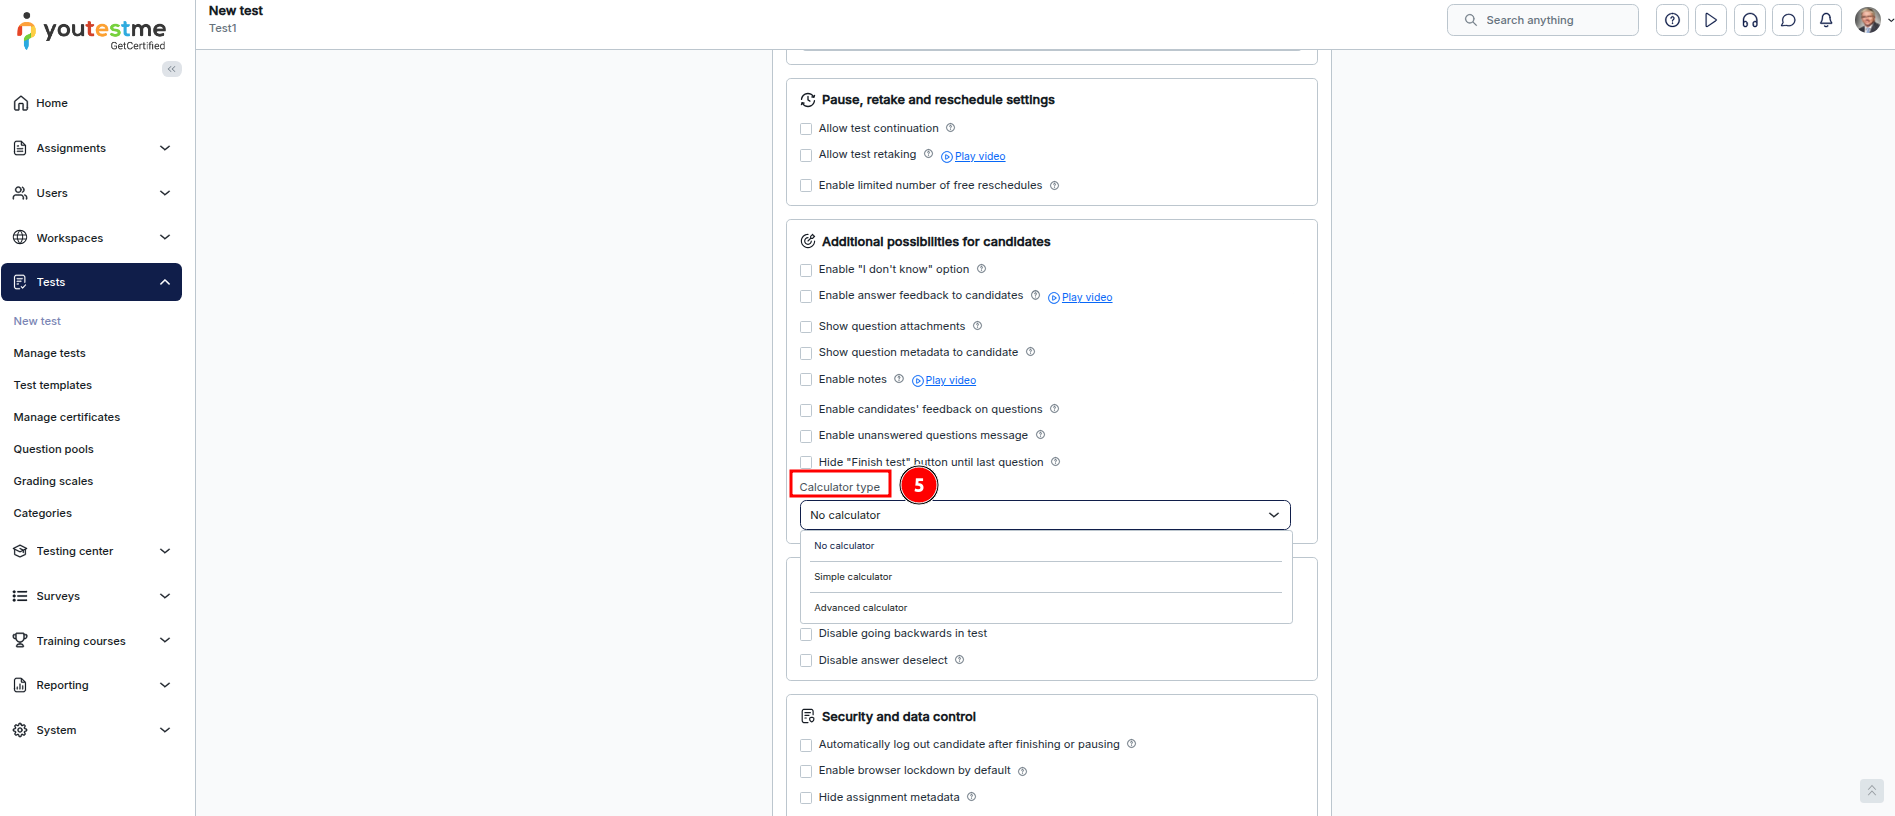
Once selected, the chosen calculator will be available to candidates during the test.
For more related instructional material, please visit:
