Article verified for Release 15.0 on September 9, 2025.
This article explains the proctor’s role during live monitored exams and how to effectively conduct a live proctored exam using the YouTestMe platform. It covers tasks such as monitoring candidates, verifying compliance, managing exam sessions, and handling incidents during the exam.
What is a Live Monitored Exam?
A live proctored exam is an assessment monitored remotely in real time by a human proctor. Before the exam begins, candidates must complete an Equipment Check, which ensures their system, identity, and environment meet the exam requirements. During this check, candidates:
- Grant access to their camera and microphone.
- Share their screen.
- Verify their identity by uploading or taking a photo of a government-issued ID.
- Optionally record a short video showing their exam environment.
Once the Equipment Check is complete, candidates wait in the exam room while the proctor reviews their compliance and grants approval to start the exam. The proctor can communicate with candidates through tools such as a microphone, chat, or camera to address issues, answer questions, or enforce exam rules.
Note: Equipment Check steps are predefined by the exam administrator.
For more information on creating a proctored exam, please refer to this article.
Pausing the Exam Session
Before candidates can start the exam, the proctor must pause the session and enter a welcome message. Pausing ensures that no candidate can begin the exam until the proctor verifies their ID and confirms compliance with the exam conditions. After verification, the proctor can resume the exam individually for each candidate.
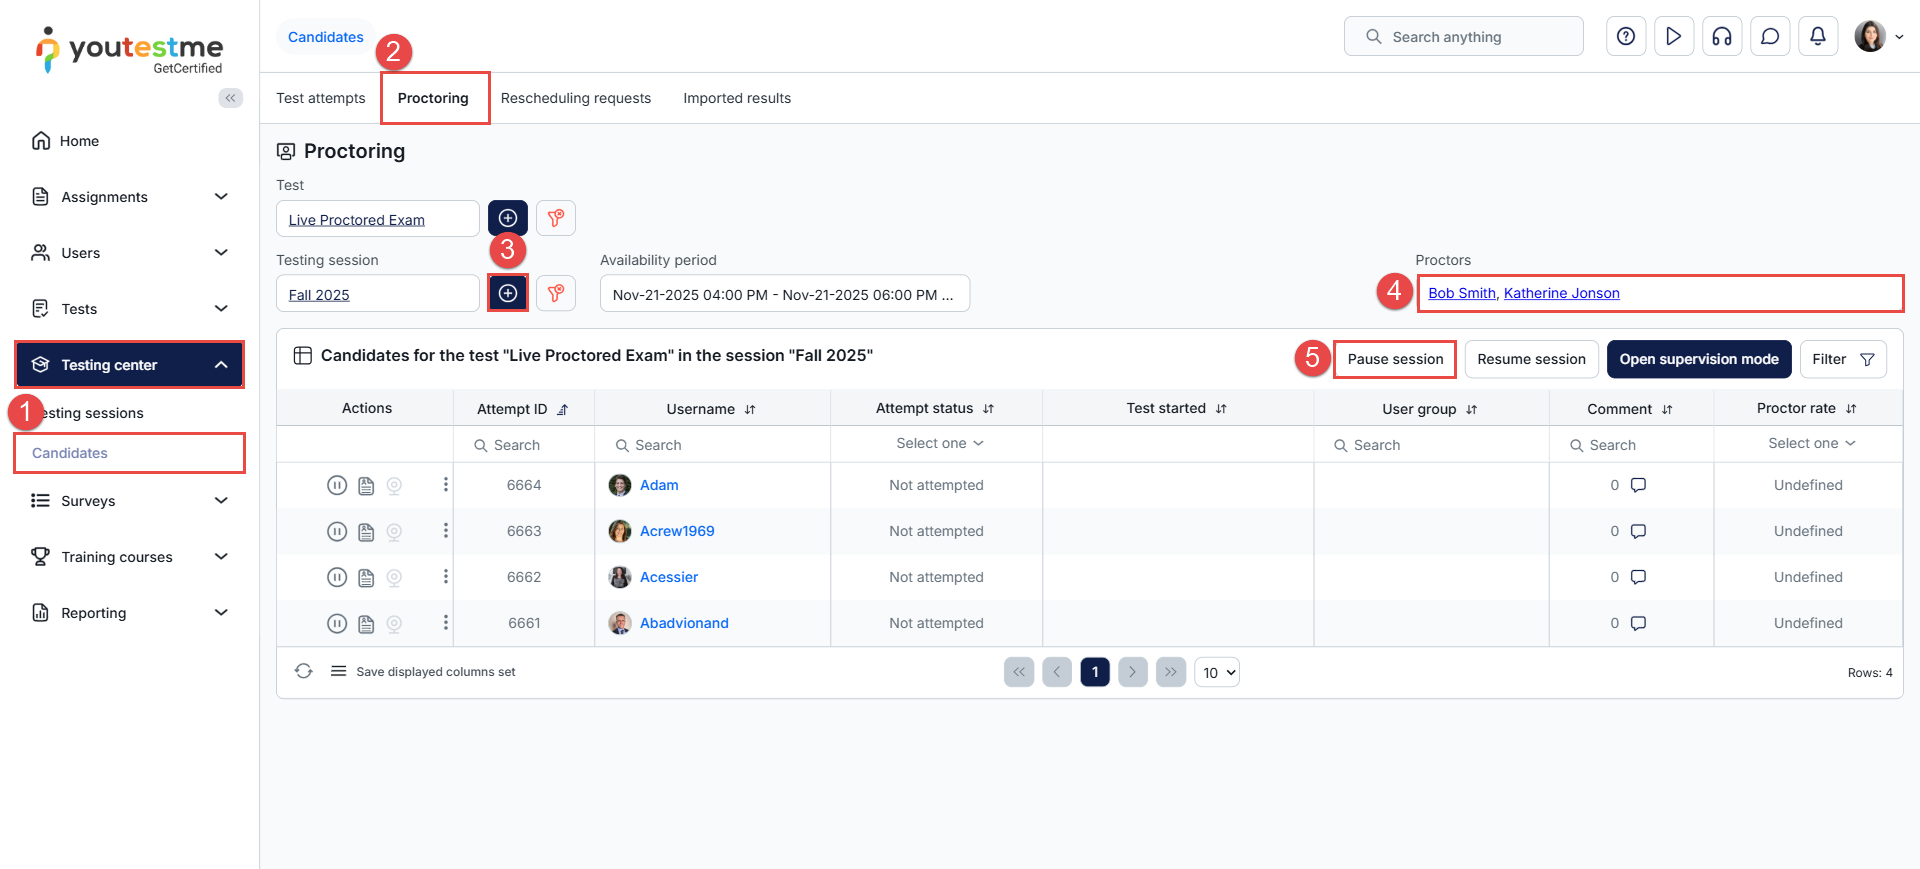
To pause the exam session:
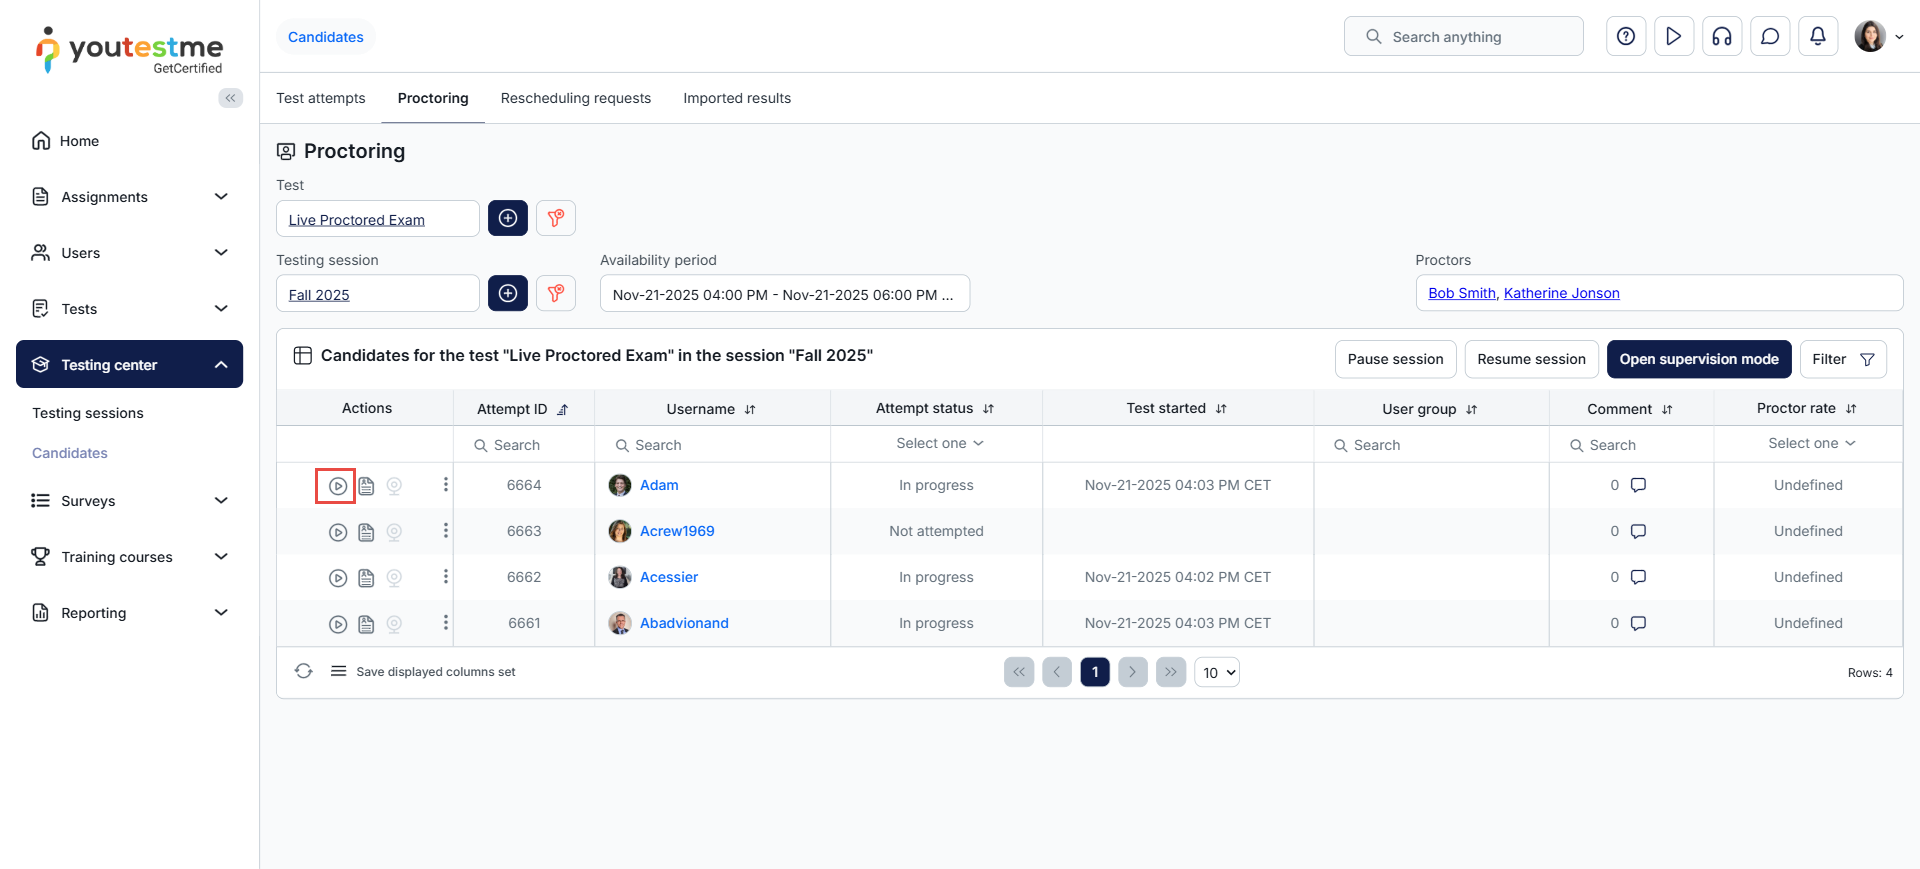
- Navigate to the Testing Center from the main menu and select the Candidates tab.
- Go to the Proctoring tab.
- Choose the proctored test and the testing session to filter the candidates’ list.
- Review and verify the assigned proctors in the Proctors section.
- Click the Pause Session button and enter the welcome message.
To write the pause message:
- Insert the desired pause message in the provided text field.
- Click Pause to save and activate the message.
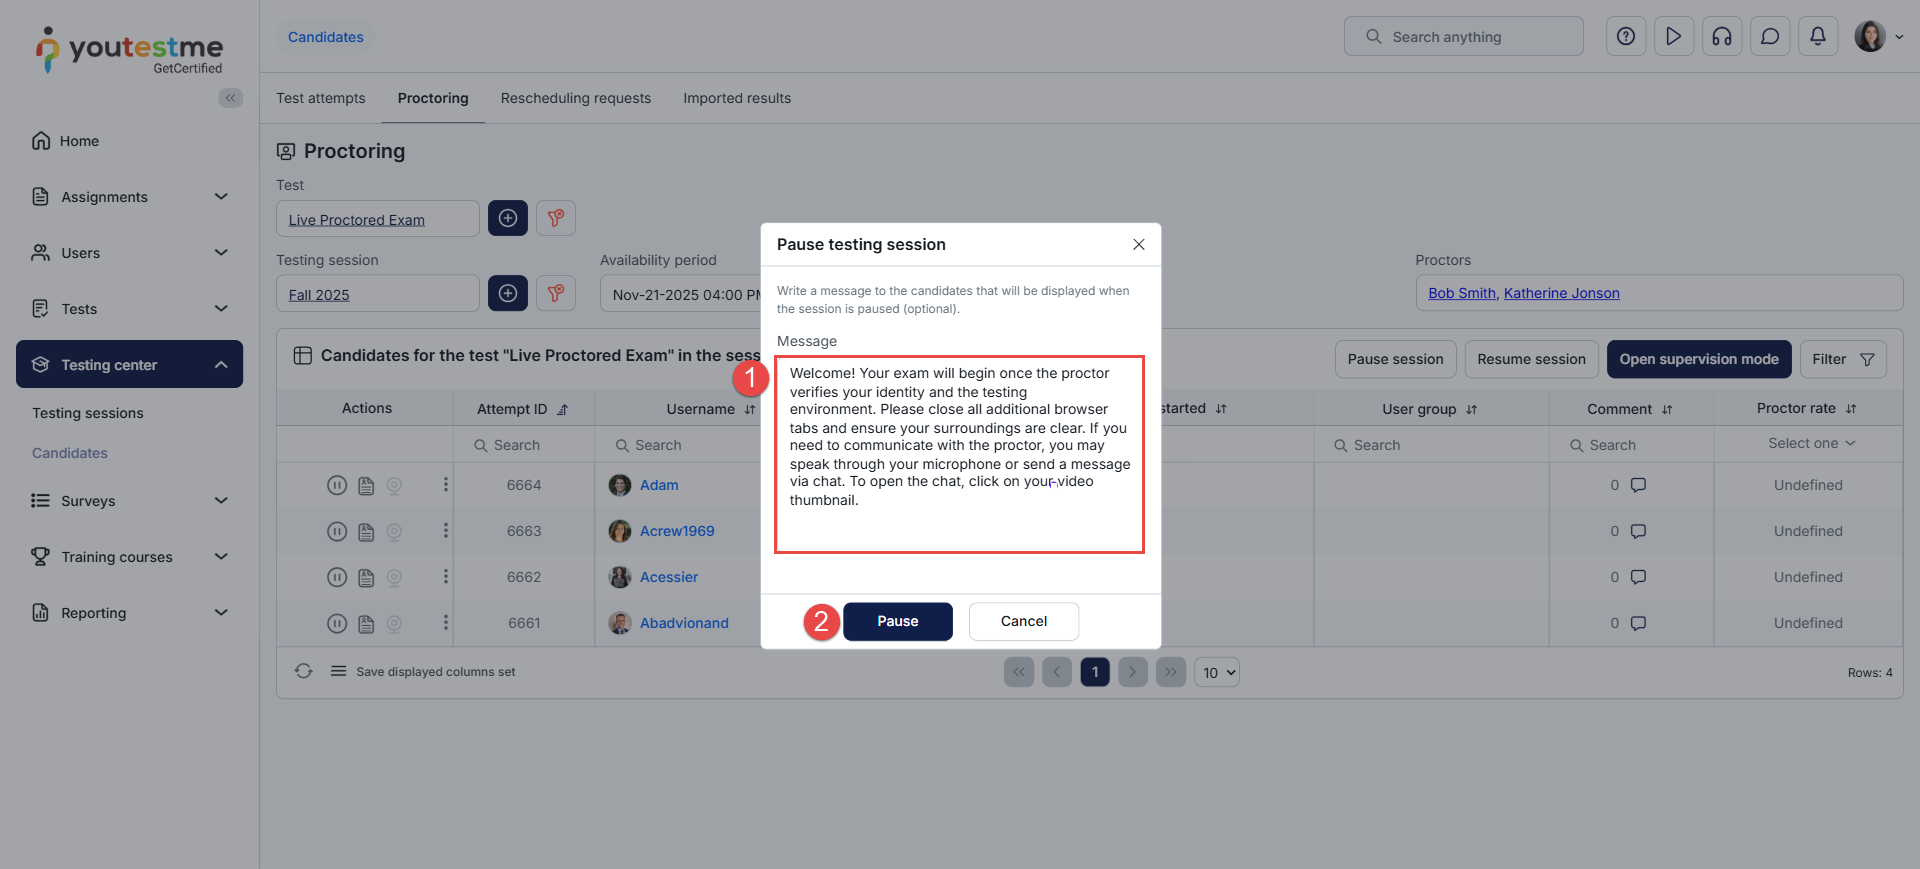
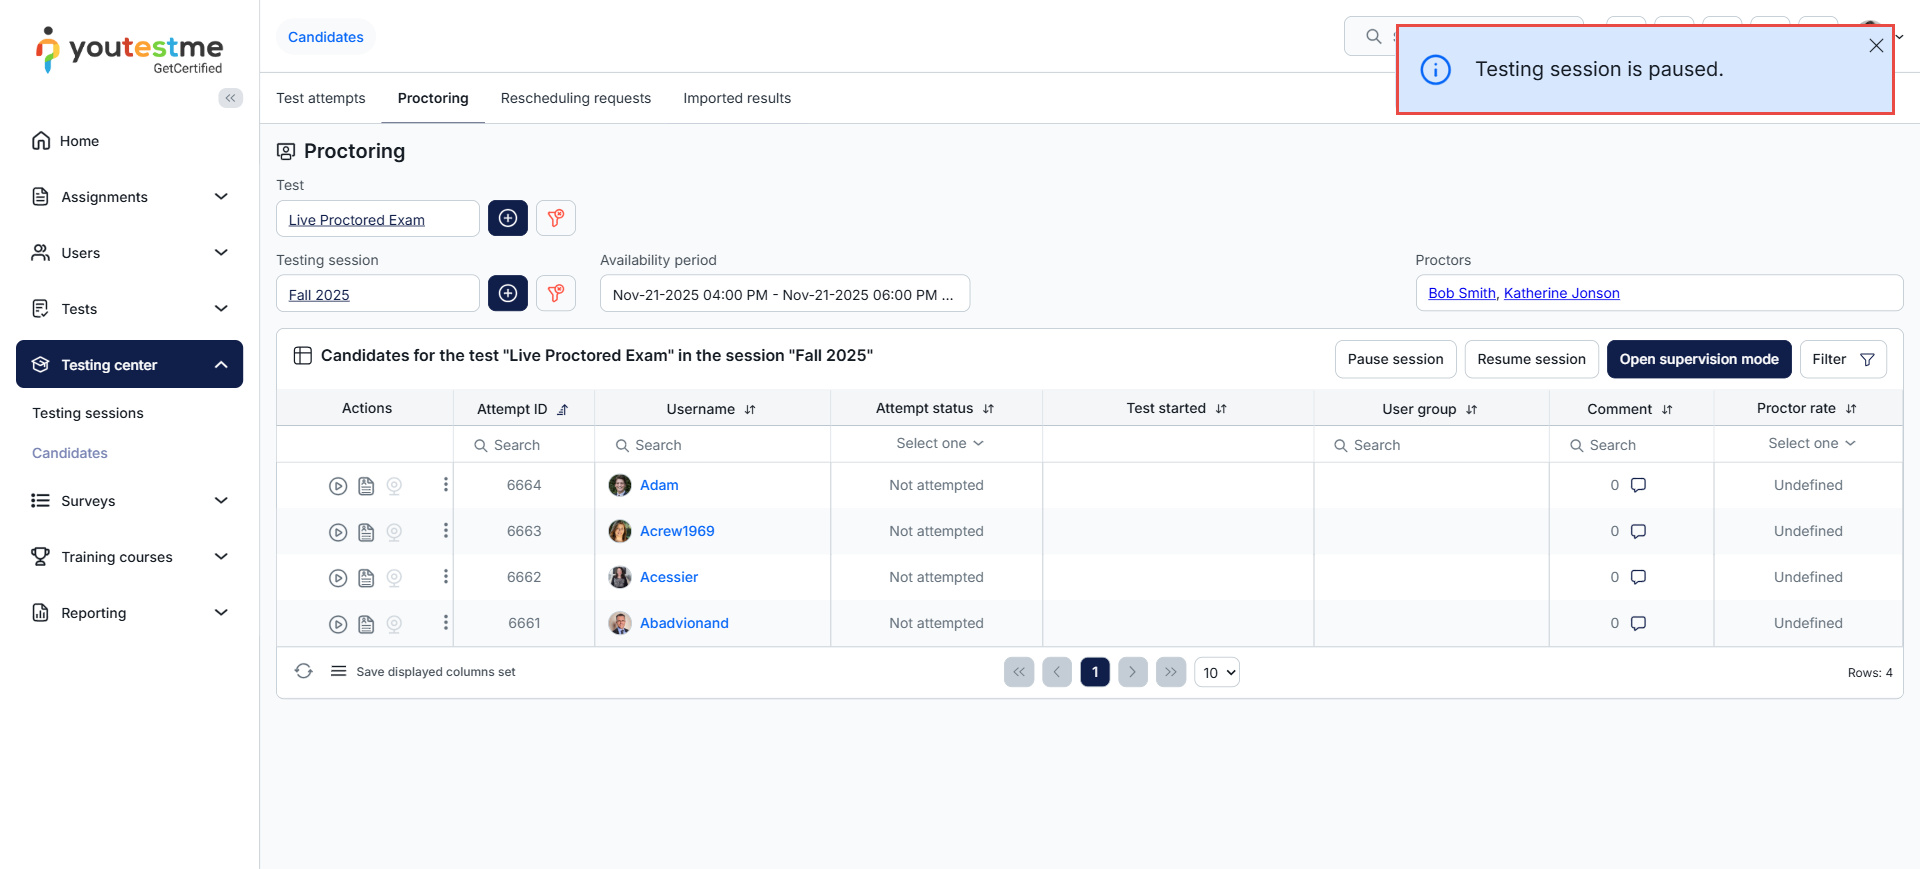
The session will be automatically paused for all candidates.
Note: The session should be paused before it becomes available, and once all candidates scheduled to take the exam during that session have fully booked their spots.
Verifying Candidate Identity and Compliance with Exam Preconditions
When the exam session begins, candidates should click the Start button to initiate the Equipment Check and join the exam room.
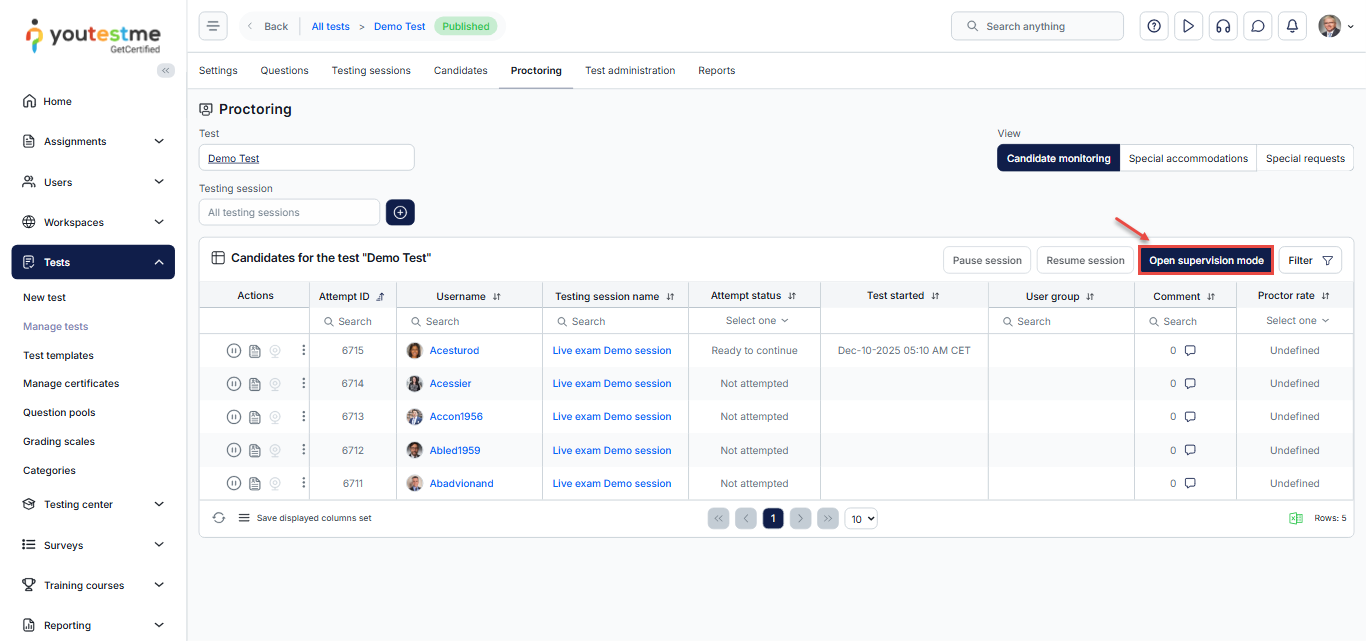
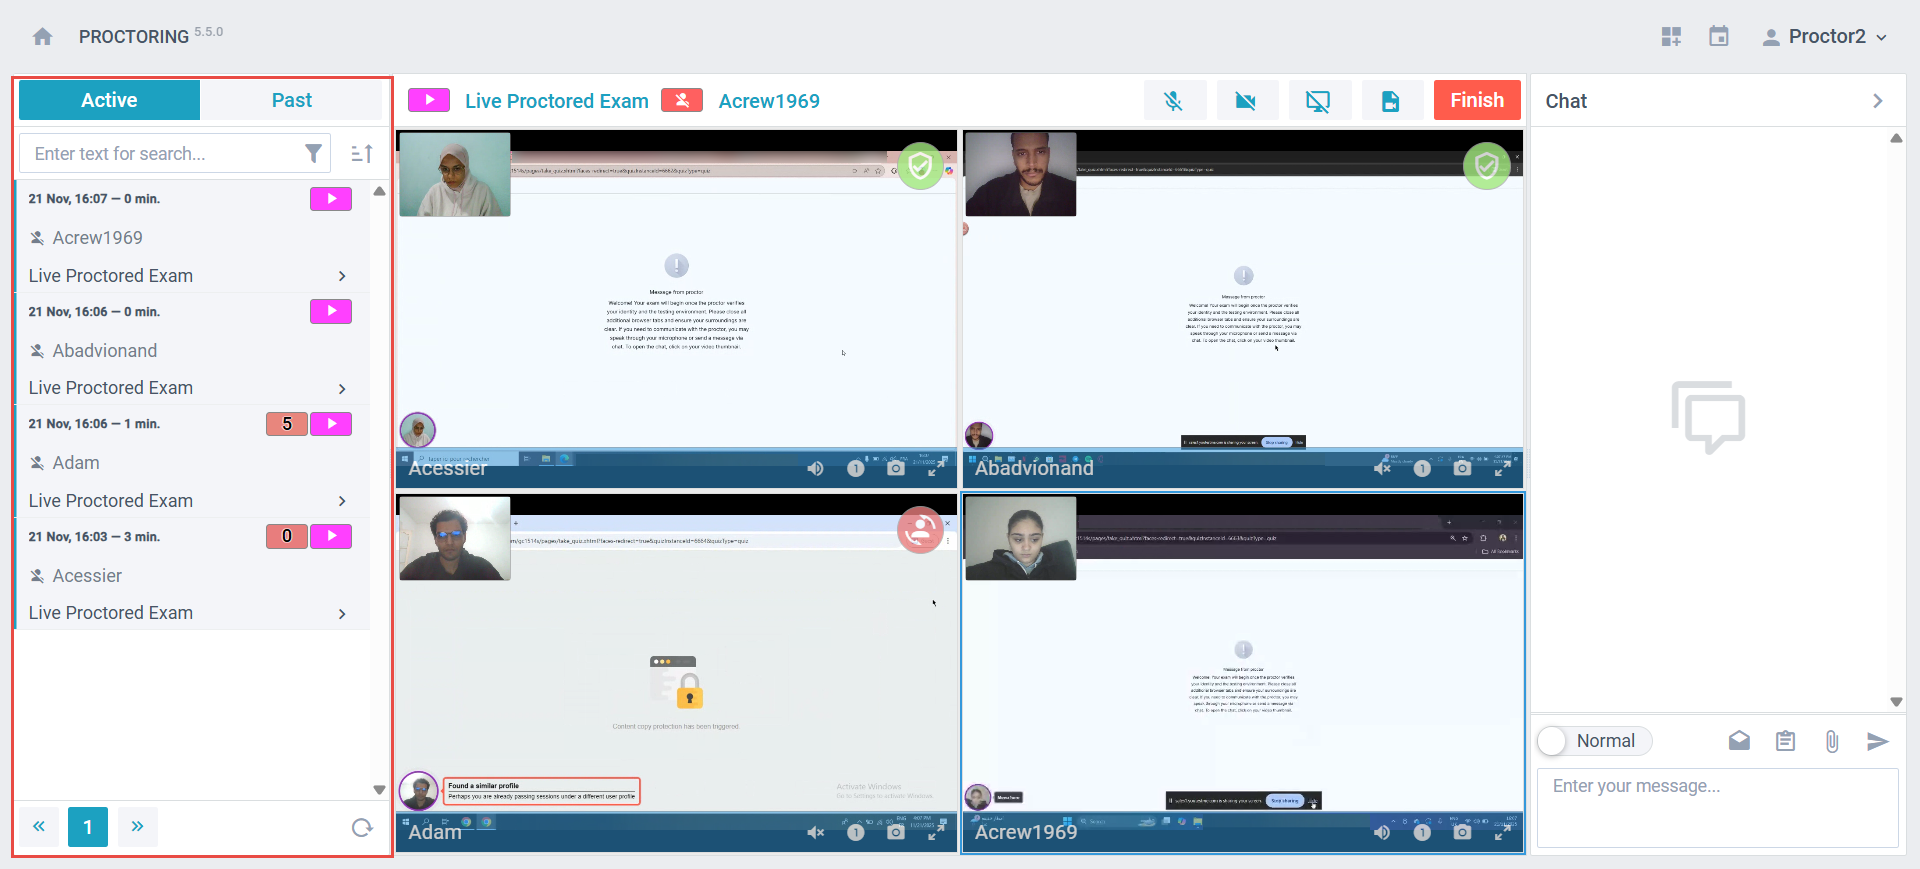
The proctor should join the exam room by clicking the “Open Supervision mode” button.
The proctor will be redirected to the exam room interface, where they can see the list of candidates joining the session on the left side of the screen. To display all candidates who have joined, the proctor should hold the Ctrl key and click each candidate’s username to add them to the view.
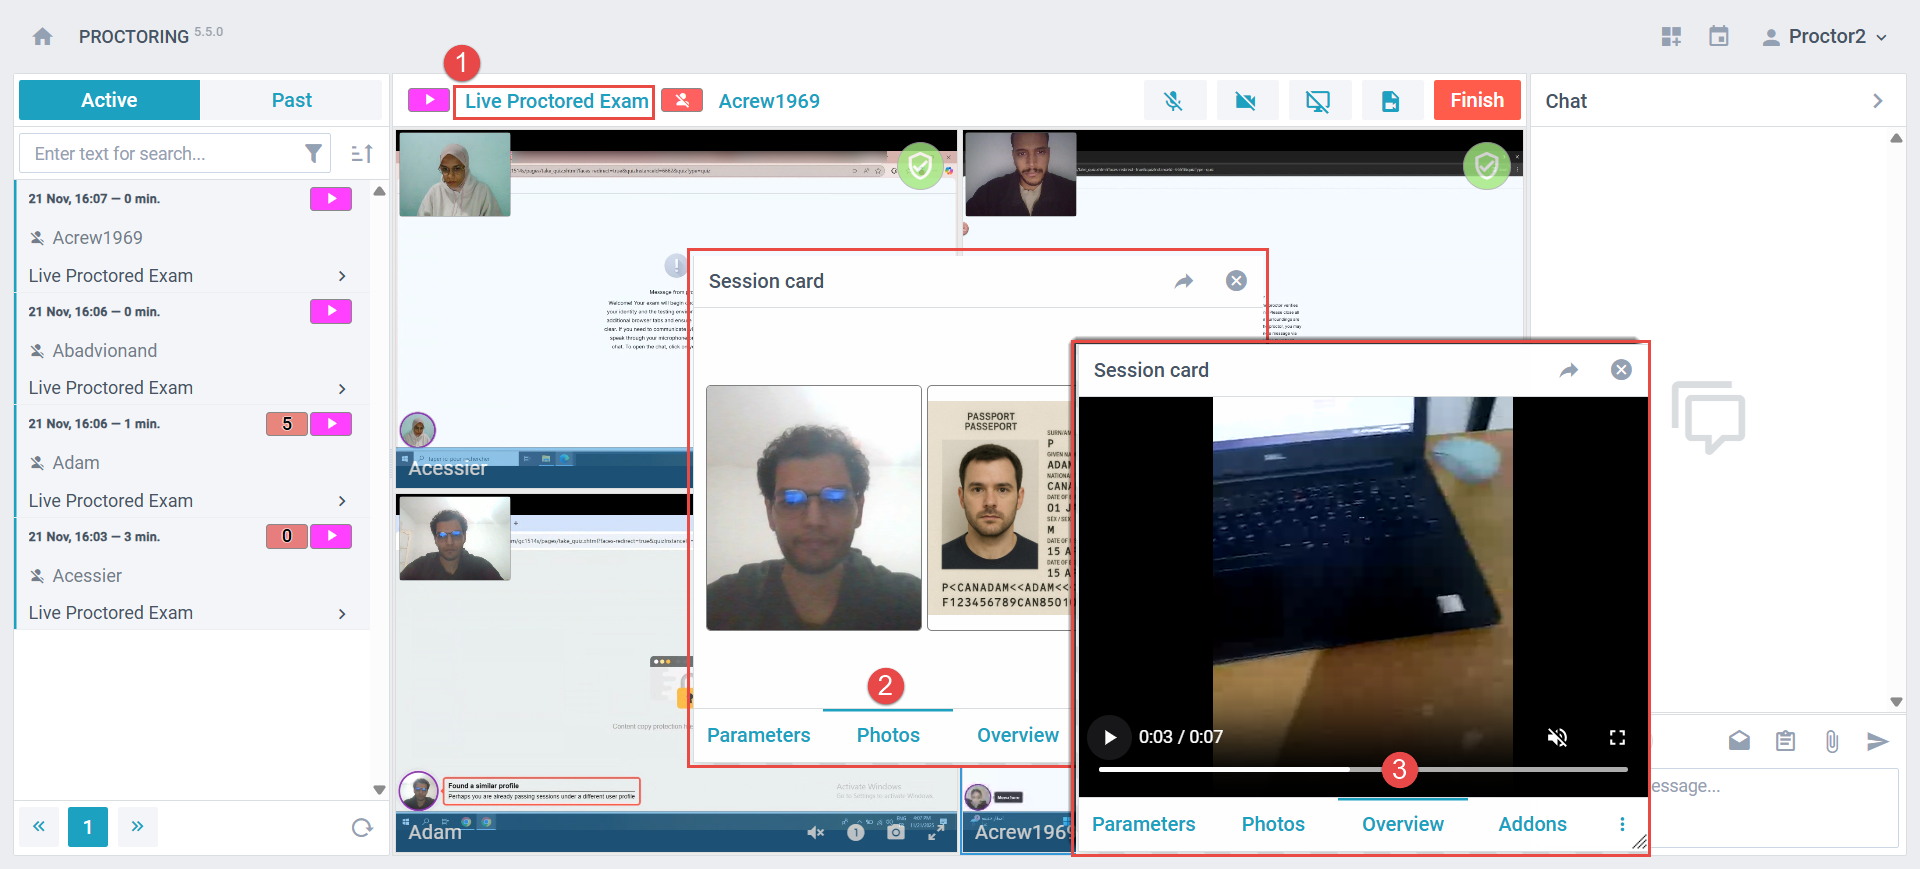
To verify a candidate’s ID and exam environment recording, the proctor should:
- Click the exam title at the top of the screen to open the session card.
- In the Photos tab, review the candidate’s ID.
- In the Overview tab, view the candidate’s environment recording.
Once the proctor has completed the check-in process, they must resume the exam by clicking the Resume Exam button next to the candidate’s attempt ID. This allows only the verified candidates to begin their exam.
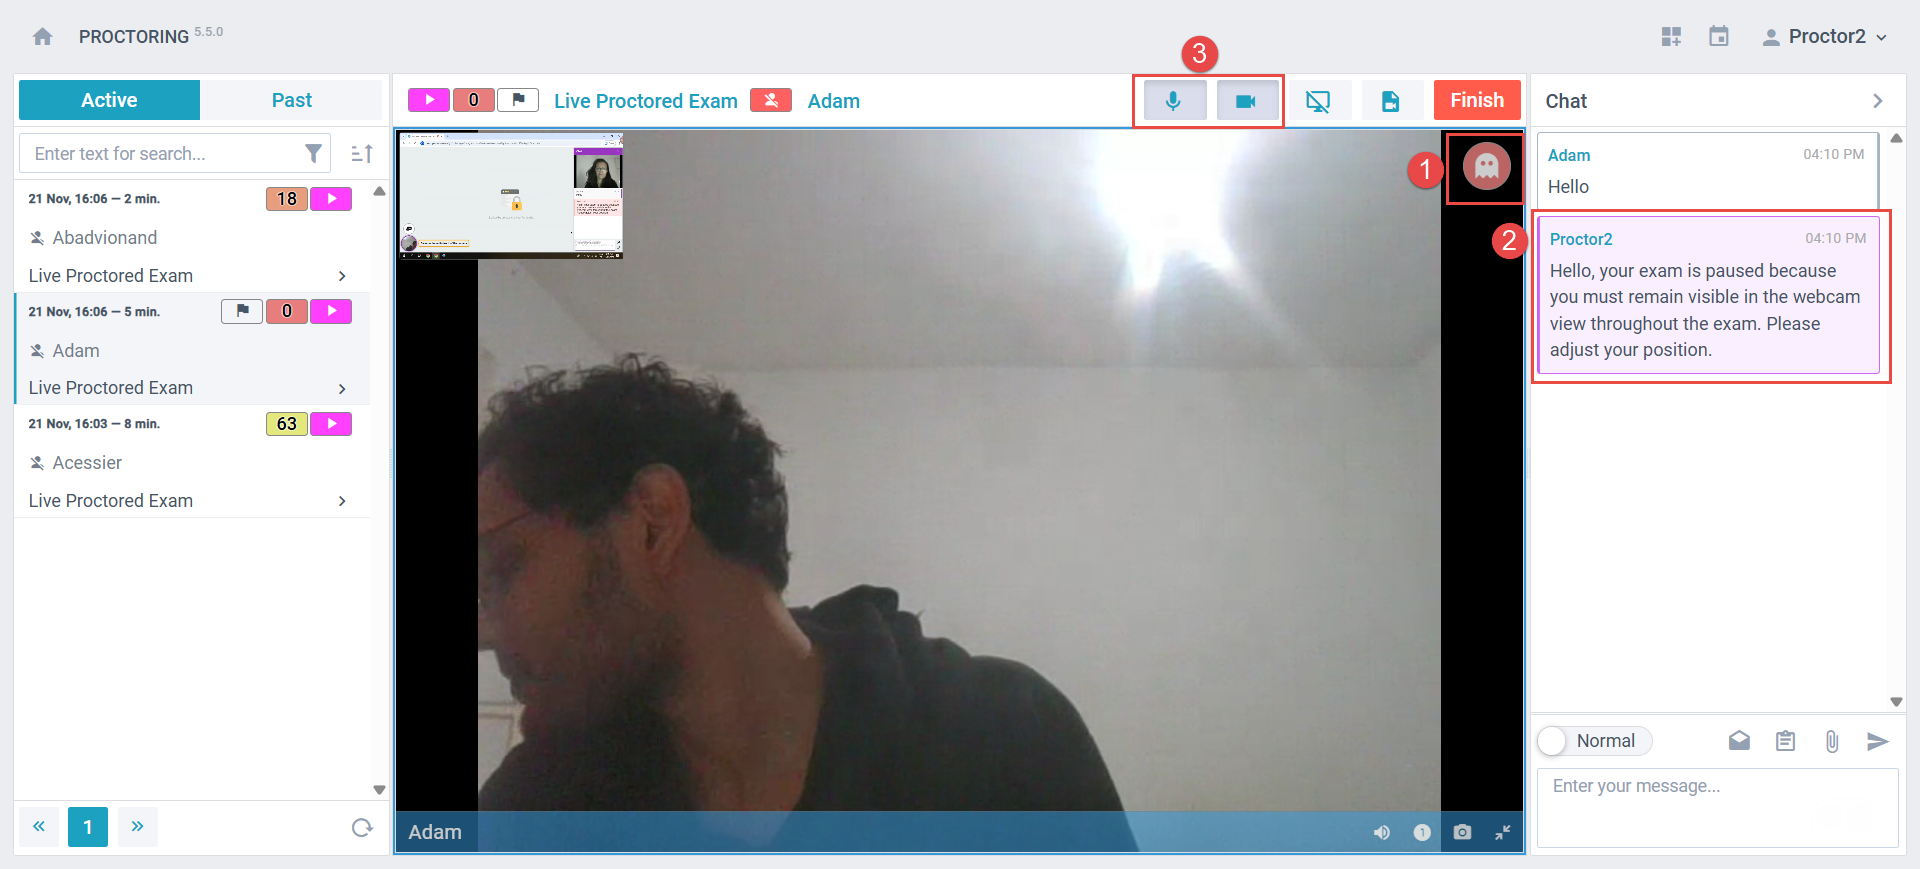
Proctor-candidate interaction
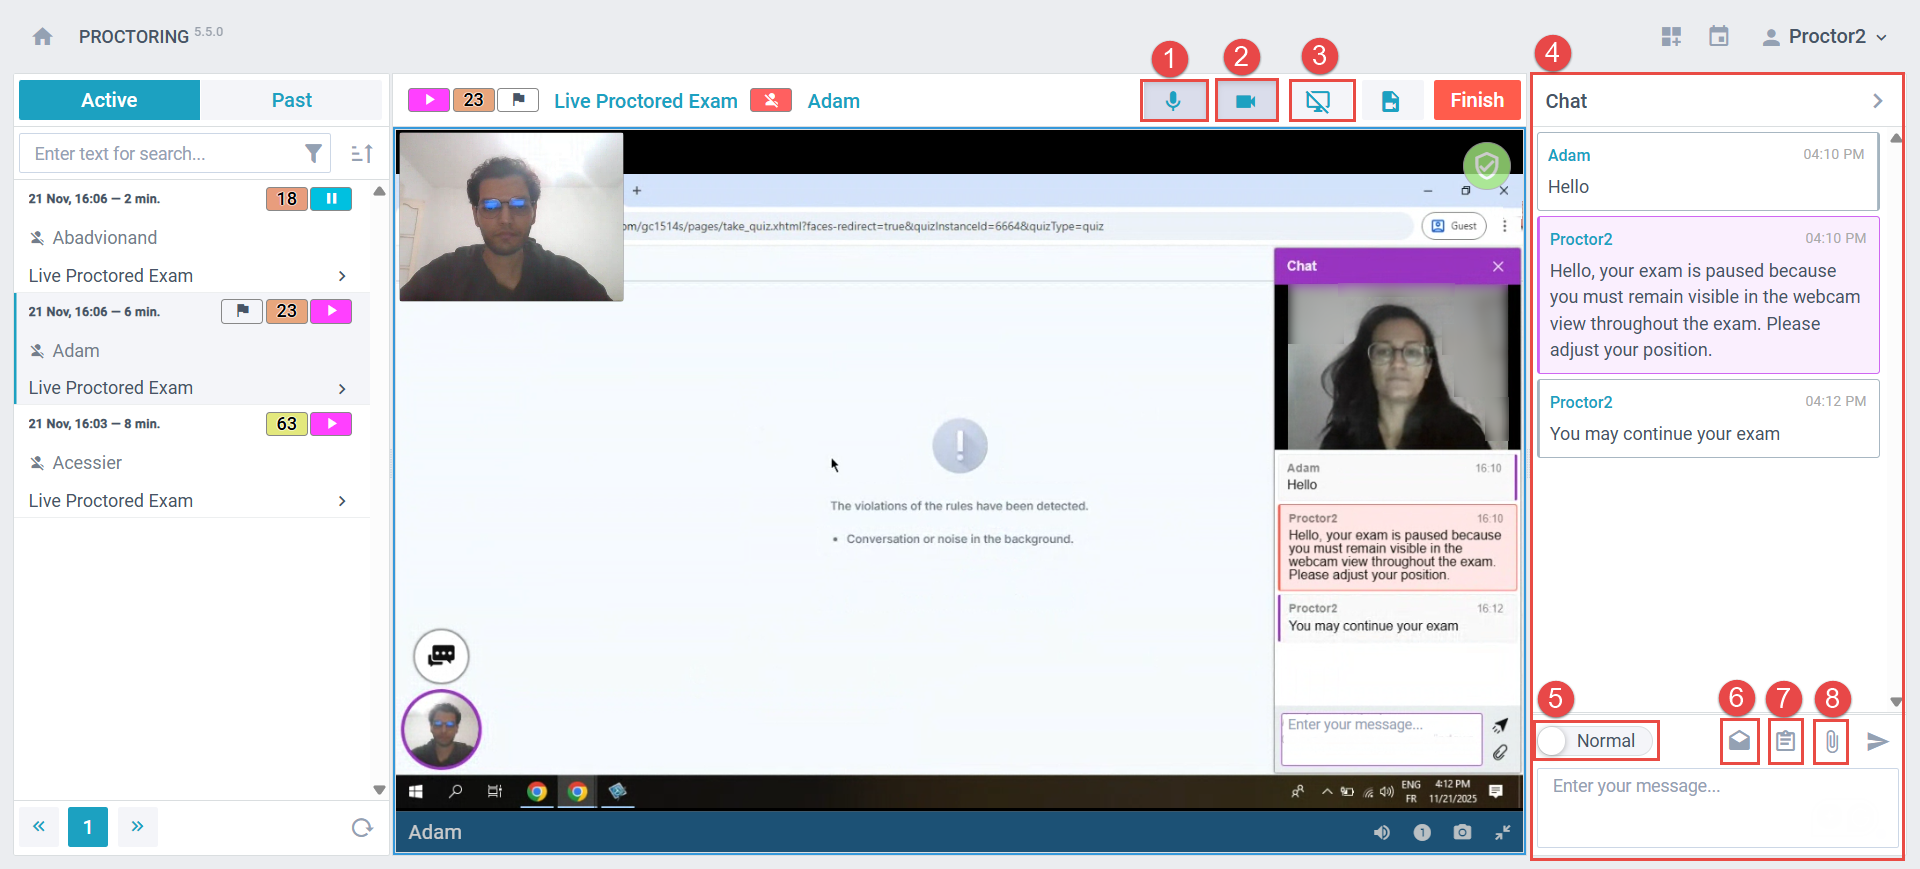
The proctor has several options for interacting with candidates during the exam:
- Enable or disable the microphone.
- Enable or disable the camera.
- Share their screen.
- Use the chatbox on the right side of the screen to communicate with the candidate.
- Enable incident messages to report any violations.
- Use the Mark as Read option to track messages.
- Send predefined, ready-made messages.
- Send attachments to the candidate.
Interaction in case of a violation
During the exam, if a violation occurs, the proctor has several options for responding and ensuring the integrity of the assessment. These include system-assisted alerts, messaging tools, and direct communication.
- System-Detected Violations
The system automatically detects certain behaviors that may indicate a violation, such as:
- Opening a new tab
- Not looking at the screen
- Moving out of the camera’s view
When the system detects a violation, it immediately sends a real-time alert to the proctor. This allows the proctor to review the situation quickly and take the appropriate action based on the rules.
- Sending Messages Through the Chat
The proctor can communicate with the candidate using two types of messages:
-
Normal Message:
Used for general communication, answering questions, or providing assistance. -
Incident Message:
Sent when the proctor identifies a violation or irregularity.- Sending an incident message automatically pauses the exam.
- If the situation is resolved, the proctor can resume the exam by sending a normal message.
To send an incident message, the proctor switches the toggle from Normal to Incident, then types the message. Incident messages appear in red in the chat, making them easily distinguishable.
- Using Audio and Video Communication
The proctor can also use the camera and microphone to directly warn the candidate about a violation. This method is useful when the candidate needs immediate clarification or guidance to correct their behavior during the exam.
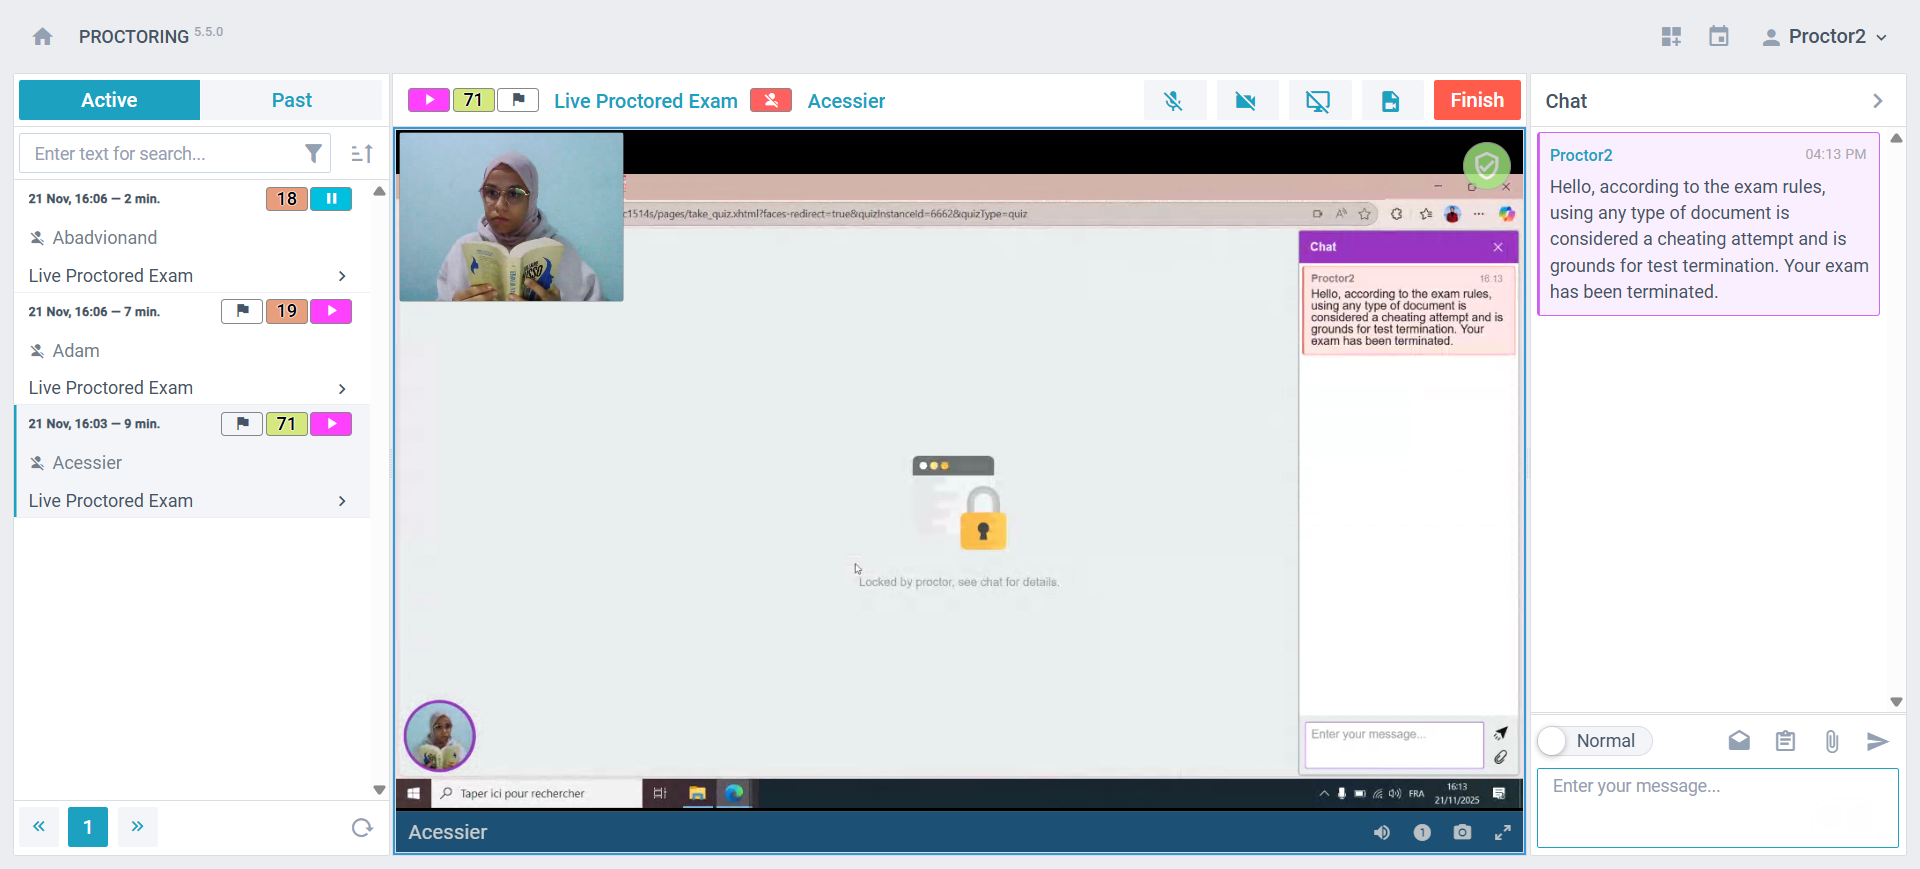
Terminating the exam attempt
If a candidate’s exam attempt is proven to have been a cheating attempt, the proctor might need to terminate the attempt and forbid the candidate from continuing the exam.
To terminate the exam attempt, the proctor should use the “Finish” button.
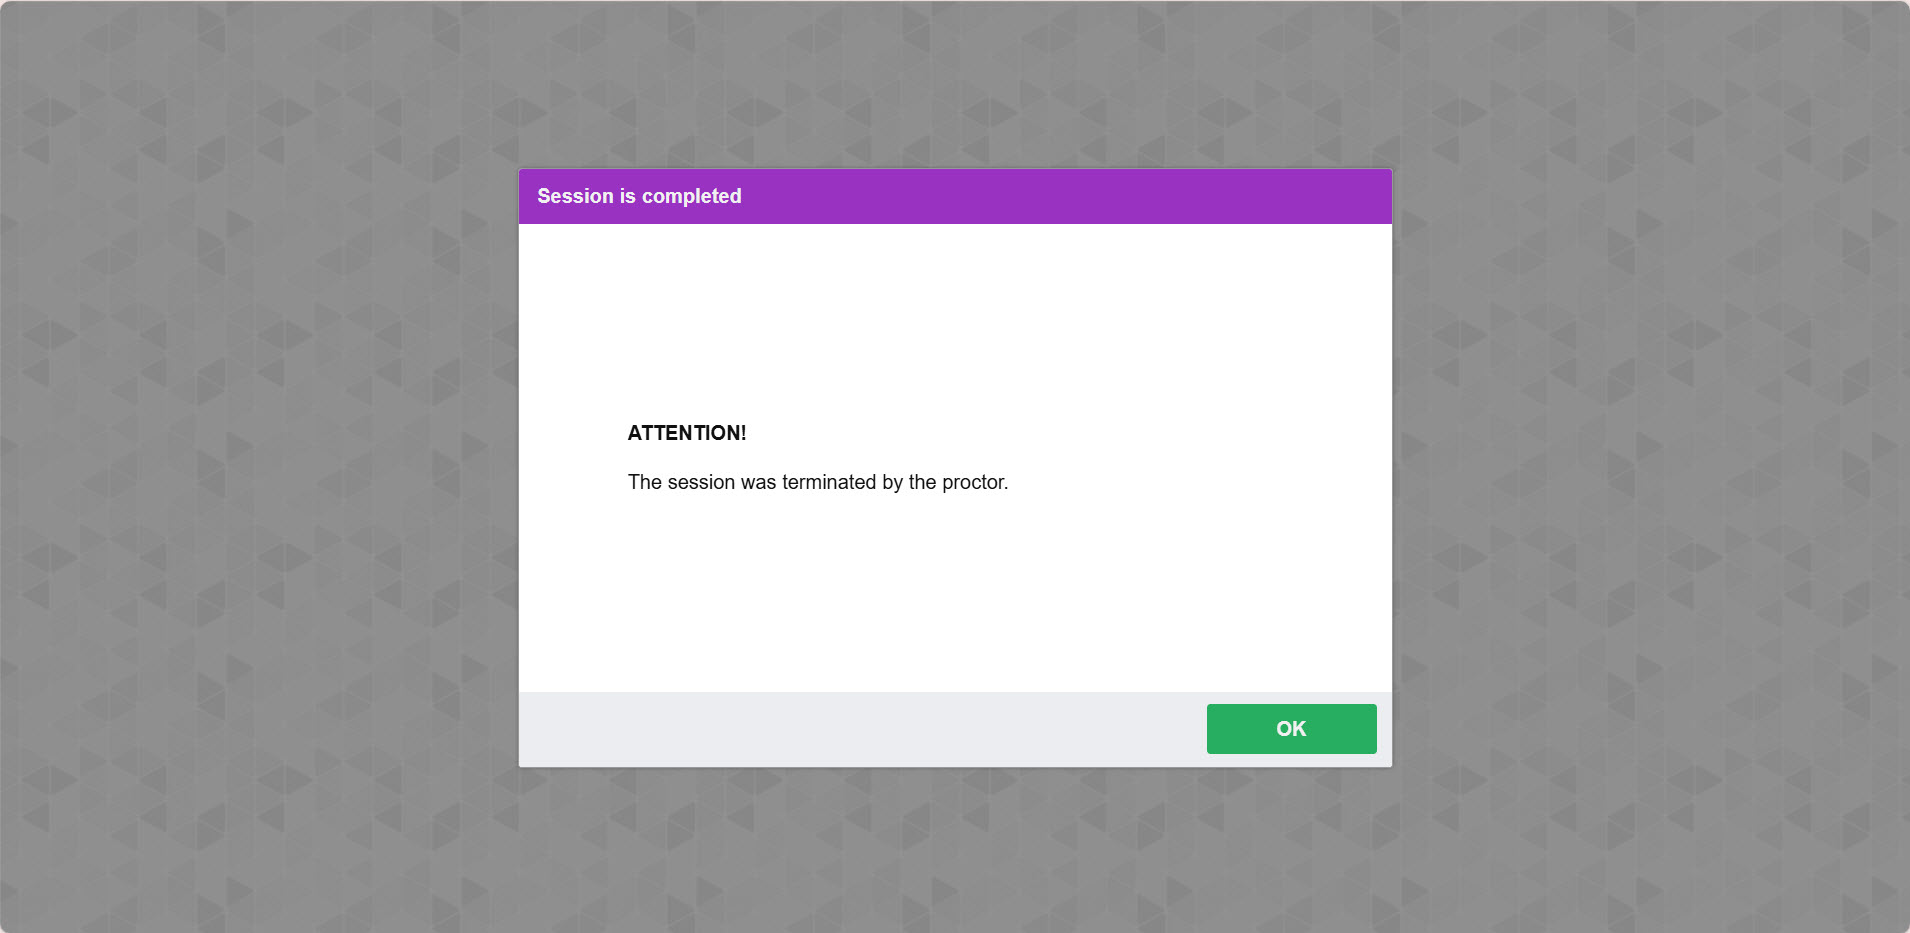
Candidate perspective
Once the session is terminated by the proctor, the candidate will receive a message stating that the session has been terminated by the proctor.
Writing the Proctoring Report
Once the candidate submits their exam attempt, the proctor is required to complete a proctoring report. This report should summarize and document any violations or irregularities observed during the exam. It serves as an official record of incidents and ensures accountability and transparency in the examination process. The proctor should provide clear and detailed information about any issues encountered, including the nature of the violation, the time it occurred, and any actions taken in response. This report is essential for maintaining the integrity of the exam and addressing any concerns that may arise.
To write the proctoring report, the proctor should follow the steps below:
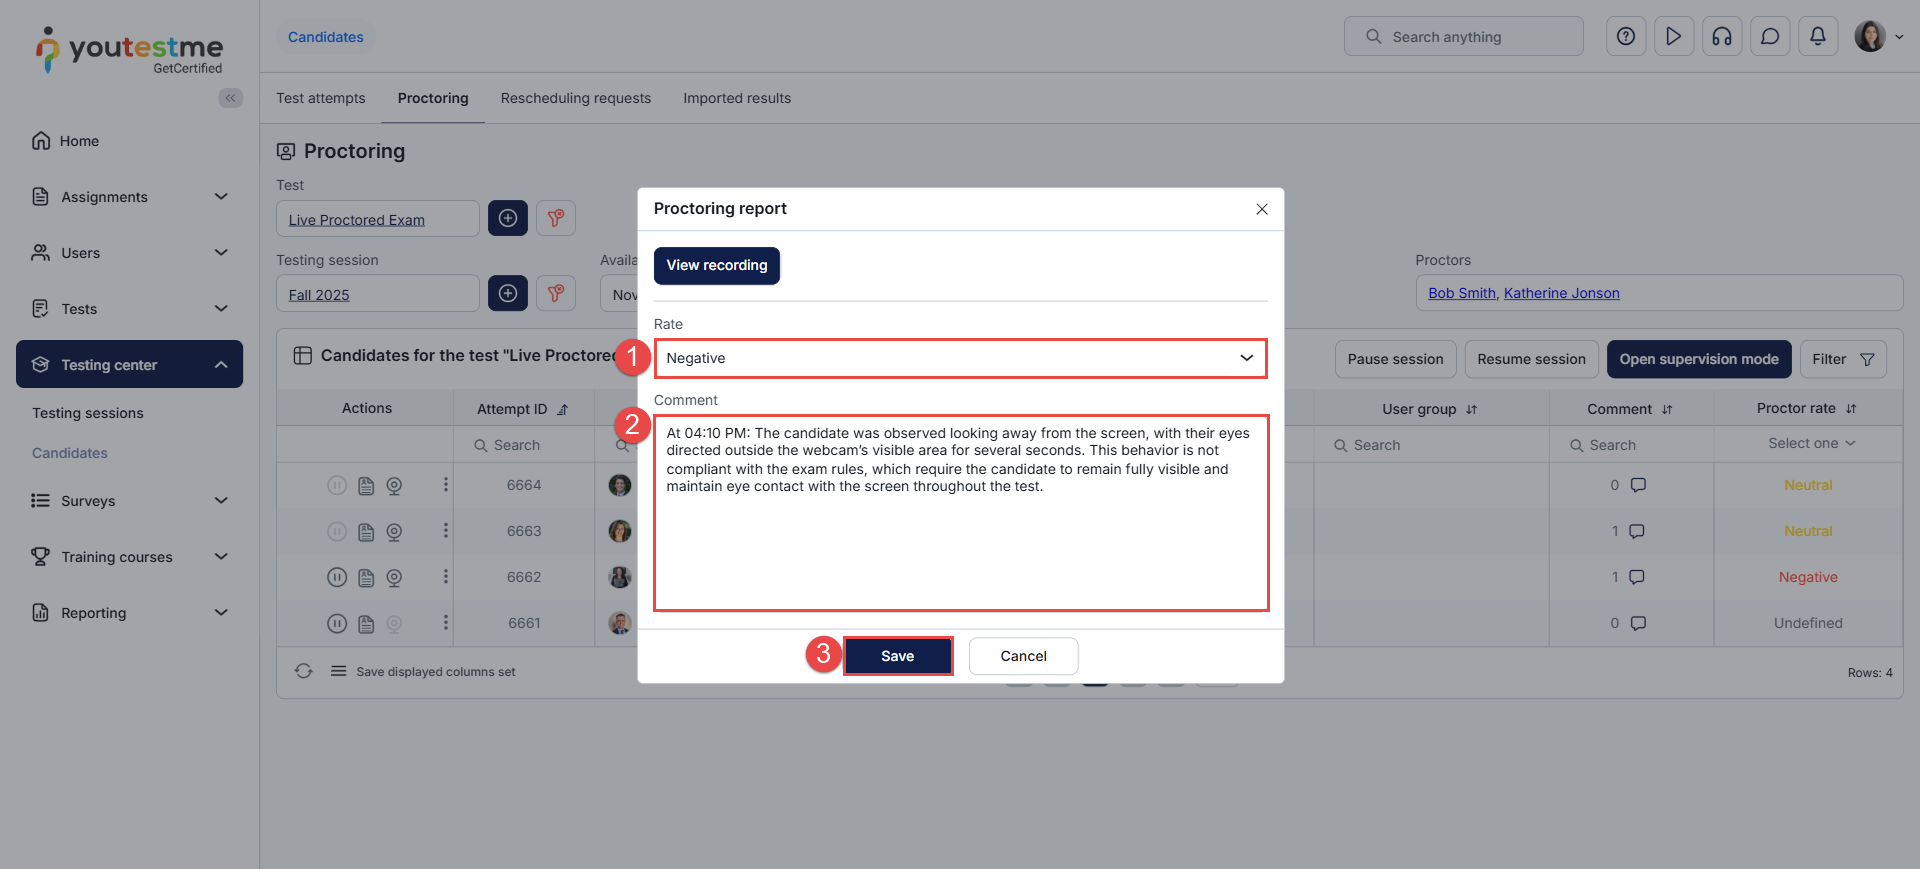
In the Proctoring tab, click the Report button from the Actions column.
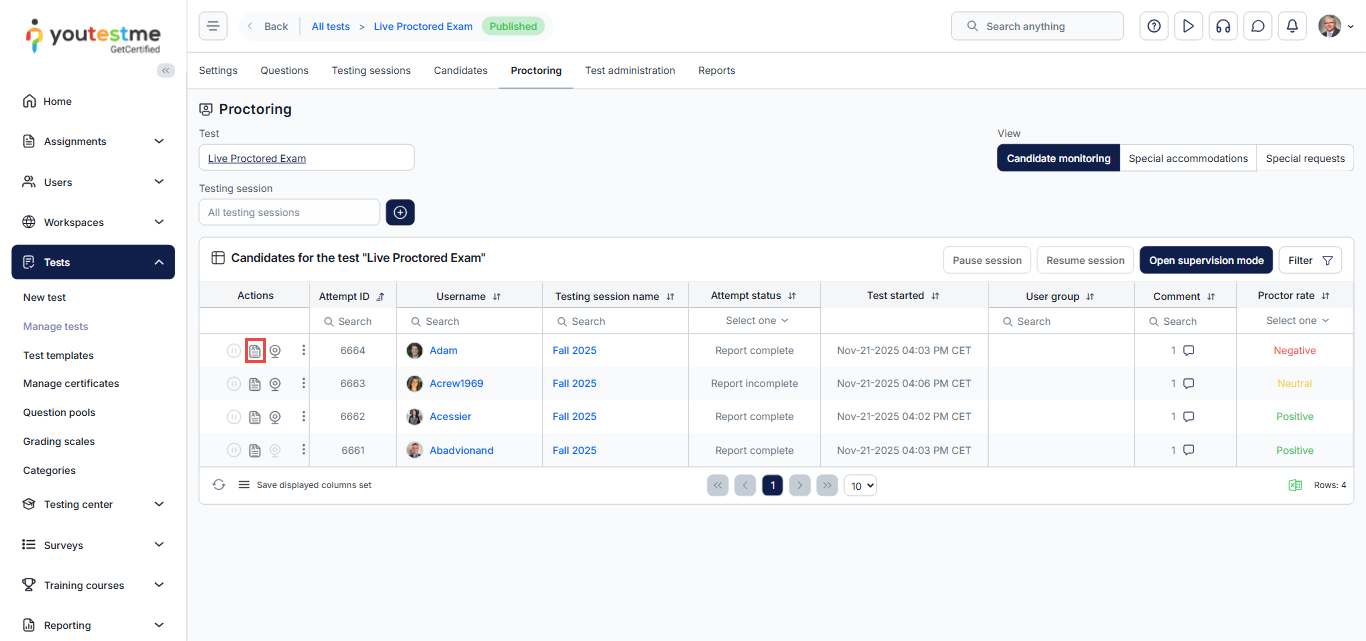
- In the Proctoring Report dialog, select the rating that should be assigned to the attempt. The options are:
- Positive: If the candidate followed all exam rules.
- Neutral: If further review or a decision is required by the exam administration.
- Negative: If the candidate committed a clear violation or cheating.
- Write a comment to summarize the events observed during the exam, including any incidents or irregularities.
- Click Save to submit the report.
Reviewing the exam recording
In some cases, reviewing the exam recording may be necessary to finalize the proctoring report and determine the appropriate rating.
To review the exam recording, follow the steps below:
From the Proctoring tab, click on the camera icon next to the relevant exam attempt.

You will be redirected to the exam recording on the proctoring server, where you can review the timestamped exam events and the candidate’s interaction with the proctor.

Downloading a Recording – Proctor’s Perspective
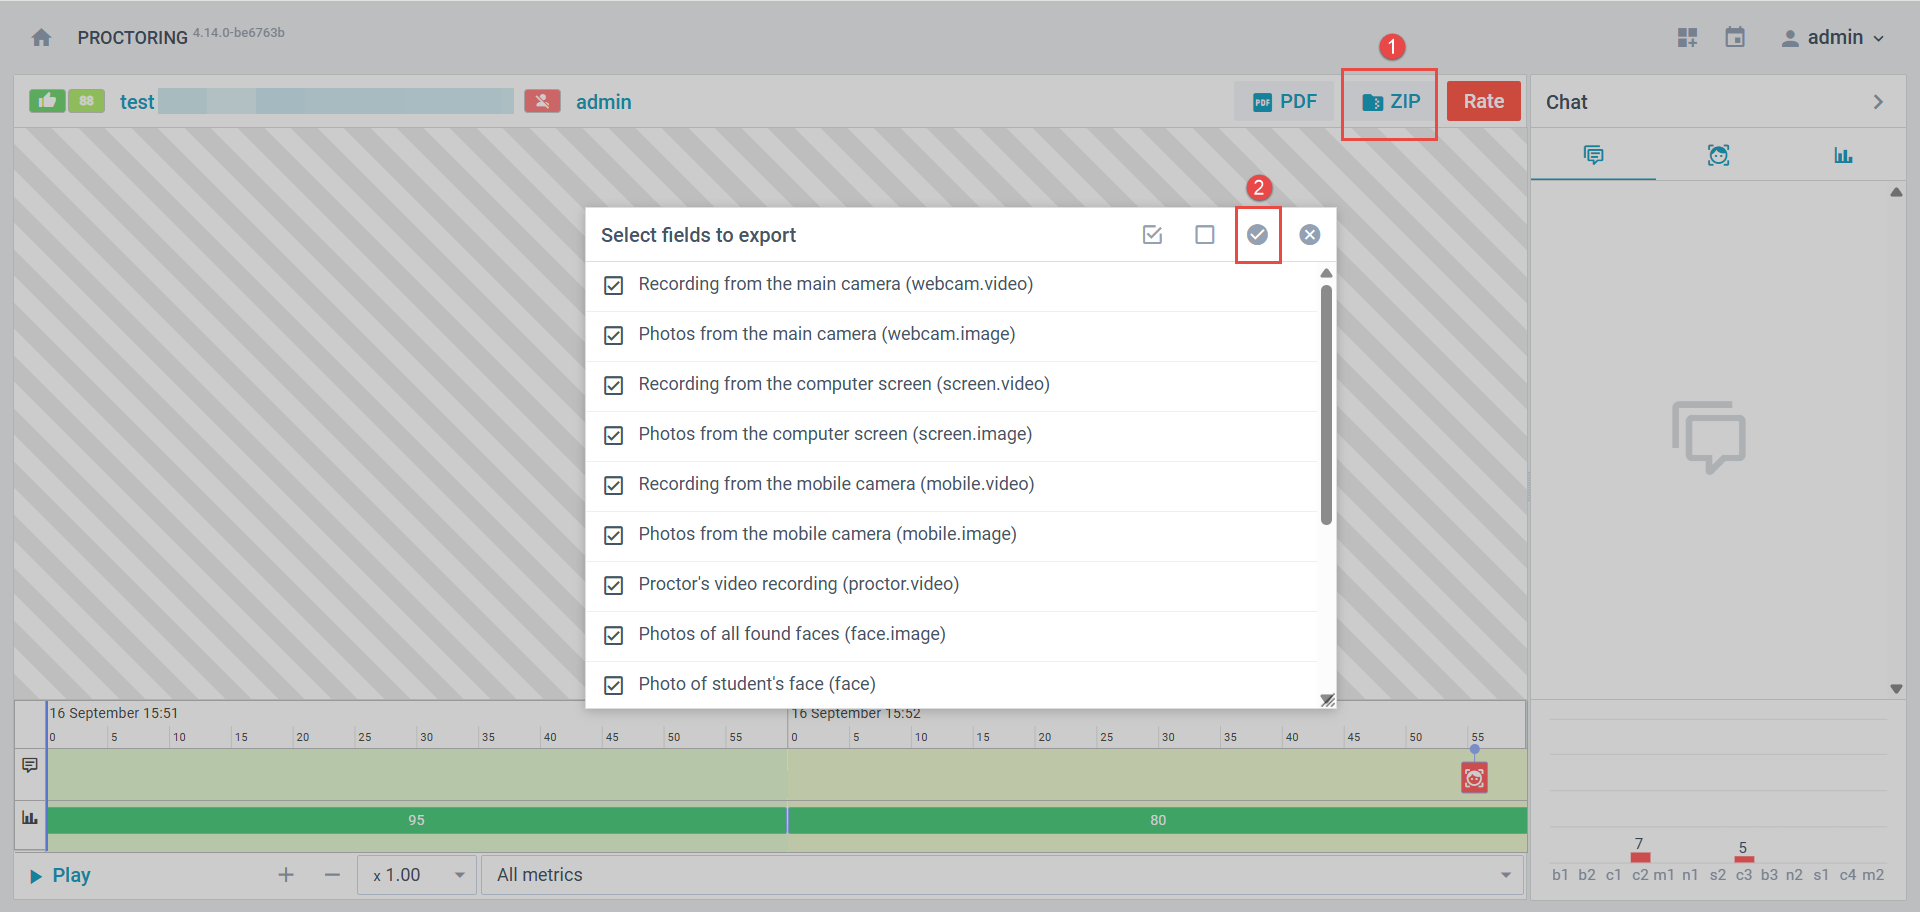
To download the recording, please follow these steps:
- Click on the ZIP folder, and a list of items available for download will appear.
- Once you select the desired item(s), click the icon in the top right corner to download the entire file.
Conclusion
Live Monitoring is the most secure method for supervising exams, as it combines real-time oversight by human proctors with system-supported alerts. With features such as the check-in process, proctor–candidate interaction, and automated system warnings, Live Monitoring provides a comprehensive solution for preventing cheating during exams.
This approach offers the highest level of security and ensures that the assessment process remains fair, transparent, and reliable. By using Live Monitoring, educational institutions can confidently administer exams and ensure that the qualifications awarded are legitimate and well-deserved.


