

Article verified for Release 15.1 on October 28, 2025.
This article provides a comprehensive guide to allowing candidates to select and purchase exams at the time that best fits their schedule, all within your personalized demo environment.
YouTestMe allows administrators to make an exam available across different time slots using the Testing Sessions feature. Administrators can create multiple testing sessions for a single exam, enabling candidates to book the session that best suits their availability.
Using the Testing Sessions functionality, administrators can define:
- The time periods during which the exam will be available
- The exam fee
- Eligibility rules (e.g., available only to members of a specific user group, participants of a particular training course, or all users in the application)
- Additional settings, such as enabling proctoring for specific sessions
To help you explore the booking and purchasing process from the candidate’s perspective, a sample exam with two testing sessions has been made available in your demo application. It can be accessed using a candidate account.
In this article, we will guide you through:
- How candidates experience the booking and purchasing process, and
- How the feature is configured from the administrator’s side.
Accessing the My Tests tab
Log in to your demo environment using the Student account:
- Username: student
- Password: Password for student account provided by YouTestMe
Users with the Student role have limited permissions. A Student account can only manage its own account settings and access assignments that have been made available to it or for which it meets the eligibility requirements. For more details about roles and permissions, please refer to this article.
Upon logging in, you will be automatically redirected to the My tests page, where you can use the search bar to find the “Cybersecurity – Proctored Test“.
This exam is proctored and has two different testing sessions. Click the Choose the session button to select a convenient time slot from the list of testing sessions.

Choosing a Time Slot
The list of all scheduled testing sessions will appear. Review the availability and select the testing session you would like to book or purchase.

Depending on the testing session settings, if a booking fee is defined, the candidate will see a Purchase button. This option is available only if the platform has been integrated with an e-commerce module and a Stripe account has been connected.
Purchasing the Exam
You will be redirected to the payment page. For testing purposes, enter the following dummy data:
- Card information: 4242 4242 4242 4242
- Date: Any future date
- CVC: Any three digits
- Cardholder name: Enter your name
- Click the Pay button

Once you have successfully paid for the exam, you will be redirected to the purchase order page. Here, you can:
- See purchase details
- Click the To my assignments button

Starting Exam
Upon completing payment, the candidate can start the test, provided the session is available. The candidate can also cancel the booking.
If rescheduling is allowed in the test settings, candidates can reschedule the exam and choose a different testing session. Rescheduling can be automatic or managed through rescheduling requests submitted by the candidate within the application. Test administrators receive these requests and can approve or decline them.

How to create a Test with multiple Testing Sessions
At YouTestMe, test creation and test scheduling are two separate processes. Test scheduling is managed through testing sessions. Users with the appropriate roles and permissions can create testing sessions for a test and define its availability, eligibility criteria, and booking or purchasing settings.
To create Testing Sessions for a specific test, log in to your demo environment using the following credentials:
- Username: admin
- Password: Password for student account provided by YouTestMe
Follow the steps below:
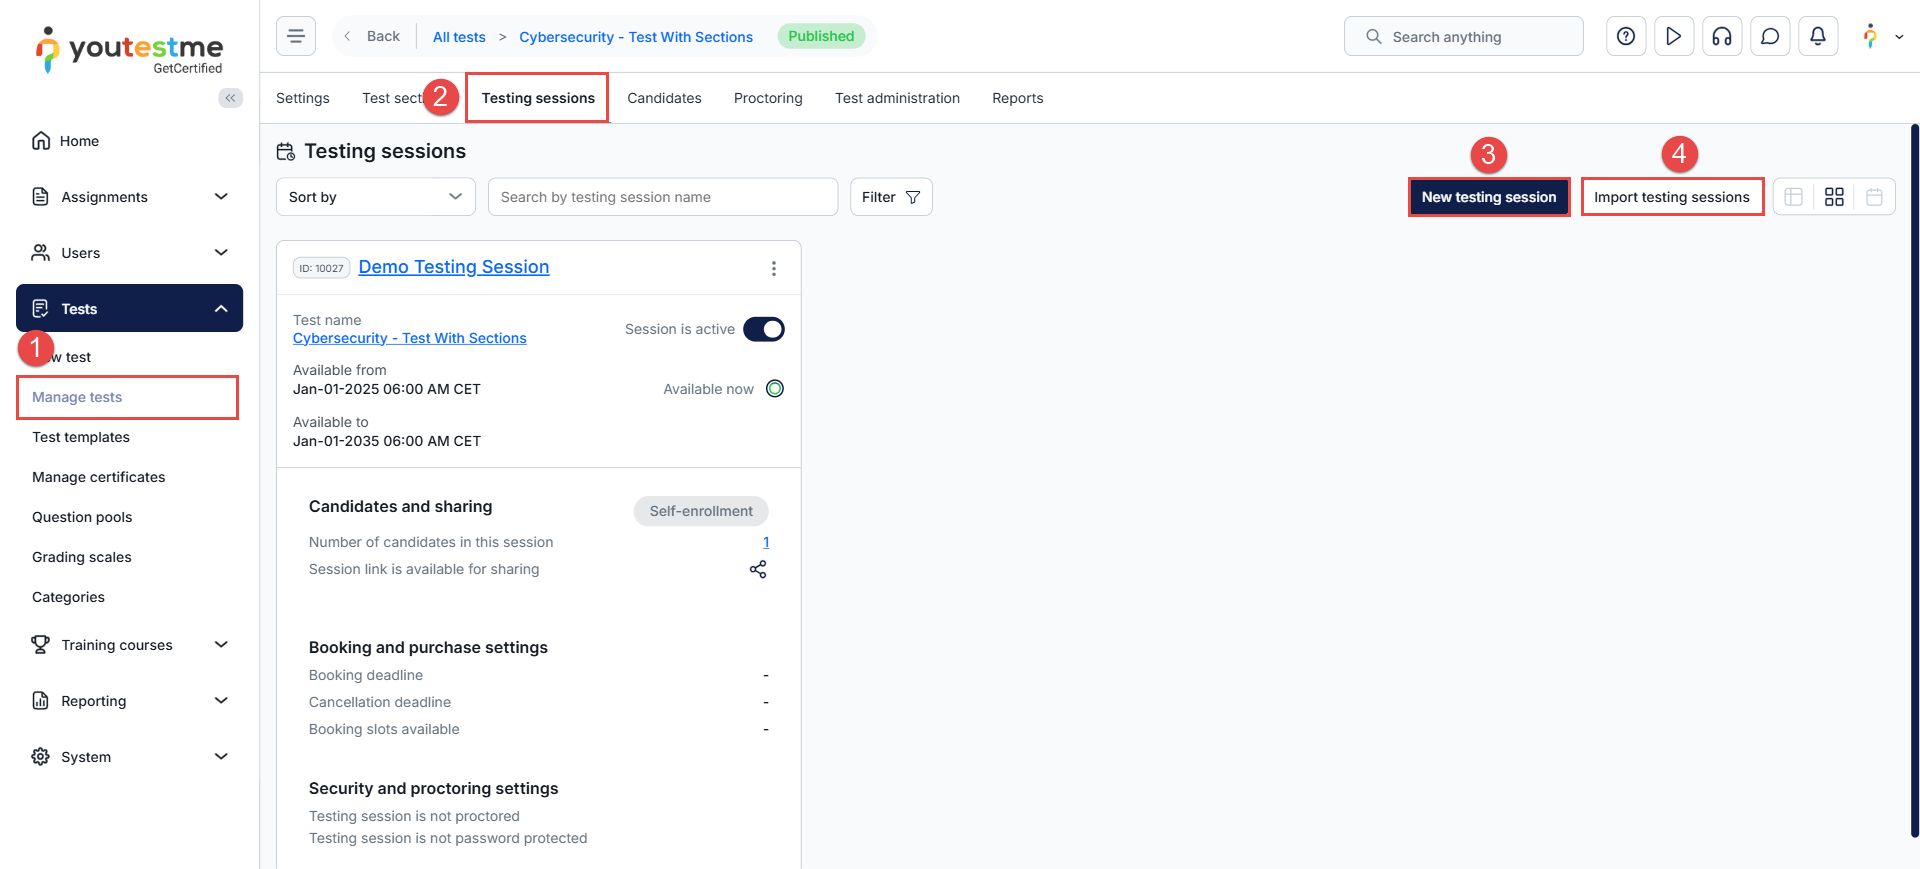
- In the main menu, click Tests, select Manage Tests, and then open the test by clicking its name.
- You will be redirected to the test’s Settings tab. From there, navigate to the Testing Sessions tab. In this tab, you can view all existing testing sessions for the selected test and create new ones in two ways:
- Manually, using the New Testing Session button
- In bulk, using the Import Testing Sessions button
The key settings managed through Testing Sessions include:
- Availability: Define the time period during which the exam will be available for candidates to take.
- Allow Candidates to Self-Enroll: You can manually assign specific candidates to the testing session, or let them enroll themselves by enabling this option. When self-enrollment is enabled, you can also control who is allowed to see the session and enroll by configuring the Access settings.
- Access: Specify who can take the test through the testing session:
- Any User in the Application: The testing session is visible to all users, and anyone can book a seat.
- Members of a User Group: Only users belonging to the specified user group will be able to view the session and book a seat.
- Members of a Training Course: Only users assigned to the defined training course will be able to view the session and book a seat.
- Taking and Retaking Price: If candidates are required to pay a fee to take the test, you can set the exam price here.
If retakes are allowed, you can also define a separate retake price. - Booking and Cancellation Deadline: Specify the deadline for candidates to book a seat or cancel their booking.
- Seats Limit: Define the maximum number of available seats. Once this limit is reached, the session becomes fully booked and no additional candidates can select it.
- Proctoring: You can enable proctoring for specific testing sessions directly in the session settings.
Use Case
An association is conducting a Cybersecurity Certification test.
Members of the association can take the exam for free, while non-members must pay a $10 fee. Test-takers have two options to take the exam:
- In person in a classroom
- Available only on the last Monday or last Friday of the month X.
- The room’s capacity limits the number of seats.
- Online from home
- Available 24/7 during the entire last week of the month X.
- This option is proctored.
How to Configure This Scenario using YouTestMe
Create User Groups
- Create one main user group for all participants.
- Within it, create two sub-groups:
- Members
- Non-members
This allows you to control access and pricing for each group.
Create Testing Sessions for Members (Free)
Create three testing sessions for the Members subgroup:
- Online Proctored Session
- Available 24/7 during the last week of month X
- Proctoring enabled
- No fee
- Classroom Session – Monday
- Available only on the last Monday of month X
- Seat limit based on classroom capacity
- No fee
- Classroom Session – Friday
- Available only on the last Friday of month X
- Seat limit based on classroom capacity
- No fee
Create Testing Sessions for Non-Members (Paid)
Create three parallel testing sessions for the Non-members subgroup, with the same availability and seat rules:
- Online Proctored Session
- Available 24/7 during the last week of month X
- Proctoring enabled
- $10 fee
- Classroom Session – Monday
- Available only on the last Monday of month X
- Seat limit based on classroom capacity
- $10 fee
- Classroom Session – Friday
- Available only on the last Friday of month X
- Seat limit based on classroom capacity
- $10 fee
