Article verified for Release 15.2 on December 6, 2025.
This article explains how to add a SCORM package as an attachment to a test in YouTestMe. It covers the steps for uploading, configuring, and setting the availability of the SCORM package, as well as the candidate experience when reviewing the SCORM content before starting the test.
YouTestMe enables organizations to combine training and assessment by attaching a SCORM-based training module to a test. This creates a two-phase experience: a training phase in which the candidate reviews the SCORM package, followed by the official test phase. When proctoring is enabled, both phases are monitored, ensuring content protection and exam integrity.
Adding a SCORM Package to a Test
To include a SCORM package within a test, with both components being proctored (a SCORM package and a test), follow these steps:
- From the main menu, navigate to Tests and select New Test.
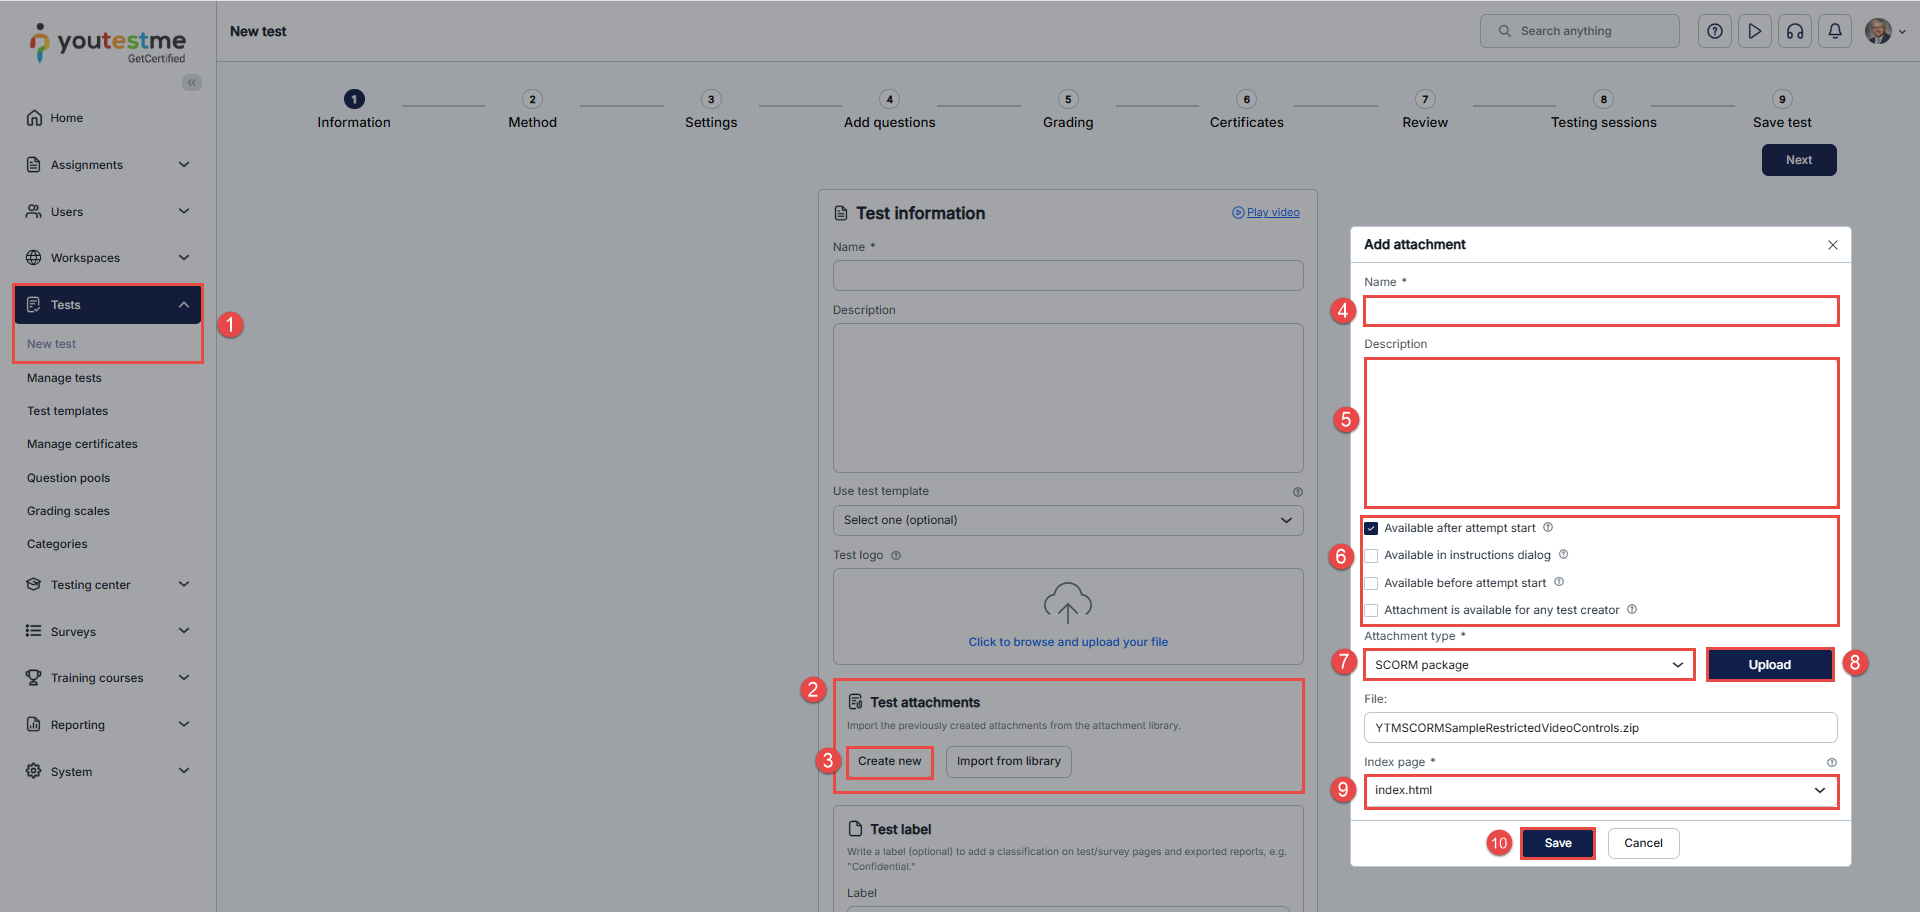
- In the Test Information step, enter the required test details and scroll down to the Test Attachment section.
- Click the Create new button.
- Enter the SCORM package name.
- Optionally enter a description for the SCORM package.
- Select the desired configuration options to define the SCORM package’s availability scope and timing. For more information, check this article.
- From the Attachment type drop-down, select SCORM package.
- Click the Upload button.
- From the Index page drop-down, select the default HTML page to be displayed from the SCORM package.
- Click the Save button.
- Proceed with configuring the test.
After completing the SCORM configuration, continue setting up the rest of the test. For detailed instructions on creating a test, please refer to the following article.
Once the setup is finalized, the candidate experience will include both the SCORM training module and the test itself
Candidate’s Perspective
Once the candidate starts the test, they will go through the equipment check stages, during which the system will verify whether the webcam, microphone, and screen sharing are functioning properly. The system will also capture a photo of the candidate and their ID, and scan the surrounding environment. For more information, see this article.
If the ‘Available before attempt start’ option is chosen, a dialog displays all SCORM packages uploaded to the test. Please
Note: The finish button will be disabled until the SCORM package is reviewed.
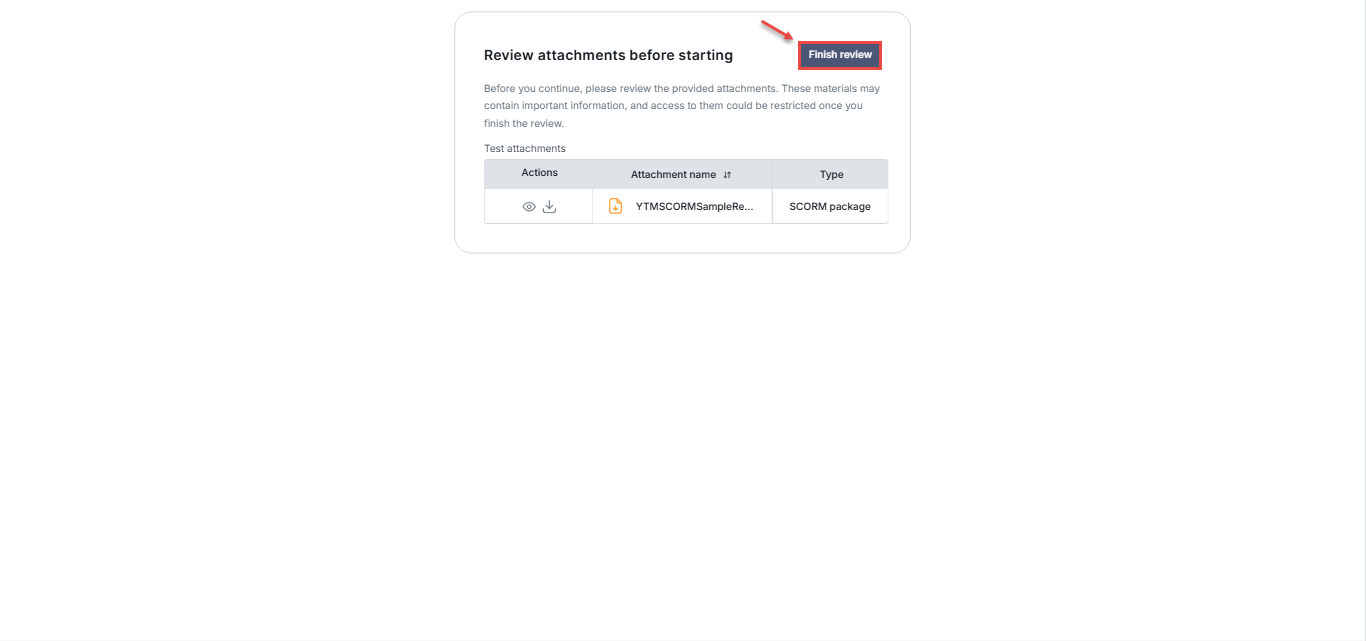
- To open a SCORM package, the candidate must click the eye icon.
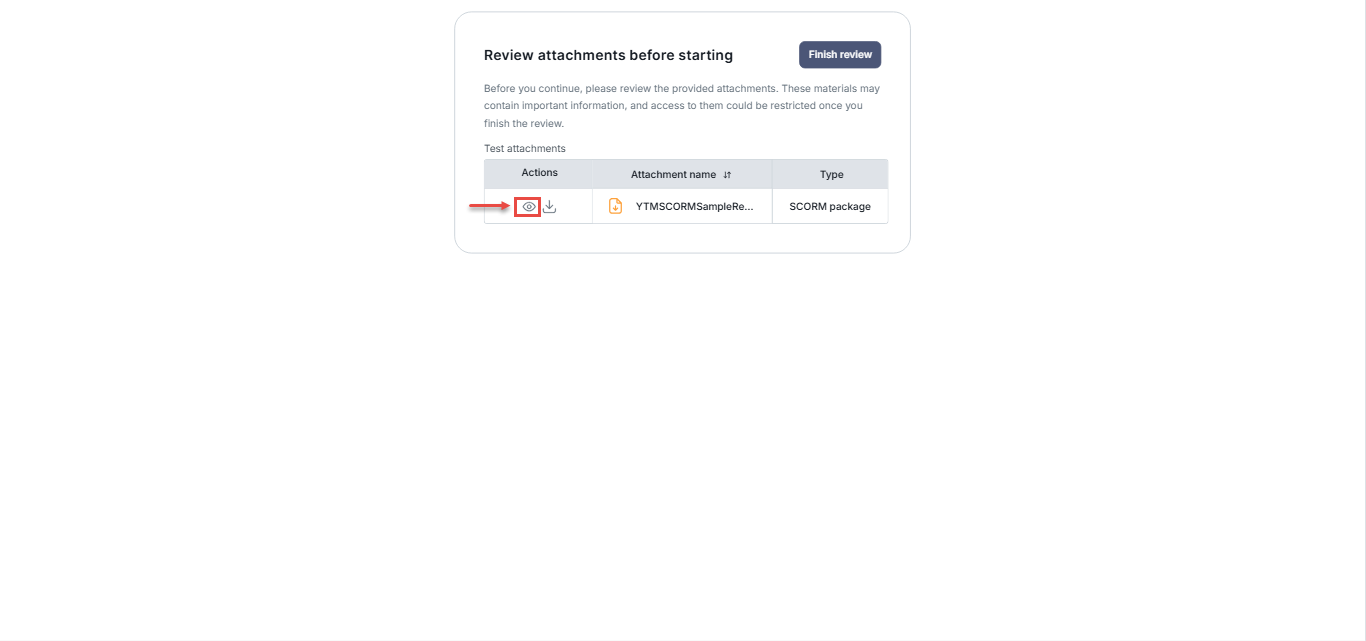
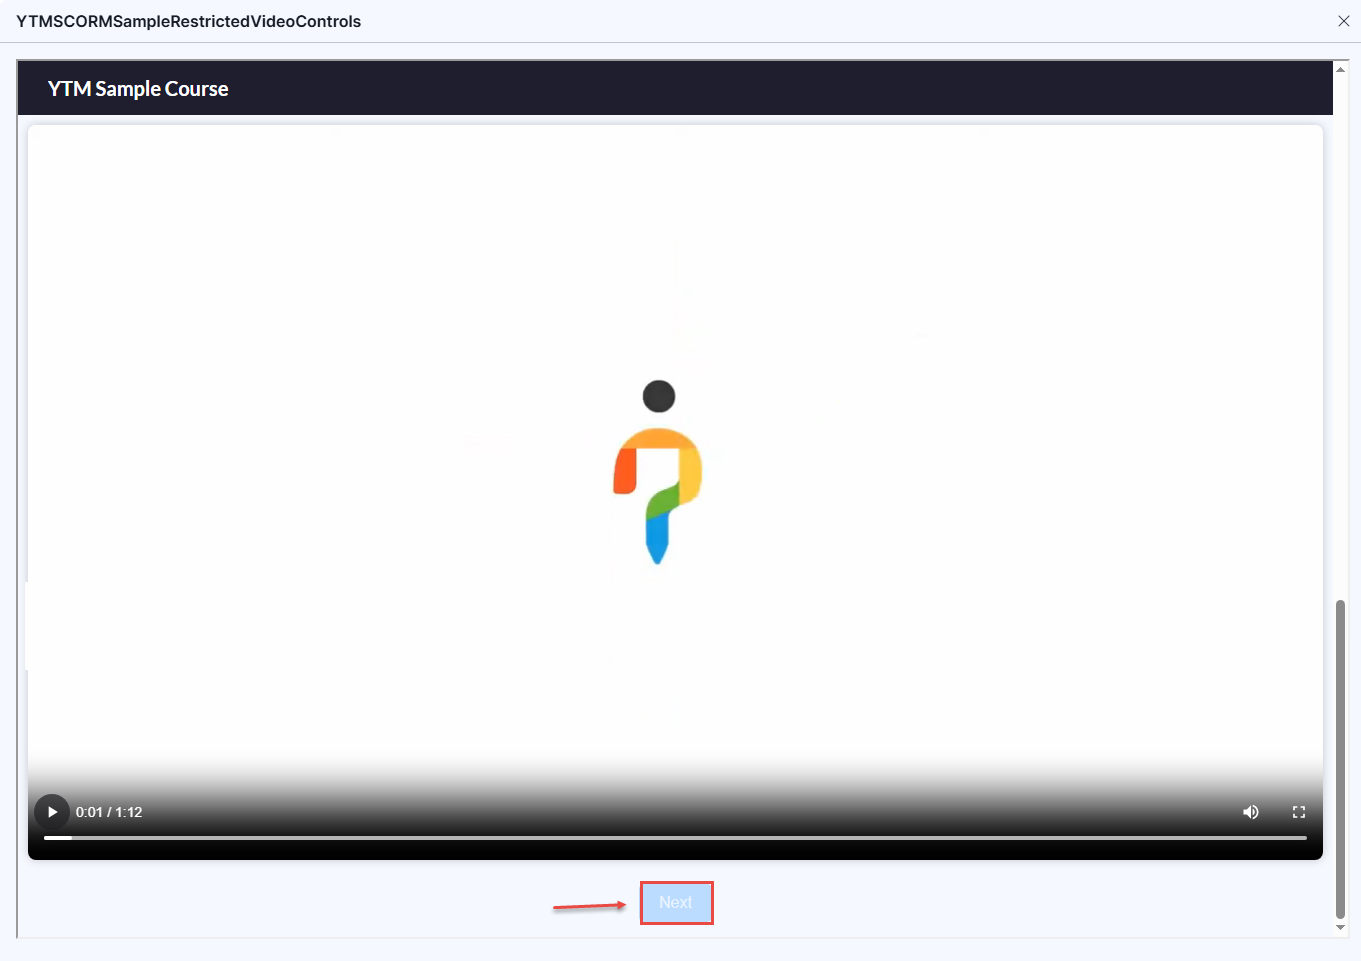
- After clicking the eye icon, the SCORM package appears and can be reviewed.
Note: While reviewing the SCORM package, the Next button will remain disabled until the candidate completes the current slide or activity. This ensures that all SCORM content is viewed as intended before progressing to the next step.
- After reviewing the SCORM package, the candidate must click the Finish review button, which displays a confirmation message that, by clicking Yes, they will no longer be able to access the SCORM package and that the official test will begin.

Integrating SCORM content into your test ensures candidates receive structured training material and helps maintain exam integrity by controlling the review process.
For more related articles, please visit:


