Generating coupons
Once coupons are generated, you will find them listed in the table below and receive a notification within the application.The generated coupons will be added to the List of coupons table. The table will contain the following details for each coupon:
- Unique coupon code.
- Discount type.
- The amount.
- The status of the coupons is displayed as Used or Unused.
- Expiration time of the coupon.
- The candidate’s username who redeemed the coupon can be displayed in the Used by column.
- The date and time the coupon was used can be displayed in the Date of use column.
- The username of the person who generated the coupon is displayed in the Created by column.
- The date and time the coupon was generated is displayed in the Creation date column.
- The coupons can be exported to PDF or Excel files using the buttons in the lower right corner.
Coupons are not personalized and can be sent to the desired users. The user will implement the coupon only once. Check out this article for more information on how it looks from a student’s perspective.
With the simple steps outlined above, you can quickly generate coupons and offer them to your users.
Candidate’s perspective
Candidates will receive the coupon code via email. They should copy and paste the code into the correct field.
To use a code, first select the Purchase button on the My test tab.
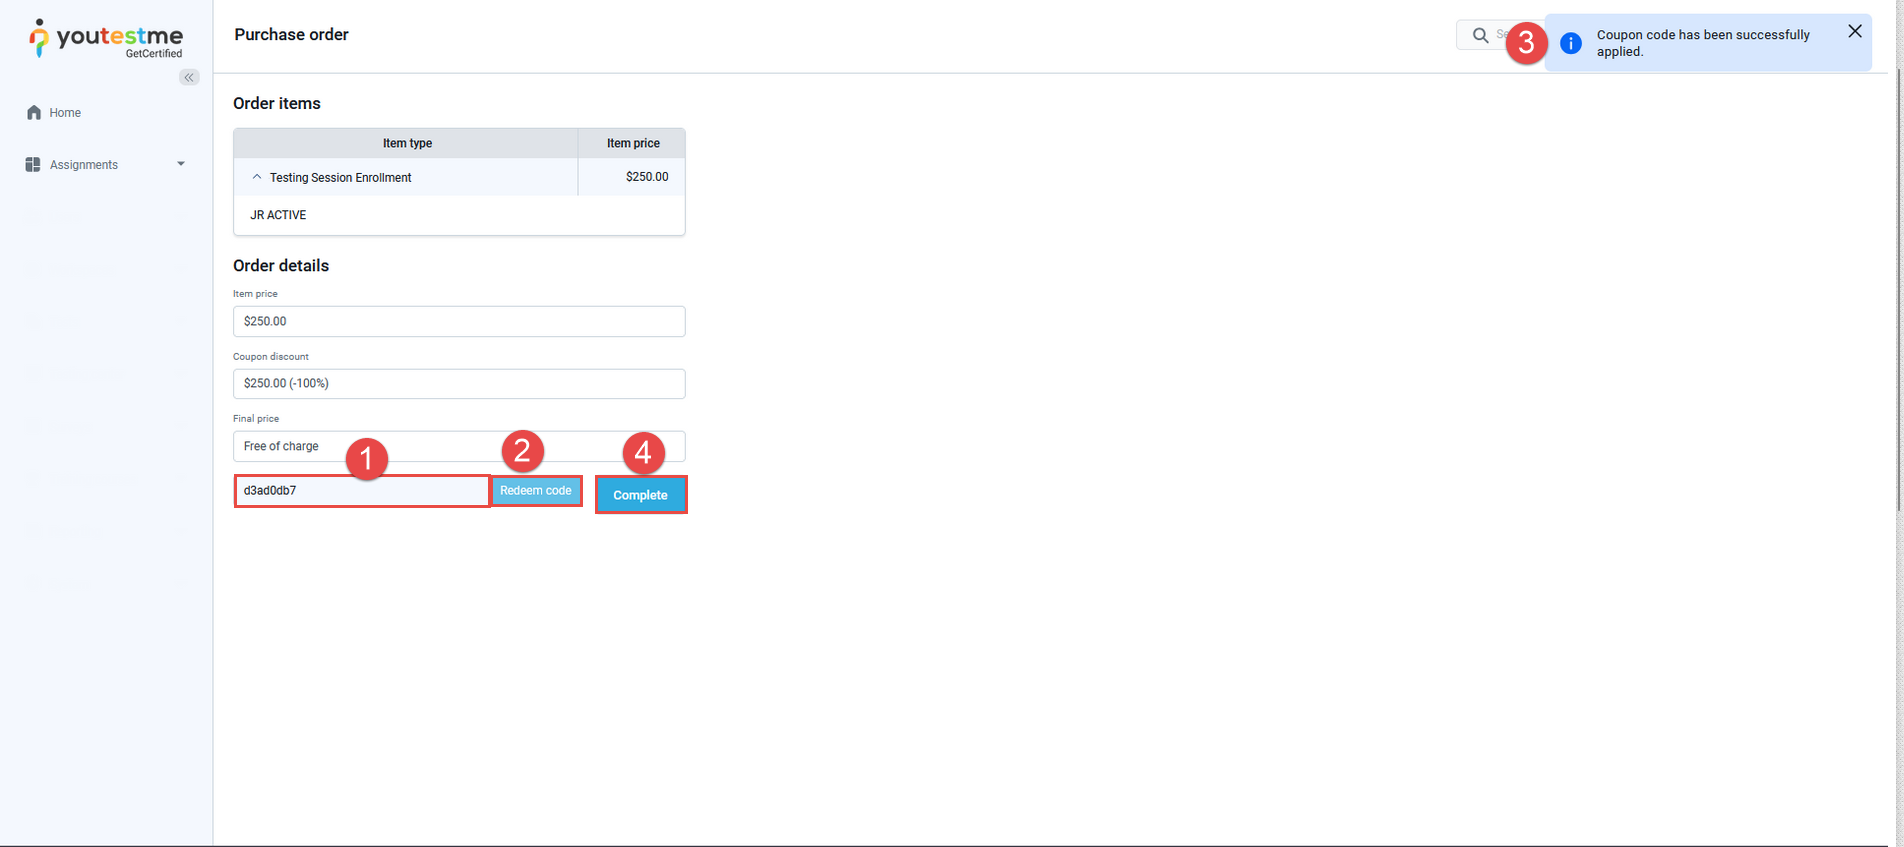
You will be directed to the Purchase order page, where you can:
- Enter the coupon code.
- After entering the code, click the Redeem code button.
- If the code is valid, you’ll receive a notification and see the discount applied.
- Confirm the coupon application with the Complete button to finalize the process.
For more information regarding the candidate’s perspective, please watch this video.


