YouTestMe provides users with the ability to generate certified tests, allowing candidates to receive certificates upon completing assignments. This article comprehensively explains how to create, integrate, and manage user access to certificates.
Creating a Certificate #
To create a new certificate from the Manage certificates module, follow these steps:
- Navigate to the Tests page in the main menu.
- Choose Manage certificates.
- Initiate the certificate creation process by clicking the New certificate button.
- In the Create certificate form, select an available certificate template or upload a custom template using the Add new template button (For more details on certificate templates, refer to this article).
- Provide the certificate’s title and optionally include a subtitle, company name, and an external ID for integration with external systems.
- Define the certificate’s validity (either unlimited or limited). If limited, specify the validity period in days.
- Upload images for the certificate’s background, logo, and organization logo.
- Use the View button to preview the certificate.
- Save the created certificate by clicking the Save button.
The displayed certificate elements will depend on the chosen template.
Assigning a Certificate To a Test #
Once the certificate is ready, you can assign it to a test:
- Click on the desired certificate in the Manage certificates module and go to the Tests tab.
- Select the Link tests to this certificate button to assign the certificate to one or more tests.
- In the popup window, select the desired test or tests and click the Confirm button to save the changes.
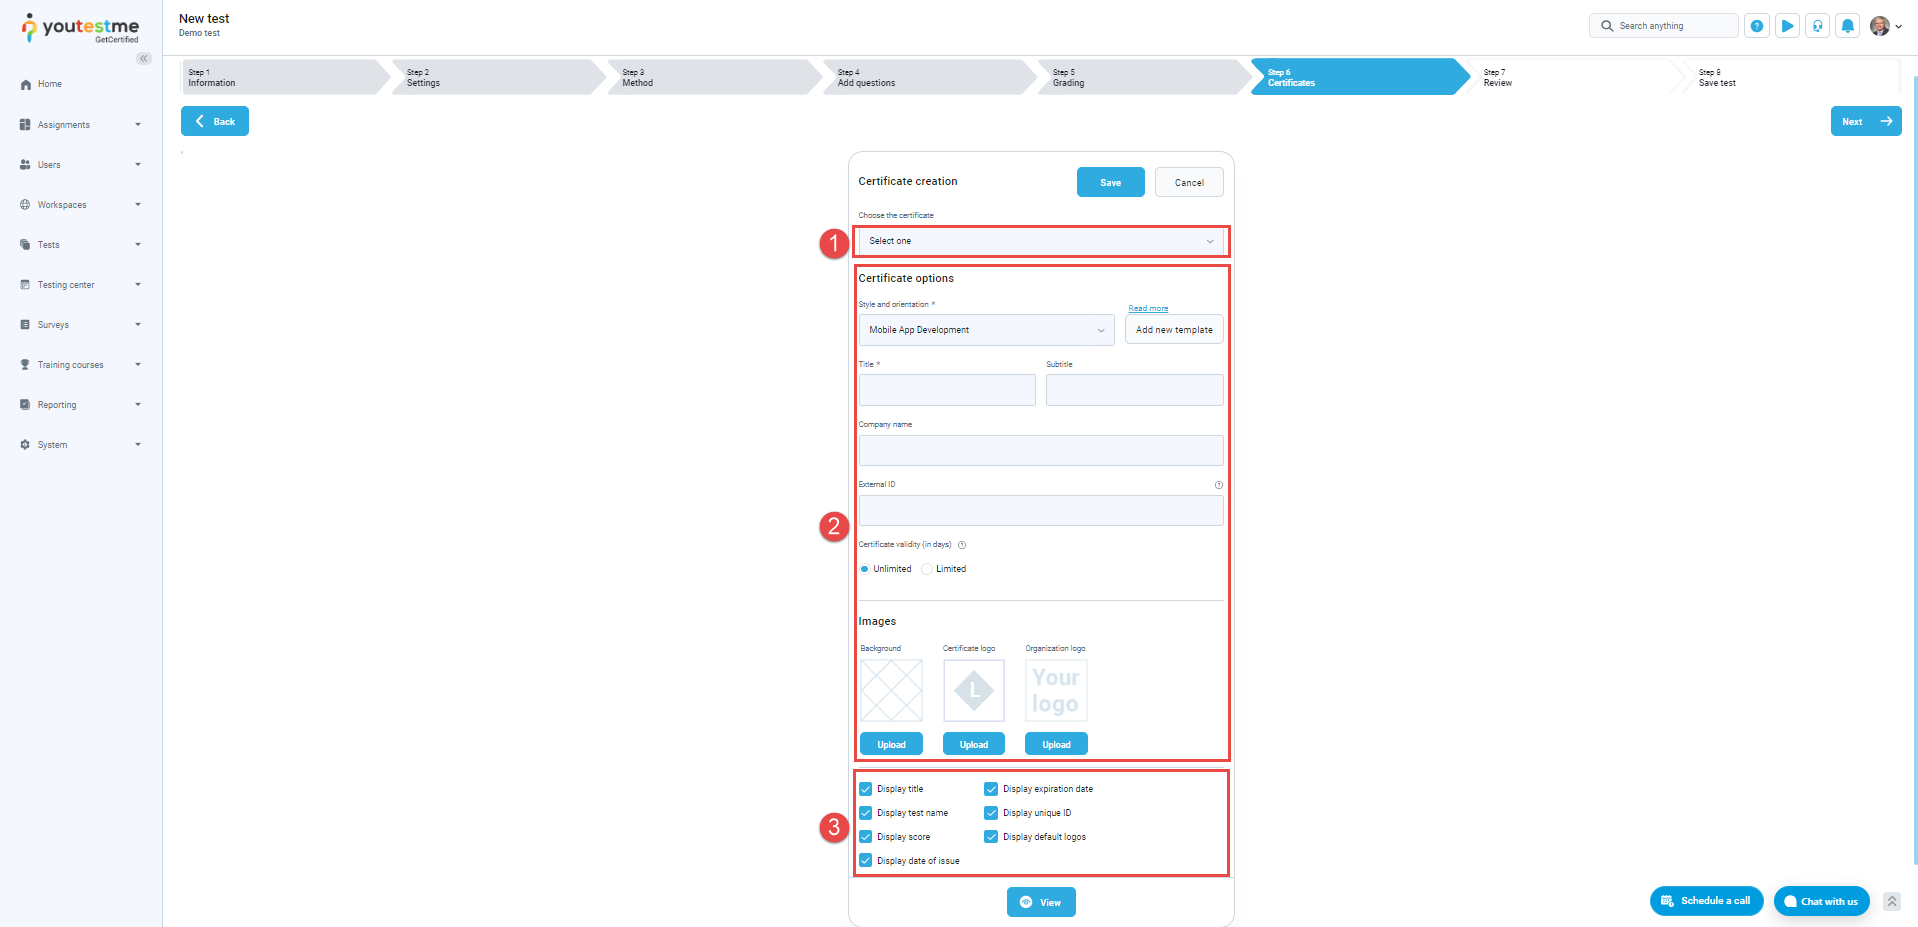
You can attach a certificate to a test during the test creation in the sixth step of the test creation wizard. To assign a certificate to a test during the test creation process, follow the steps:
In the Certificates tab in the Test creation wizard, click the Add Certificate button.
- Select a previously created certificate from the drop-down menu.
- Alternatively, you can create a new certificate following the instructions provided above.
- Furthermore, you have the option to customize the information displayed on the certificate by checking the box in front of the element name.
You can also add a certificate to the tests you’ve created from the test settings.
To add a certificate to a published test, follow these steps:
- Select the test to which you want to add certificates in Manage Tests.
- In the Settings tab, click on the Certificates option.
- Select the Add certificate button to add an already created certificate or create a new one.
Note: You have the flexibility to incorporate multiple certificates into the test.
Manage Access to Certificates #
The admin role can grant or revoke candidates’ permissions to view the certificates earned on both the My Certificates section, accessible from the candidate’s profile, and the test’s Personal Report page.
To provide users with access to their certificates, kindly proceed through the following steps:
- On the main menu, navigate to Users, then select the Roles and permissions option.
- Select the desired role and the Edit option in the Actions column.
Scroll down for the Enable viewing of achieved certificates permission in the permissions list and check the box beside it.
To save the changes, click the Update button at the bottom of the permissions list.
Subsequently, the My Achieved certificates section will become visible within the candidate’s profile and on personal reports for completed tests.
For video instructions on how to design a certificate, you may watch this video.
For more related instructional materials, please visit:


