
Article verified for Release 15.1 on February 24, 2026.
This article explains how to create a user with a proctor role and assign it to a test. The proctors’ role is to monitor candidates during the test-taking process, making sure candidates do not cheat or manipulate the test in any way.
Creating a new user with a proctor role
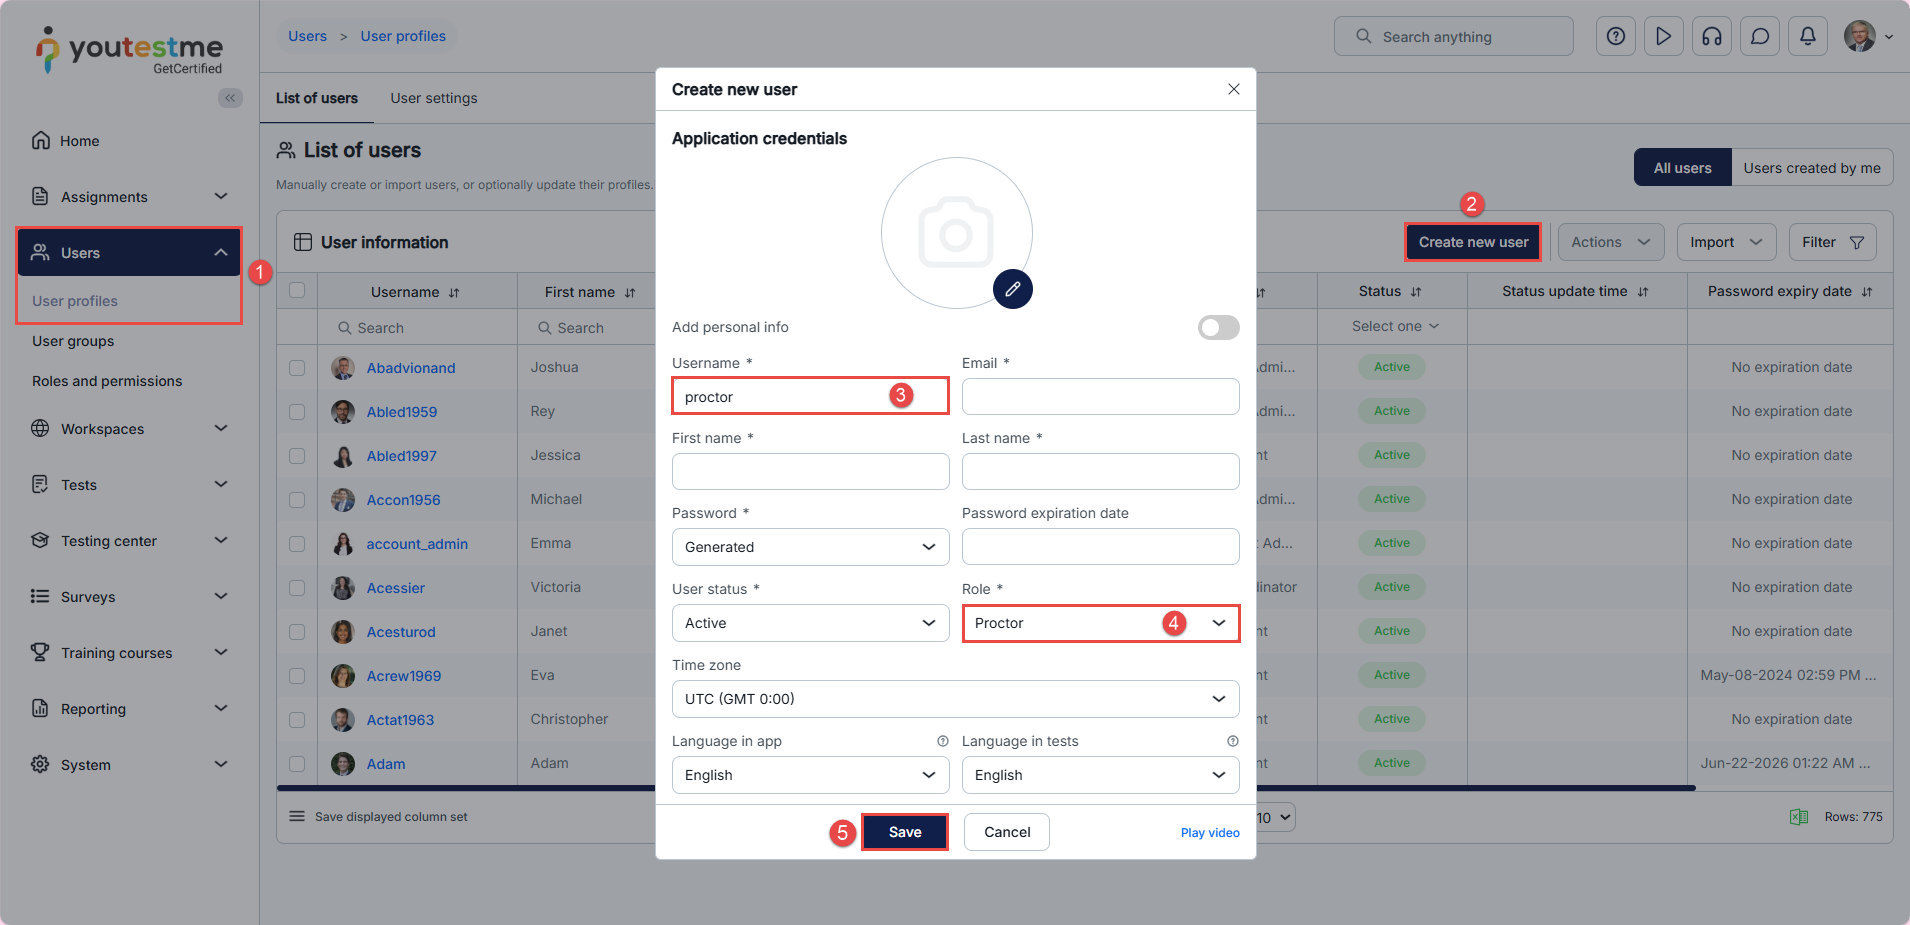
To create a new user:
- In the main menu, click on Users, then select User Profiles.
- Click on the Create New User button.
- Fill in the required user information (fields marked with an asterisk are mandatory).
- From the Role dropdown menu, select Proctor.
- Click Save to create the user.
Adding a Proctor to a Testing Session
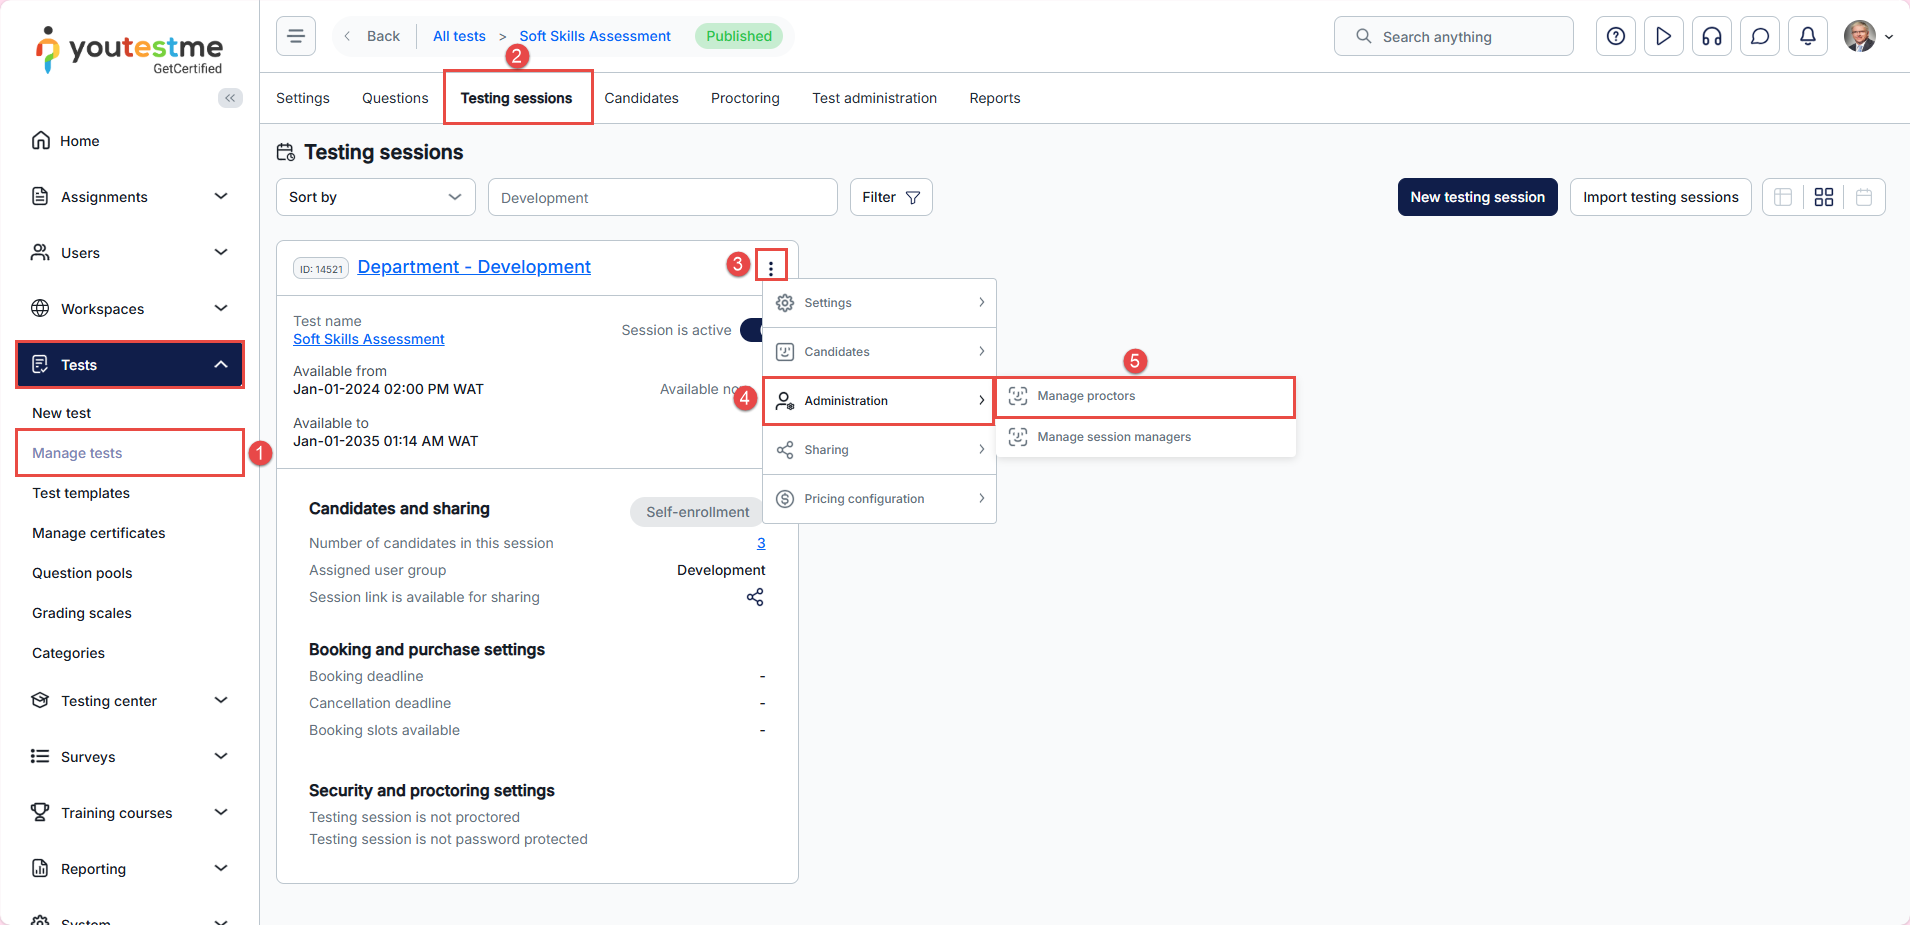
To add a new proctor to a specific testing session:
- Navigate to the Manage Tests tab under the Tests module.
- Select the desired test and navigate to the Testing Sessions tab.
- Click the three vertical dots next to the desired session name
- Hover over Administration.
- Select the Manage Proctors option.
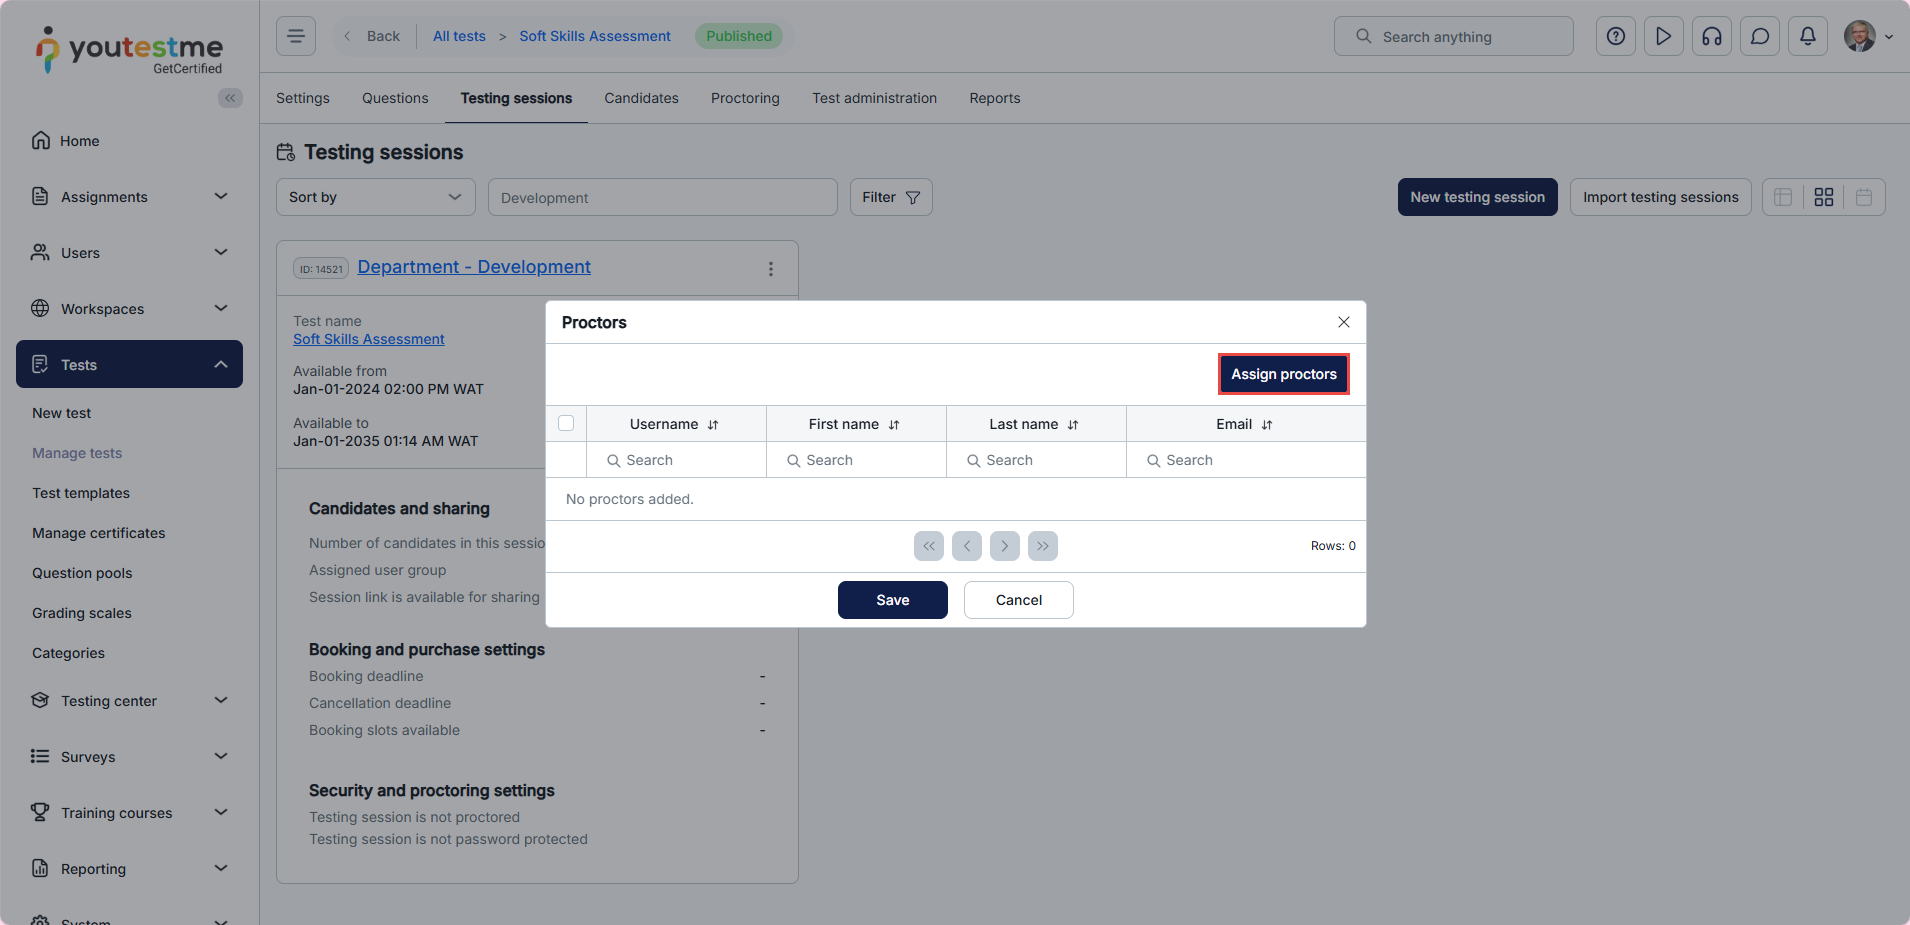
Click on the Assign Proctors button to open the selection window.
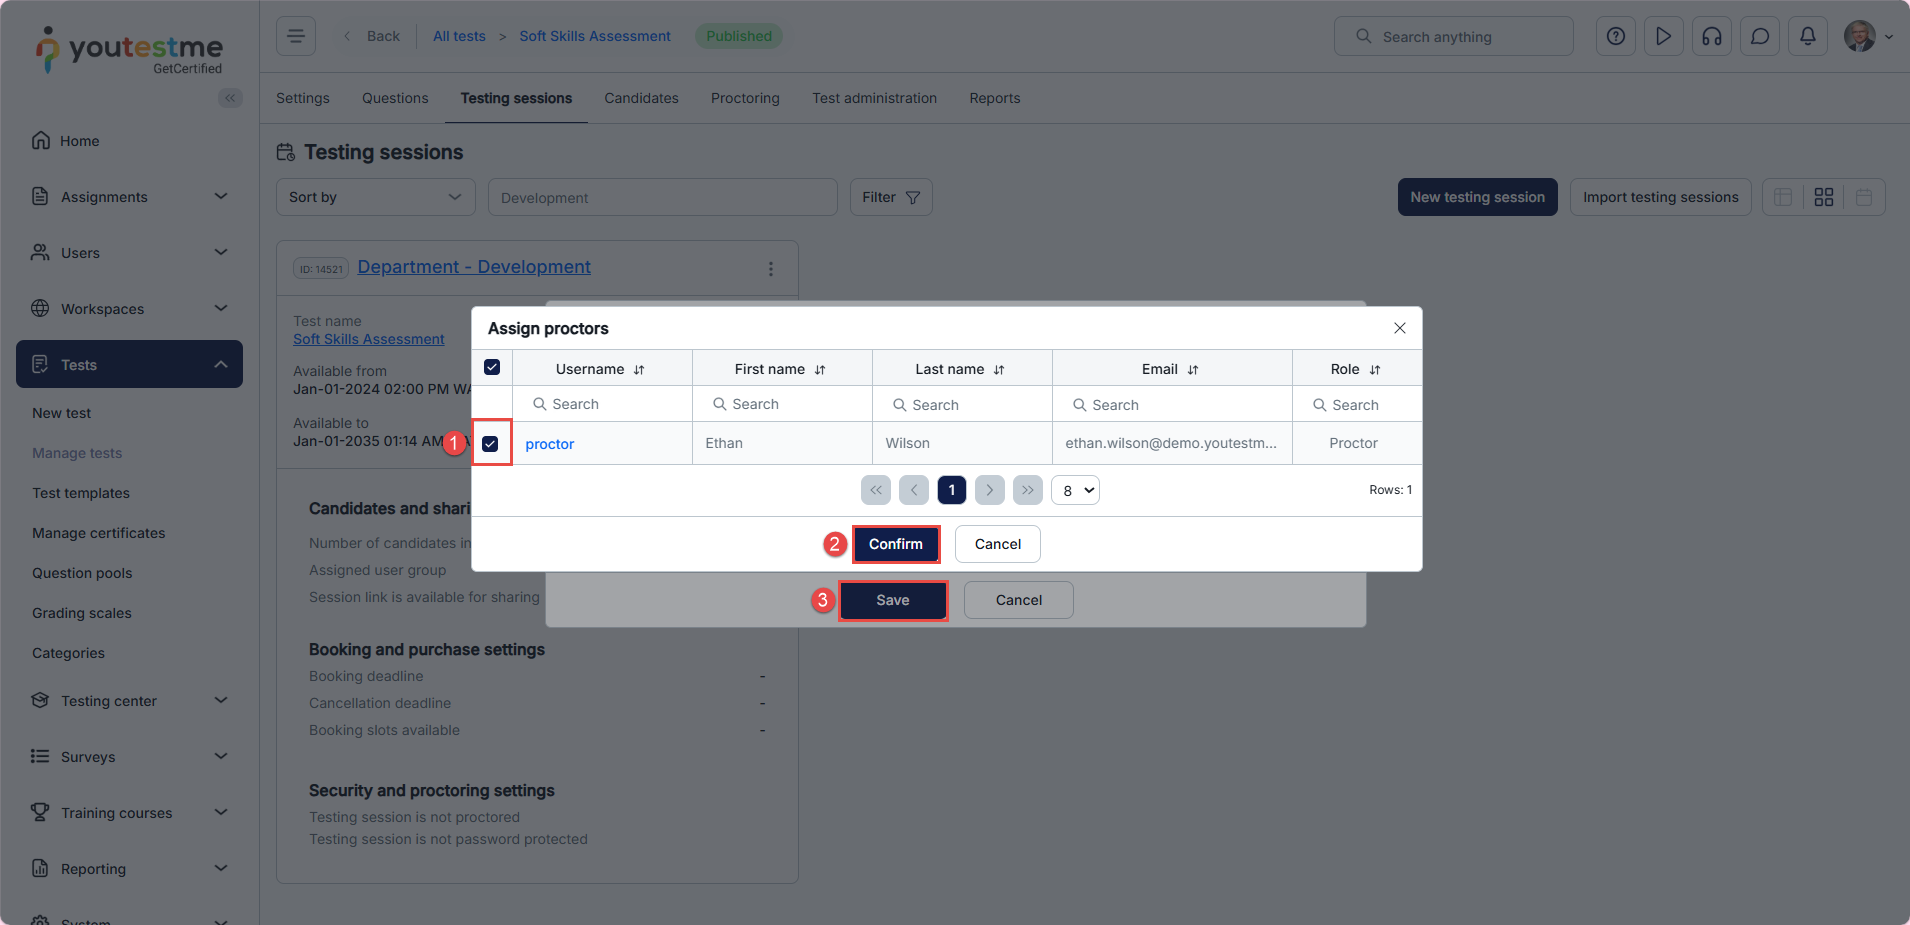
- Select the desired proctors by checking the boxes next to their usernames.
- Click Confirm to apply your selection.
- Press Save to assign the selected proctors.
Test from the proctor’s perspective
Note: Proctors must access candidate monitoring through the Candidates tab. Proctors do not have access to the test, so all monitoring actions must be performed from the Candidates tab within the assigned testing session.
To access candidate monitoring, proctors should navigate to Testing Center in the main menu, then click on the Candidates tab and select the desired testing session.
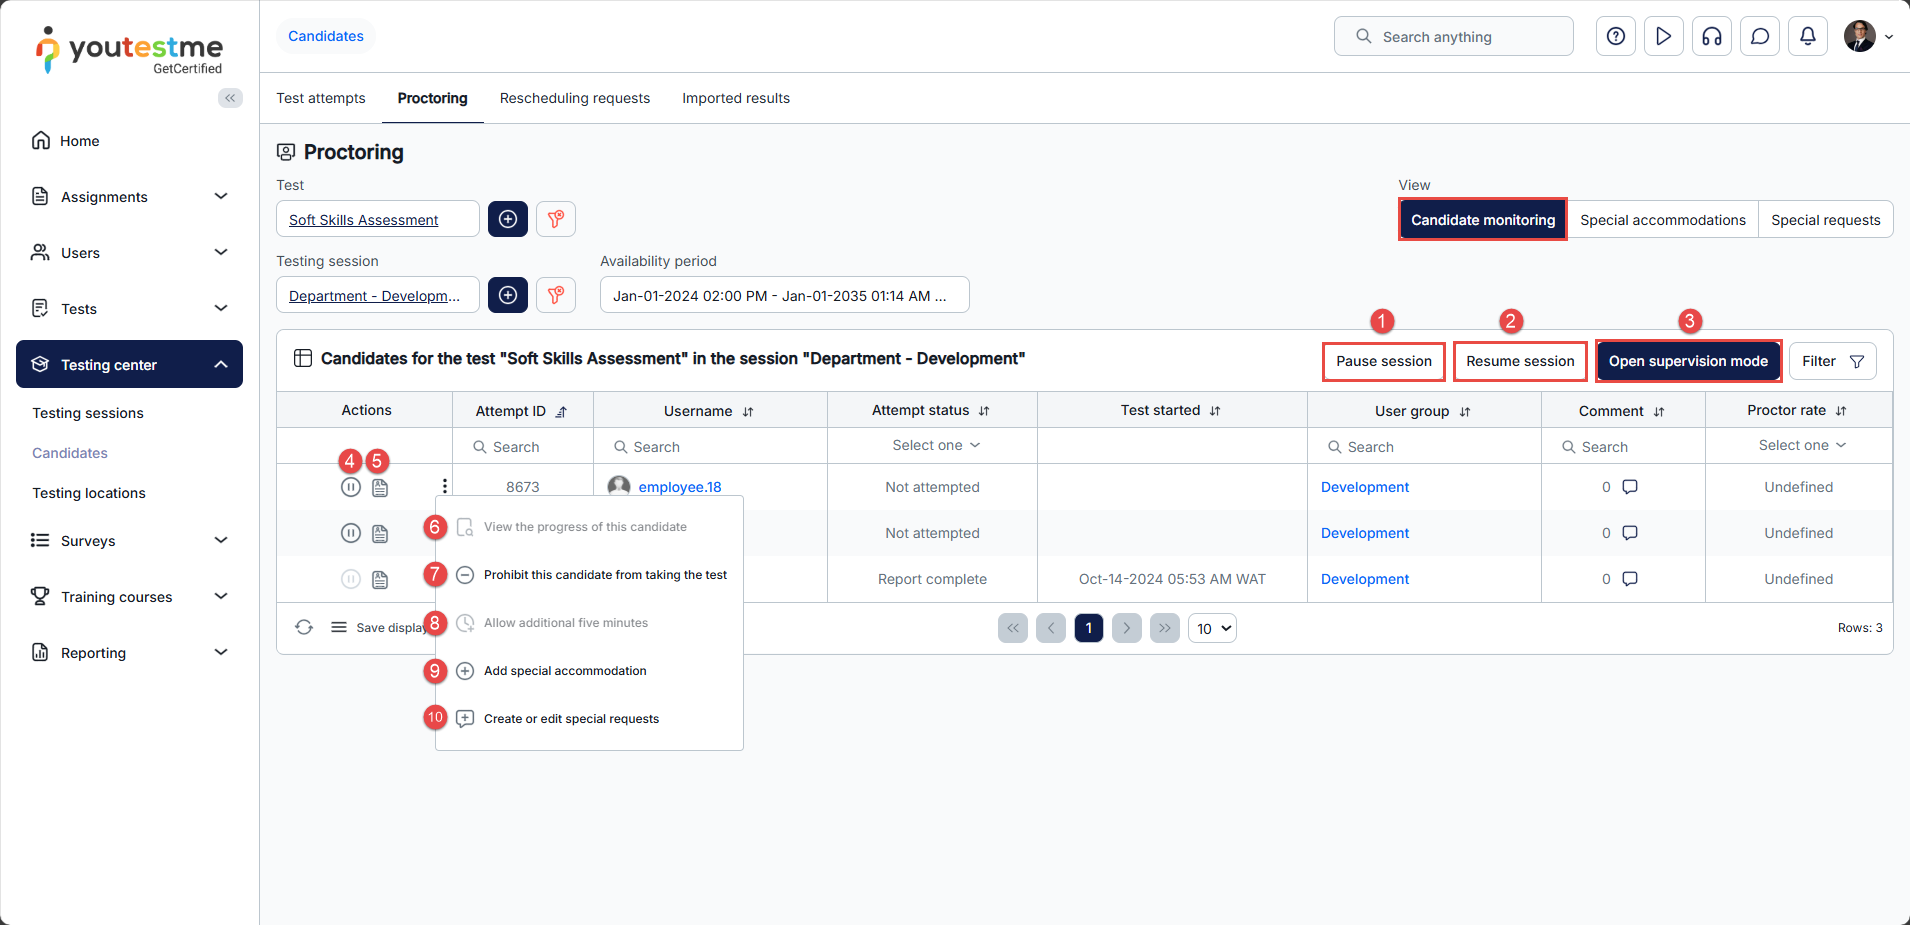
In the Candidate Monitoring tab, the proctor can:
- Pause session – Pause the session for a user during test-taking and write the reason for the pause. The candidate will see the message proctor has provided and will not be able to continue the test as long as the session is paused.
- Resume session- Resume a previously paused session, allowing the candidate to continue the test.
- The Open Supervision Mode button allows proctors to access the supervision dashboard, where they can monitor live proctoring sessions or review and grade past sessions.
- Pause – Allows a proctor to pause the test for each candidate separately. Proctor can also send a message to the candidate explaining the test pausing.
- Open proctoring report for this candidate– This option allows proctors to grade a candidate’s behavior during or after the test.
- View the progress of this candidate – View the progress of a particular candidate. The proctor can track the candidate’s event log and view each test question’s status by clicking this button.
- Prohibit this candidate from taking the test- This option allows proctors to prohibit a candidate from taking the test. To allow the candidate to take the test later, he should click again on the same icon.
- Allow additional five minutes – This option allows proctors to give an additional 5 minutes to a candidate in real time. This option only works if the candidate is currently taking a test. It can be used an unlimited number of times.
- Add special accommodation – This option allows proctors to apply customized support for a candidate’s test attempt, such as extra time, screen reading, or other accommodations.
- Create or edit special request- This option allows proctors to create or modify special requests related to a candidate’s test session, such as requesting documentation or additional information before or after the test.
Note: Proctor cannot change the test settings and testing sessions.
For video instructions on how to create proctored tests and assign proctors, please watch this video.
For more related instructional material, please see:
