
Article verified for Release 15.1 on January 29, 2026
This article provides step-by-step guidance to help candidates prepare for and successfully complete a proctored exam on the Moodle platform.
Exam Requirements
To take a proctored exam, you will need the following:
- Device: A desktop or laptop computer with a working microphone and webcam.
- Mobile Device (if required): A smartphone with a functional camera may be required for exams that use a secondary camera.
- Android: Version 4.4 or higher with Chrome 72+
- iOS: Version 13 or higher with Safari
- Operating System:
- Windows 7 or later
- macOS 10.12 “Sierra” or later
- Linux (compatible distributions)
- Supported Browsers:
- Google Chrome (latest version recommended)
- Opera 59 or higher
- Firefox 66 or higher
- Microsoft Edge 79 or higher
- Safari 12.x or higher
Before Starting the Exam
To ensure a smooth exam experience, make sure to complete the following setup steps:
- Chrome Users: Make sure Window Management permission is enabled for the exam platform.
- macOS Users: Verify that the screen recording permission is granted for the browser you will use.
- Using Multiple Monitors: Ensure your displays are duplicated so that all screens show the same content.
- Microphone Setup:
- Select the correct microphone (especially if using headphones, USB, or wireless mic).
- Set the input volume to 50% or higher.
- Webcam Setup: Ensure the correct webcam is selected (if using an external USB webcam).
Accessing the Exam
To access and begin your proctored exam:
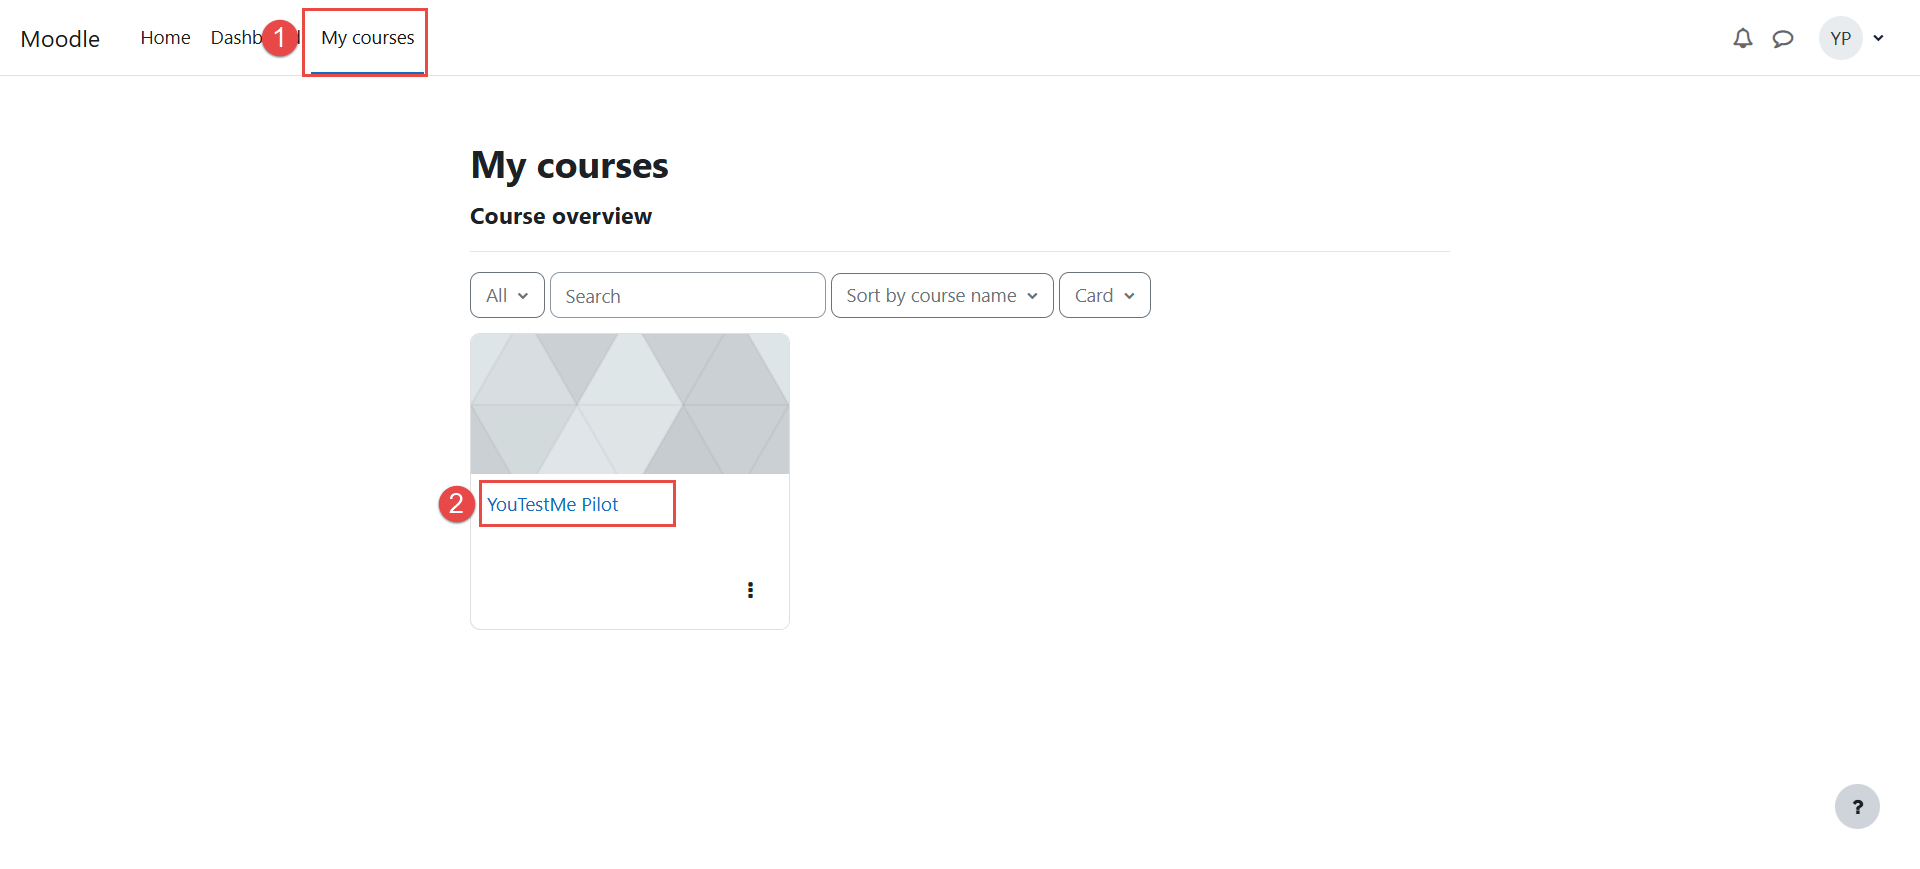
- Log in to your account and go to “My Courses.”
- Click on the relevant “course name.”
- Carefully read the provided instructions and click on the “Equipment Check” link to initiate the setup process.
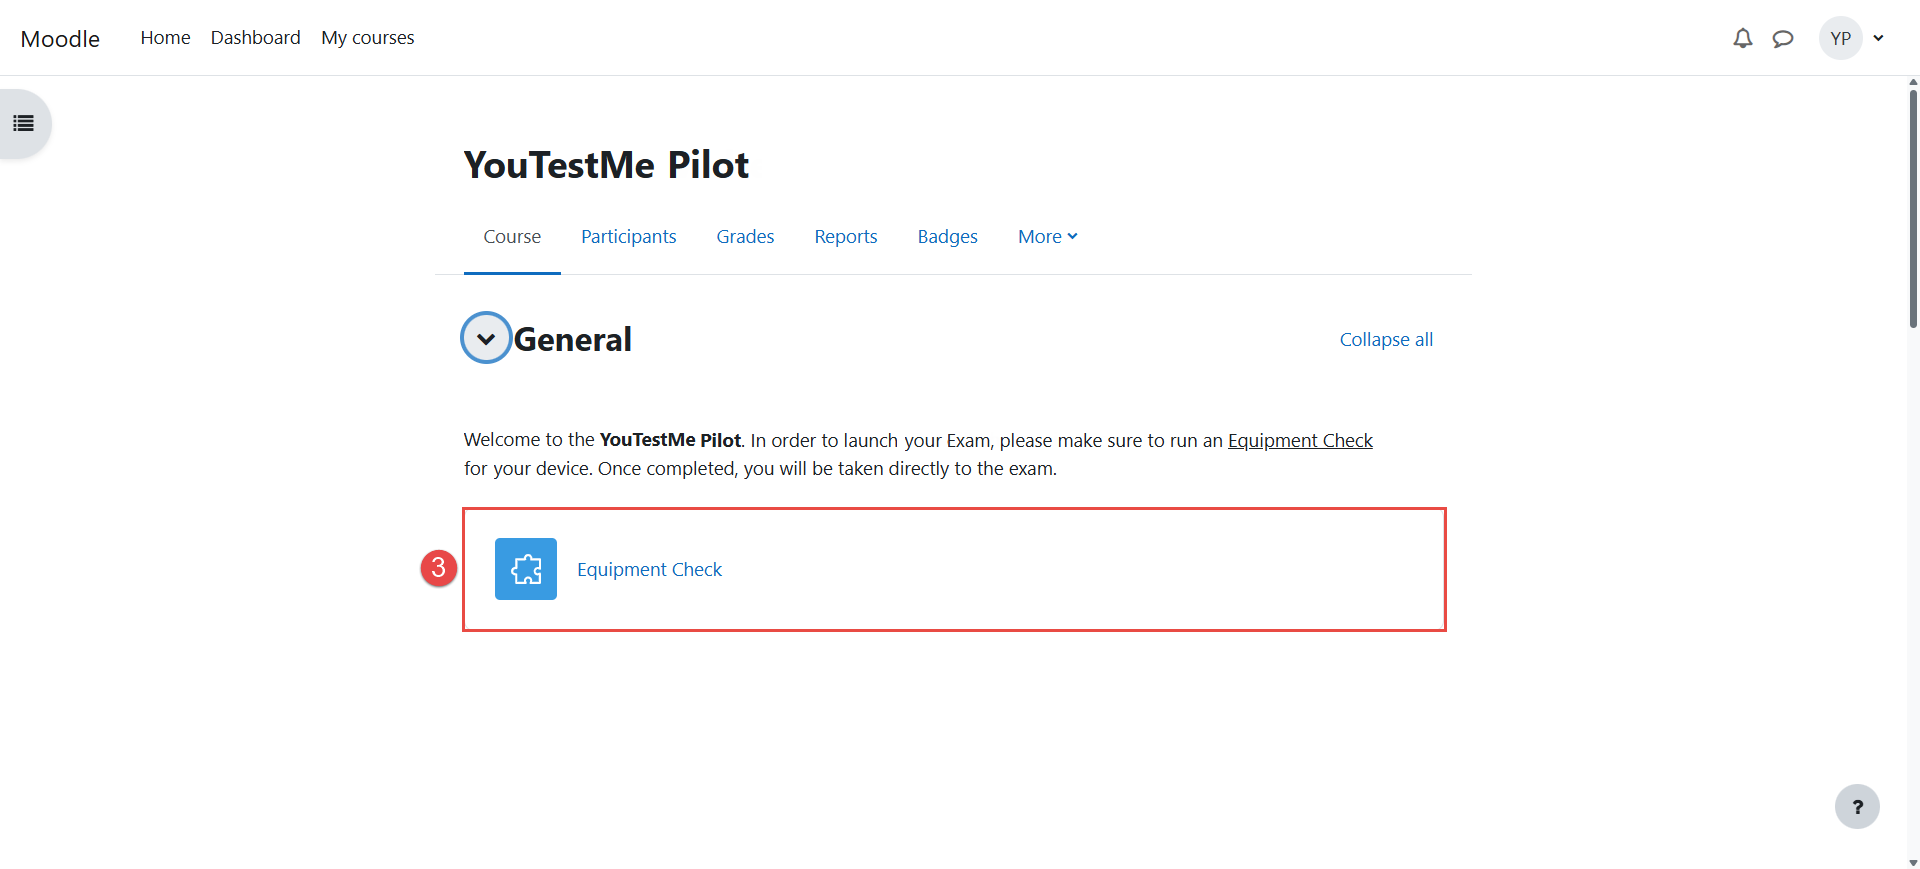
The system will automatically begin checking your device and verifying your identity to ensure you meet all requirements for taking a proctored exam.
Equipment Check Steps
The equipment check consists of several steps. The number and type of steps may vary depending on the specific requirements of the exam. Below are the possible steps, listed in their typical order:
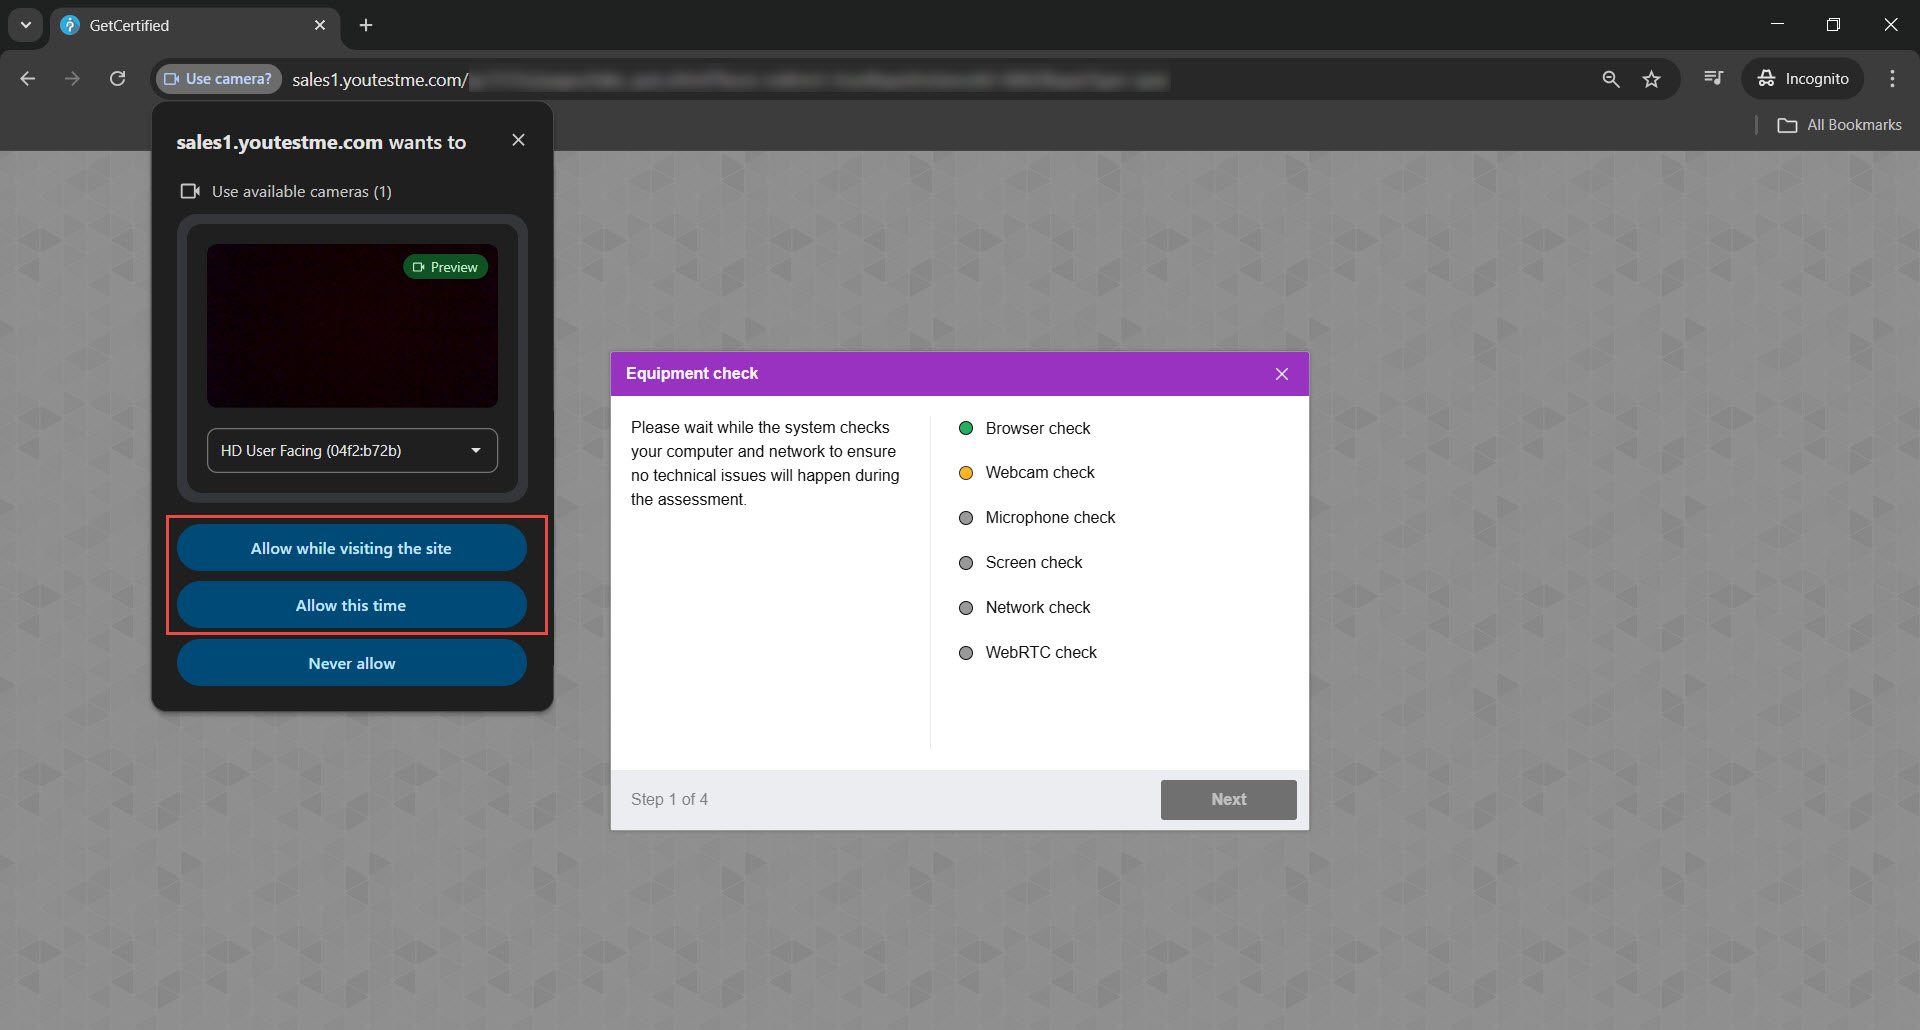
Step 1: Equipment Check
At the beginning of each session, an automatic check is performed to verify the computer and internet connection. User interaction is only required if problems are detected.
During this step, your browser will prompt you to grant access to your camera, microphone, and screen. Please ensure that all necessary permissions are granted and that you select ‘Entire Screen’ when prompted. Once the system verifies the setup, the Next button will turn green, allowing you to continue.
If you encounter any issues during this process, please refer to the following articles: Camera, Microphone, Screen-sharing, and WebRTC.
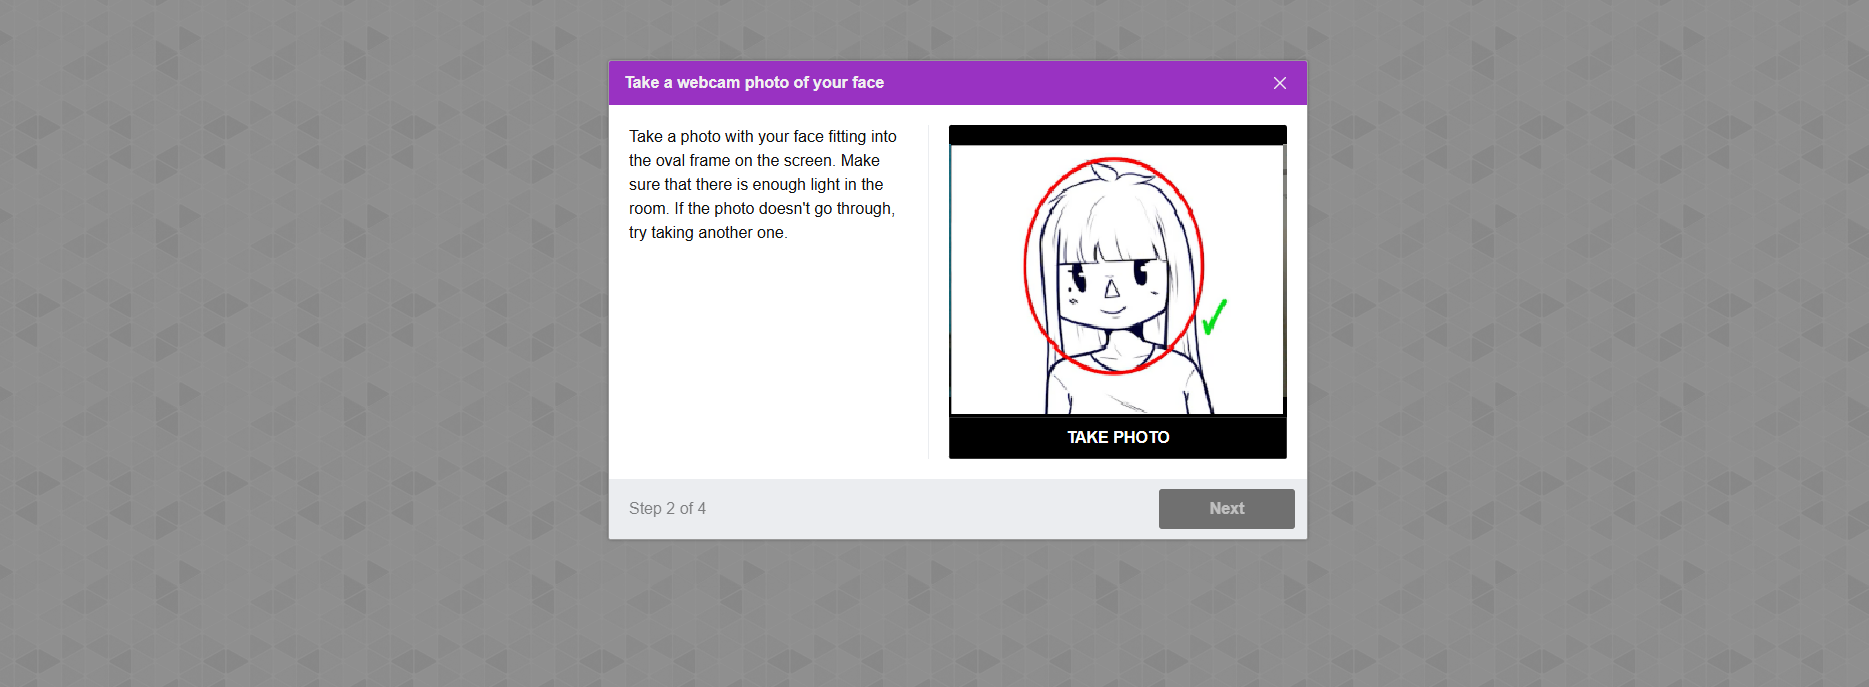
Step 2: Taking a Face Photo
At this step, your webcam will activate, allowing you to capture a photo of your face. After the photo is taken, the system will verify and approve it. Once the image is accepted, the Next button will turn green, allowing you to proceed to the following step.
If you encounter any issues during this process, please refer to the troubleshooting guide for assistance.
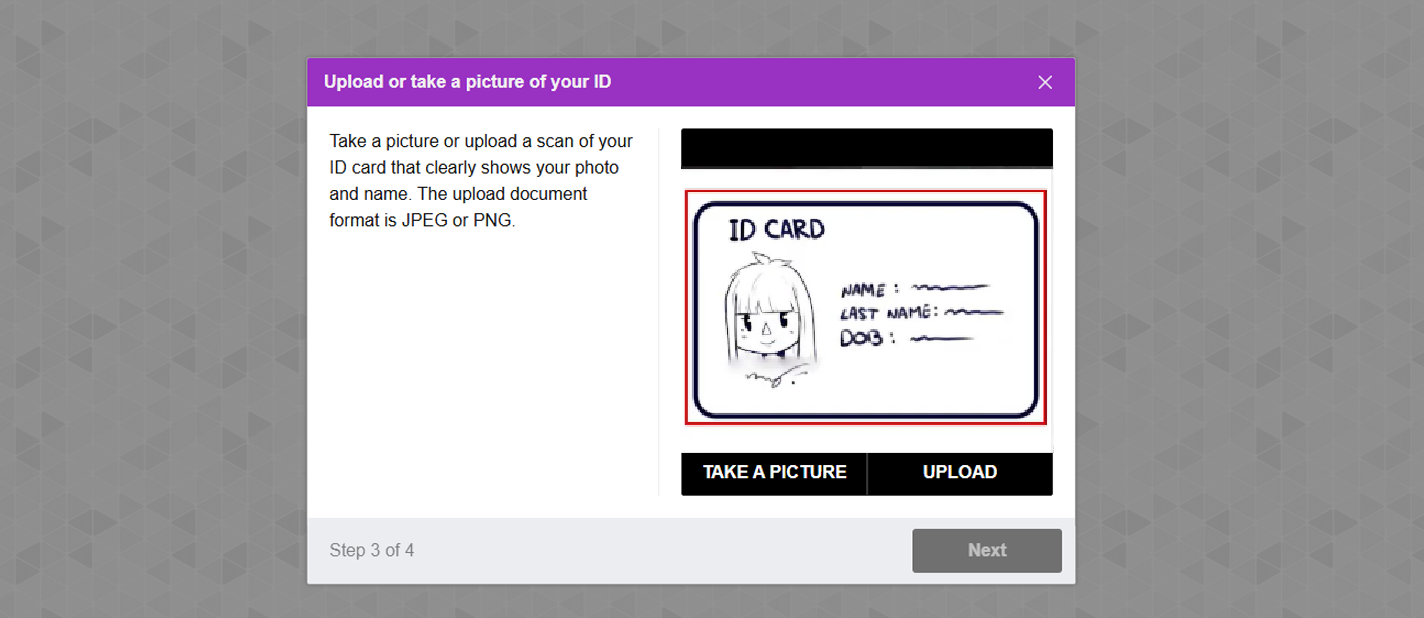
Step 3: Taking or Uploading an ID Photo
At this step, your webcam will activate, allowing you to capture a photo of your ID. Alternatively, you can click the Upload button to submit an image of your ID from your device. Once the ID is verified and approved, the Next button will turn green, enabling you to proceed.
If you encounter any issues during this step, please refer to the troubleshooting guide for assistance.
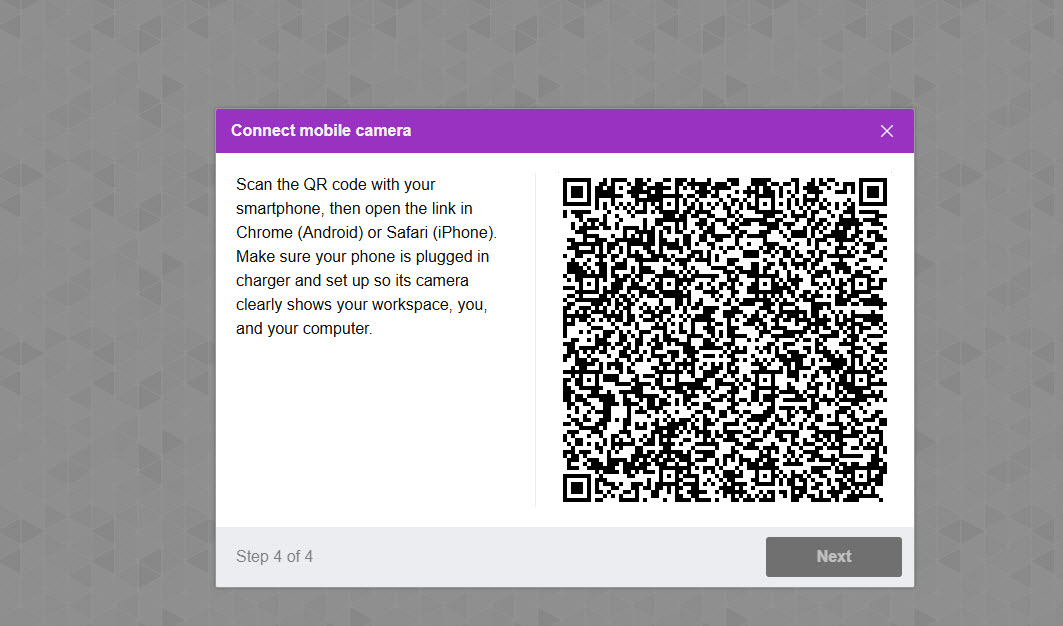
Step 4: Secondary Camera Setup
A QR code will appear on your screen. Scan it using your smartphone to connect your mobile camera as a secondary camera for the exam.
Depending on the exam configuration, candidates may be required to record a short video during this step. Afterward, the secondary camera may continue recording throughout the exam.
If you encounter any issues during this step, please refer to this article.
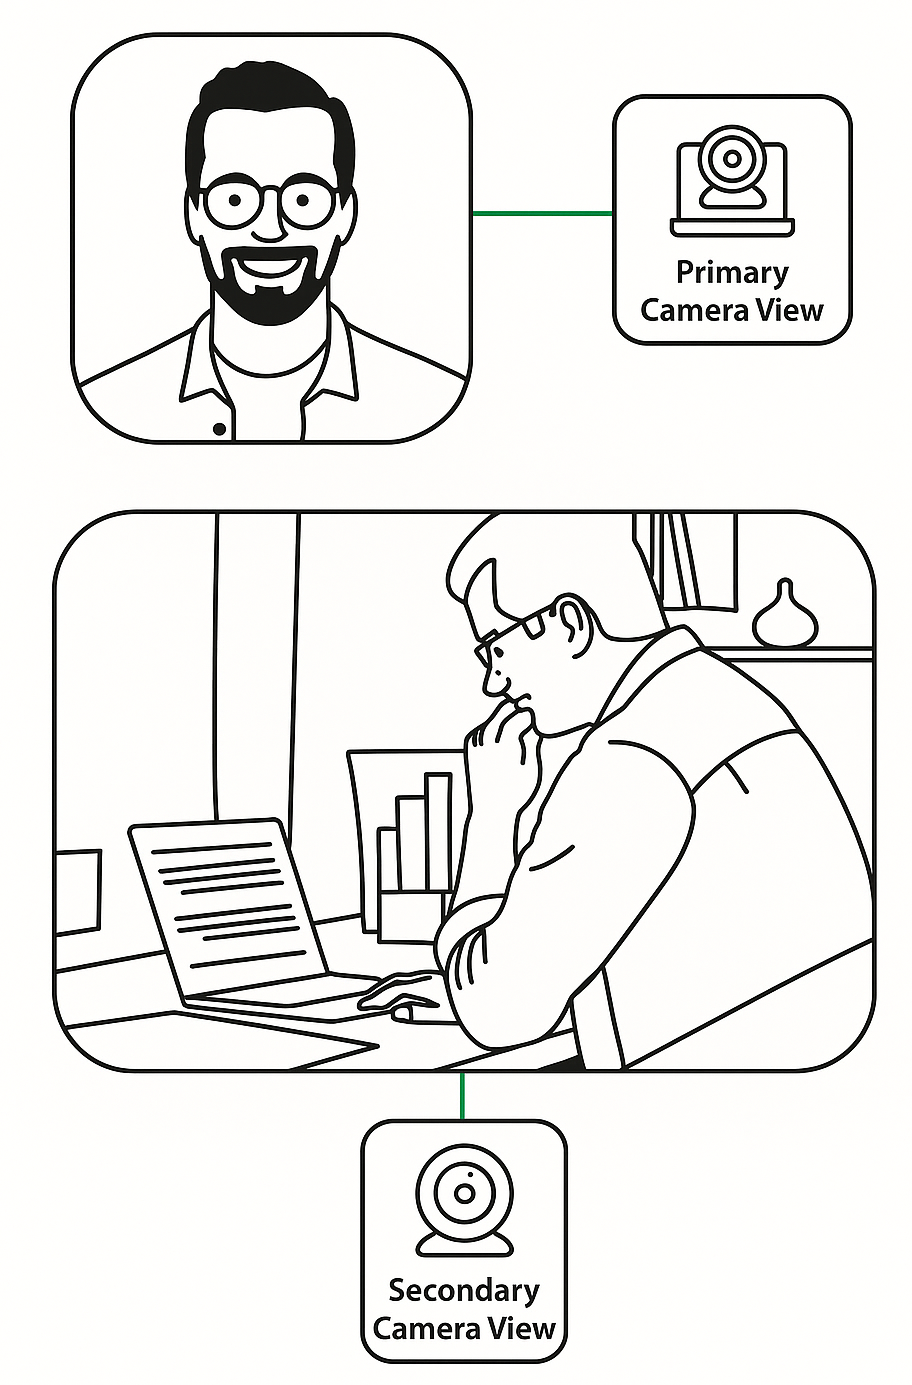
Once the connection is established, place your mobile device on a stable surface or holder to the side or slightly behind you. Ensure the camera captures a clear view of you, your desk, and your laptop during the entire exam.
Return to your exam screen and click Next to begin the test.
For additional related topics, please refer to the following articles:
