
Article verified for Release 15.1 on November 23, 2025.
YouTestMe provides users with the ability to generate certified tests, allowing candidates to receive certificates upon completing assignments. This article provides a comprehensive explanation of how to create, integrate, assign, and manage user access to certificates.
Creating a Certificate
Setting Up the Certificate Template and Details
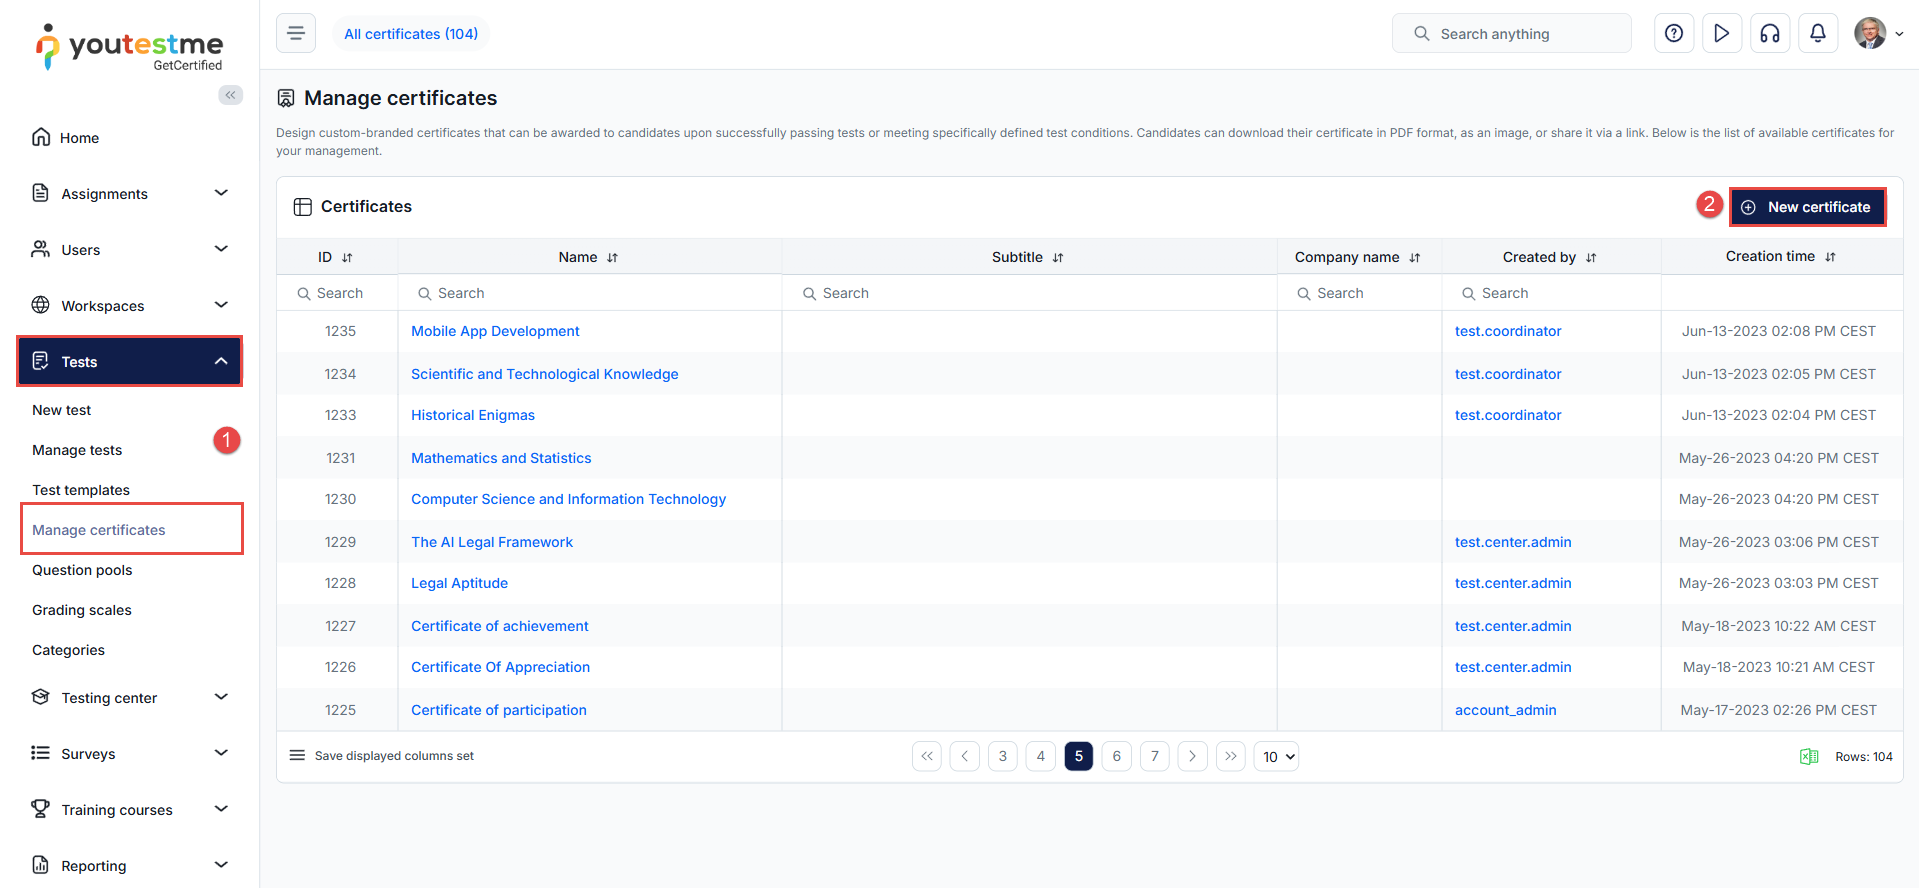
To create a new certificate from the Manage certificates module, follow these steps:
- From the main menu, navigate to Tests and choose Manage certificates.
- Initiate the certificate creation process by clicking the New certificate button.
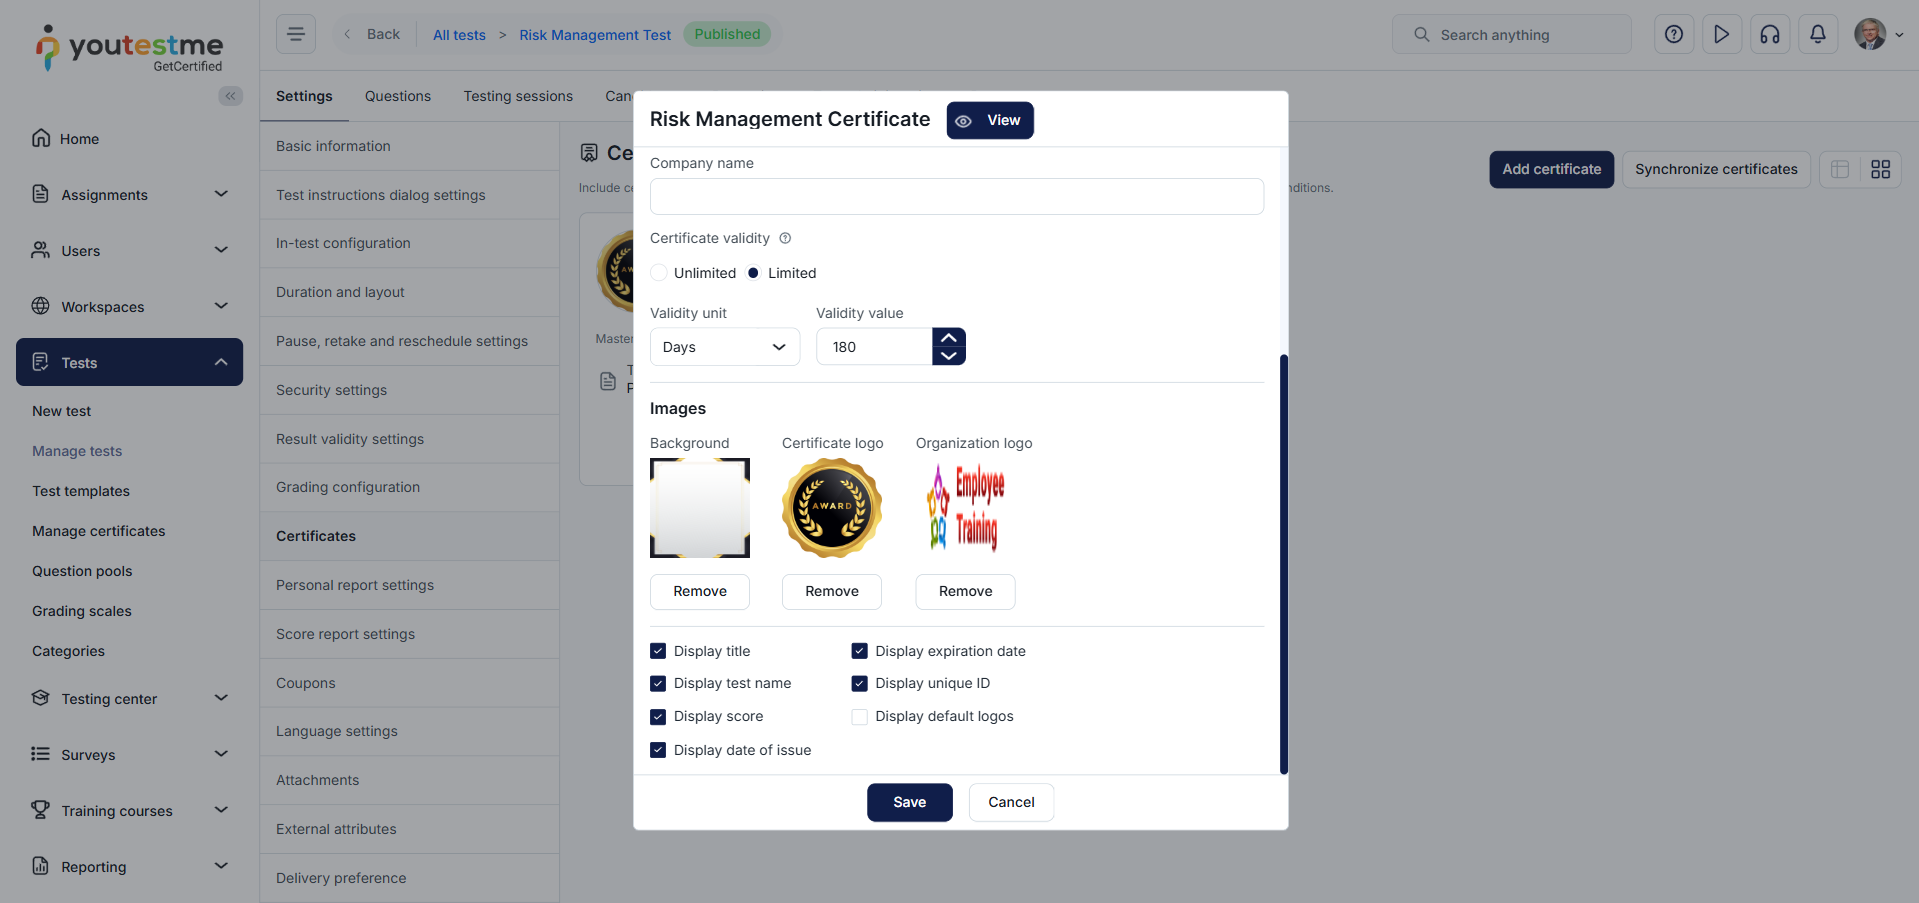
- In the Create certificate form, select an available certificate template or upload a custom template using the Add new template button (For more details on certificate templates, refer to this article).
- Provide the certificate’s title and, optionally, include a subtitle, company name, and an external ID for integration with external systems.
- Define the certificate’s validity (either unlimited or limited in days or years). For more information, check this article.
- Upload images for the certificate’s background, logo, and organization logo.
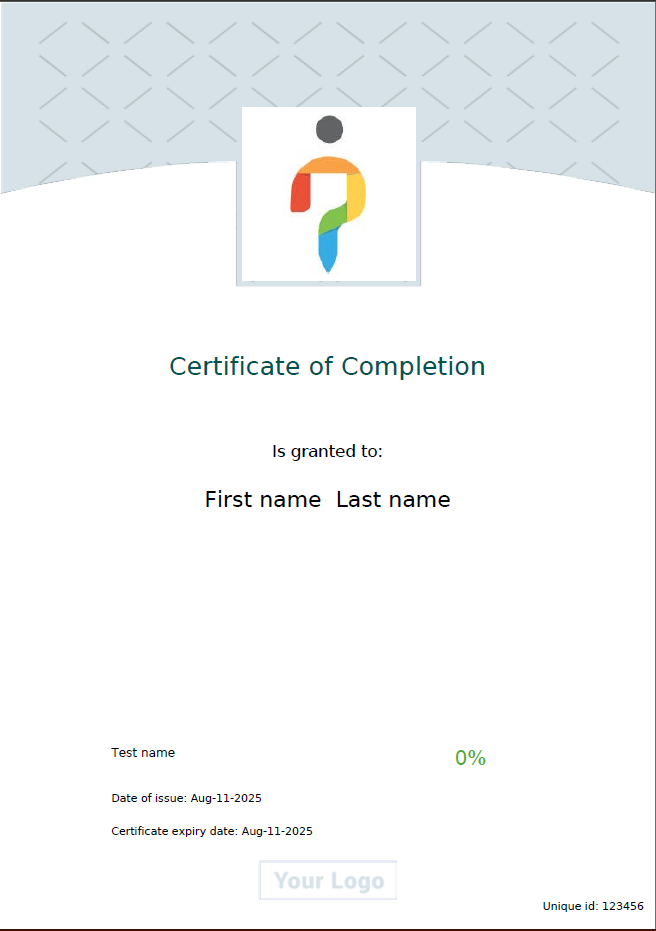
- Use the View button to preview the certificate.
- Save the created certificate by clicking the Save button.
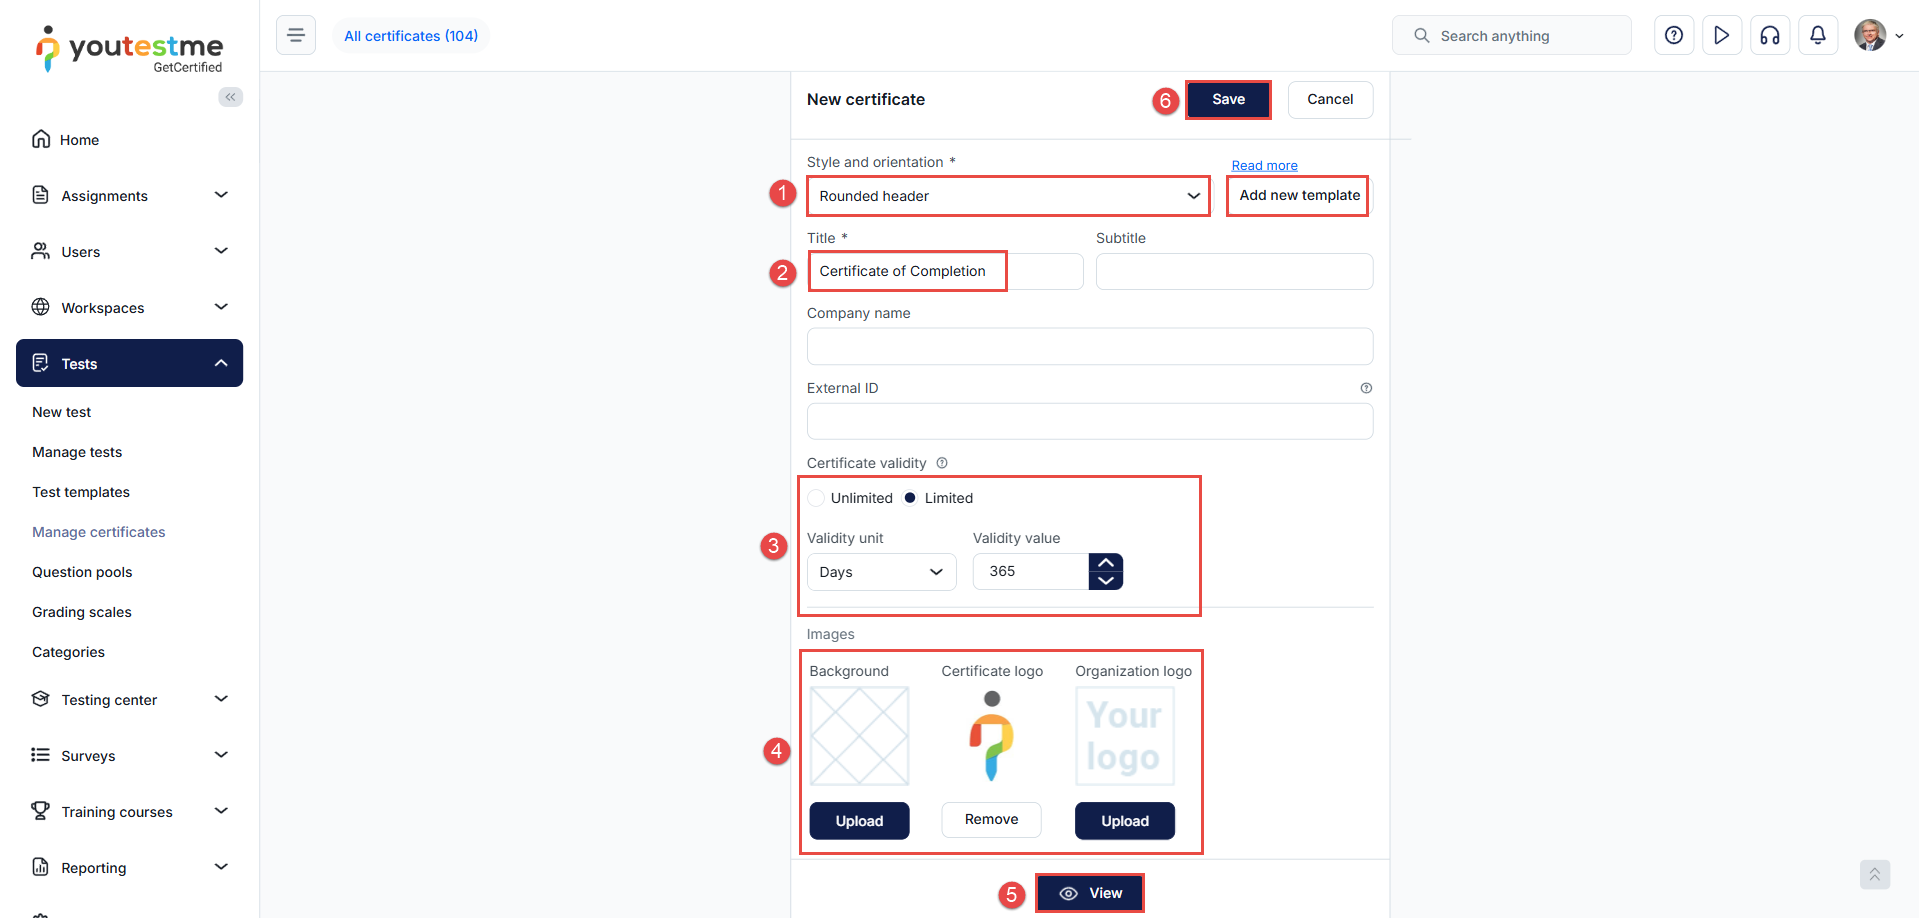
The displayed certificate elements will depend on the chosen template.
Assigning a Certificate Manager
To assign a certificate manager to the created certificate, follow the steps below:
- Navigate to the “Managers” tab of the created certificate settings.
- Click the Assign managers button.
- Select the desired user(s) by checking the box next to their name.
- Click the Confirm button to complete the assignment.

Note: Certificate managers have the ability to manage certificates and assign them to tests, regardless of their role within the system.
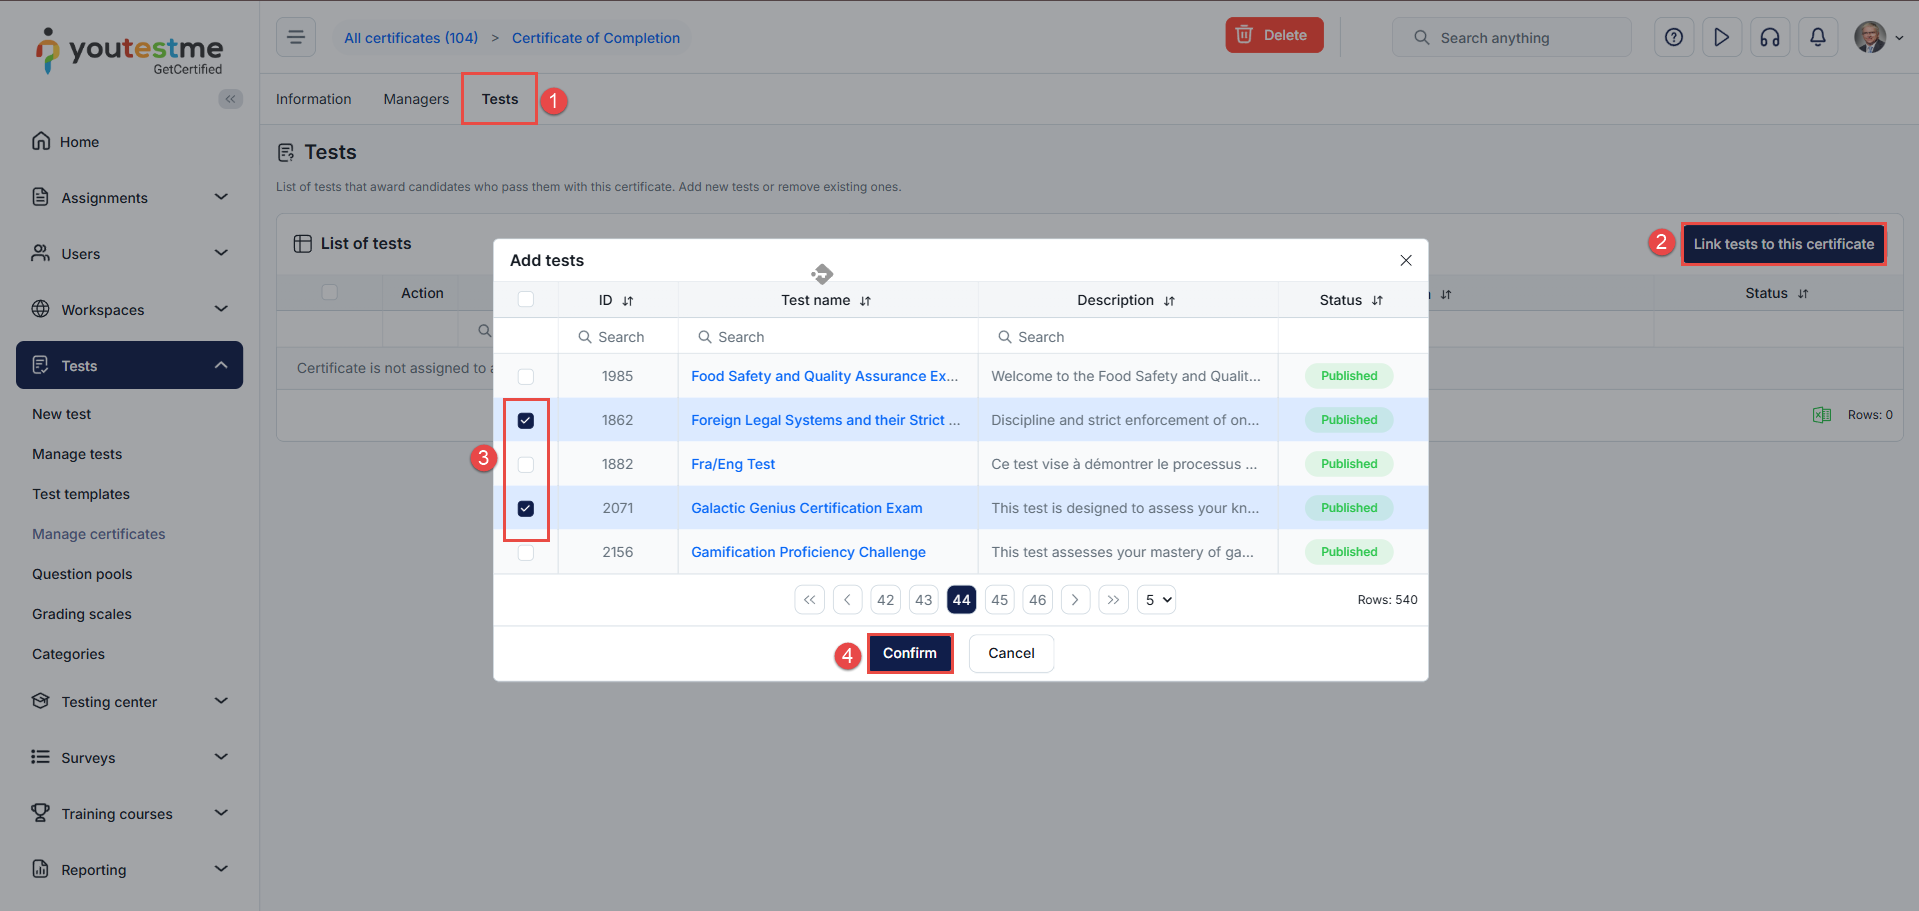
Assigning a Certificate To a Test
To assign the created certificate to a test, follow the steps below:
- Go to the Tests tab of the created certificate settings.
- Click the Link tests to this certificate button to assign the certificate to one or more tests.
- In the pop-up window, select the desired test or tests.
- Click the Confirm button to complete the assignment.
You can also add a certificate to the tests you’ve created from the test settings.
To add a certificate to a published test, follow these steps:
- Select the test to which you want to add certificates in Manage Tests.
- In the Settings tab, click on the Certificates option.
- Select the Add certificate button to add an existing certificate or create a new one.
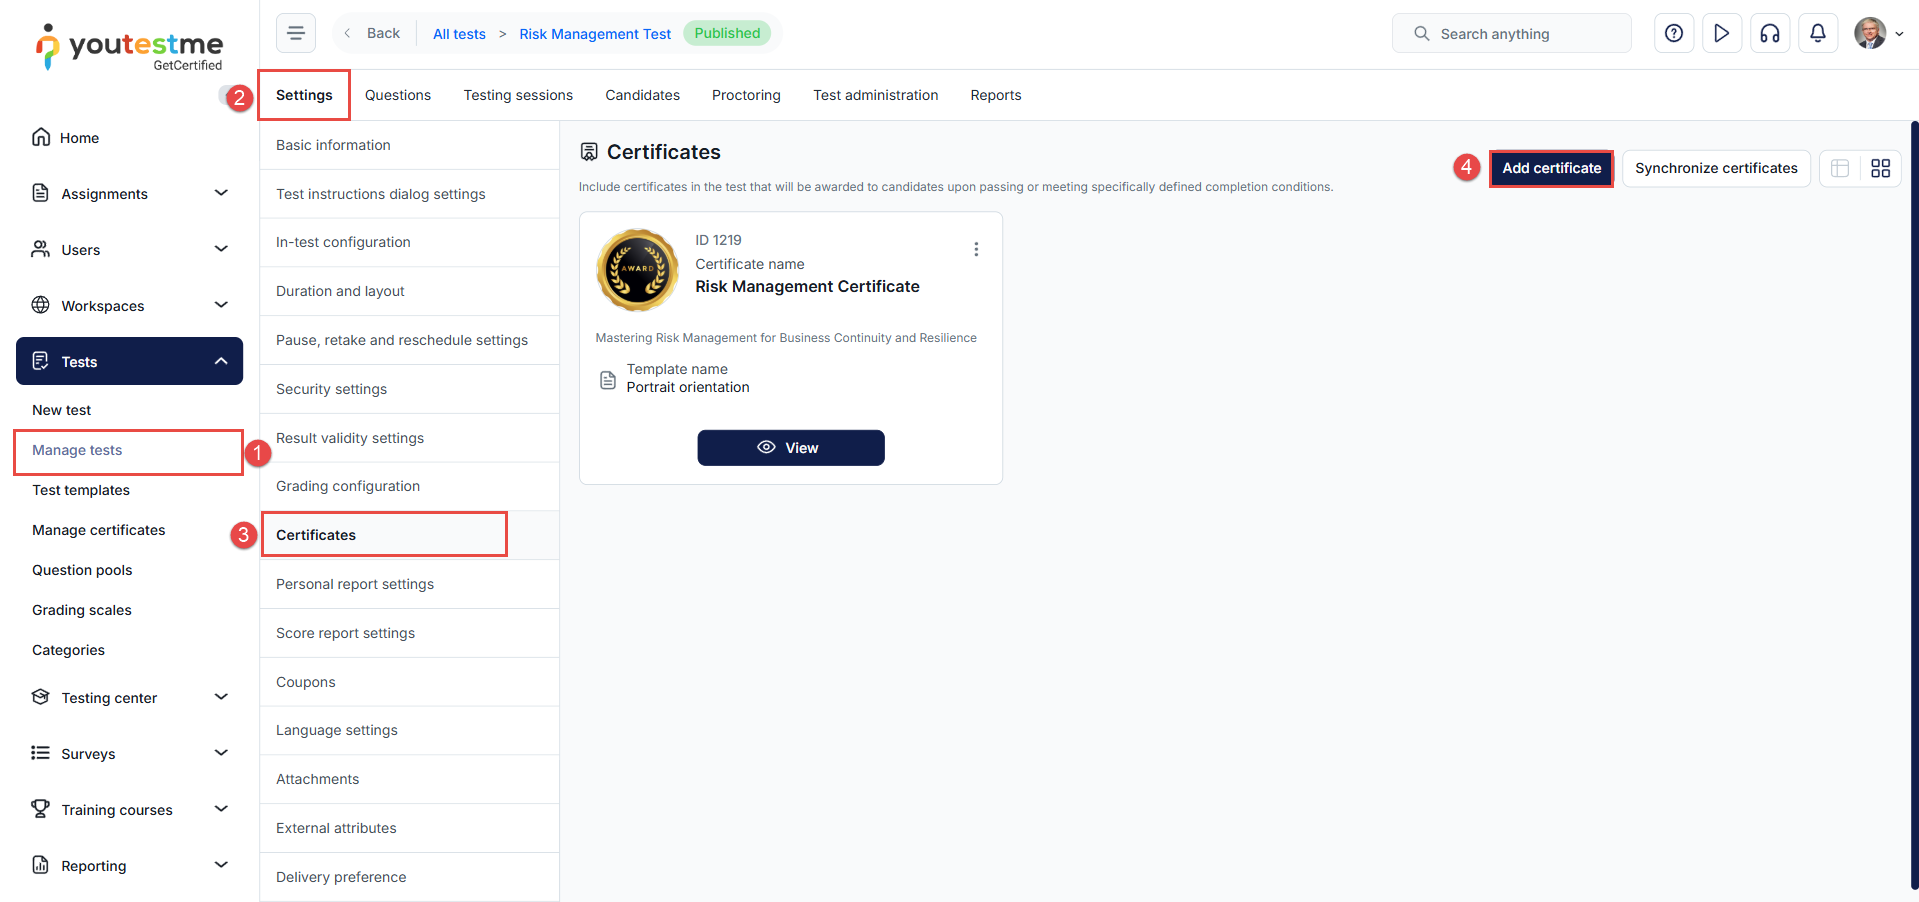
Note: You have the flexibility to incorporate multiple certificates into the test and define the certification conditions. Please read this article for further details.
Editing a Certificate
You can modify an existing certificate if changes are required after it has been created.
To do so, click the three-dot menu (⋮) next to the certificate name and select Edit.
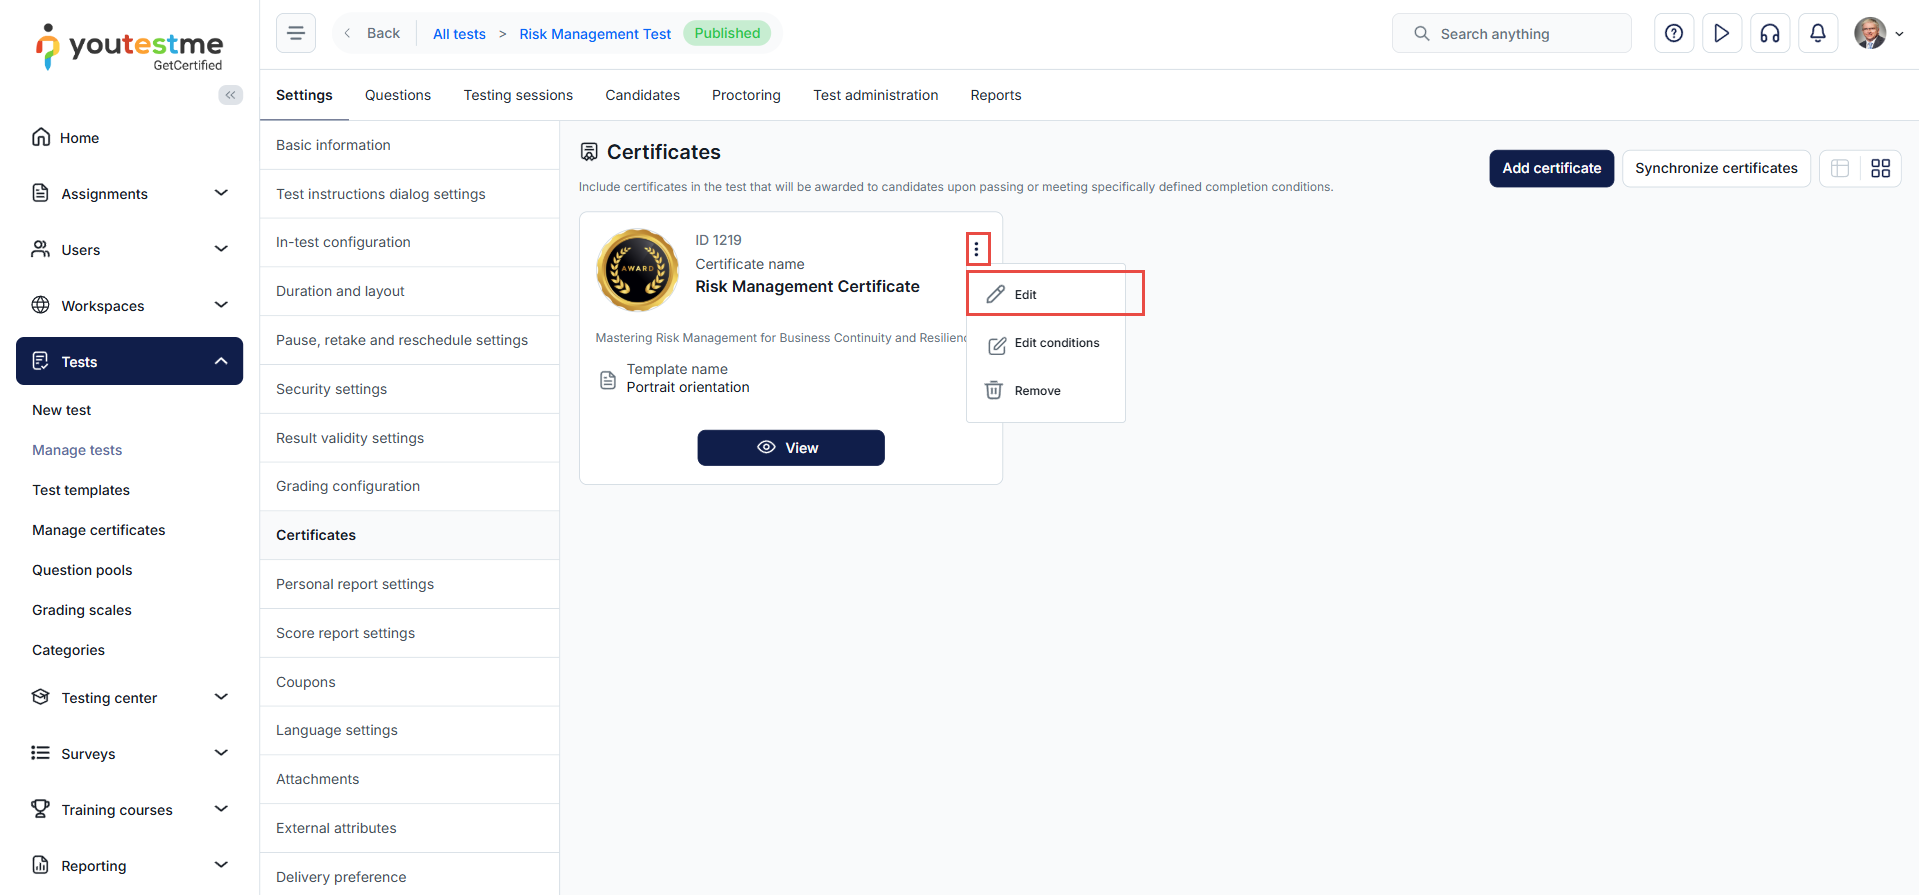
This will reopen the certificate configuration form. You can:
- Modify displayed content (title, logos, score, etc.)
- Change the certificate validity period. For more information, check this article.
- Adjust visual components like uploaded images.
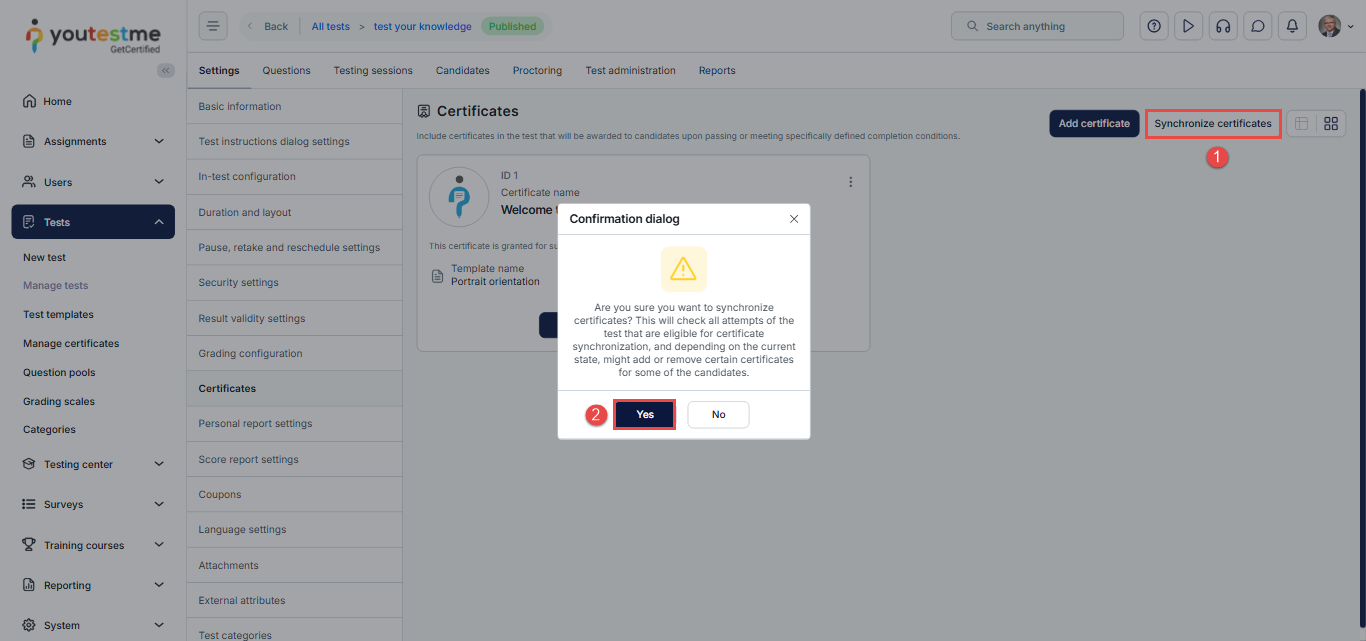
Synchronizing Certificates
After modifying certificate conditions or test configurations, you may need to synchronize certificates to ensure that all changes are reflected in users’ assignments. This action re-evaluates the conditions for each candidate and assigns or removes certificates based on the most recent criteria.
It’s recommended to synchronize certificates if you:
- Modify the test’s grading configuration.
- Change a user’s test results.
- Update the certificate conditions.
To synchronize certificates:
- Click the Synchronize Certificates button.
- In the pop-up window, click Yes to confirm the action.
- The system will re-evaluate the current certificate assignment conditions and update the certificates for the relevant candidates.
This action will remove certificates from candidates who no longer meet the criteria and assign them to those who now qualify based on the modified conditions.
Manage Access to Certificates
The admin role can grant or revoke candidates’ permissions to view the certificates earned in both the My Certificates section, accessible from the candidate’s profile, and the test’s Personal Report page.
To provide users with access to their certificates, kindly proceed through the following steps:
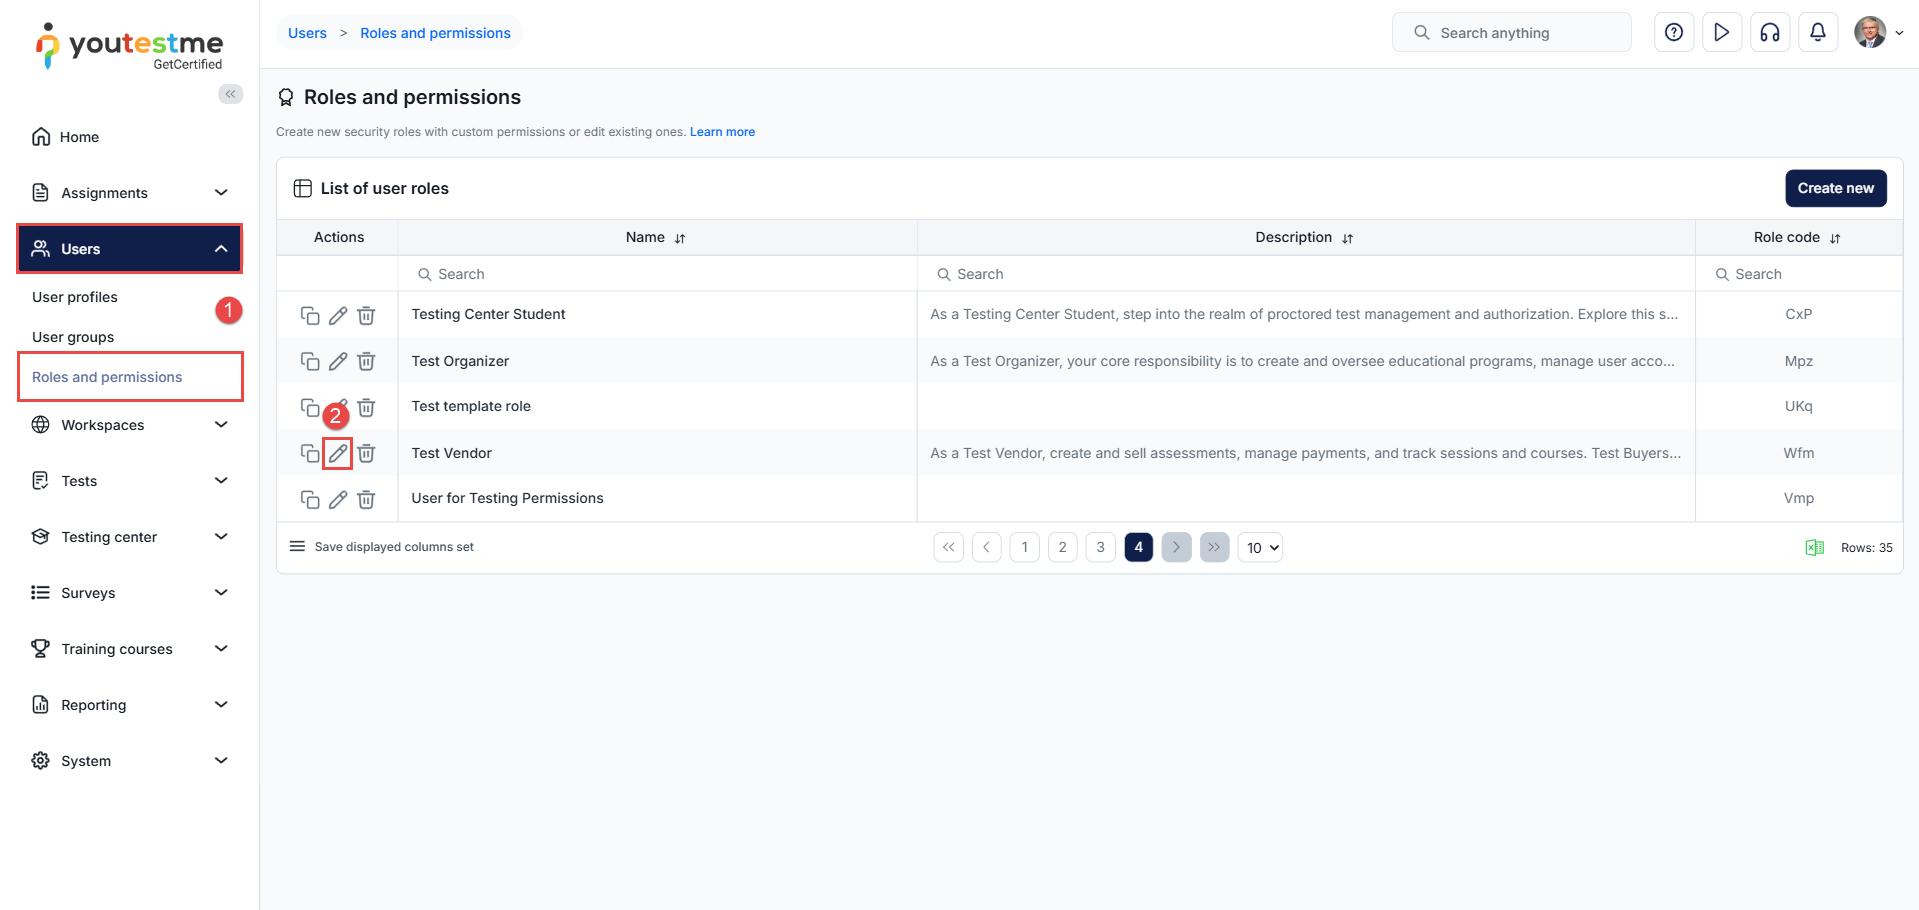
- On the main menu, navigate to Users, then select the Roles and permissions option.
- Select the desired role and the Edit option in the Actions column.
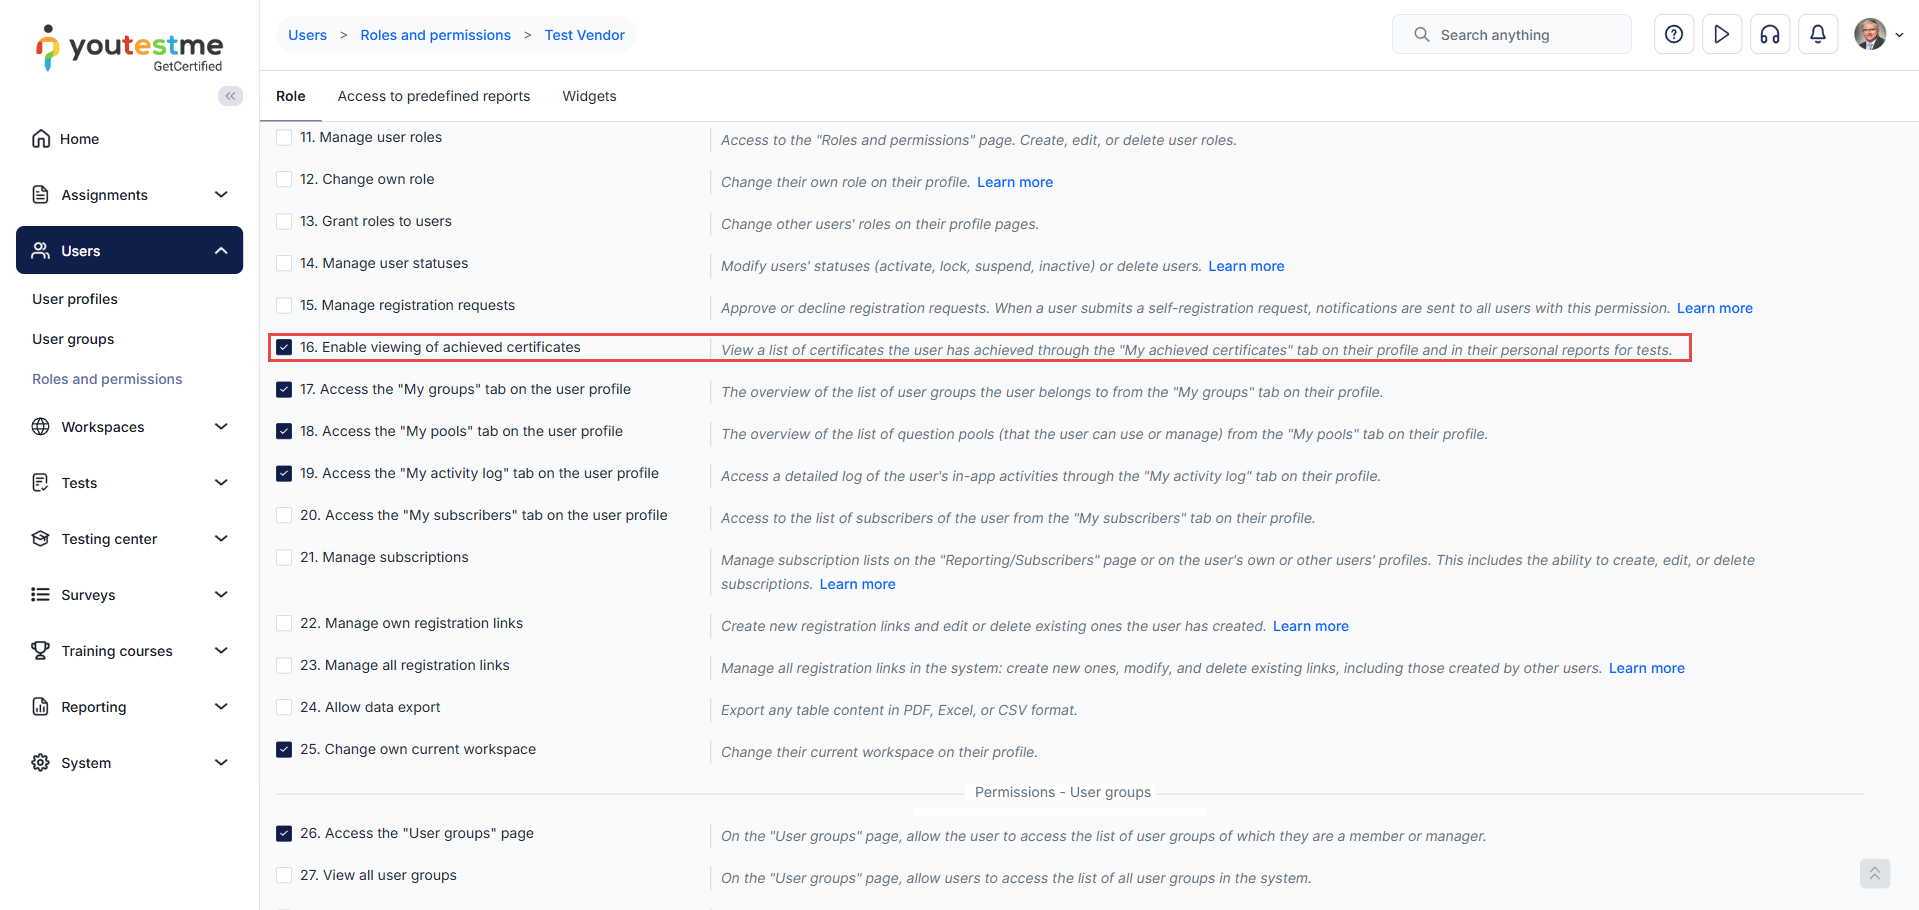
Scroll down for the Enable viewing of achieved certificates permission in the permissions list and check the box beside it.
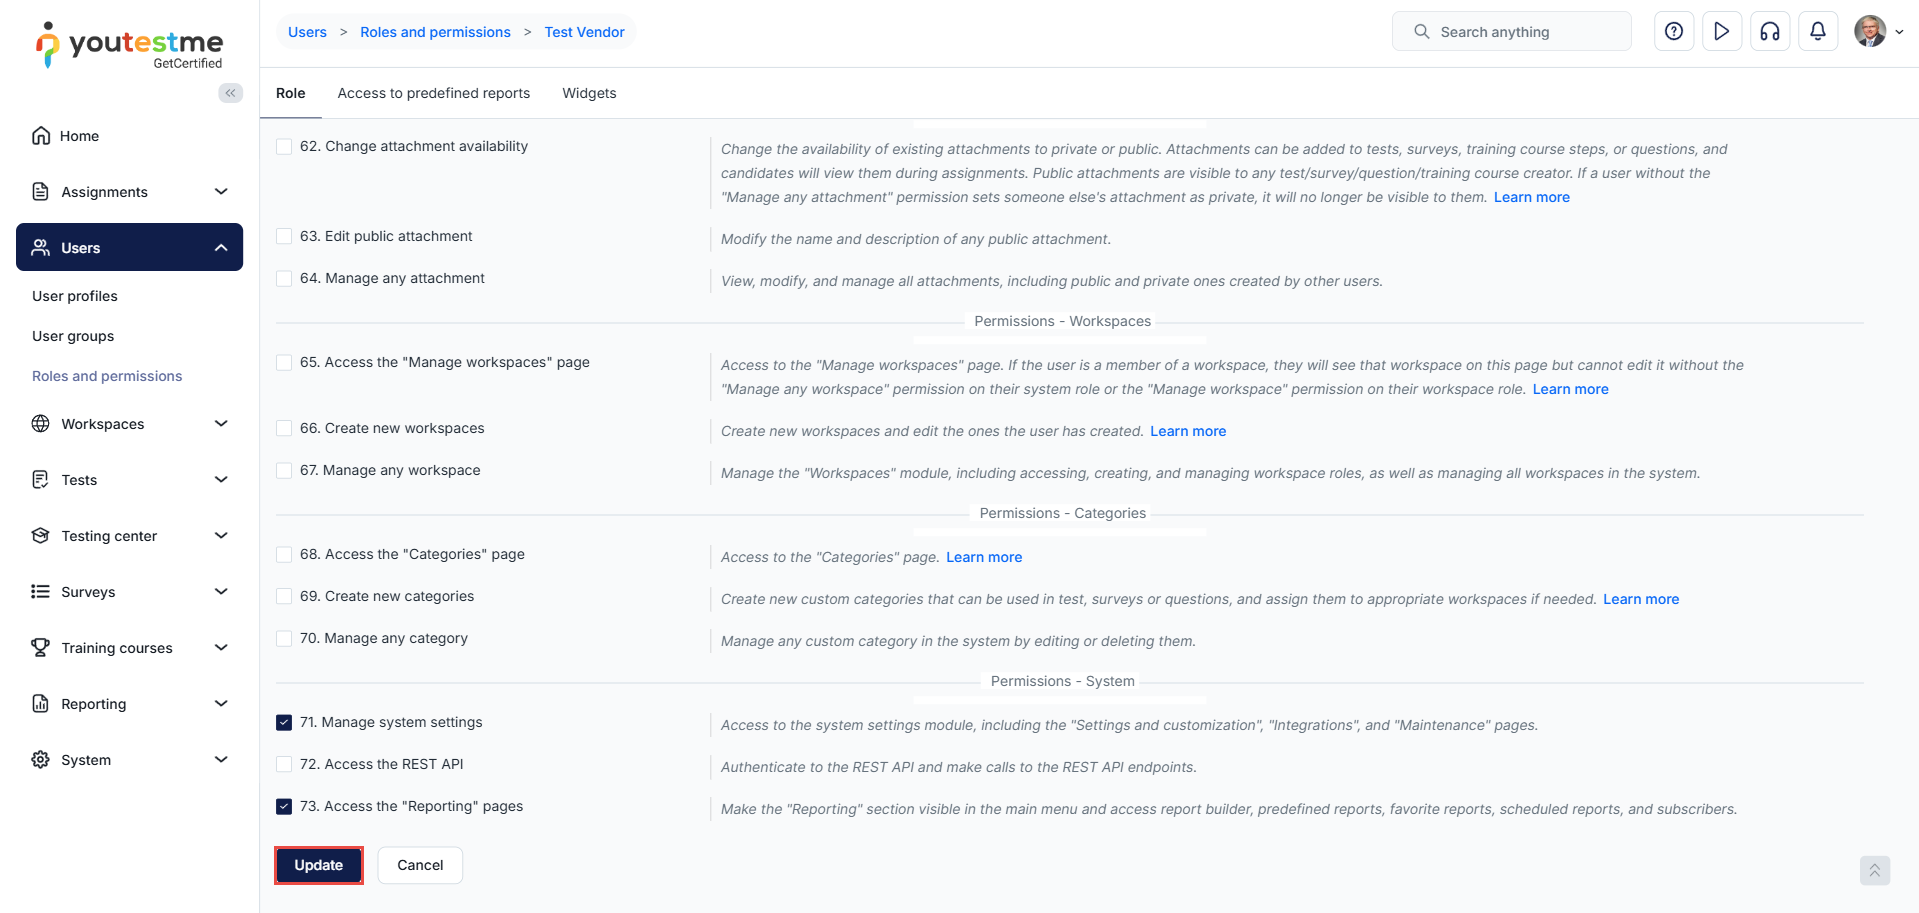
To save the changes, click the Update button at the bottom of the permissions list.
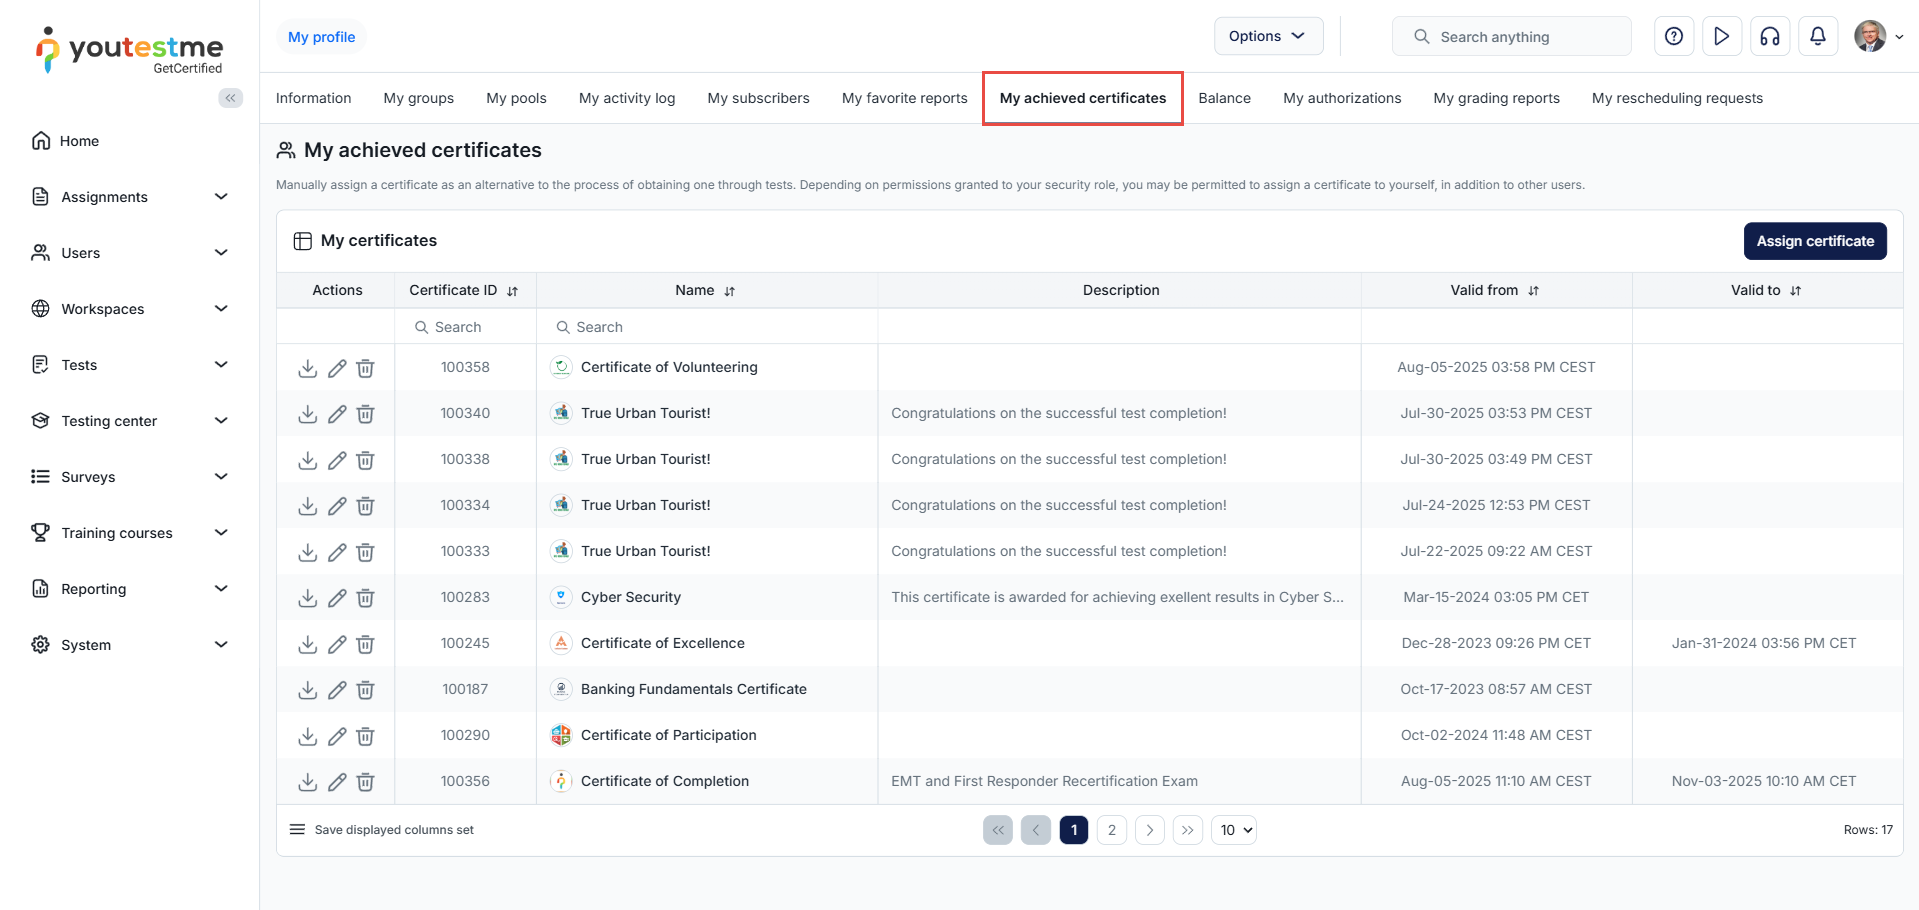
Subsequently, the My Achieved certificates section will become visible within the candidate’s profile and on personal reports for completed tests.
For video instructions on how to design a certificate, you may watch this video.
For more details about defining certificate conditions, please visit:
For more details about assigning a certificate to users, please visit:
