Article verified for Release 14.1 on January 24, 2025.
This article explains how to configure the mail server in the System settings on the Mail server tab.
Configuring mail server settings
The Mail server tab sets parameters for a mail server that will send email notifications to administrators and users. There is no limit regarding the number of mail servers that can be set.
To configure the mail server, you need to set up the following:
- The drop-down list determines the mail server from which the parameters are displayed.
- Enter the SMTP hostname of the mail server.
- Enter the SMTP port number of the mail server.
Note: For security reasons, platforms like Azure block outbound port 25 by default. To avoid connection timeouts and ensure smooth email delivery, use alternative ports such as 587 or 465. Contact your email service provider if you are unsure which port to use.
- Enable SMTP authentication.
- Enable starting TLS protocol.
- Enter the username of the mail server.
- Enter the password for the mail server.
- Enter the email address a recipient will see as the sender’s address.
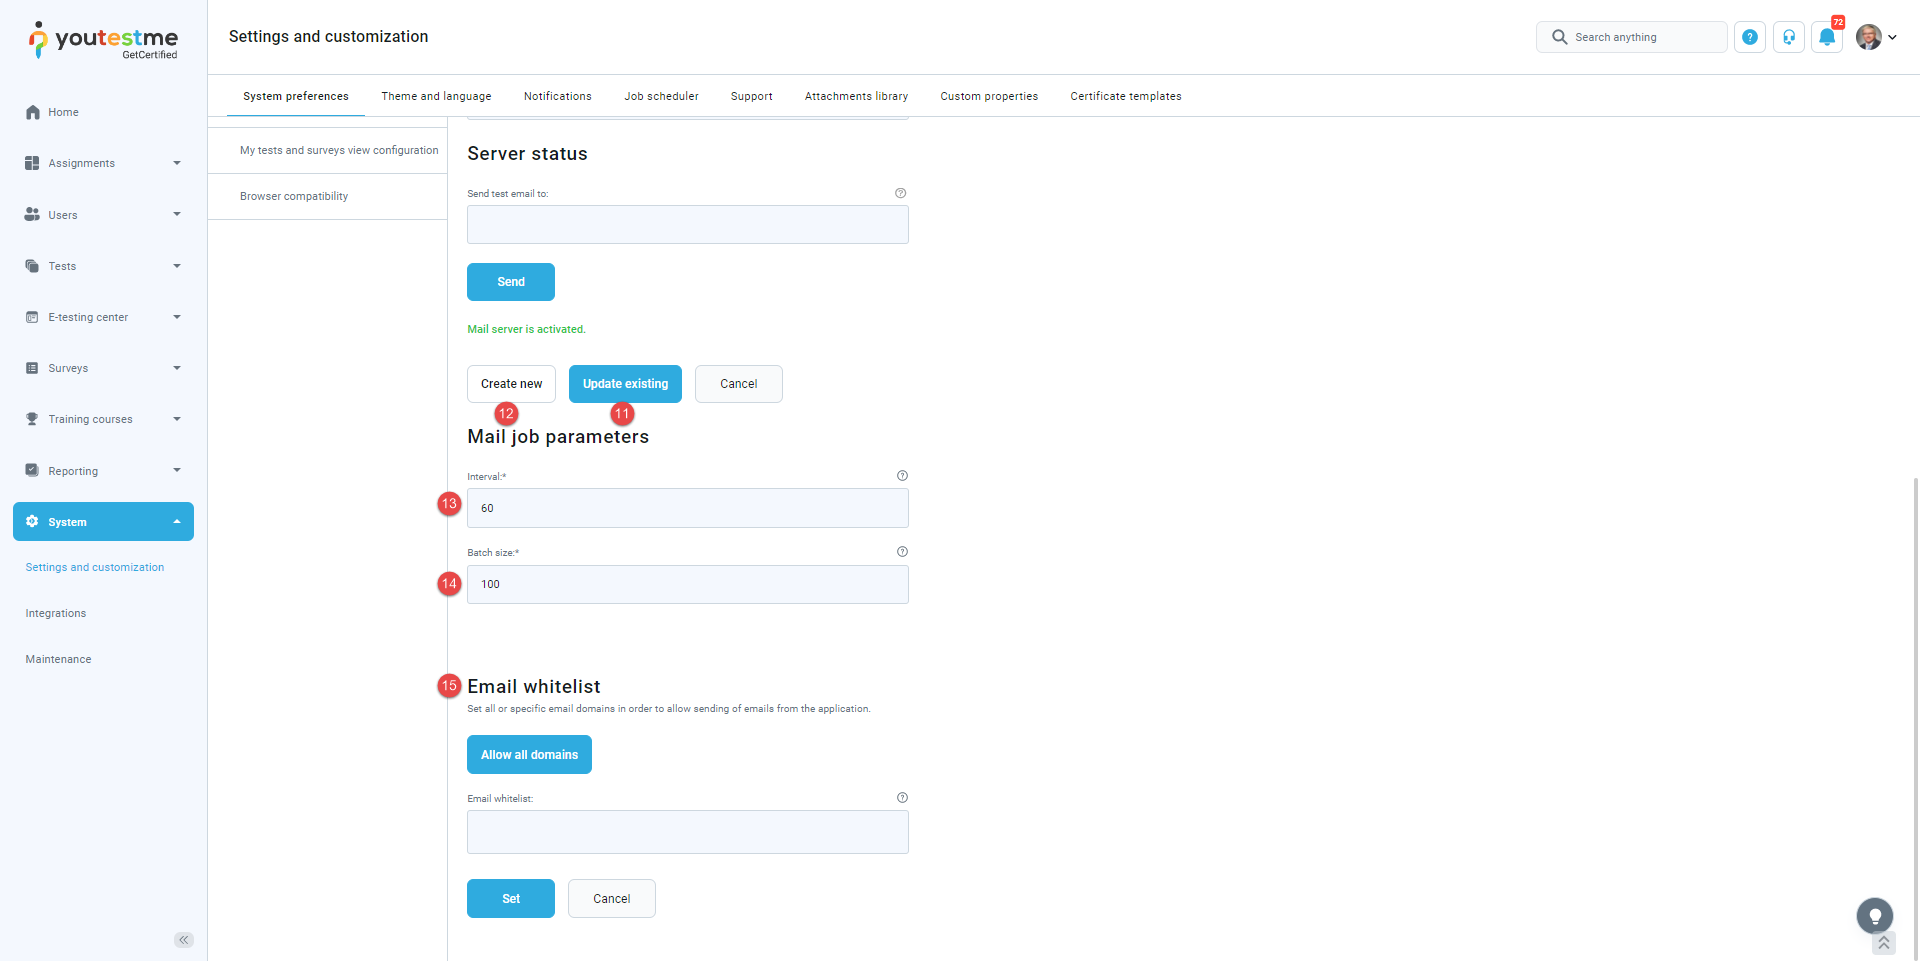
- You can test if the mail server works by sending an email to the address you specify in the Send a test email field.
- Click the Send button to send the test email.

- By clicking the Update existing button, the entered parameters will be applied to the selected mail server.
- You will create a new mail server with the entered parameters by clicking on the Create new button.
- Interval – enter the number of seconds between two successive executions of the mail job.
- Batch size – enter the maximal number of emails sent during one execution of the mail job.
- Set up Email whitelist – Set all or specific email domains to allow sending of emails from the application.

Testing the Mail Server and Checking the Status of the Test Email
Once you have configured the mail server, it’s important to test its functionality and ensure that emails can be sent successfully. Here’s how you can do that:
-
Send a Test Email: After entering the necessary SMTP settings (hostname, port, username, password, etc.), you can test the email server configuration by sending a test email.
- In the Mail Server tab, enter the email address in the Send a test email field.
- Click the Send button to initiate the test email.
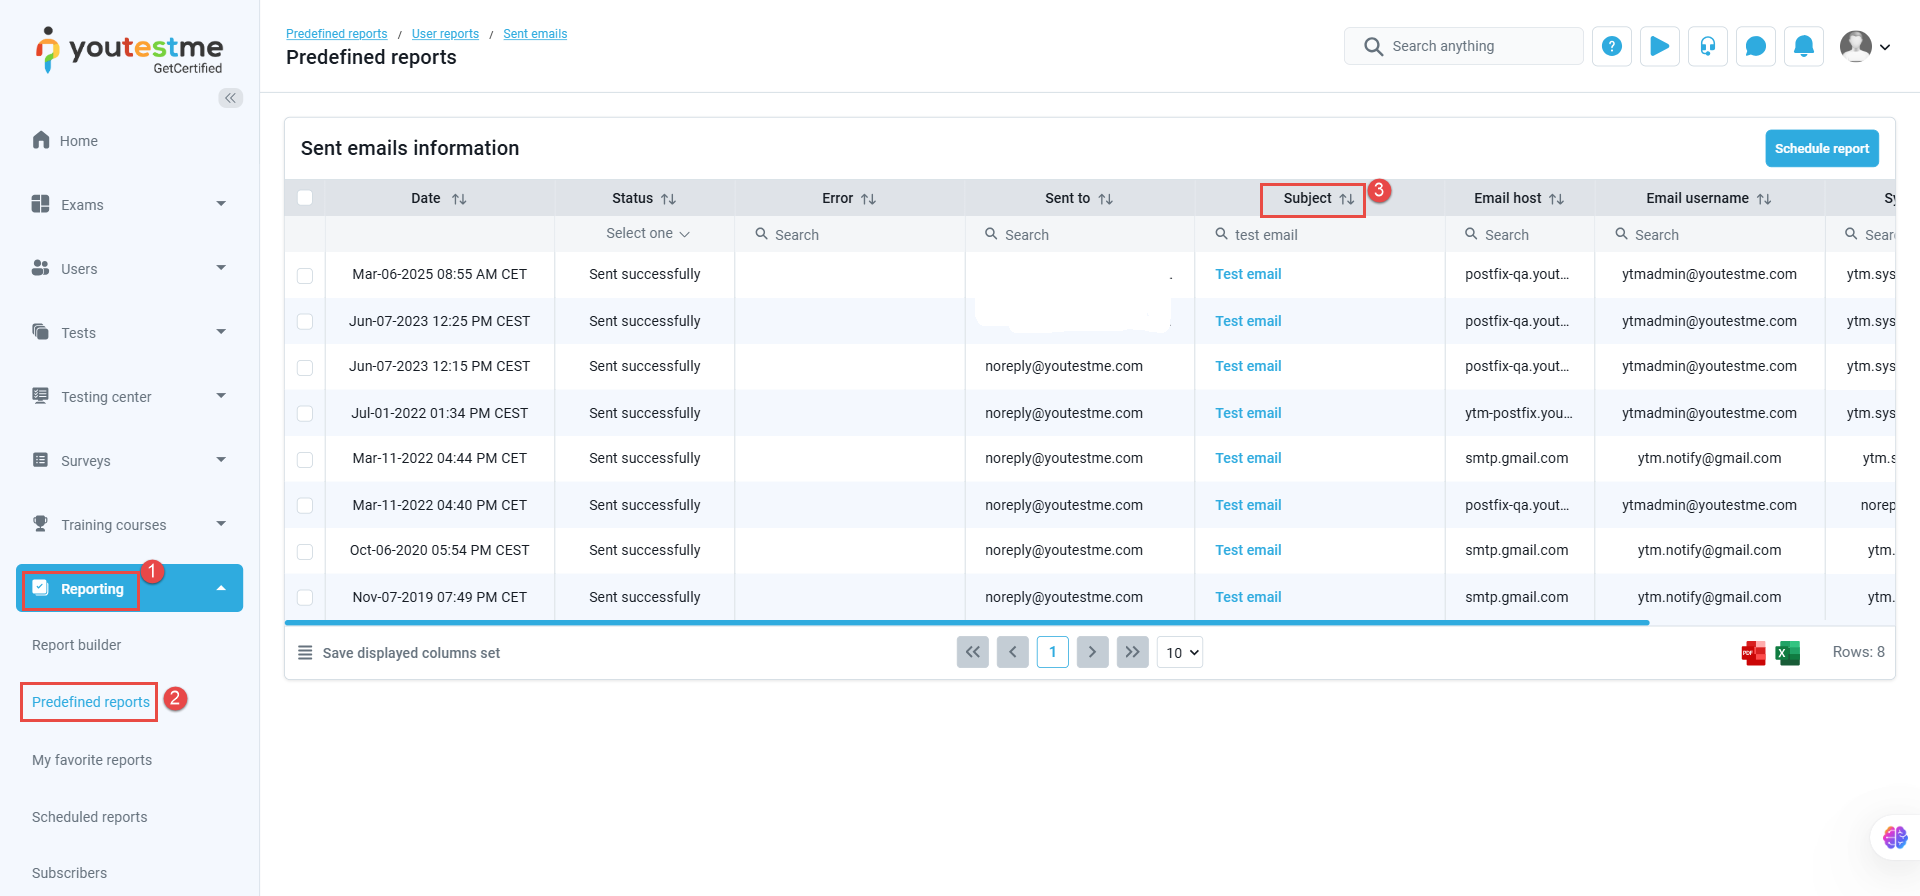
Check the Status of the Test Email: After sending the test email, you can verify whether the email was successfully delivered or if there were issues.
Navigate to the Sent Emails Report under
1. Reporting
2. Predefined Reports; User Reports.
3. Search for the email with the subject: Test email.
-
- Check the status of the email. The status should be Sent successfully if the mail server is correctly configured. If the status is something other than Sent successfully, such as Failed to send or Invalid, refer to the error message displayed next to the email to identify the issue.
What to Do if the Test Email Fails:
-
- If the status is Failed to send, ensure that your SMTP server settings are correctly configured. Refer to the Configure Mail Server section above to verify the settings.
- If the status is Invalid, the recipient email address may be incorrect. Double-check the test email address entered in the Send a test email field.
By following these steps, you can easily test the mail server configuration and ensure that emails are being sent properly.
Note: Only one mail server can be active at a time. Inactive mail servers can be deleted by clicking on the Delete button in the form of the inactive mail server.


