
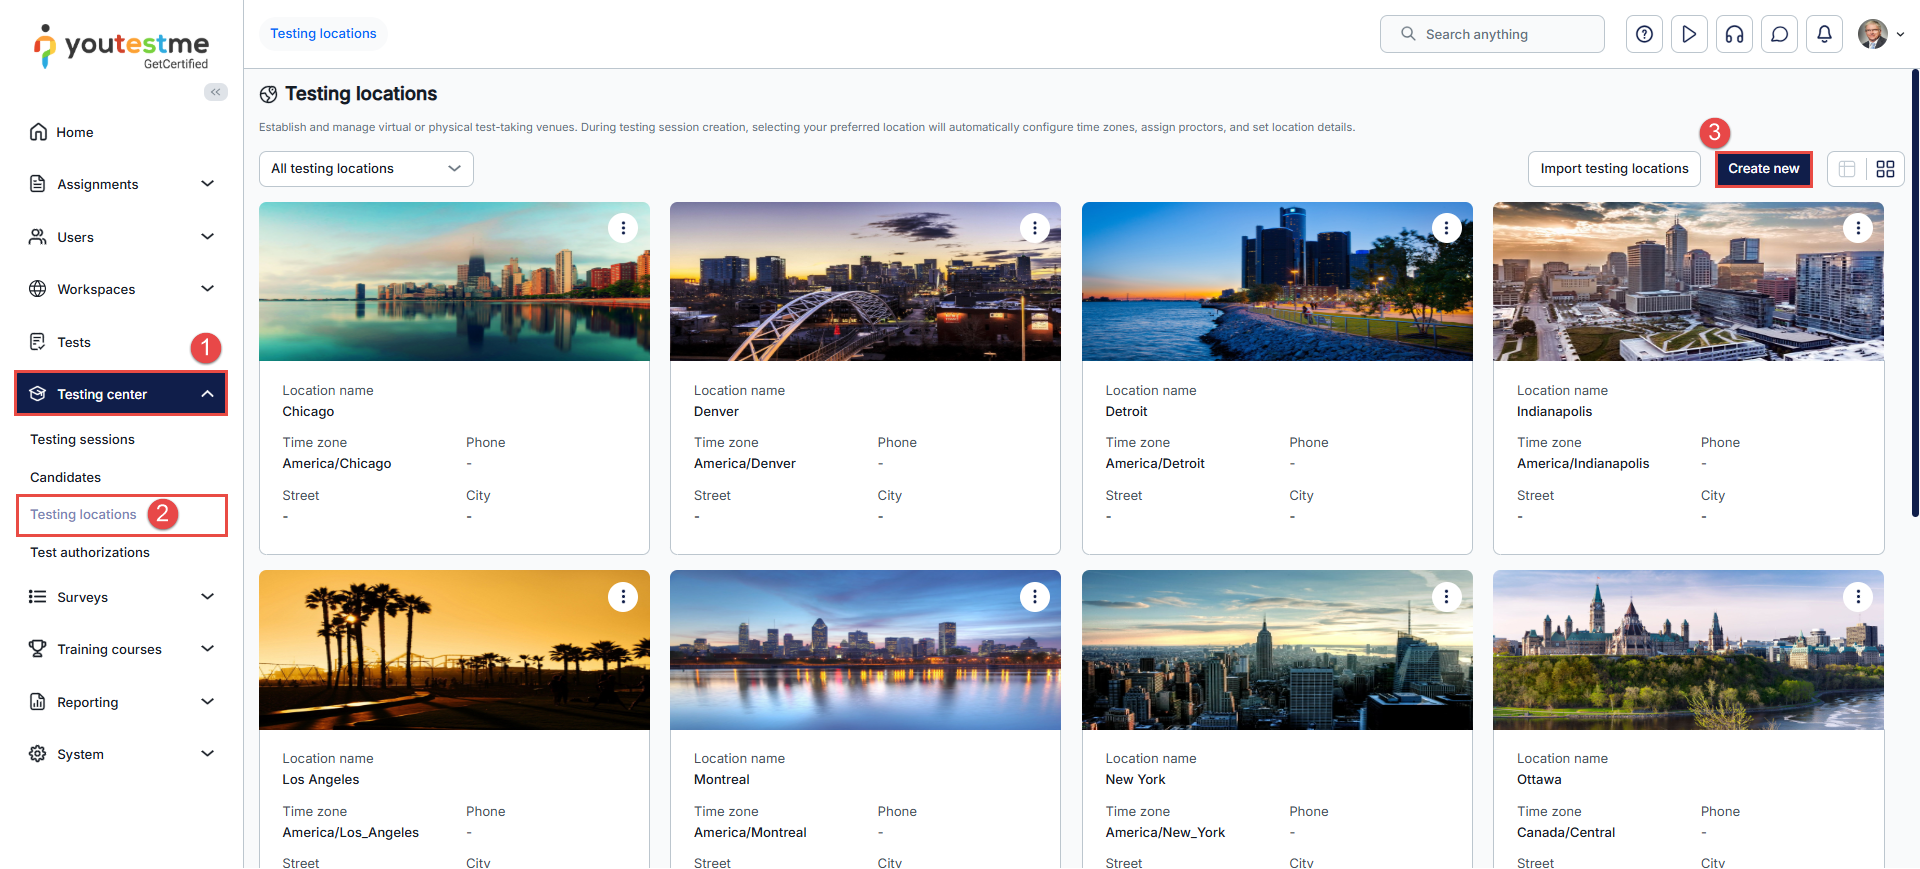
About Testing Locations
- When assigning proctors to a session, only users who are assigned as proctors to the location used in that session will appear in the proctor selection list.
- The location’s time zone automatically becomes the time zone for the session.
Note: If a user is assigned as a proctor at the location but is also set as the session manager for that session, the user will not appear in the list of available proctors. A user cannot act as both a session manager and a proctor for the same session.
Manually Creating a Testing Location
To manually create a new testing location:
- In the main menu, select Testing center.
- Navigate to the Testing locations.
- Click the Create new button.
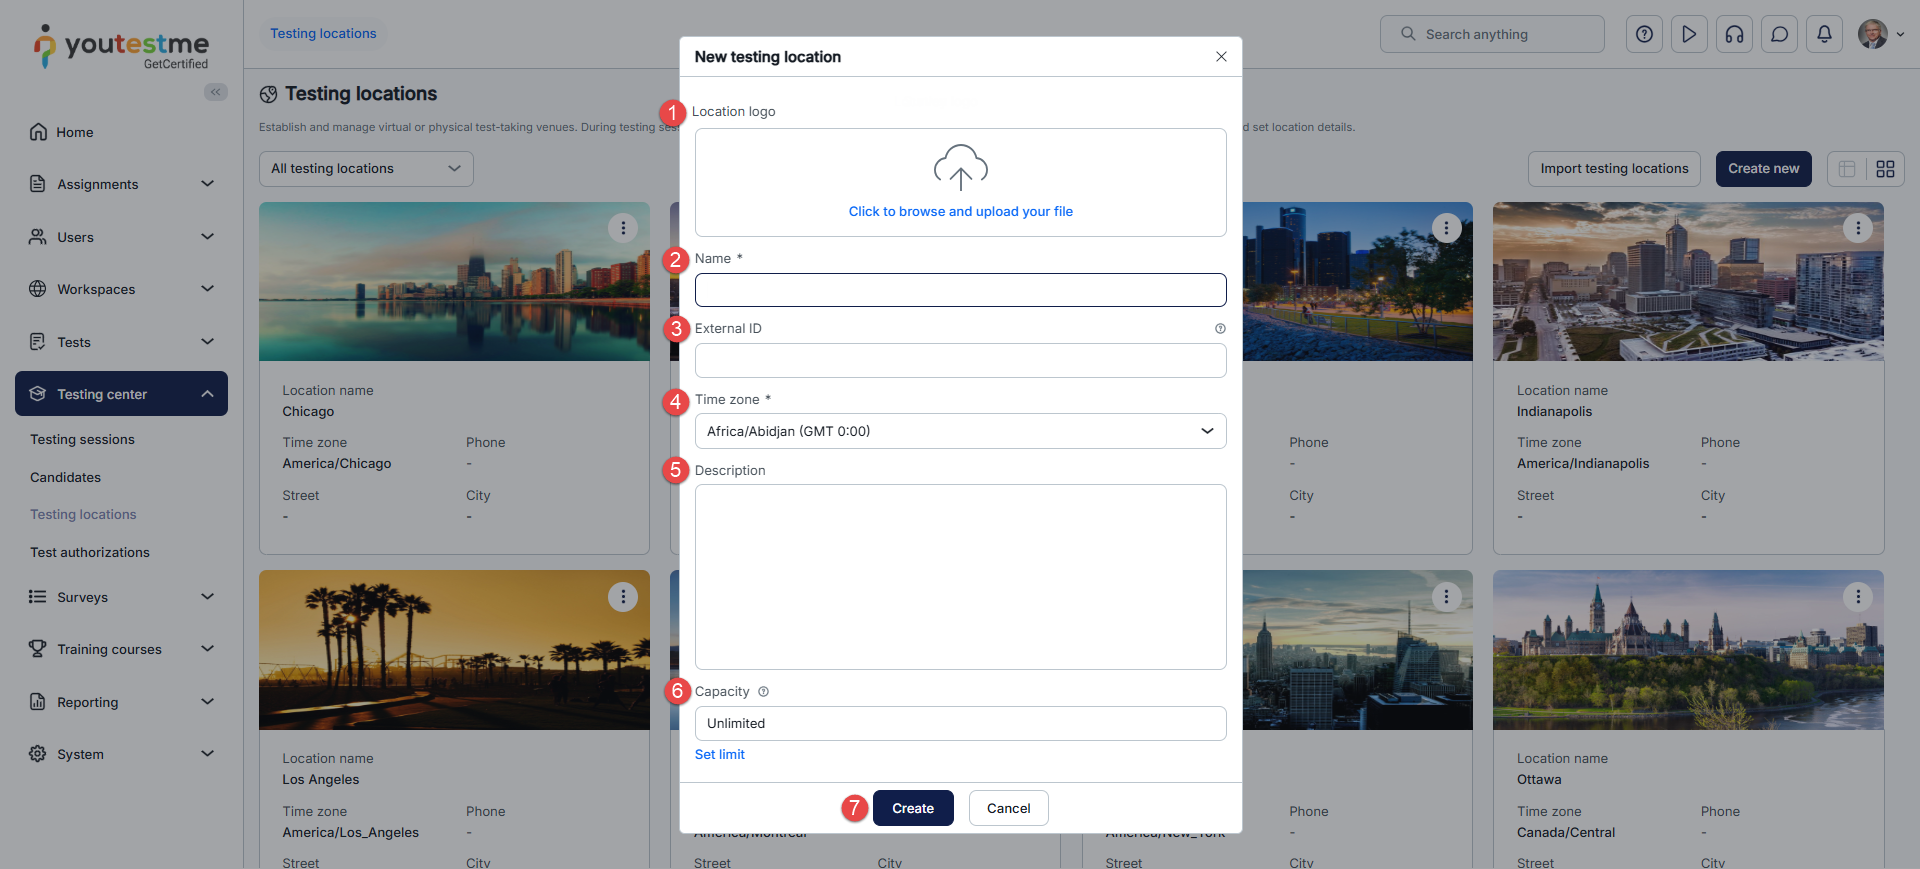
In the New Testing Location pop-up window:
- Include a picture of the location for visual reference.
- Enter a unique, clear name for the testing center.
- A unique identifier used to reference the location in external systems.
- Select the time zone that matches the testing center’s location.
- You can provide a short description to give more details about the location.
- Specify the maximum number of candidates allowed in the testing center during a session.
- Use the Create button to save the new location.
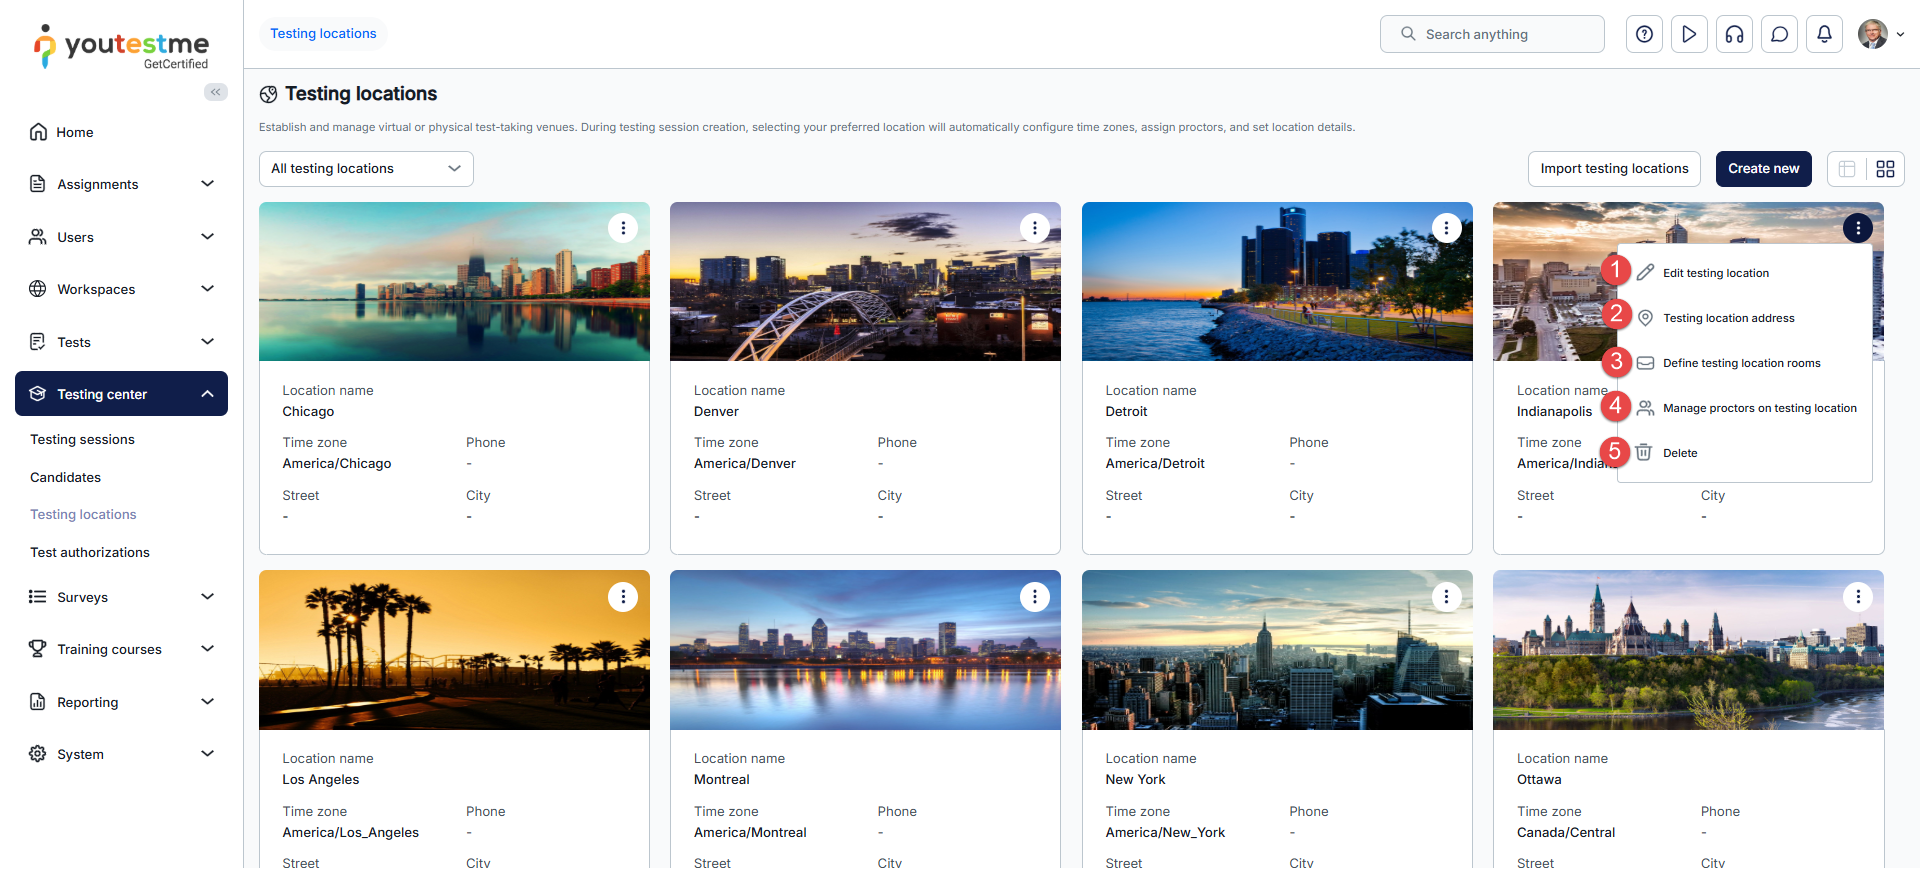
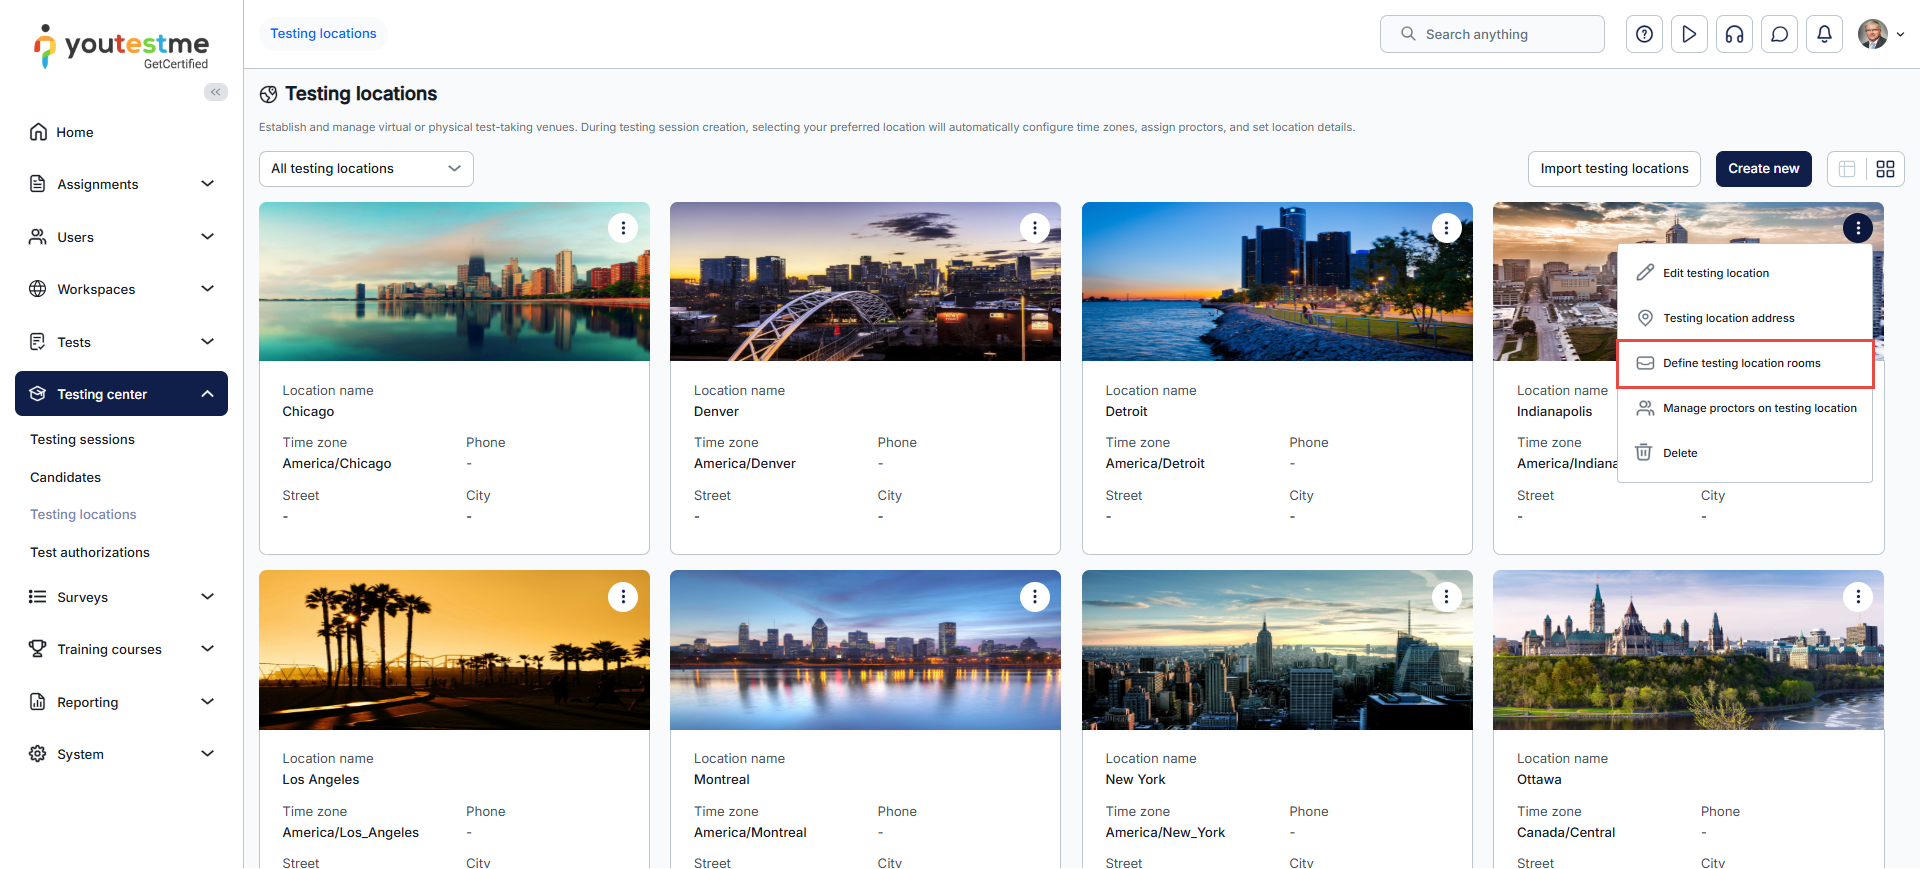
After creating a testing location, by clicking on the three dots, you can:
- Edit testing location
- Configure the testing location address
- Define testing location rooms
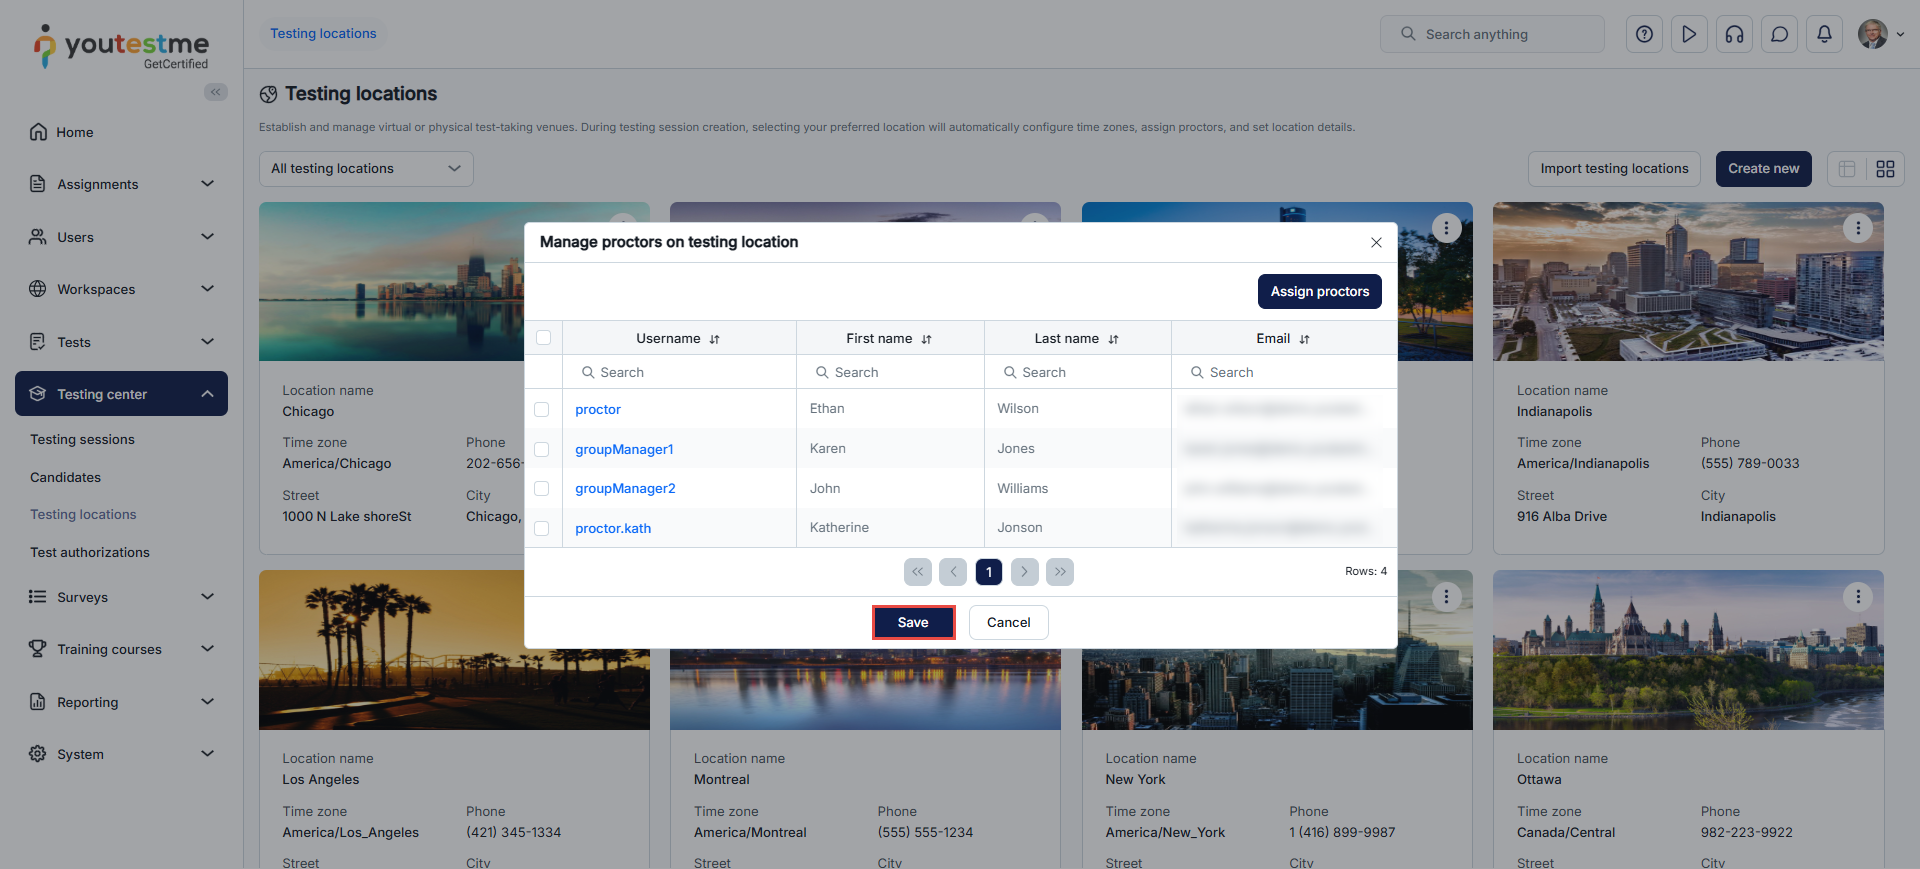
- Manage proctors for the testing location
- Delete the testing location
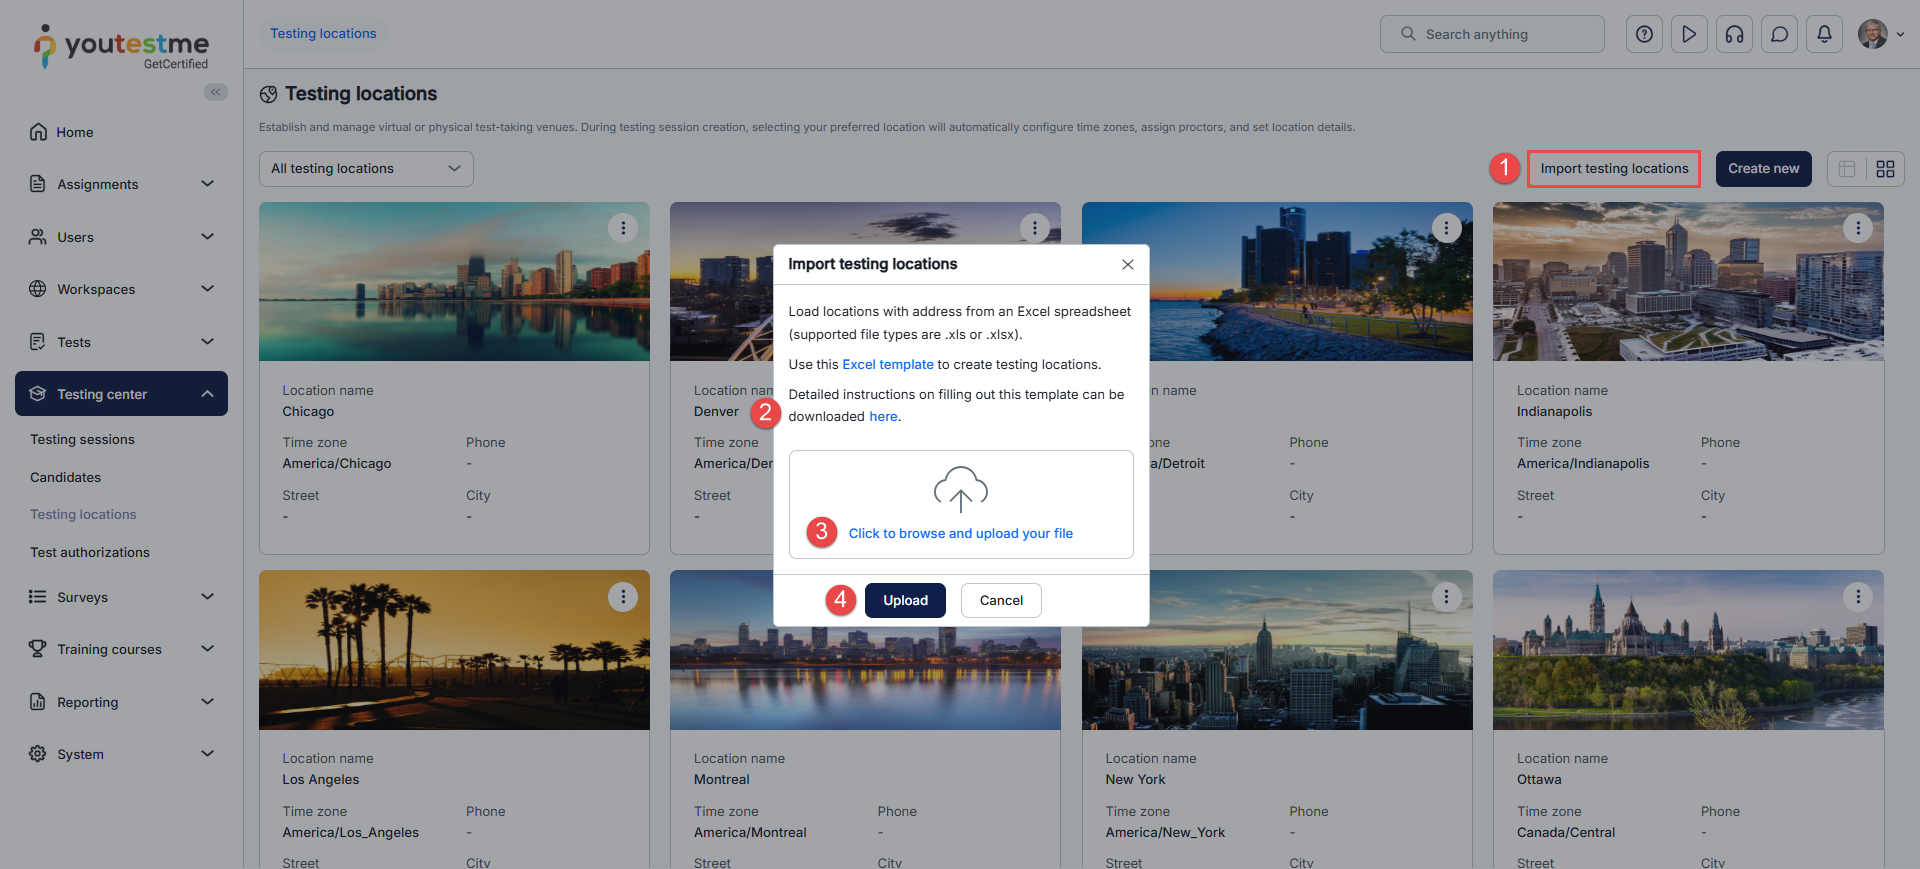
Loading Multiple Locations using the Excel Template
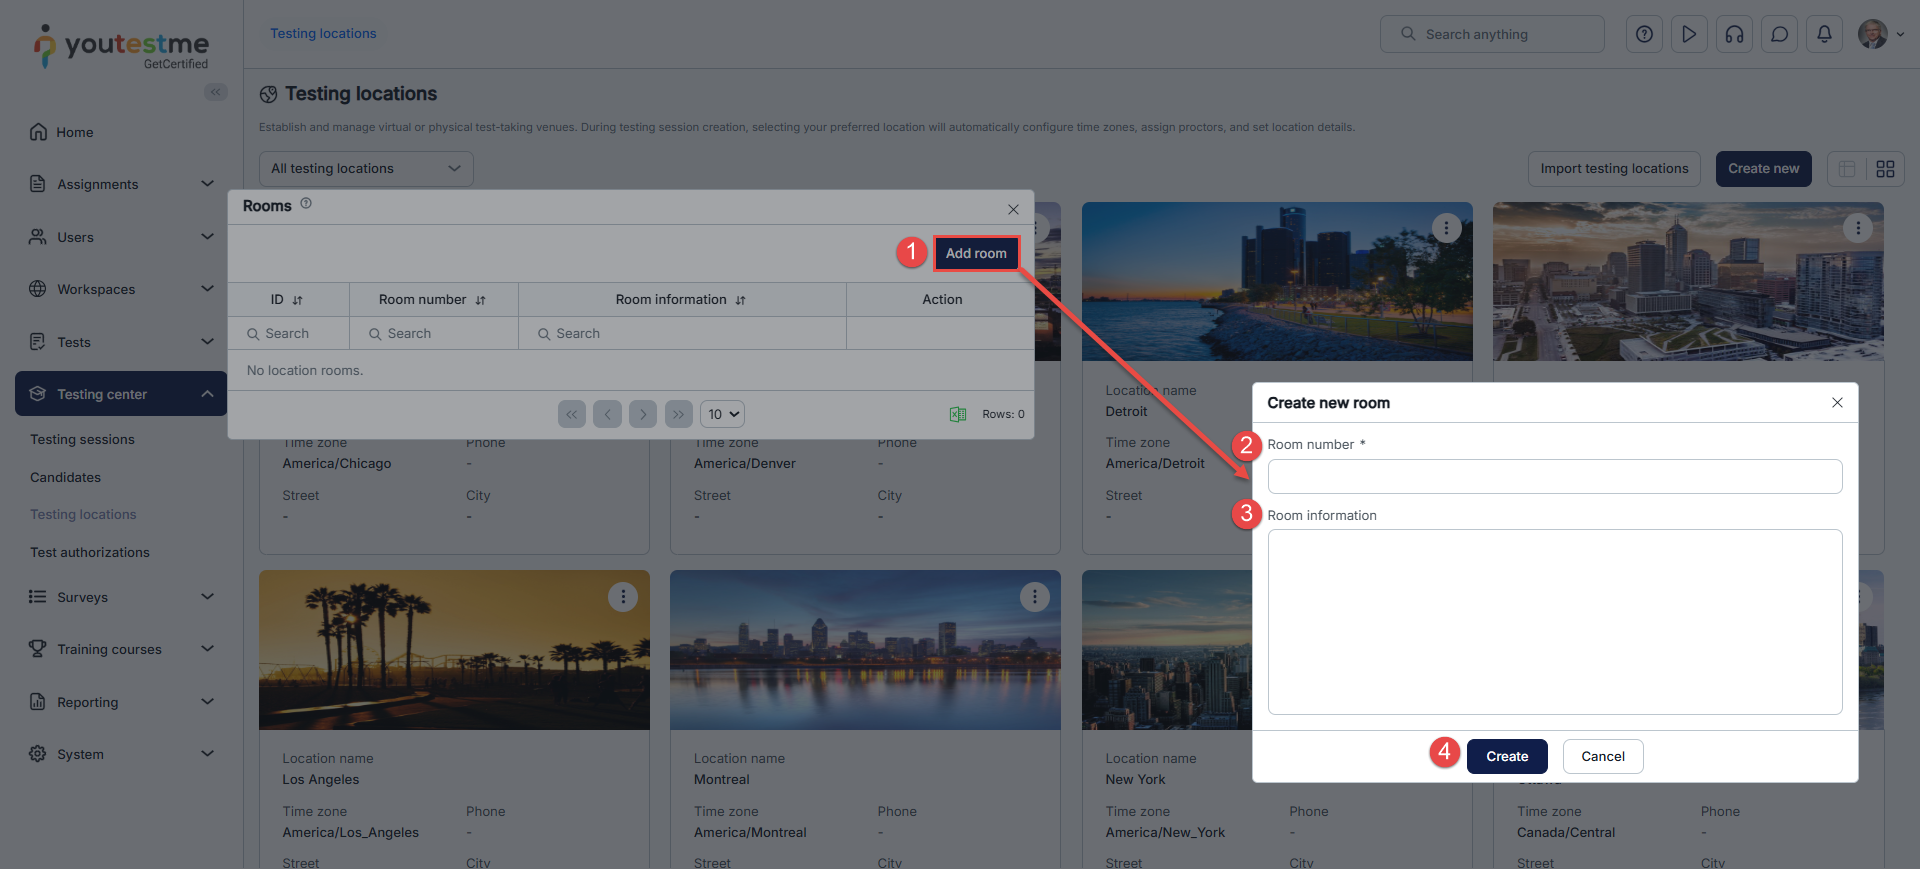
Defining Location Rooms
Specify the testing location more precisely by entering the specific room or classroom where the test will take place. Storing this information is helpful, especially when multiple rooms are available at the exact testing location.
Select the Define location rooms option in the Actions drop-down list to create a new location room.

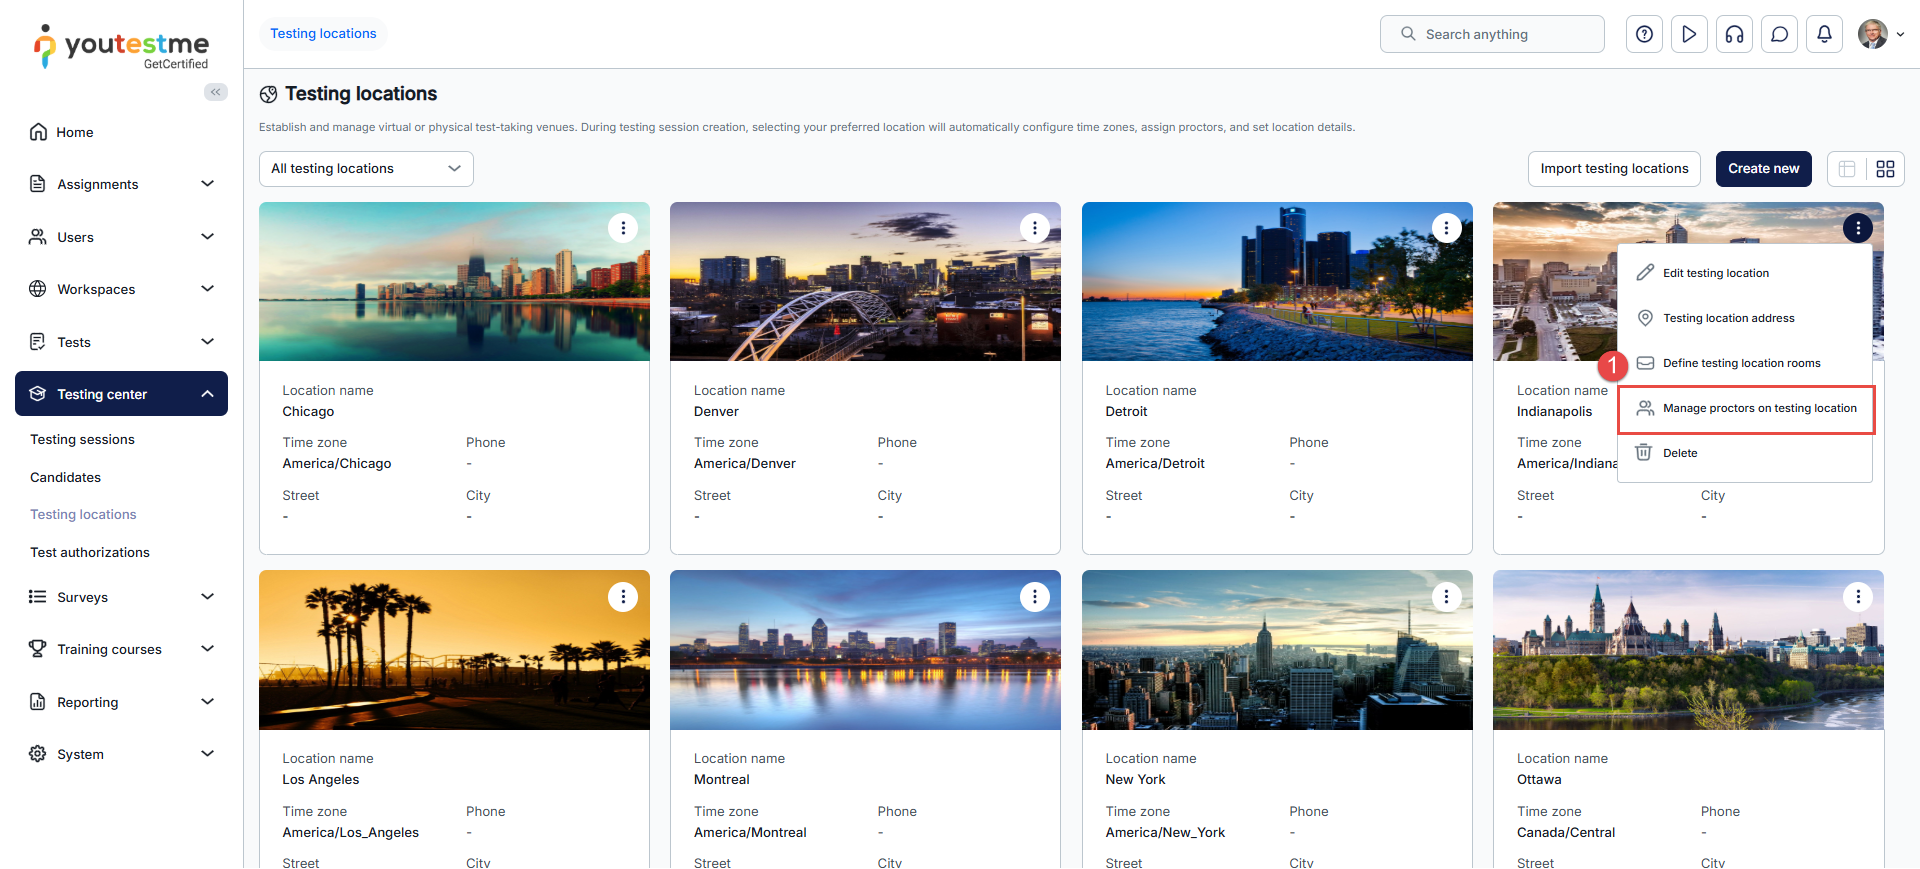
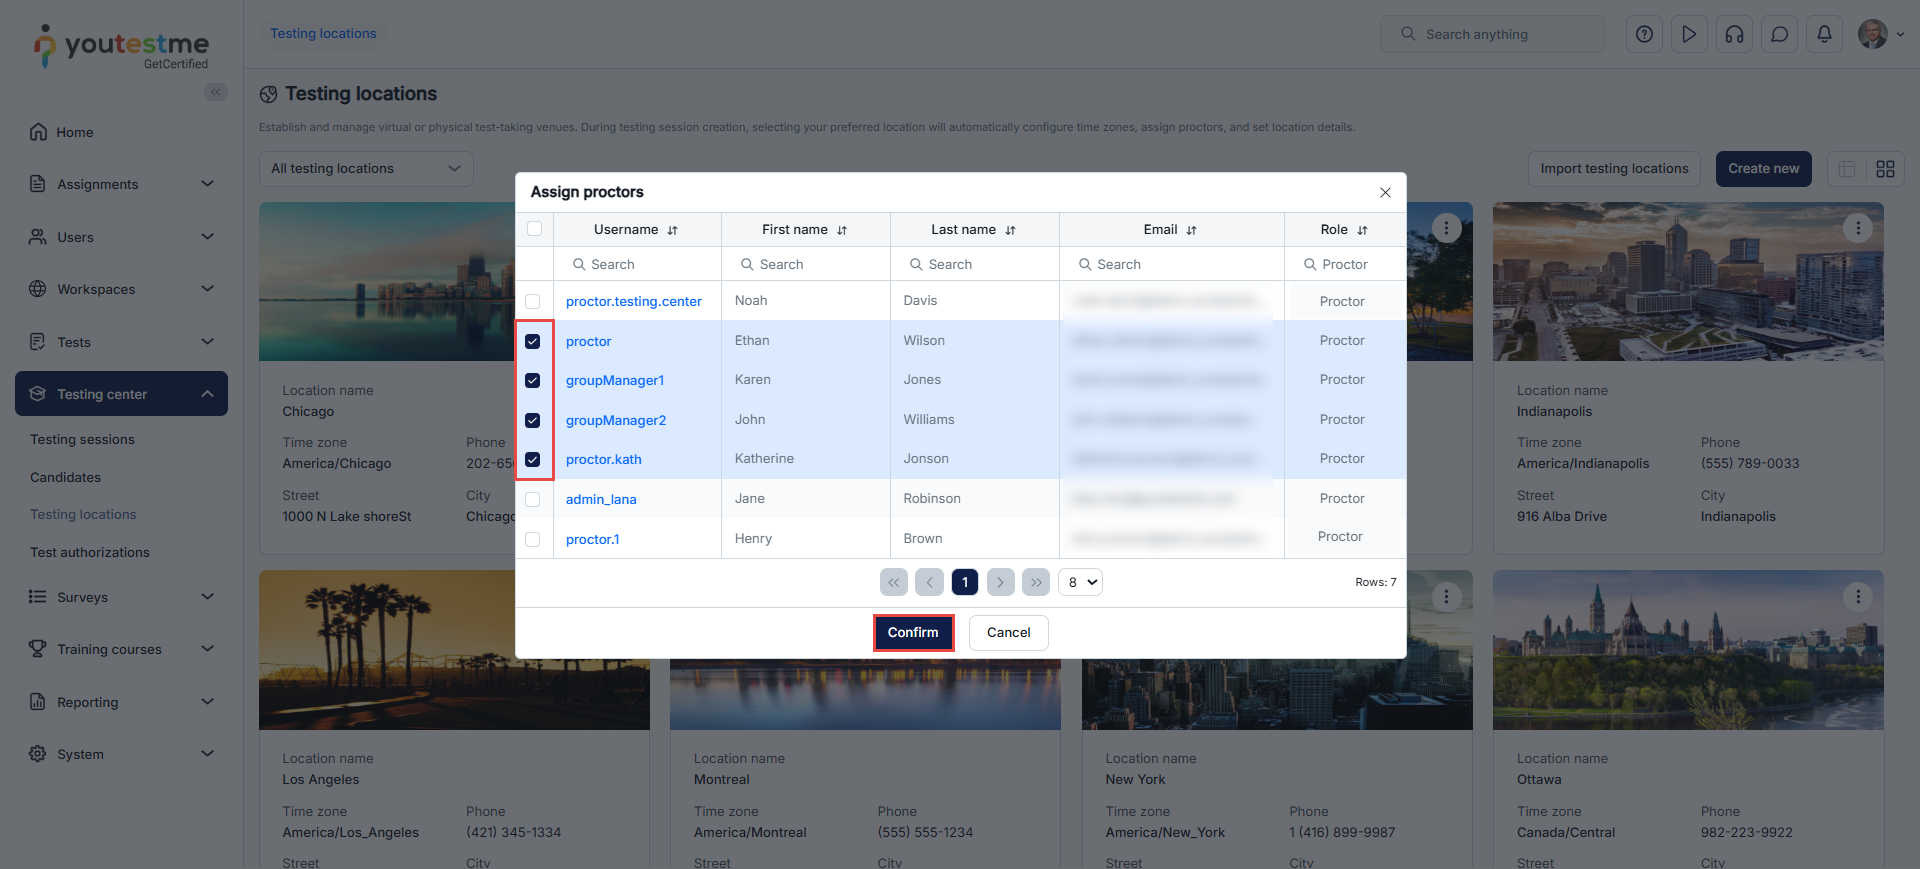
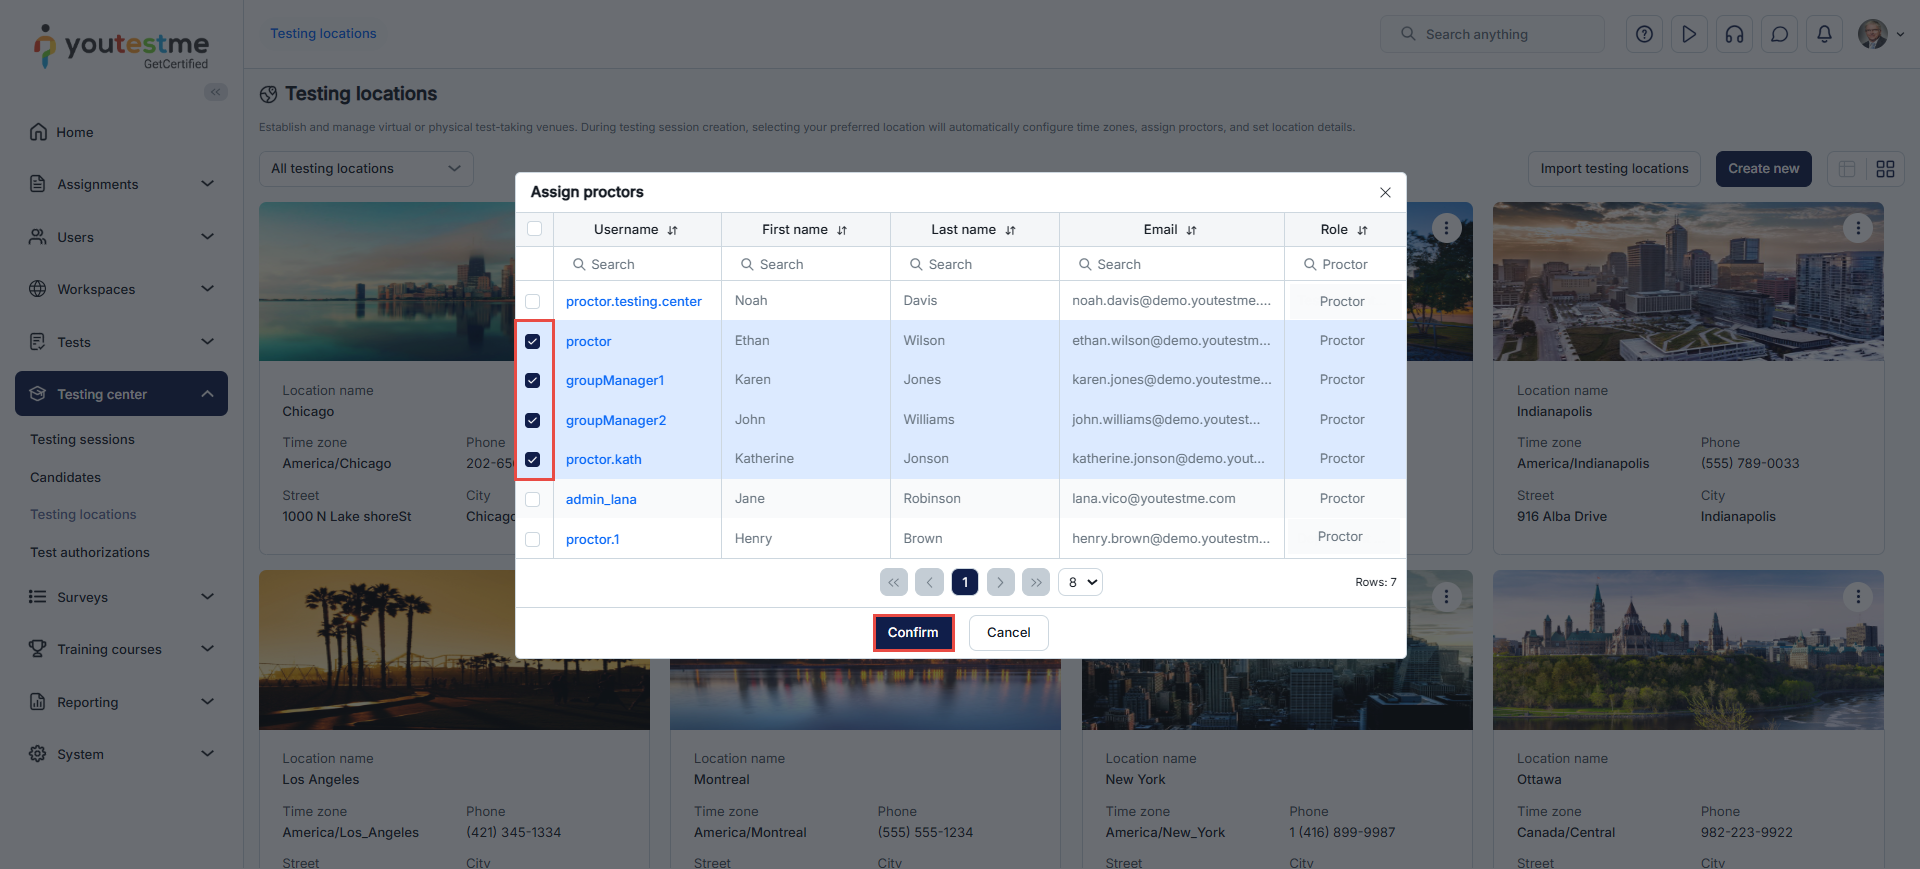
Assigning Proctors to a Testing Location
- To assign proctors, click the three dots and select Manage proctors for the testing location.

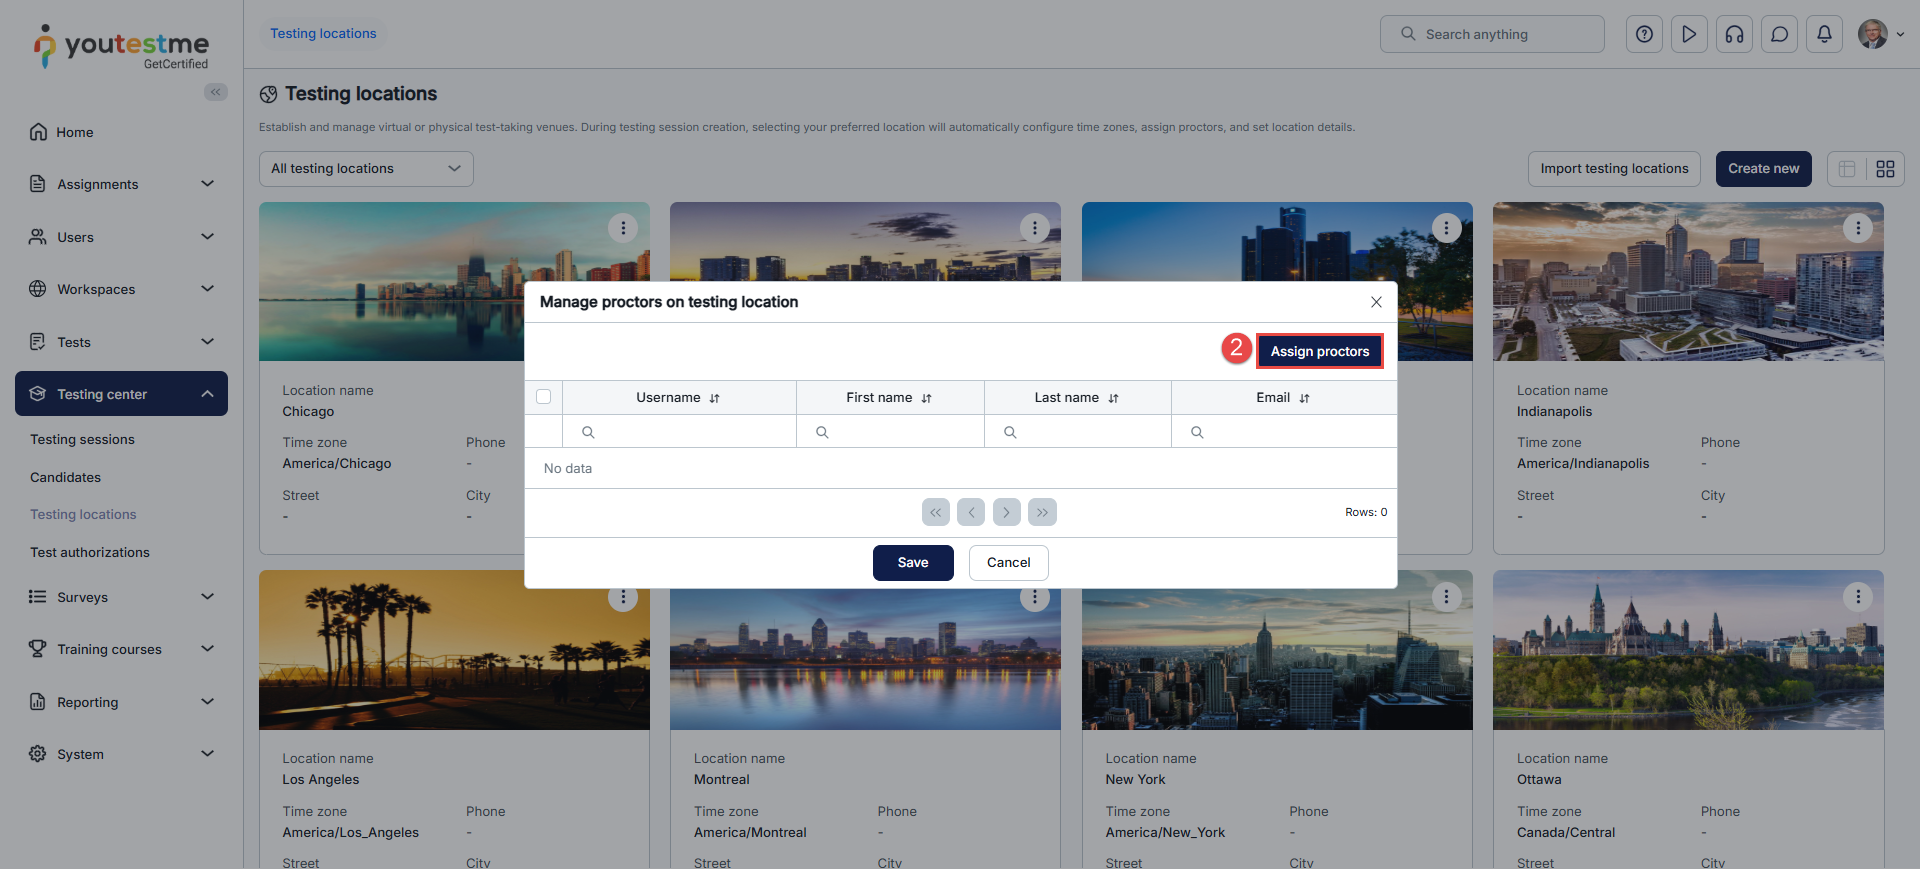
- Click the Assign proctors button and select the proctors you want to assign to the location in the pop-up dialog by marking the checkbox next to each proctor’s username. Afterward, click the Confirm button.
- Use the Save button to save the modifications.
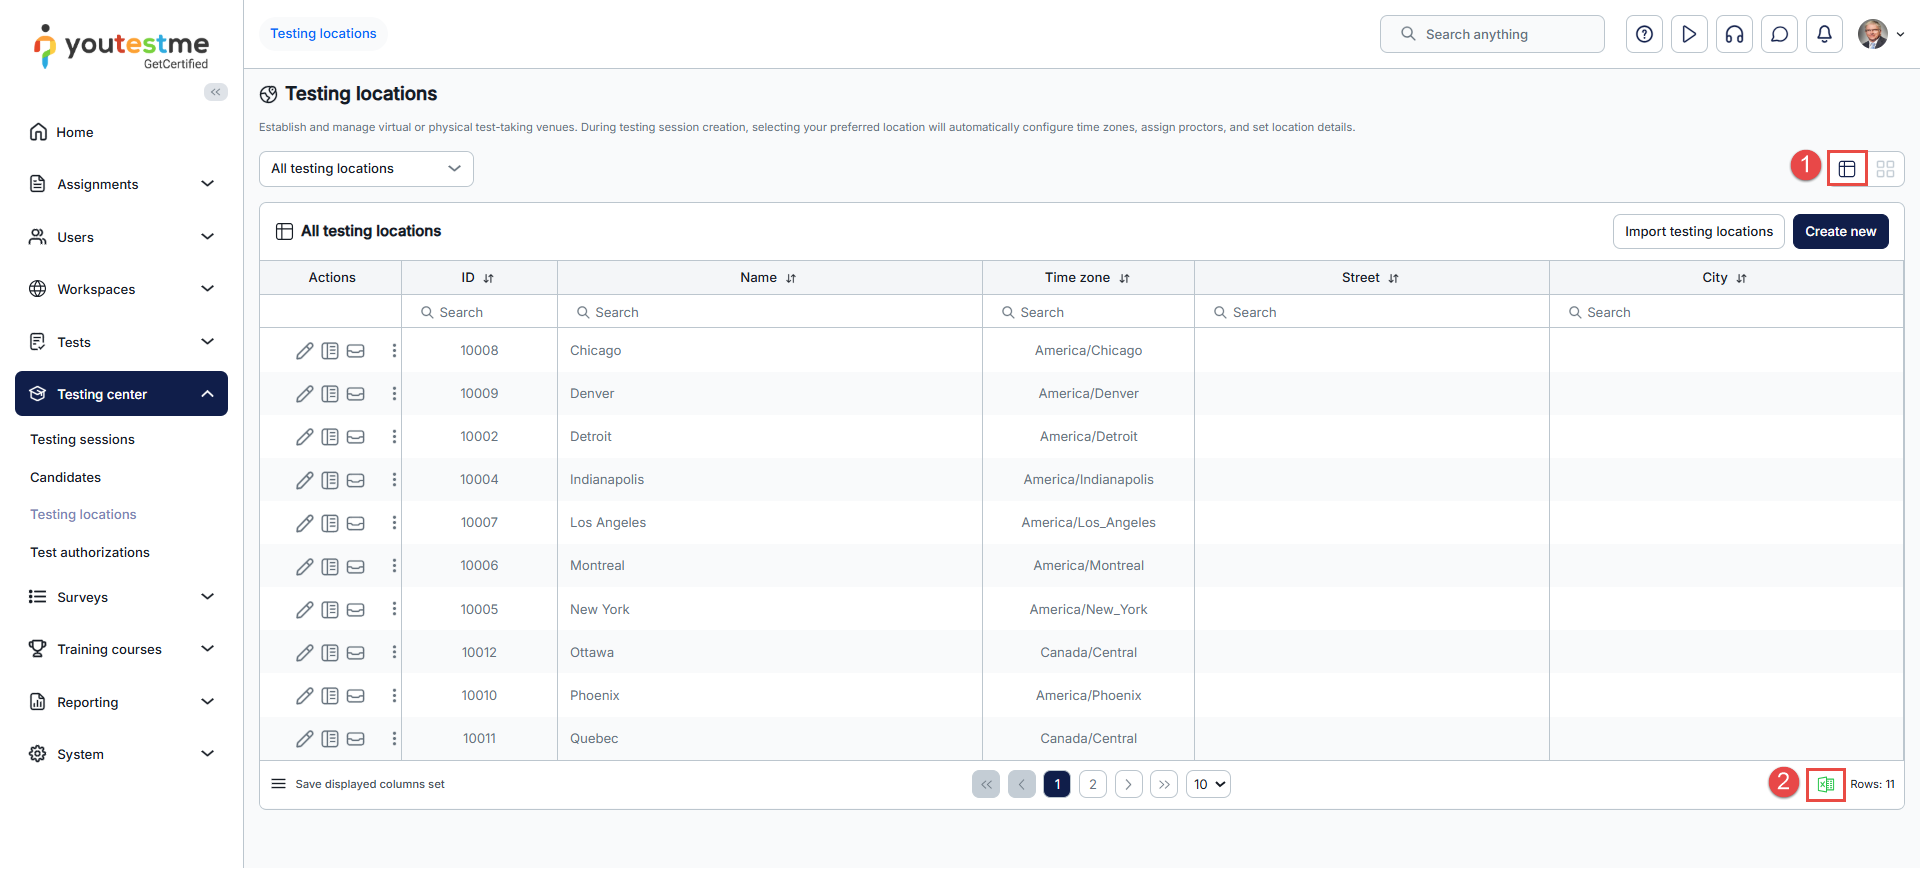
Downloading the List of Testing Locations
To download the list of available testing locations:
- Select the list view.
- Select the Excel icon at the bottom of the list to download it.
For more related instructional materials, please visit:
