Article verified for Release 14.2 on May 15, 2025
YouTestMe enables users to efficiently import multiple testing sessions for a single test using the Excel template. Additionally, the template allows specific users to be assigned to each session during the import process. This guide explains how to use the Excel template to upload multiple sessions and assign participants seamlessly.
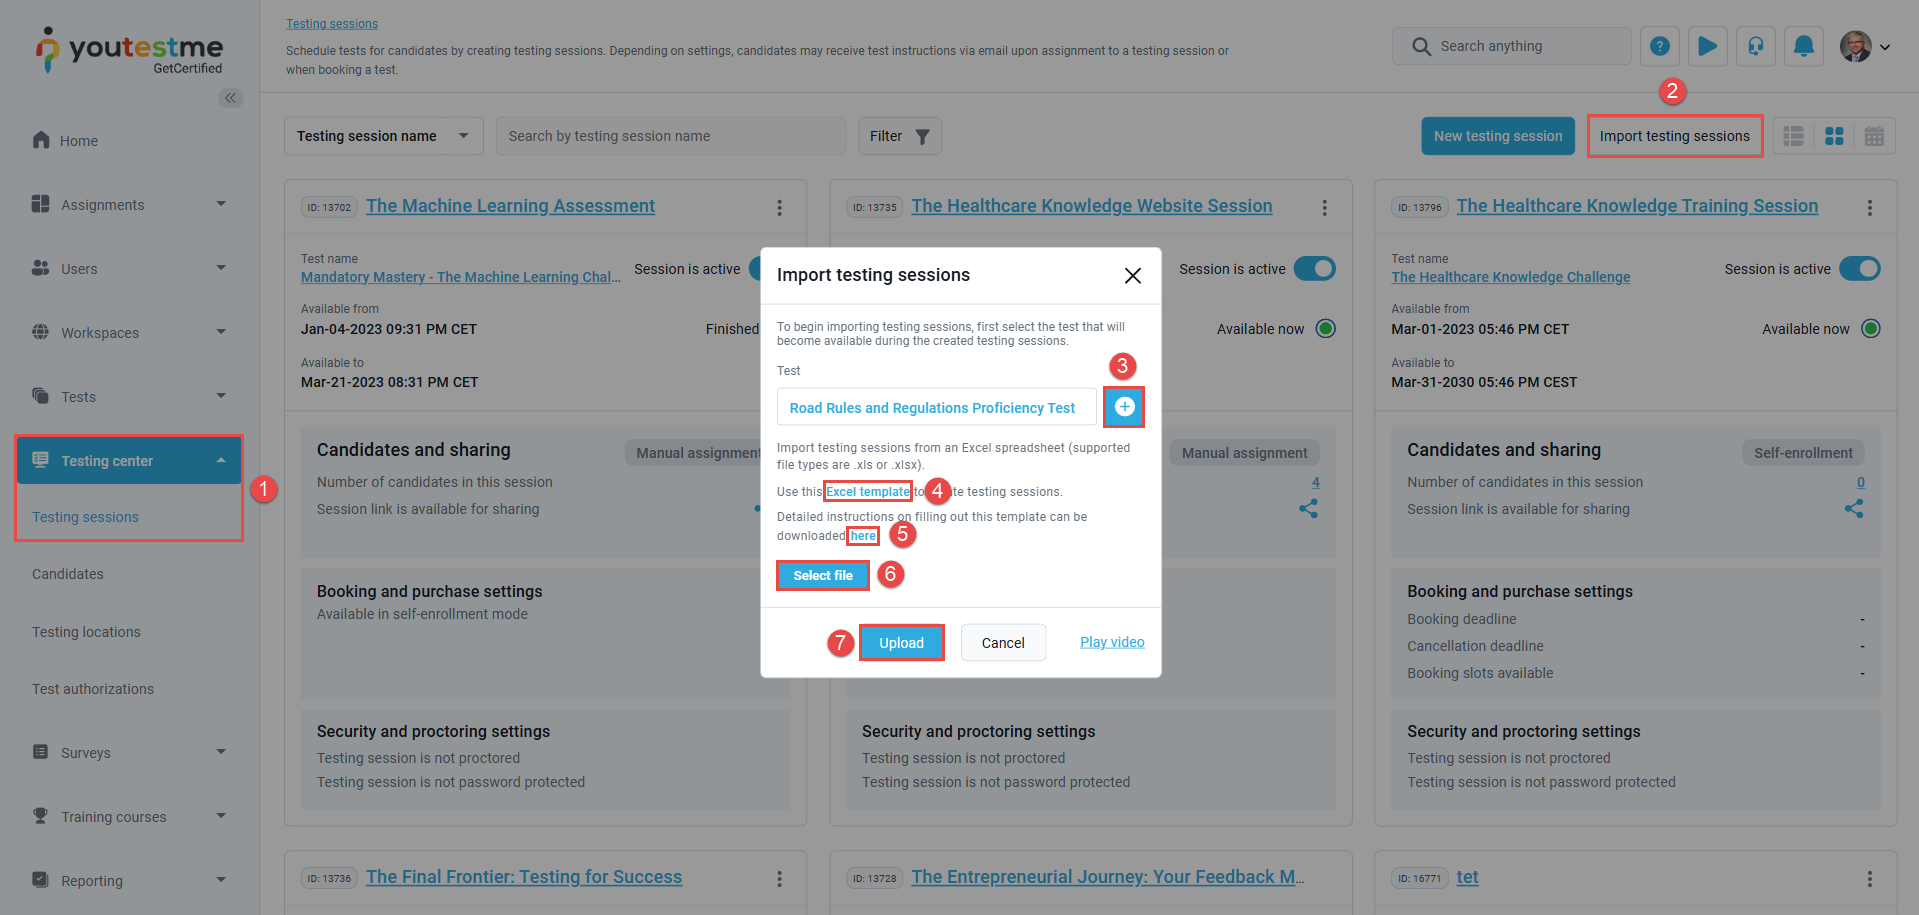
Upload testing sessions
-
Navigate to Testing Center > Testing Sessions.
-
Click the Import Testing Sessions button.
-
Click the (+) icon to choose the test for which you want to import sessions.
-
Download the Excel template by selecting Excel Template.
-
Open the Instructions to review detailed guidance on how to fill in each column of the template.
-
Once the template is completed, click Select File to upload it.
-
Click Upload to import the sessions into the selected test.
Filling in the Excel template
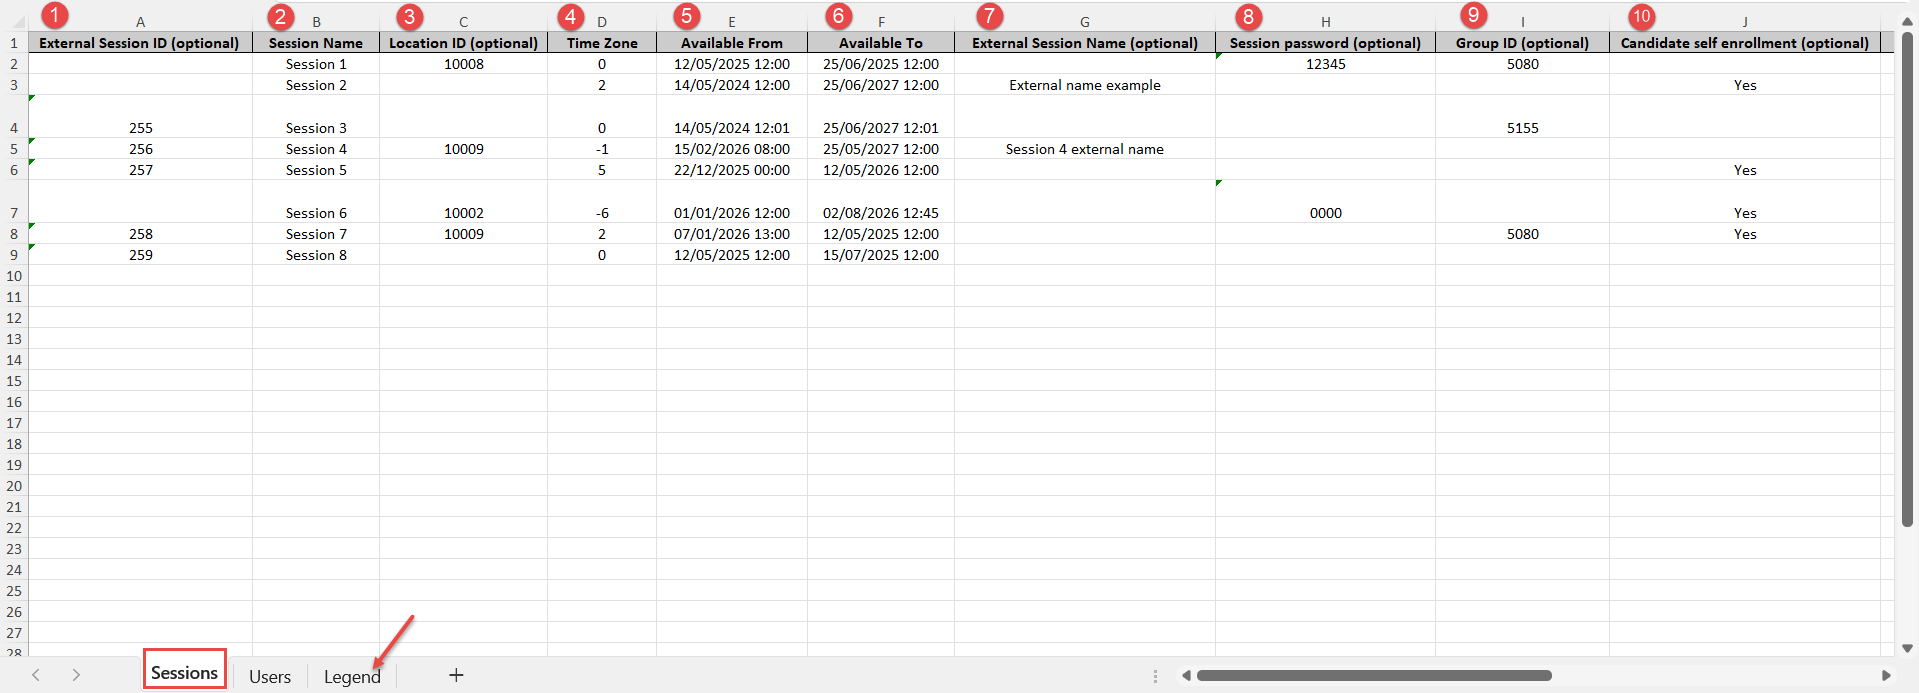
When using the Excel template, you’ll need to complete the required fields across two sheets: Sessions and Users.
-
External Session ID (Optional): A unique text identifier that links each session to candidates listed in the Users sheet. Ensure consistency across both sheets.
-
Session Name (Required): Enter a clear and descriptive name for the testing session.
-
Location ID (Optional): A numeric value representing the physical or virtual location of the session.
-
Time Zone (Required): Use the appropriate time zone code as listed in the Legend sheet.
-
Available From (Required): Specify the session’s start date and time in the format:
dd/mm/yyyy hh:mm -
Available To (Required): Specify the session’s end date and time in the same format:
dd/mm/yyyy hh:mm -
External Session Name (Optional): If applicable, provide a session name already used in an external system.
-
Session Password (Optional): Set a password for locking/unlocking the session.
Note: If this field is filled, the Locked field must be set to Yes. -
Group ID (Optional): Assign the session to a specific group using a numeric ID.
Note: Candidates not part of the group will not be imported. -
Candidate Self-Enrollment (Optional): Accepts Yes or No. If set to Yes, candidates are automatically assigned to the session. If No (default), the test manager must manually assign them. Invalid values will trigger a system error.
-
Locked (Optional): Accepts Yes or No (default). If set to Yes, the session is locked and cannot be accessed without a password if one is set. Only valid values are accepted.
-
Booking Deadline (Optional): Specify the latest date and time candidates can book the session. Use the format
dd/mm/yyyy hh:mm.
The session will not accept new bookings after this time. -
Cancellation Deadline (Optional): Specify the final date and time candidates can cancel their booking. Use the format
dd/mm/yyyy hh:mm.
Cancellations after this time will not be allowed. -
Seat Limit (Optional): Define how many candidates can book the session by entering a numeric value.
-
Authorization (Optional): Accepts Yes or No (default). If set to Yes, candidates will need authorization before starting the test. Only valid options are accepted.
-
Proctoring ID (Optional): Enter the corresponding ID from the proctoring configuration found under Integrations → Proctoring Settings.
-
Built-in Browser Lockdown (Optional): Accepts Yes or No (default). When enabled, the test will run in full-screen mode and restrict certain browser actions.
-
Active (Optional): Accepts Yes or No (default). Only Yes marks the session as active; otherwise, it remains inactive.
Detailed guidelines can be found in the Instructions or Legend sheet within the template.
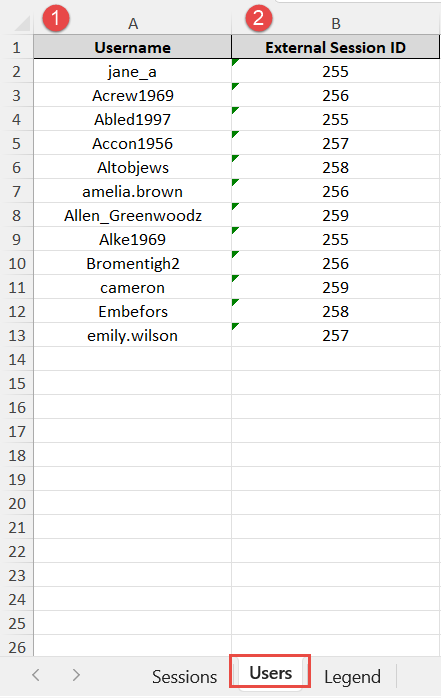
Users Sheet
-
Username: Enter the exact username of each candidate you wish to assign to a session.
Note: All users listed in the Excel template must already exist in the application. Ensure that each username matches exactly with an existing user account. -
External Session ID: Enter the corresponding session ID from the Sessions sheet to assign the user to that session. Ensure it matches exactly.
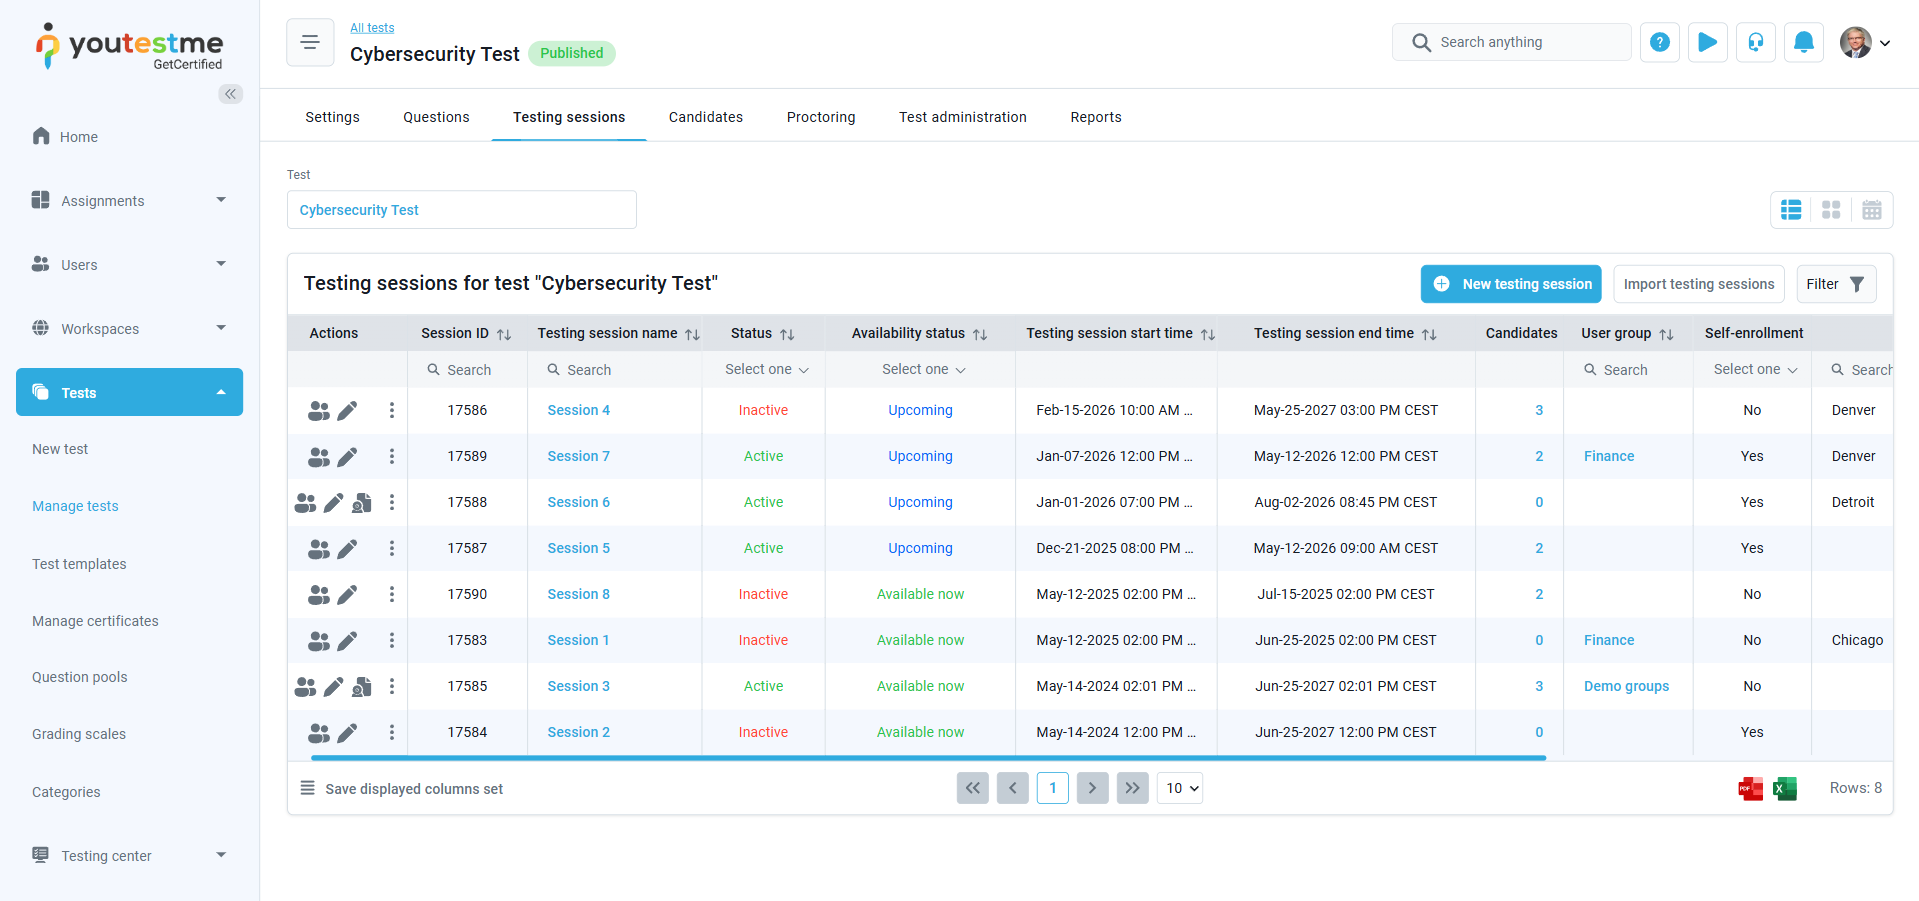
Previewing testing sessions in the application
For more related instructional materials, please visit:


