Article verified for Release 14.2 on June 9, 2025.
At YouTestMe, you can control when test-takers see their results, what information is shown, and how long it’s available.
In some cases, results shouldn’t be released immediately after the test. Candidate answers may need to be reviewed and approved by the exam administrators first. Only after approval should the results be shared.
This article explains how to prevent test-takers from accessing their results until they are approved by an authorized user.
Personal Report Settings
The visibility, availability, and content of test results are managed through the Personal Report Settings. These settings can be configured during test creation or edited later for an existing test.
During Test Creation
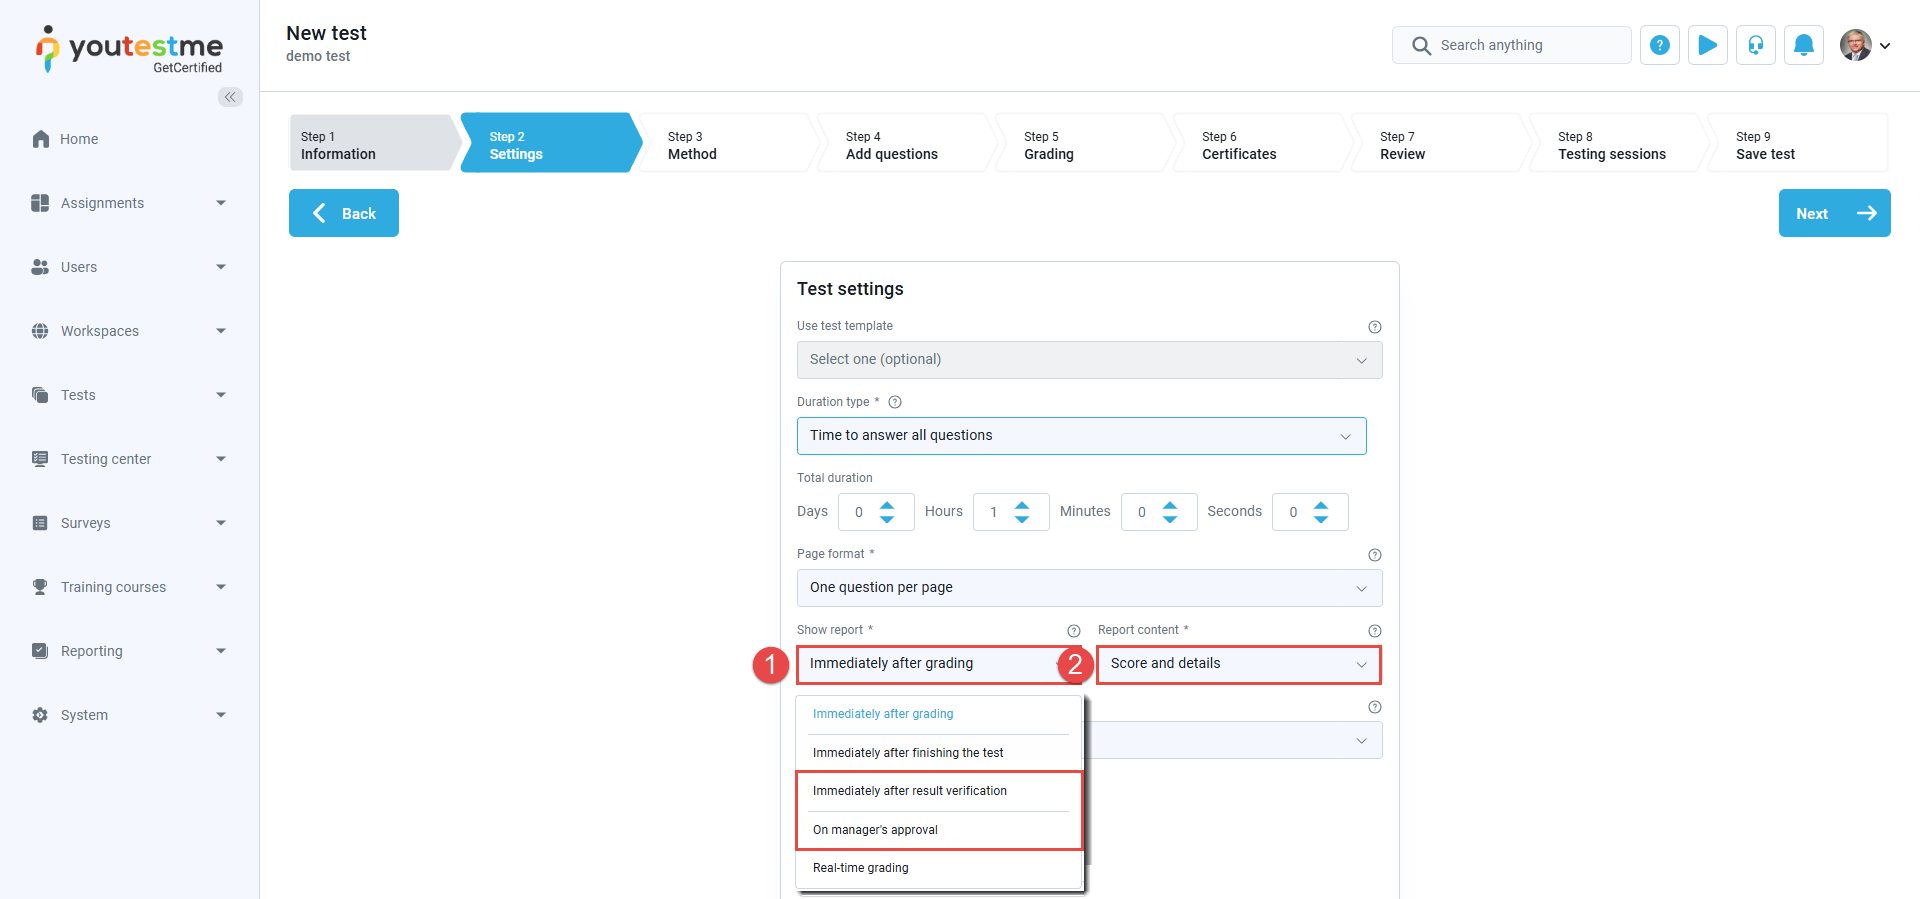
At the Settings step of the test creation wizard, you will be prompted with the Personal Report Settings, where you can:
- Choose when to display the report:
To ensure candidates cannot access their results until approved by test managers, select one of the following options:- Immediately After Result Verification: When this option is selected, the results will become visible to the candidate as soon as an authorized user verifies the attempt using the dedicated Verify Results button.
- On Manager’s approval: When this option is selected, a test manager must manually make the personal report visible to the candidate by clicking the “Release reports to candidates” button.
- Define the report content:
Choose between displaying Score Only or Score and Details.
From the test Settings
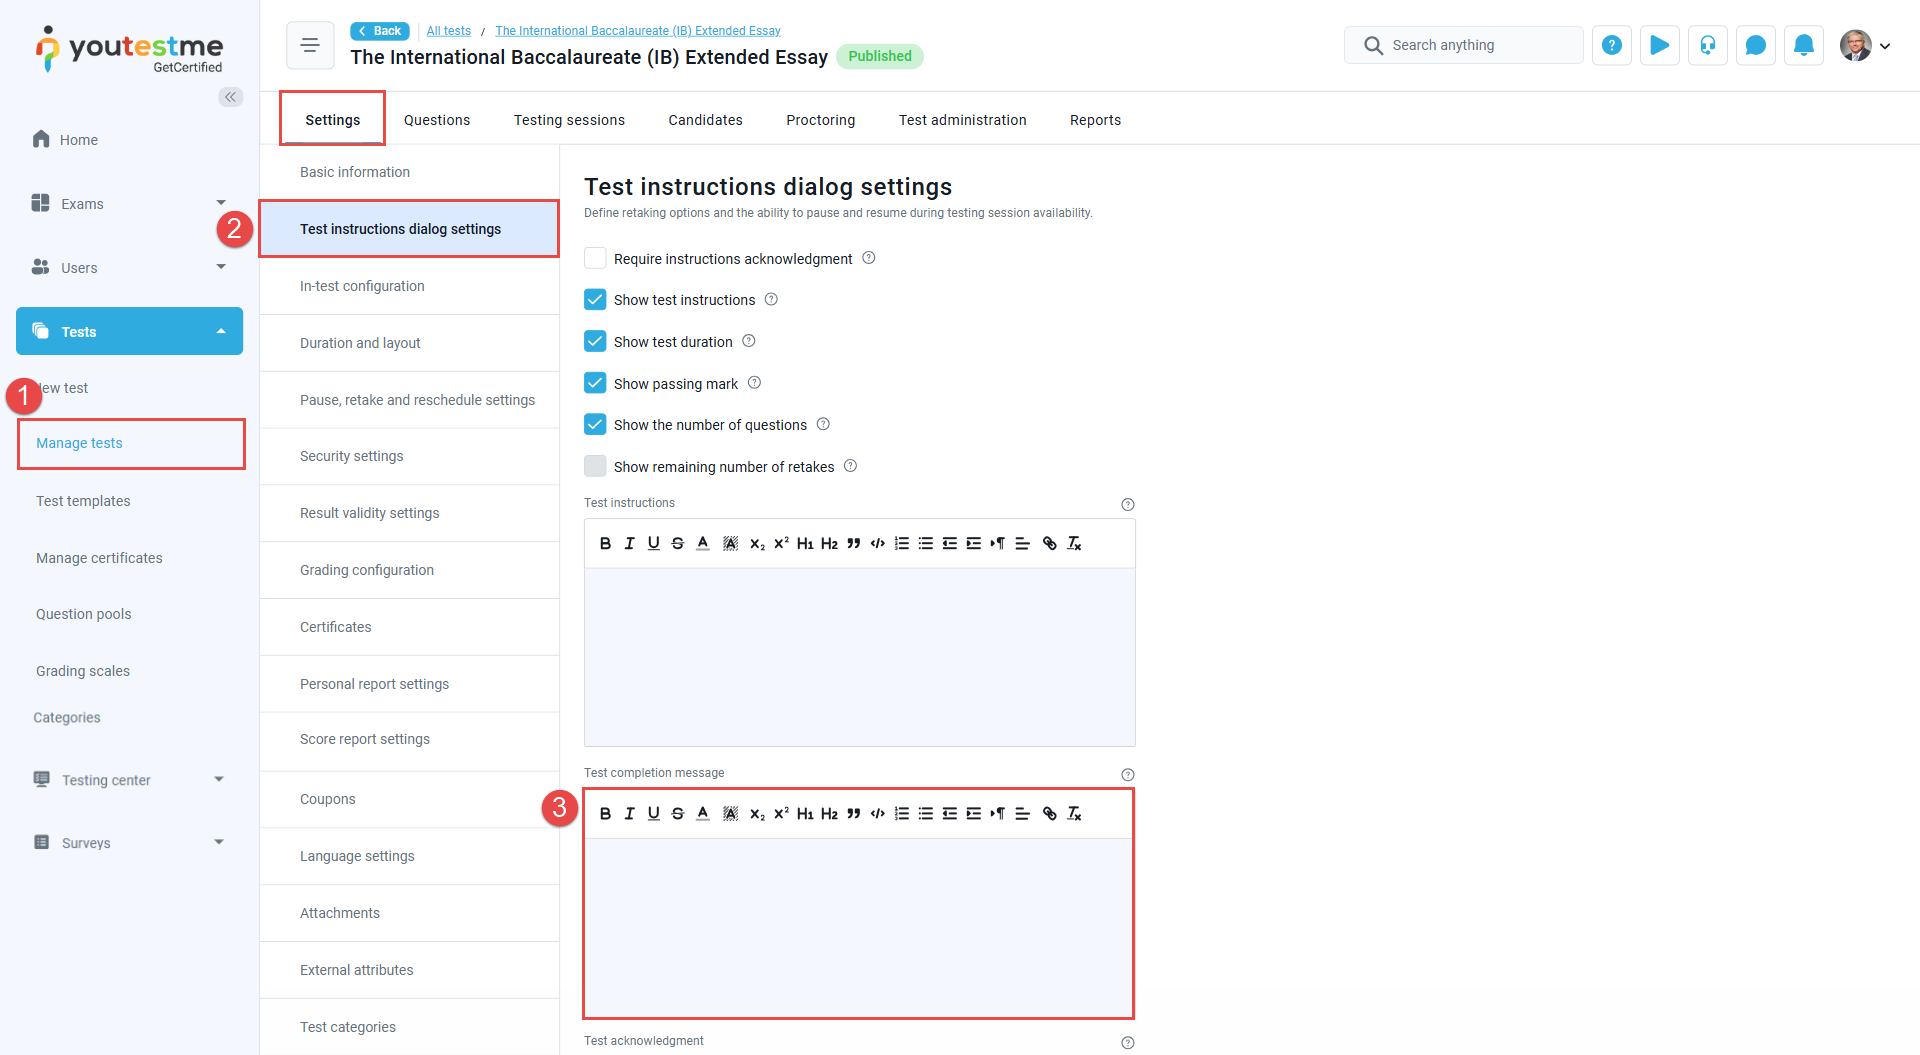
- From the main menu, go to Tests, then open the Manage Tests tab and select the desired test.
- Under the Settings tab, click on Personal Report Settings. Here, you can choose when candidates should see their results. To prevent access until approval by test managers, select one of the following options:
- Immediately After Result Verification: When this option is selected, the results will become visible to the candidate as soon as an authorized user verifies the attempt using the dedicated Verify Result button.
- On Manager’s approval: When this option is selected, a test manager must manually make the personal report visible to the candidate by clicking the Make Visible button.
- On this page, you can also set the report’s lifespan and availability, and use the checklist to customize the report content. For more details, please refer to this article on personal report settings.
- Click the Save button to update the settings.

Adding Test completion message
To enhance the candidate experience, you can add a test completion message that informs them their results will be available after review. This message will be displayed immediately after they finish the test. Please refer to this article for more details.
Releasing test results
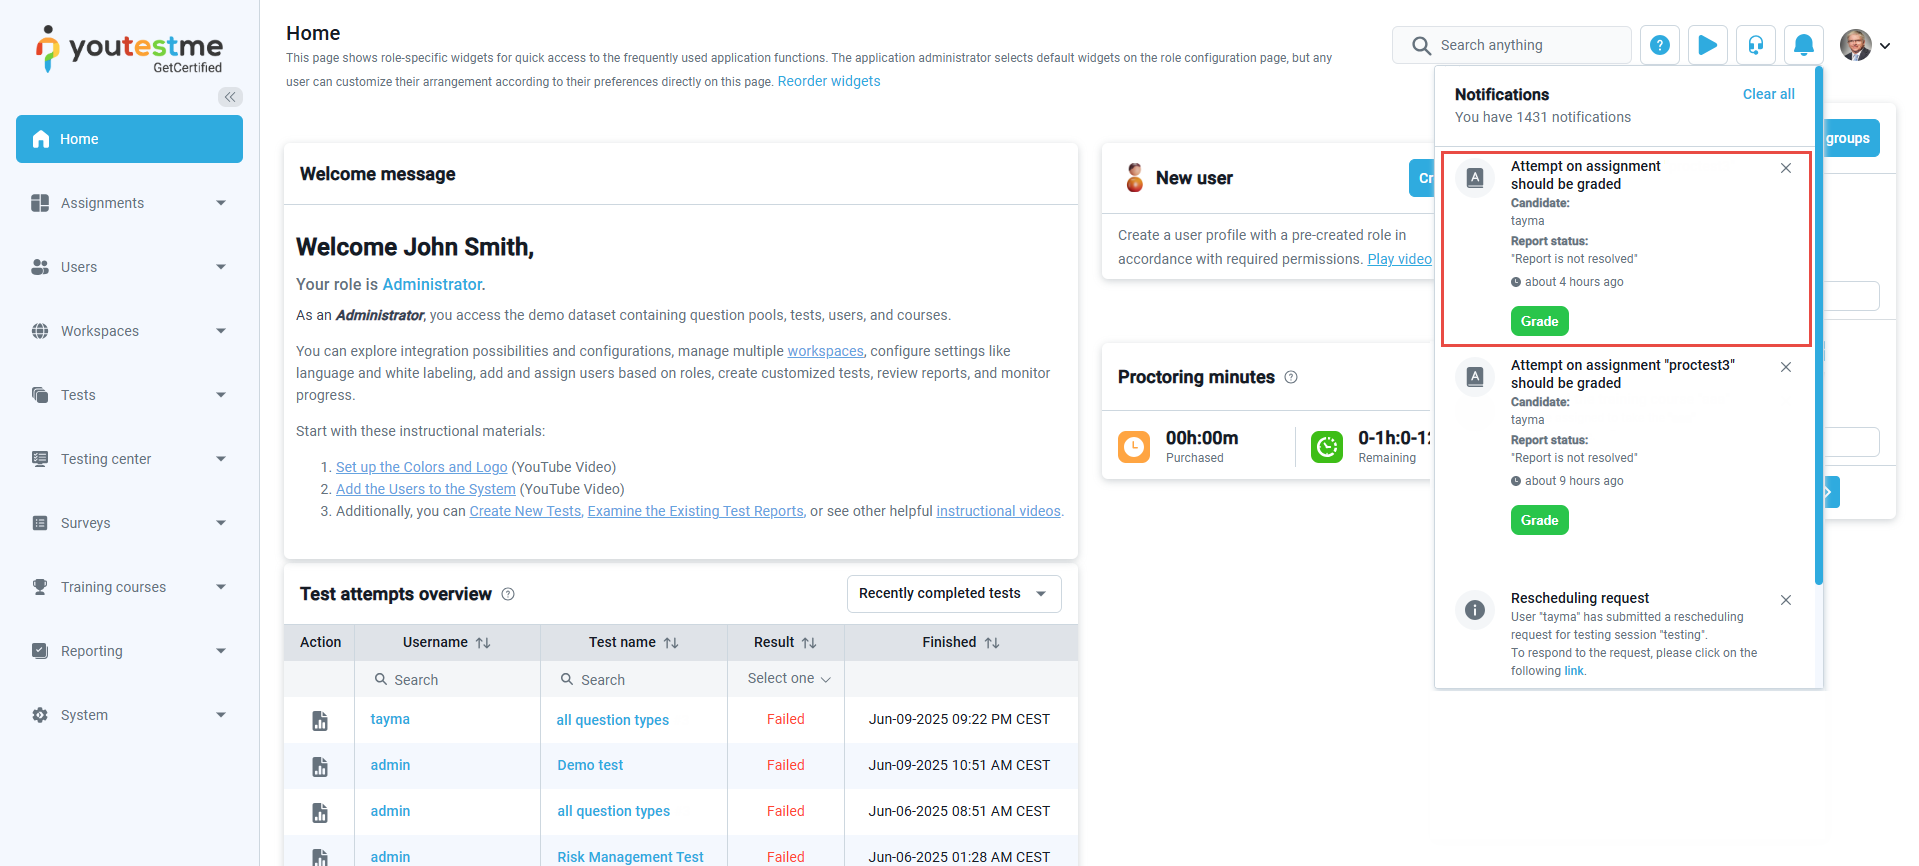
When the On Manager’s approval option is selected, the test administrator will be notified that there are submissions requiring manager approval once candidates complete their attempts. If the test includes questions that need manual grading, grading must be completed before the results can be released. For more information on how to grade a test, please refer to this article.
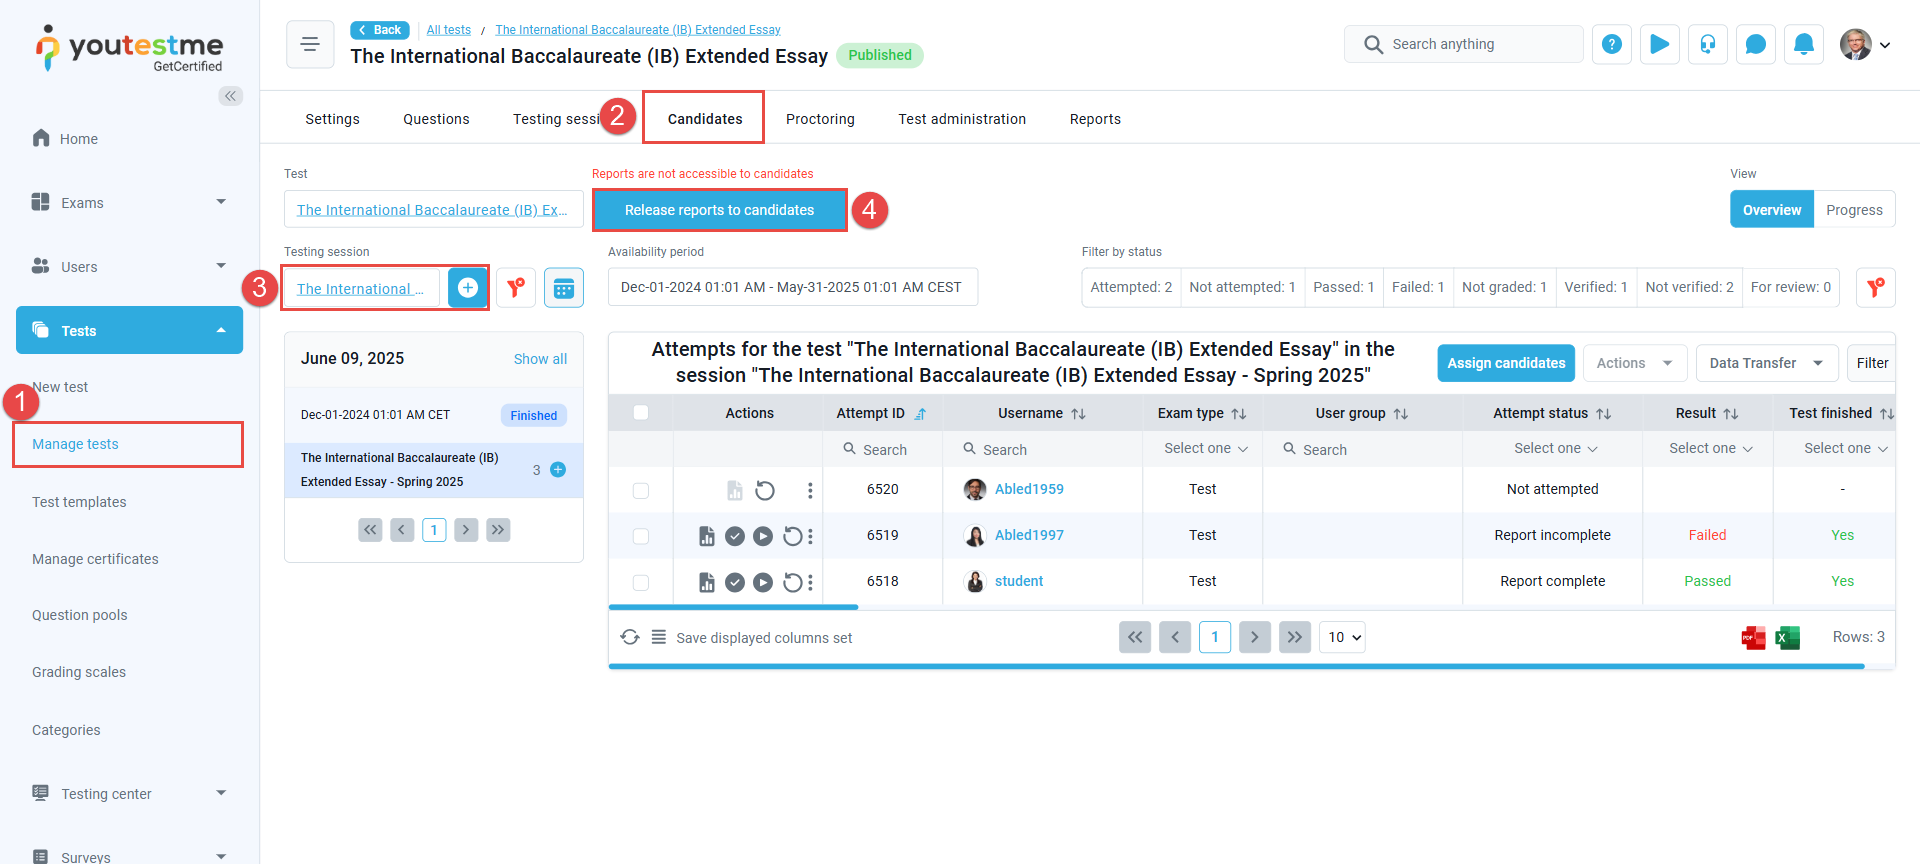
When the results are ready to be released, the manager can do so by following these steps:
- From the main menu, go to Tests, then open the Manage Tests tab and select the desired test.
- Navigate to the Candidates tab.
- Select the testing session.
- Click the Release Reports to Candidates button.
Note: Once you click the Show Results button, all candidates who completed the test will receive a notification that their report is available, provided that test result emails and/or in-app notifications are enabled.
Verifying the test attempts
When the Immediately After Result Verification option is selected, the test administrator or any permitted user should verify the exam attempts to allow test-takers access to their personal report.
To verify the exam attempts, follow the steps below:
- From the main menu, go to Tests, then open the Manage Tests tab and select the desired test.
- Navigate to the Candidates tab.
- Select the testing session.
- To release results, select the candidate attempts that are ready by checking the box next to their usernames.
- Click the Actions button and choose Verify Selected Attempts.
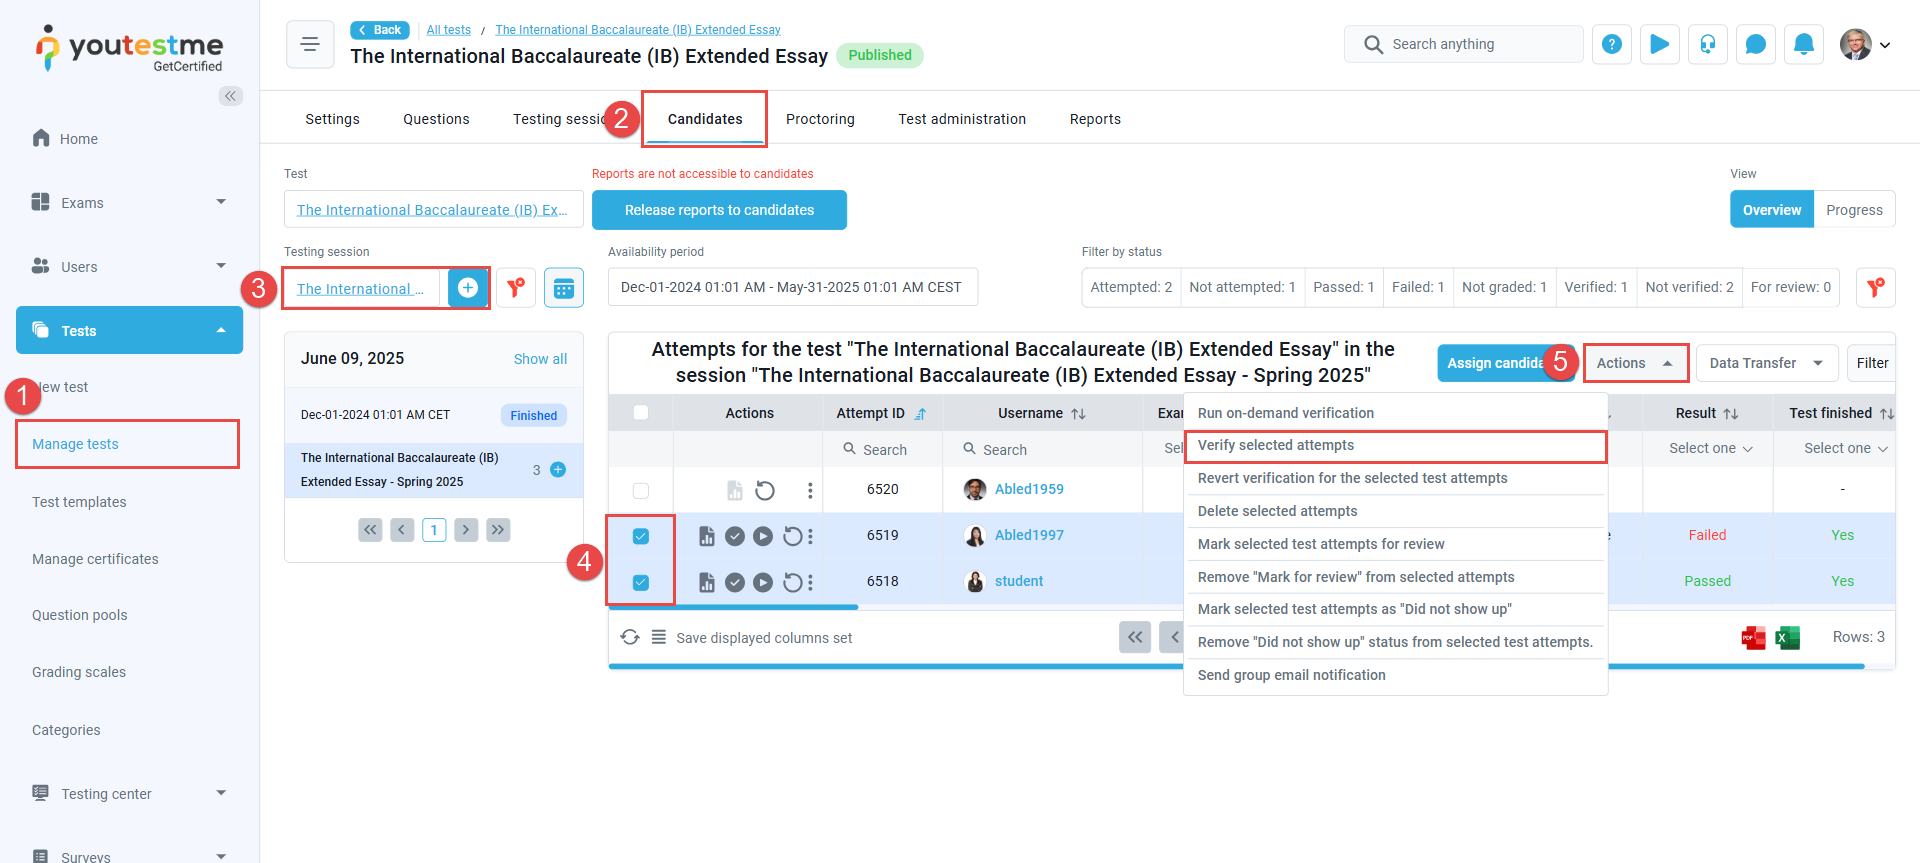
- Alternatively, you can verify each attempt individually by clicking the Verify Attempt for This Candidate button in the Actions column.

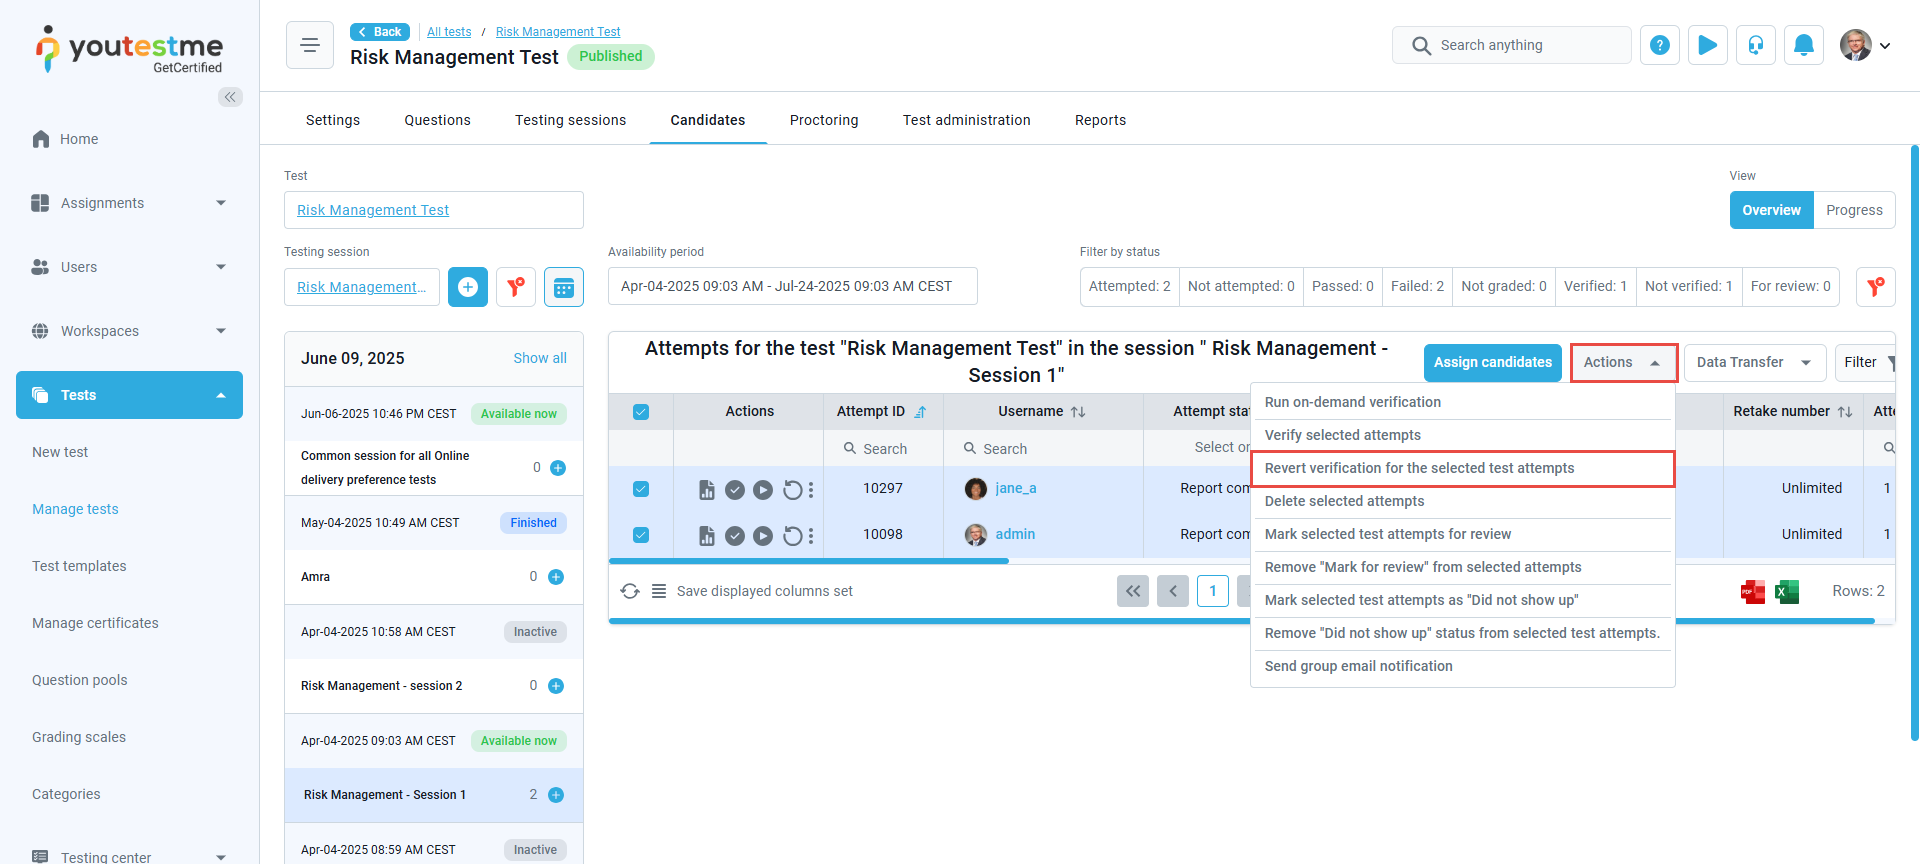
Note: Once an attempt is verified, it cannot be edited unless the verification is first reverted.
Candidate’s perspective
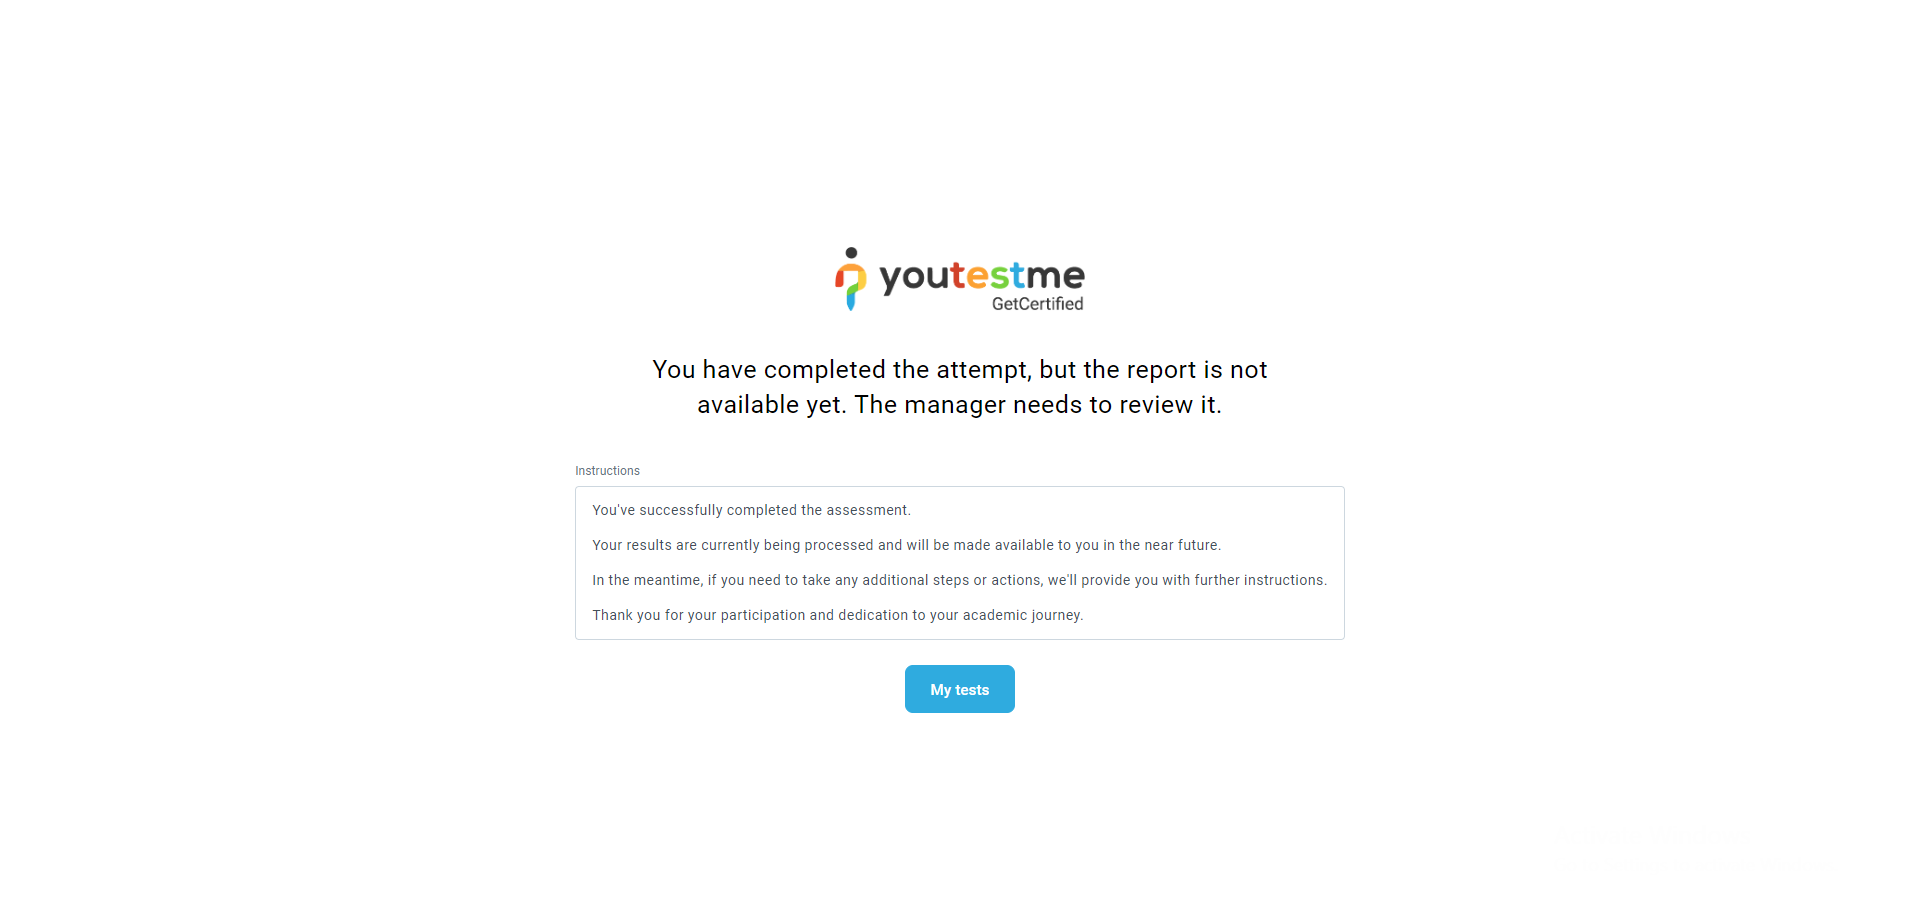
When the test completion email notification is enabled, test-takers will receive an email confirming the submission of their attempts.
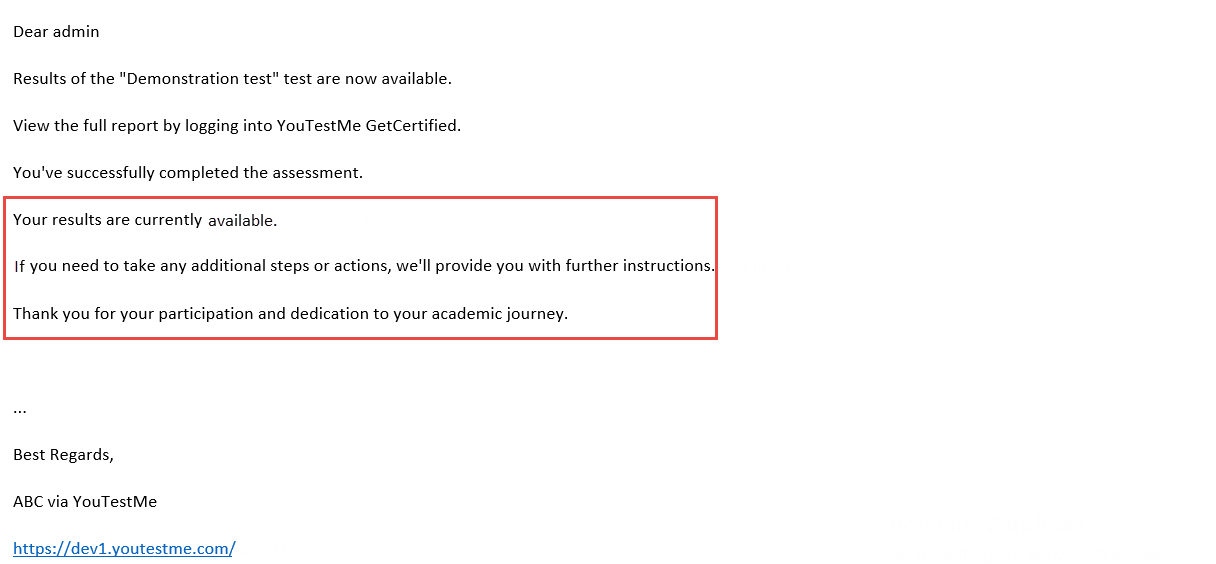
Additionally, if a test completion message is configured in the test instructions settings, candidates will see this message on their screen after submitting the test, similar to the example shown below.
For more useful instruction materials, please check the following links:


