Article verified for Release 15.0 on September 03, 2025.
This article explains how to configure hold and release conditions for the test results verification process.
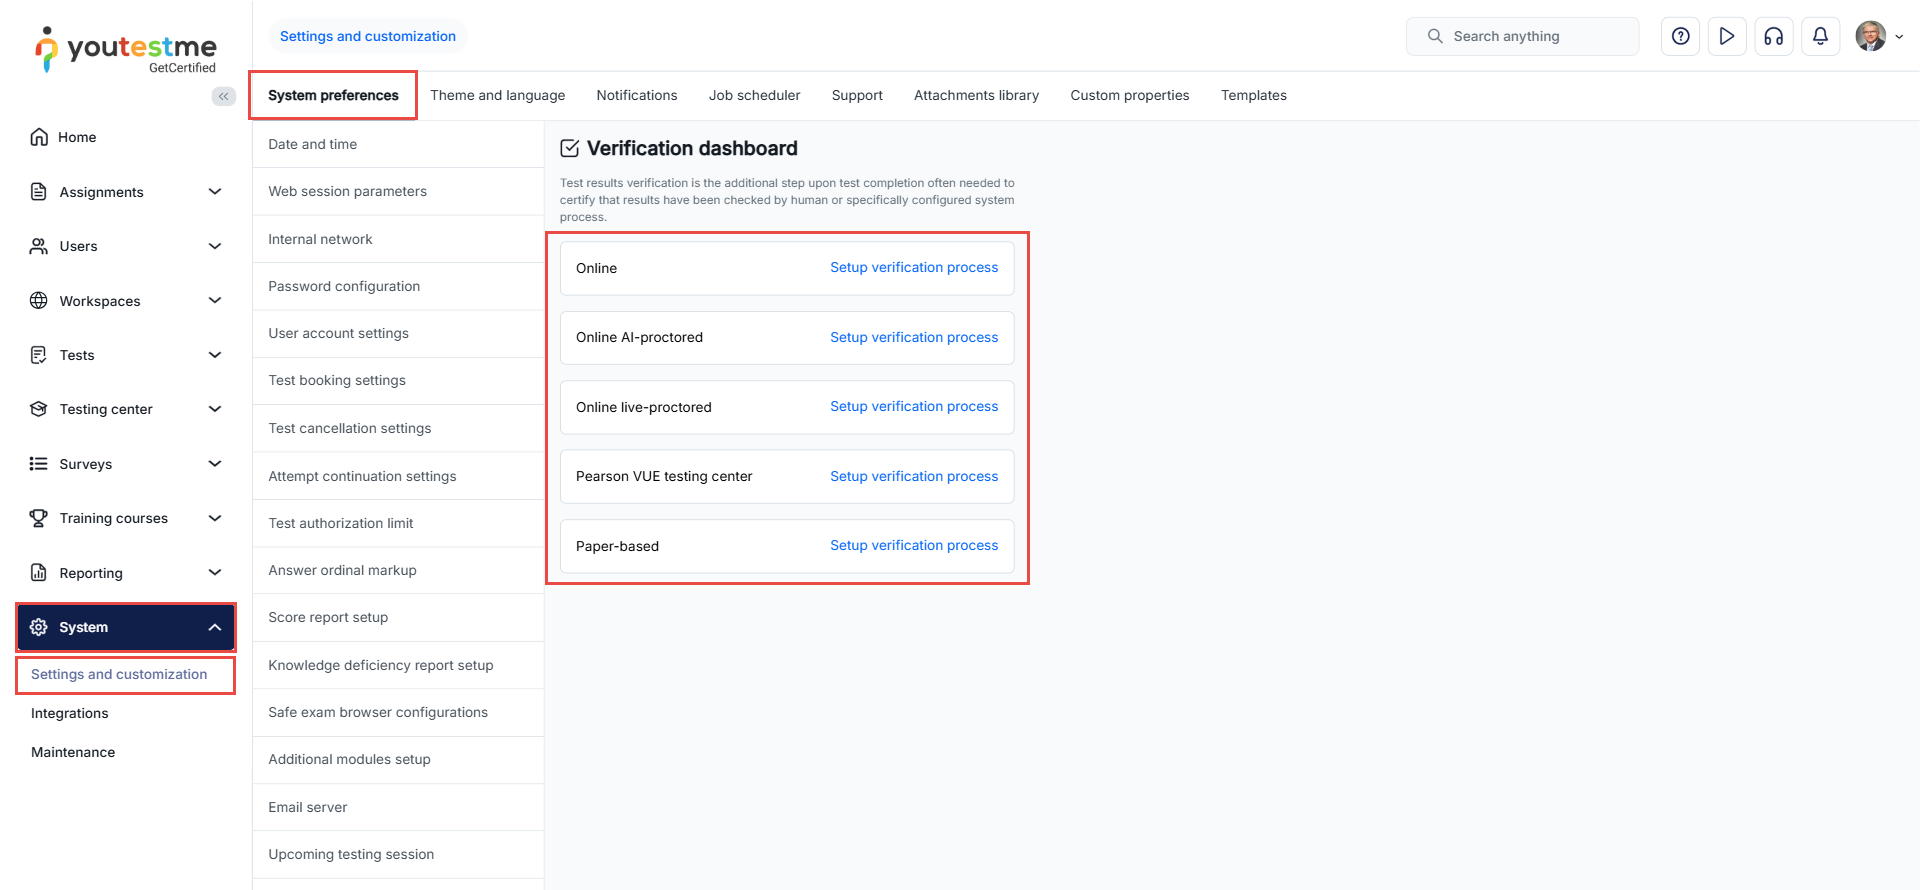
Accessing the page
Verification can be the final step in managing test results. Once a candidate’s report is verified, any changes to the grading settings will not impact the candidate’s score.
You can define when and how to verify the test attempts on the Verification process setup tab.
Verification setup
Verification setup allows you to decide when and how to verify the test results. There are three options to setup verification:
- Immediate after completing test verify by hold criteria
- On-demand verify by hold criteria
- One by one – manual verification
Immediate after completing test verify by hold criteria
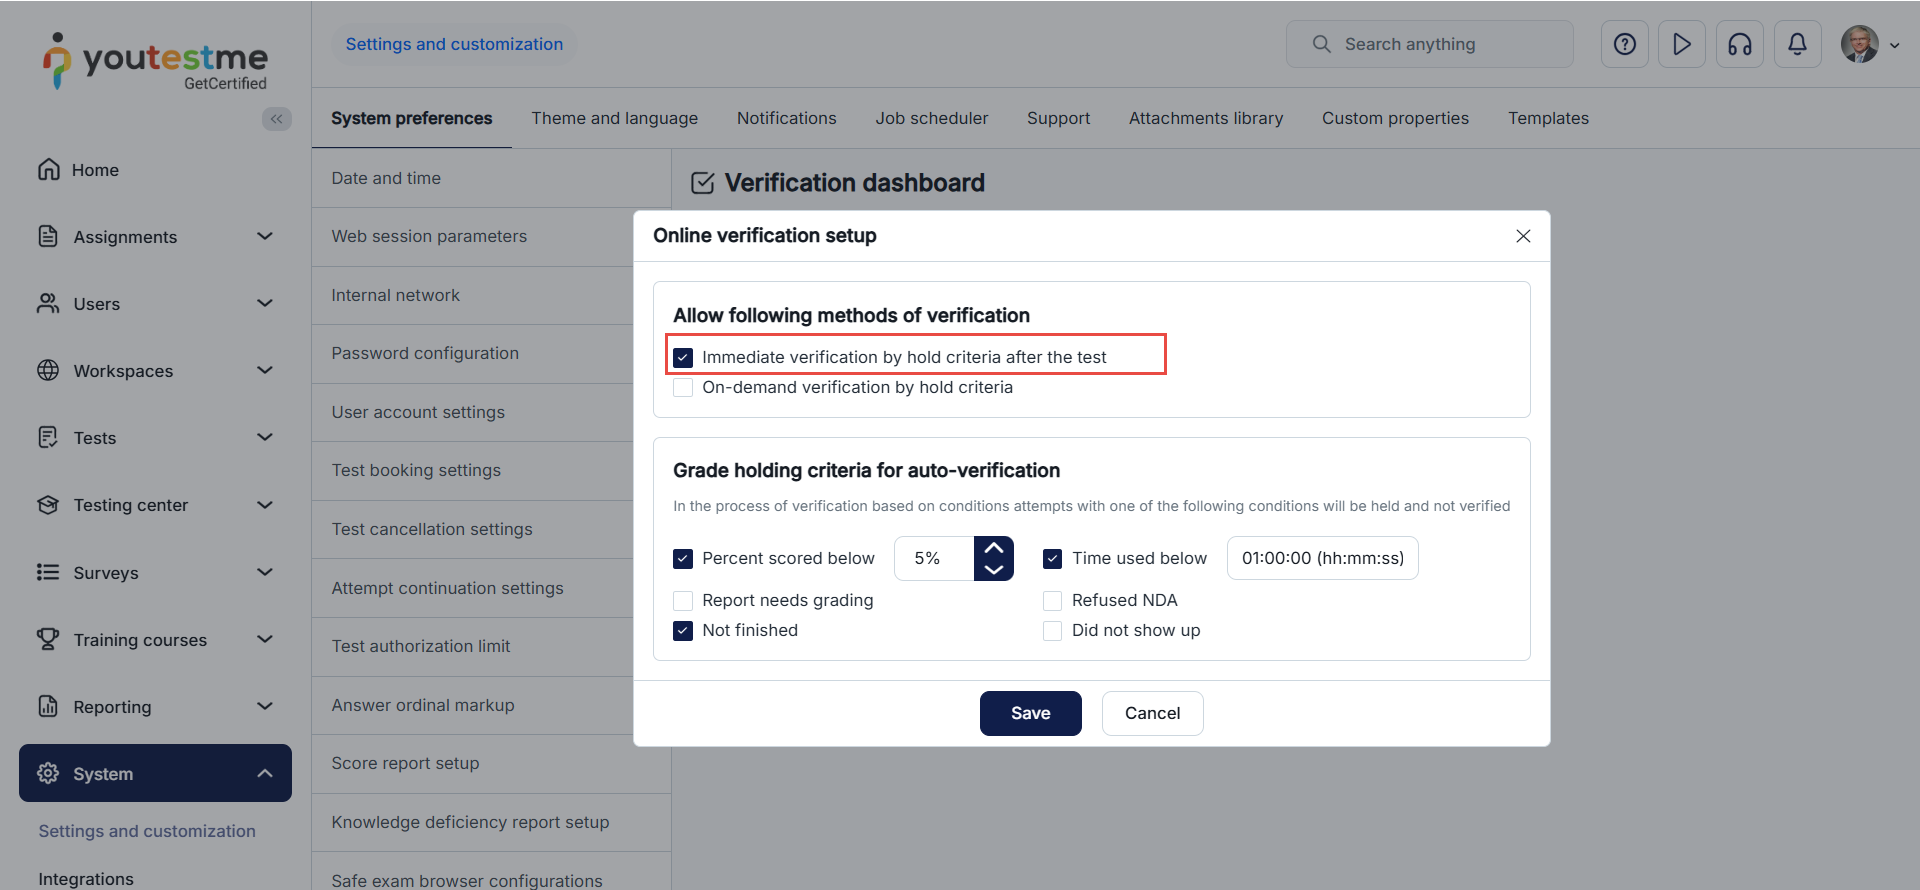
To set up automatic verification, you must enable the Immediate after completing test verify by hold criteria after the test option.
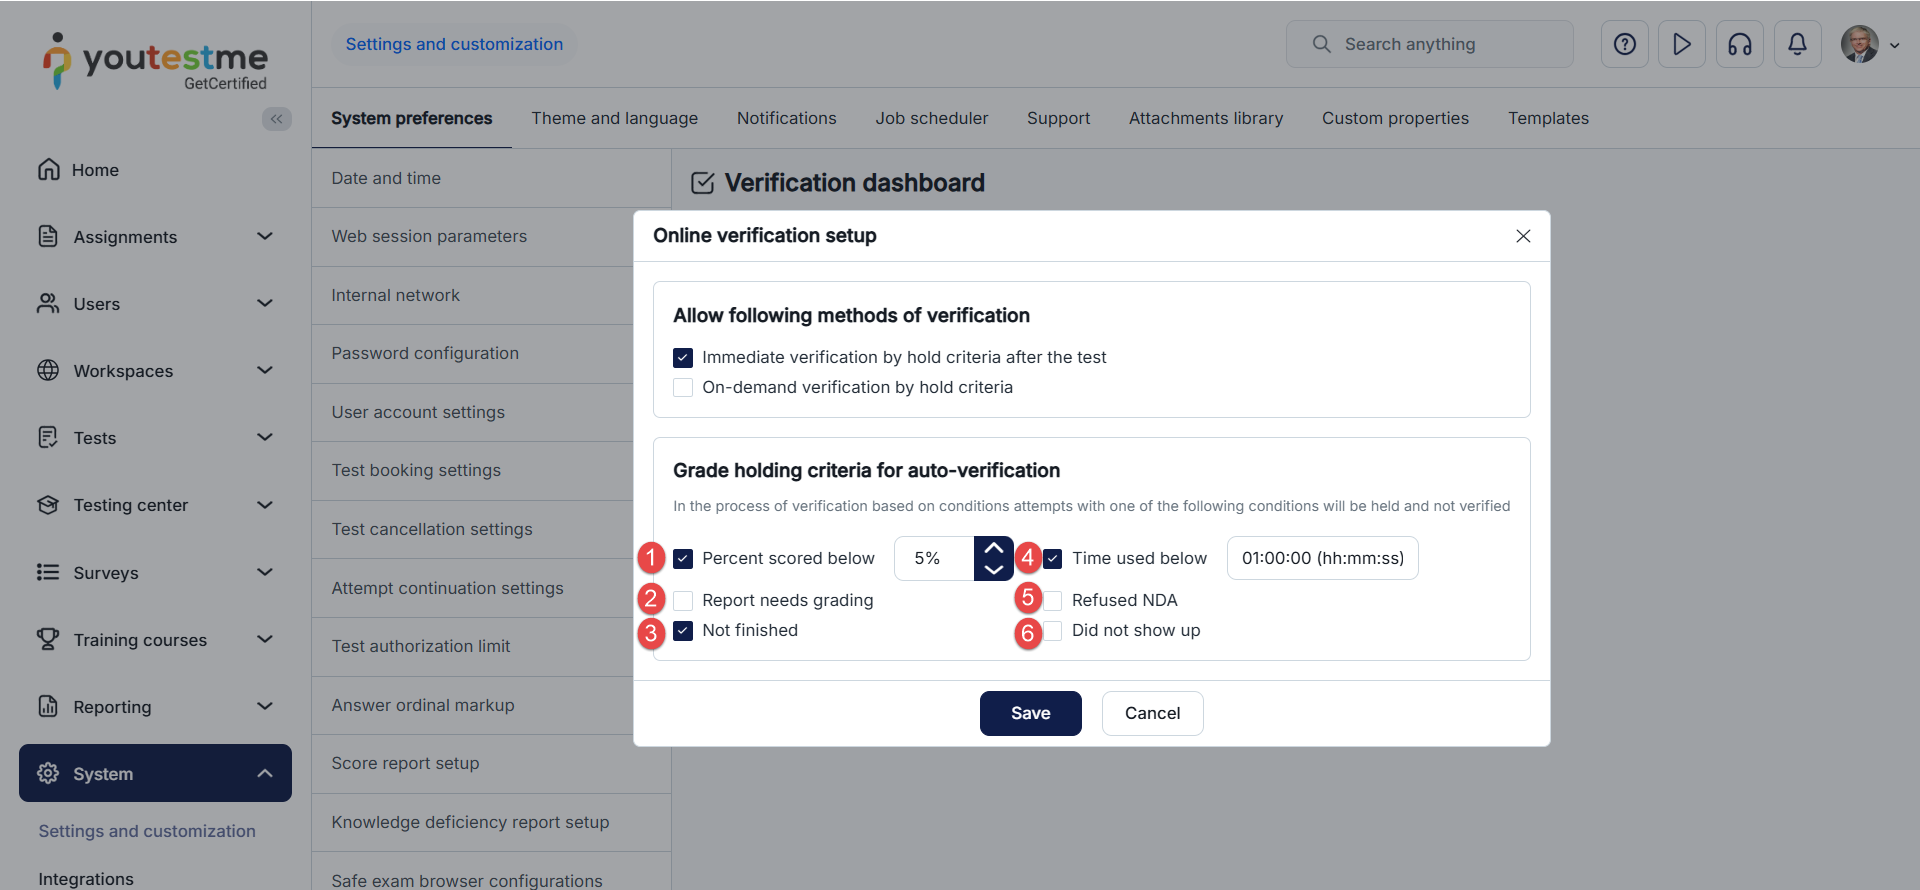
Then you need to set all the conditions for which you want the results to be held and not verified.
- Percent scored below – Test attempts won’t be verified if the candidate scores below the specified percentage.
- Report needs grading – The test attempt will not be verified if there are questions left that require manual grading.
- Not finished – Verification won’t occur if the candidate doesn’t finish the test.
- Time used below – Verification won’t proceed if the candidate finishes the test in less time than specified.
- Refused NDA – Verification won’t occur if the candidate refused the Non-Disclosure Agreement (test attempt status is Refused NDA).
- Did not show up – Verification won’t proceed if the candidate did not take the test within the allotted time (test attempt status is Did not show up).
After setting all the conditions, click on the Save button.
Note: The setup configurations will affect the next processing of the imported test results, and the setup configurations will affect the next processing of test results.
On-demand verify by hold criteria
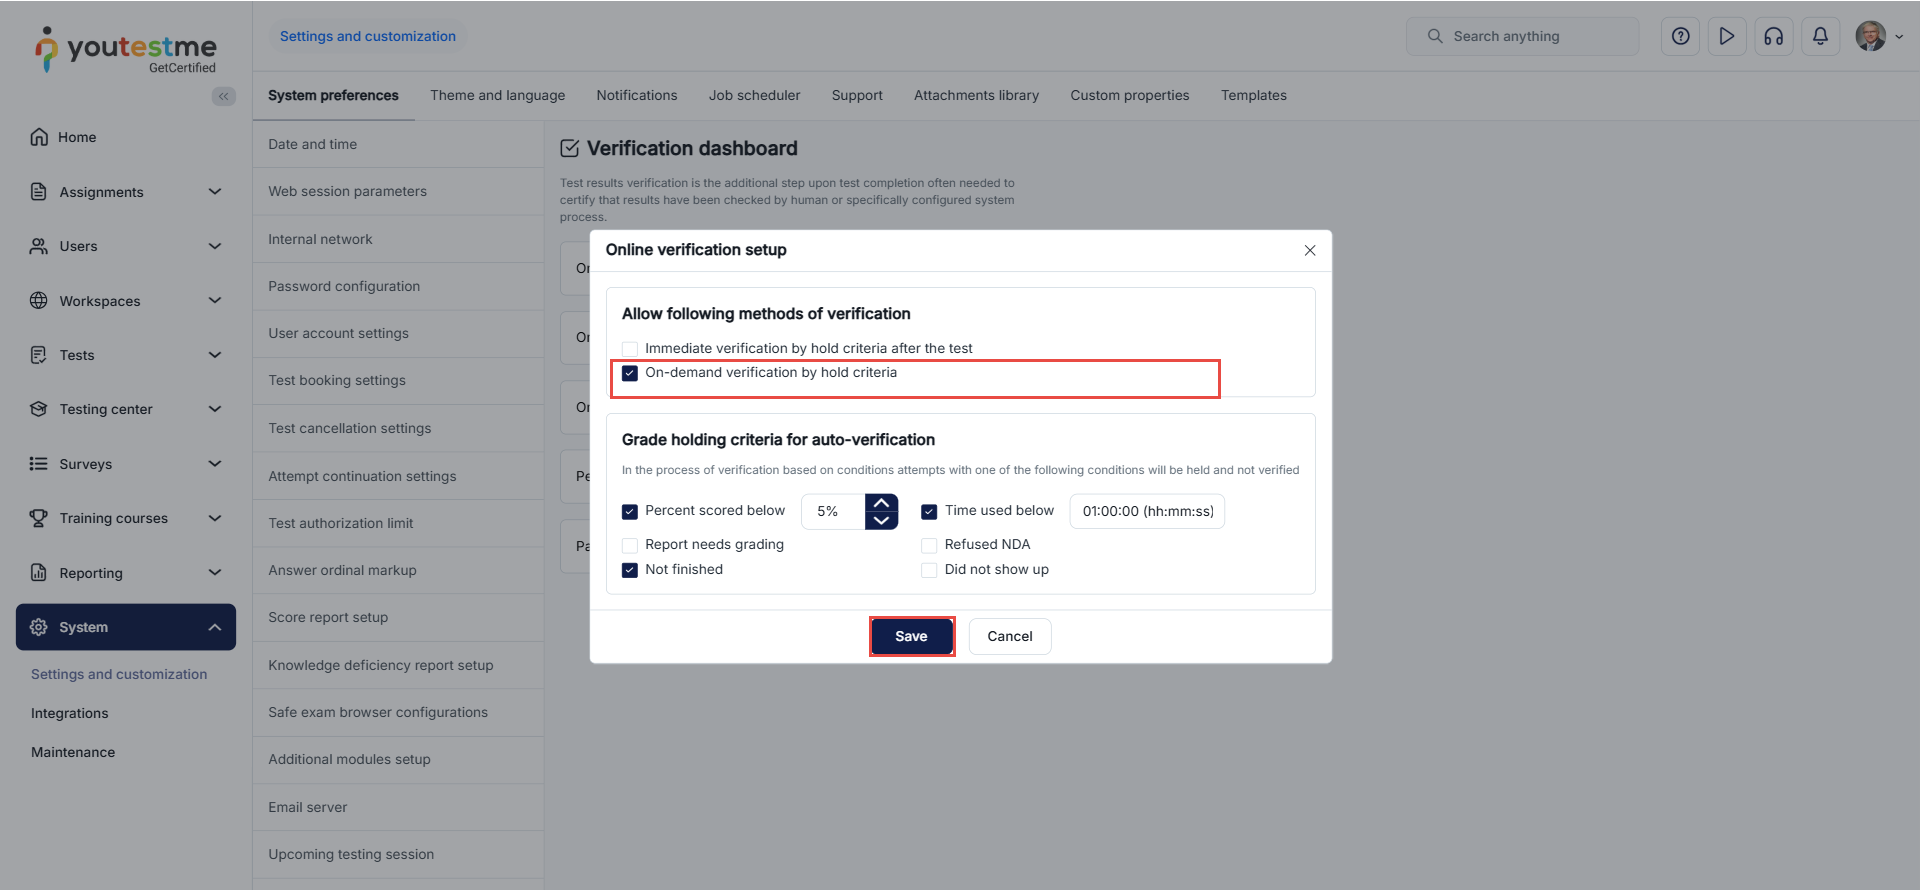
You must enable the On-demand verify by hold criteria option to set up on-demand verification.
After setting all the conditions, click on the Save button.
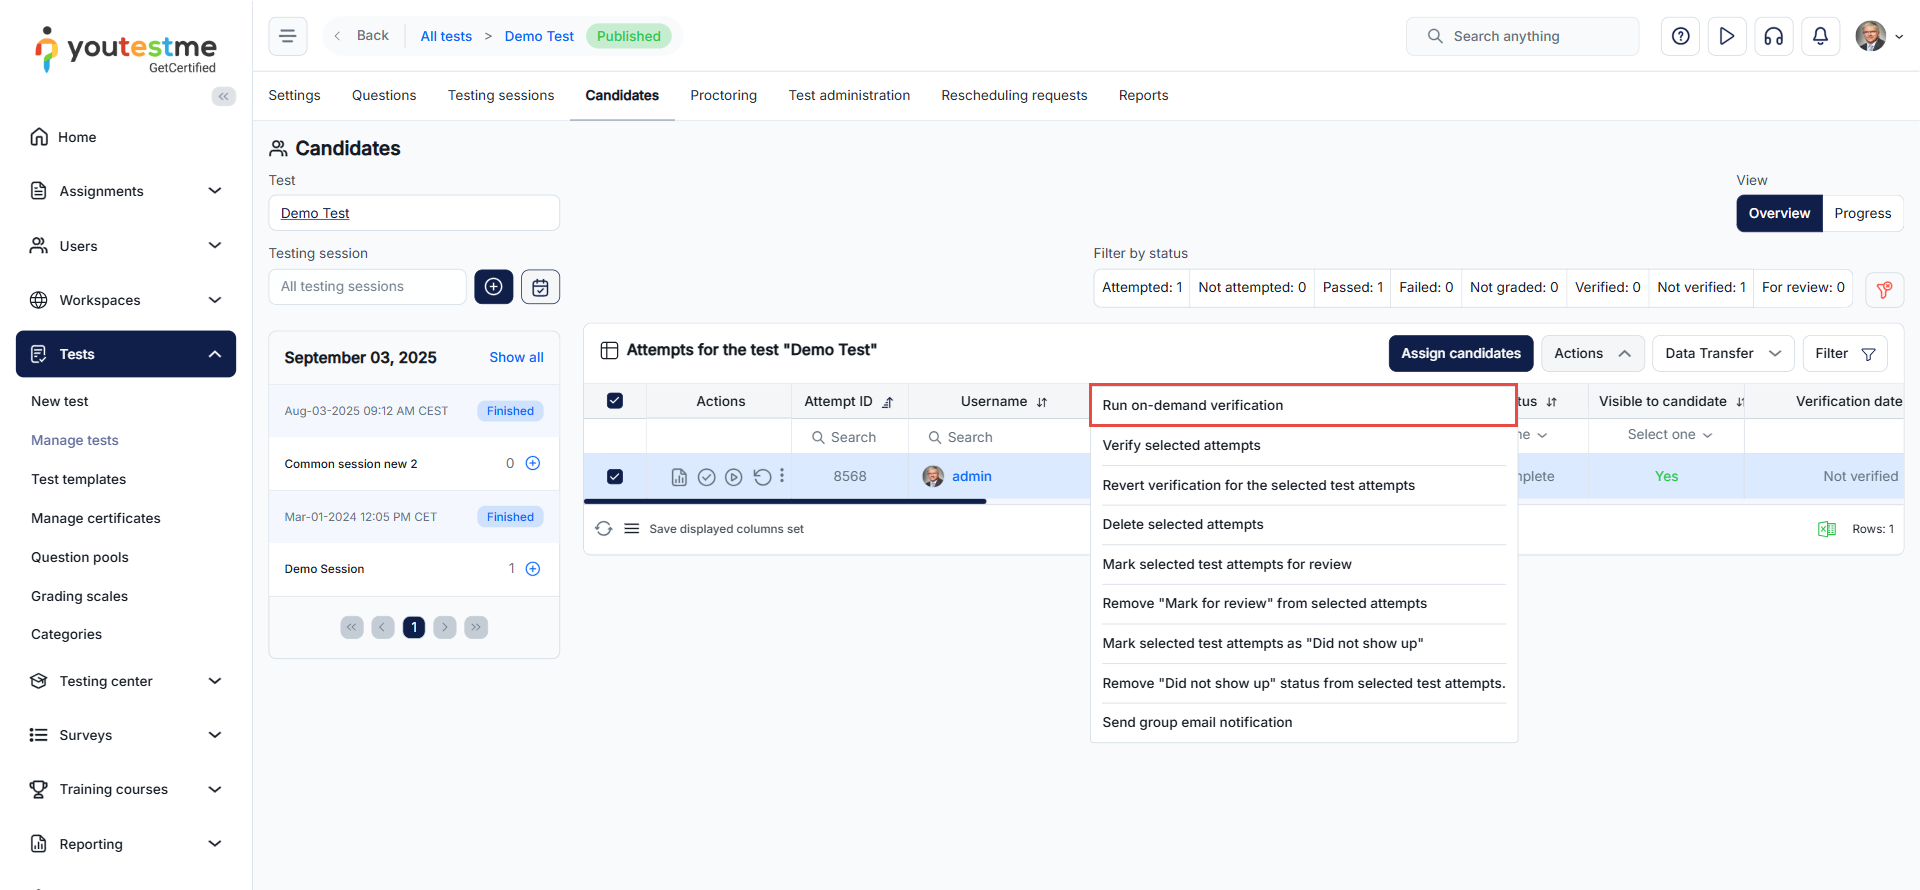
Select the test attempts for which you want to execute the verification, and select the Run on-demand verification option from the Actions option.
By clicking this button, the system will try to verify all the attempts for the selected test that are not verified. If any of the checked conditions are satisfied for the attempt, the attempt will not be verified and will be furthered to the manager for additional processing.
Manual verification
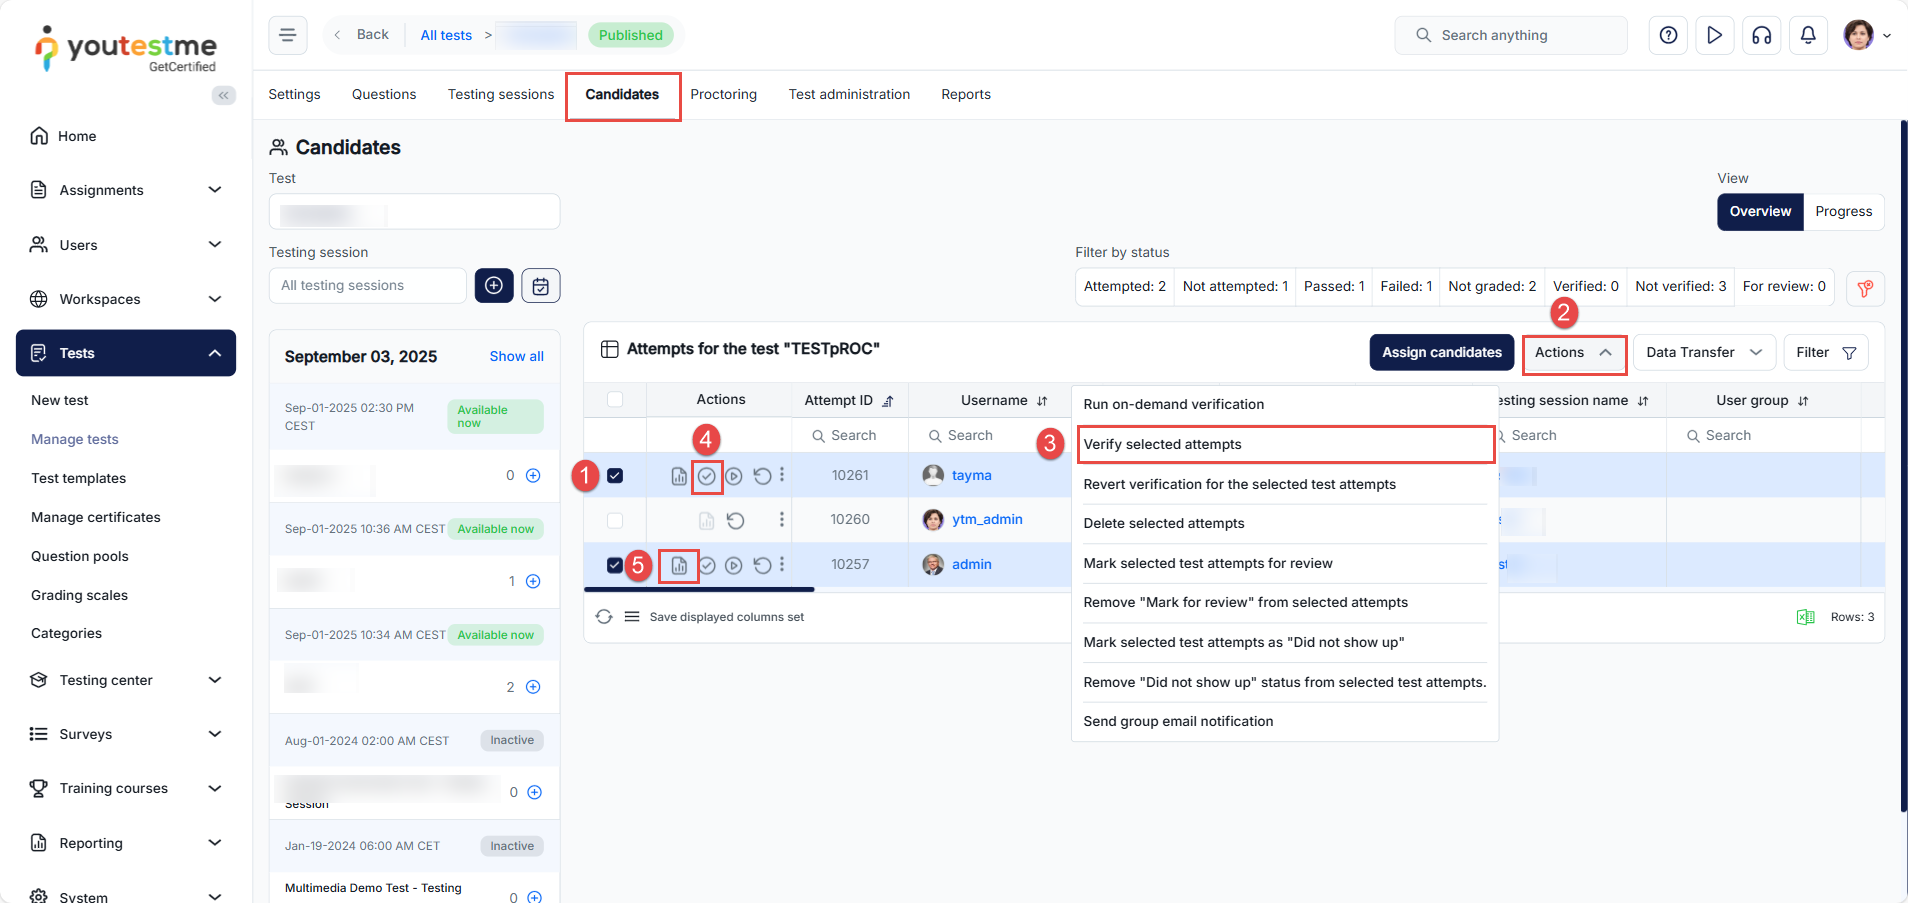
To verify test attempts, first navigate to Tests > Manage Tests and open the Candidates section of the desired test. In the Test Attempts table, you can verify attempts using three different methods.
Method 1 – Using the Actions menu
- Select the attempt(s) you want to verify.
- Click Actions.
- Choose Verify selected attempts.
Method 2 – Using the Verify icon
- Click directly on the Verify icon in the Actions column.
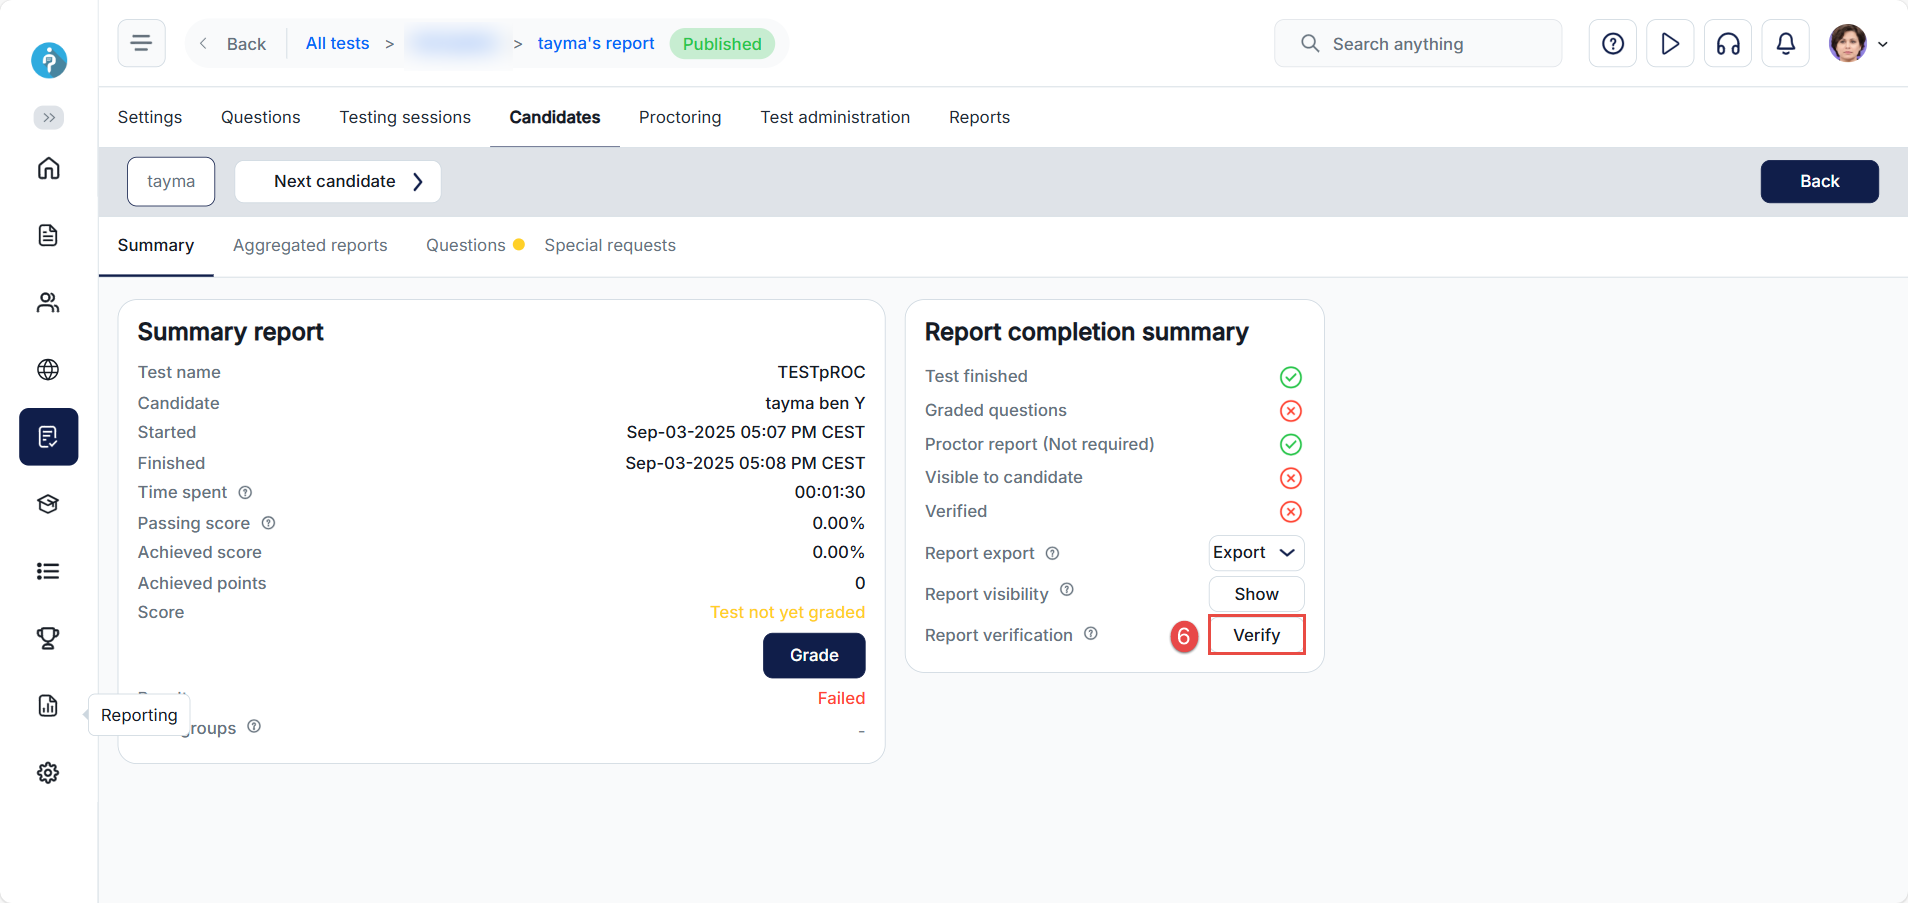
Method 3 – From the Reports tab (per candidate)
- Click the Report icon.
- In the Summary tab, click the Verify button to confirm the result for that candidate.
